
How to Use Logseq Agenda3 Plugin (Version 3.0)
Here's how to use Logseq Agenda3 plugin version 3.0. Create tasks and manage projects in your Logseq directory with ease.
One of my favorite Logseq plugins is the Agenda plugin, which lets you manage tasks and projects with ease. Recently, the Agenda Plugin developer released version 3.0 of the plugin, which completely overhauled how the plugin looks and functions. In this guide, I will show you how to use Logseq Agenda plugin Version 3.0 to manage tasks and projects.
Install Agenda plugin V3 in Logseq directory
If you have never used the Agenda plugin before, you can use the steps below to install it in your Logseq directory:
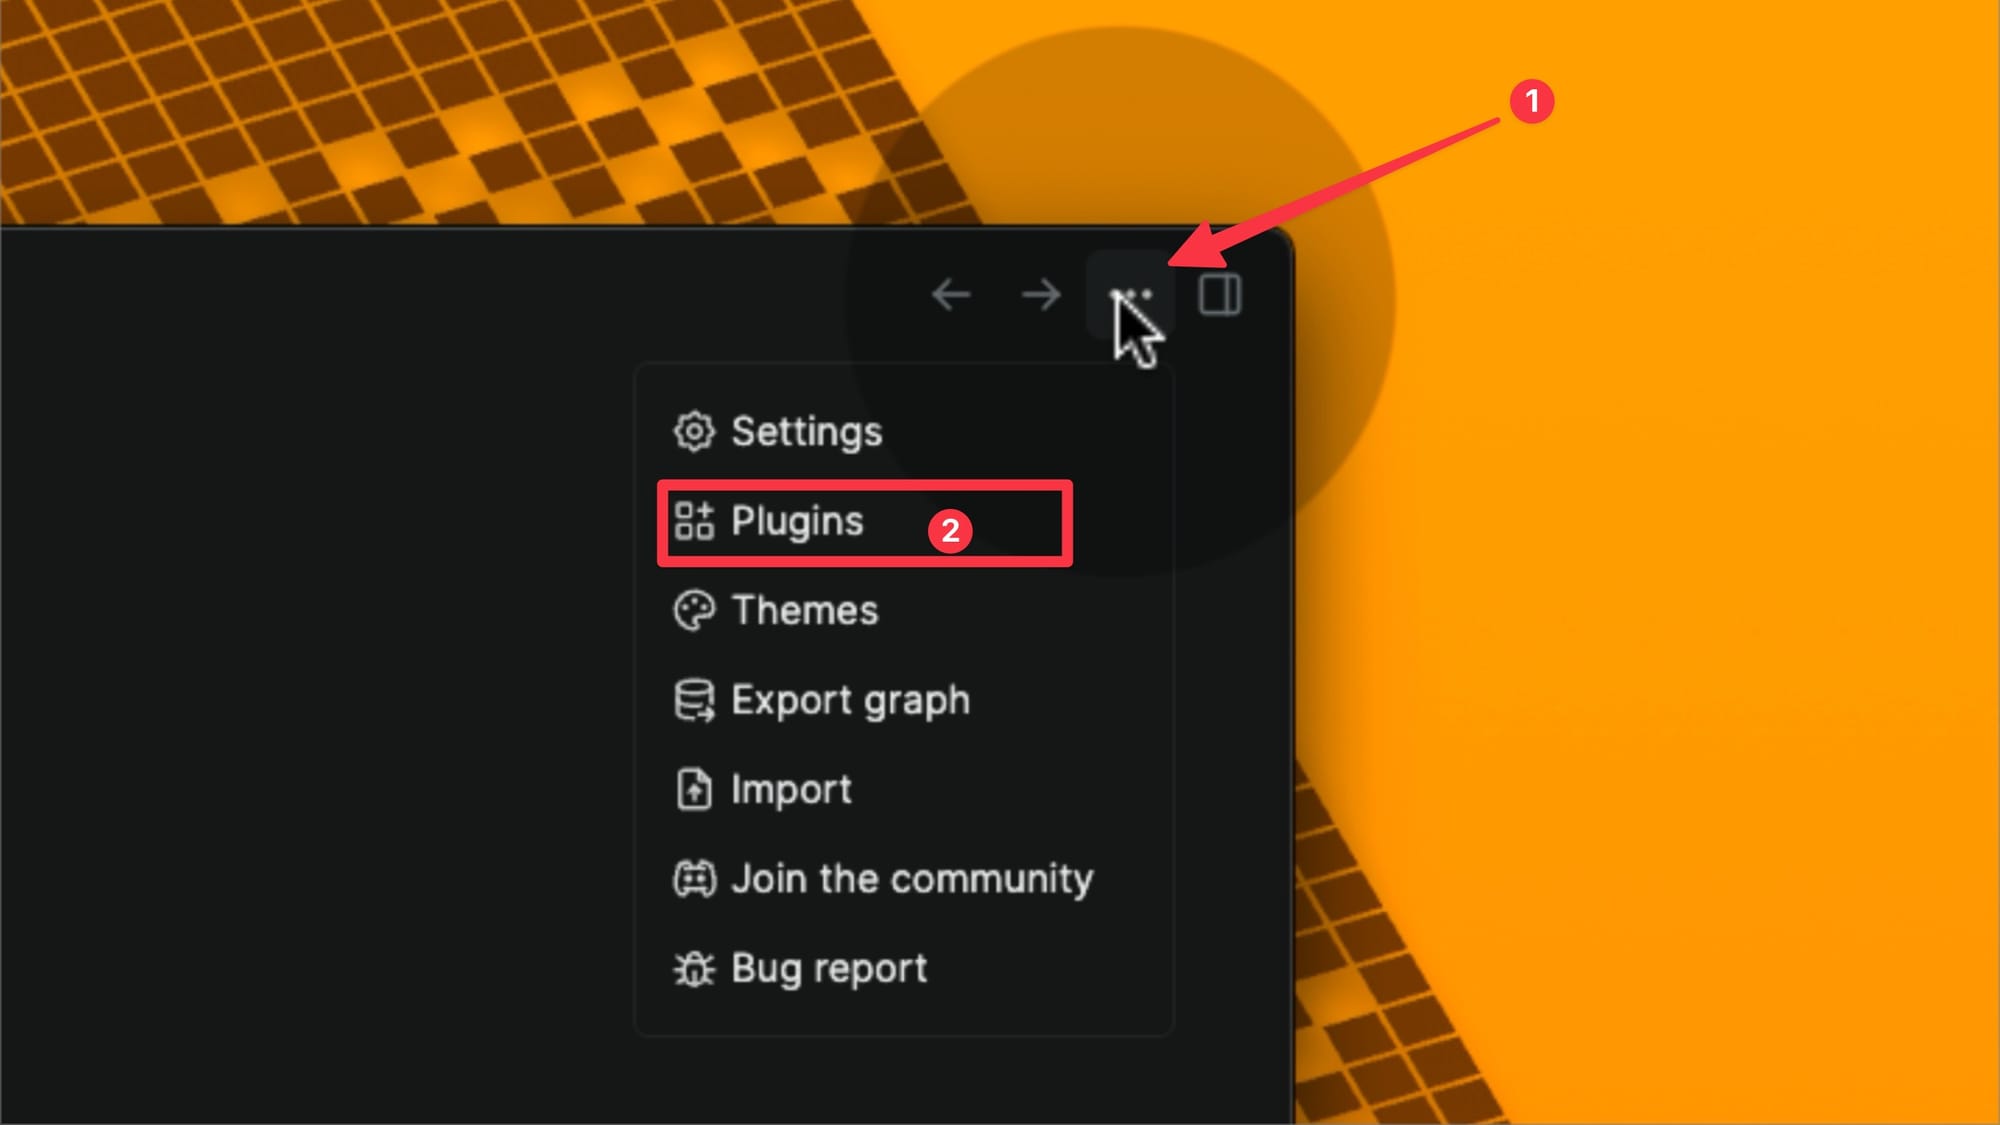
1. Launch the Logseq app on your computer, click the three-dot menu in the top-right corner, and open Plugins.
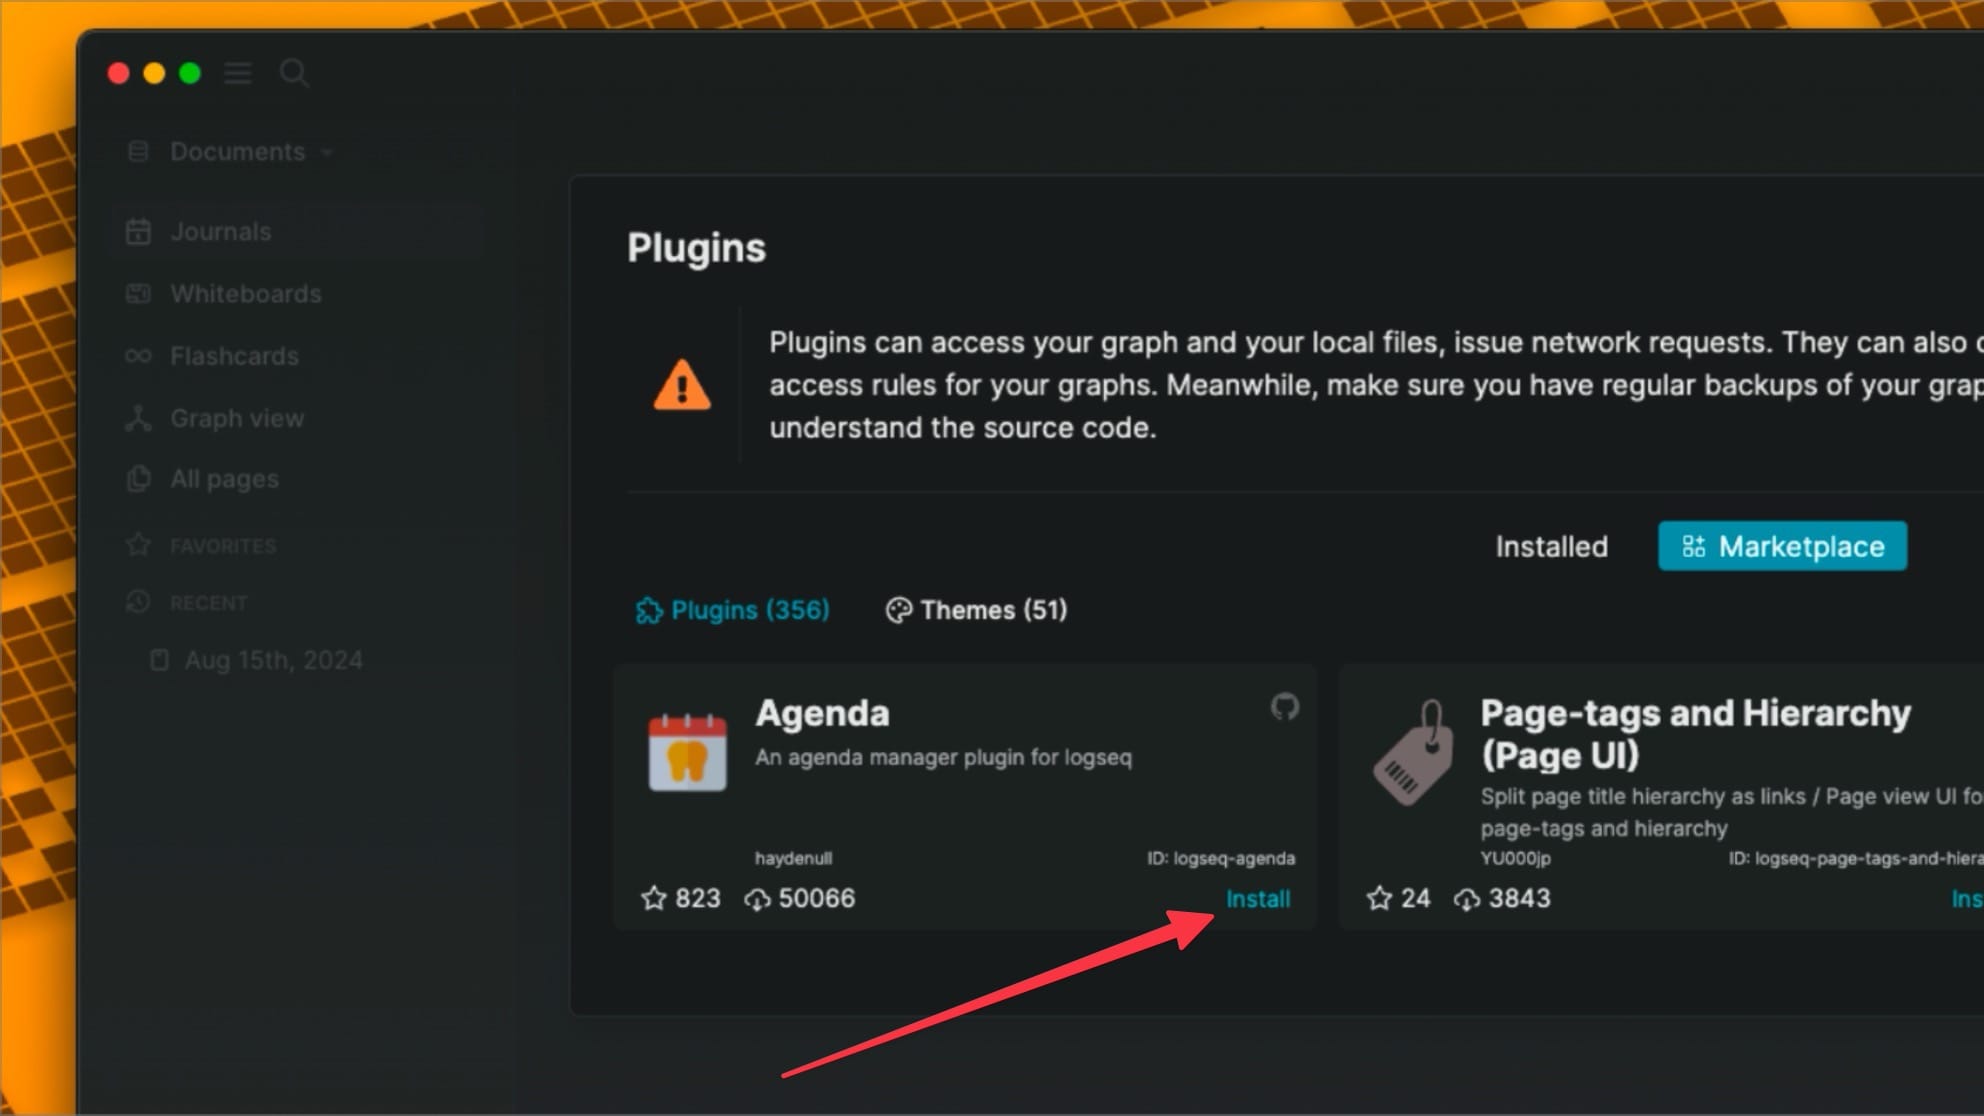
2. Click to open plugins Marketplace and search for Agenda plugin.

3. Now, click the Install button to install the plugin in your Logseq directory.
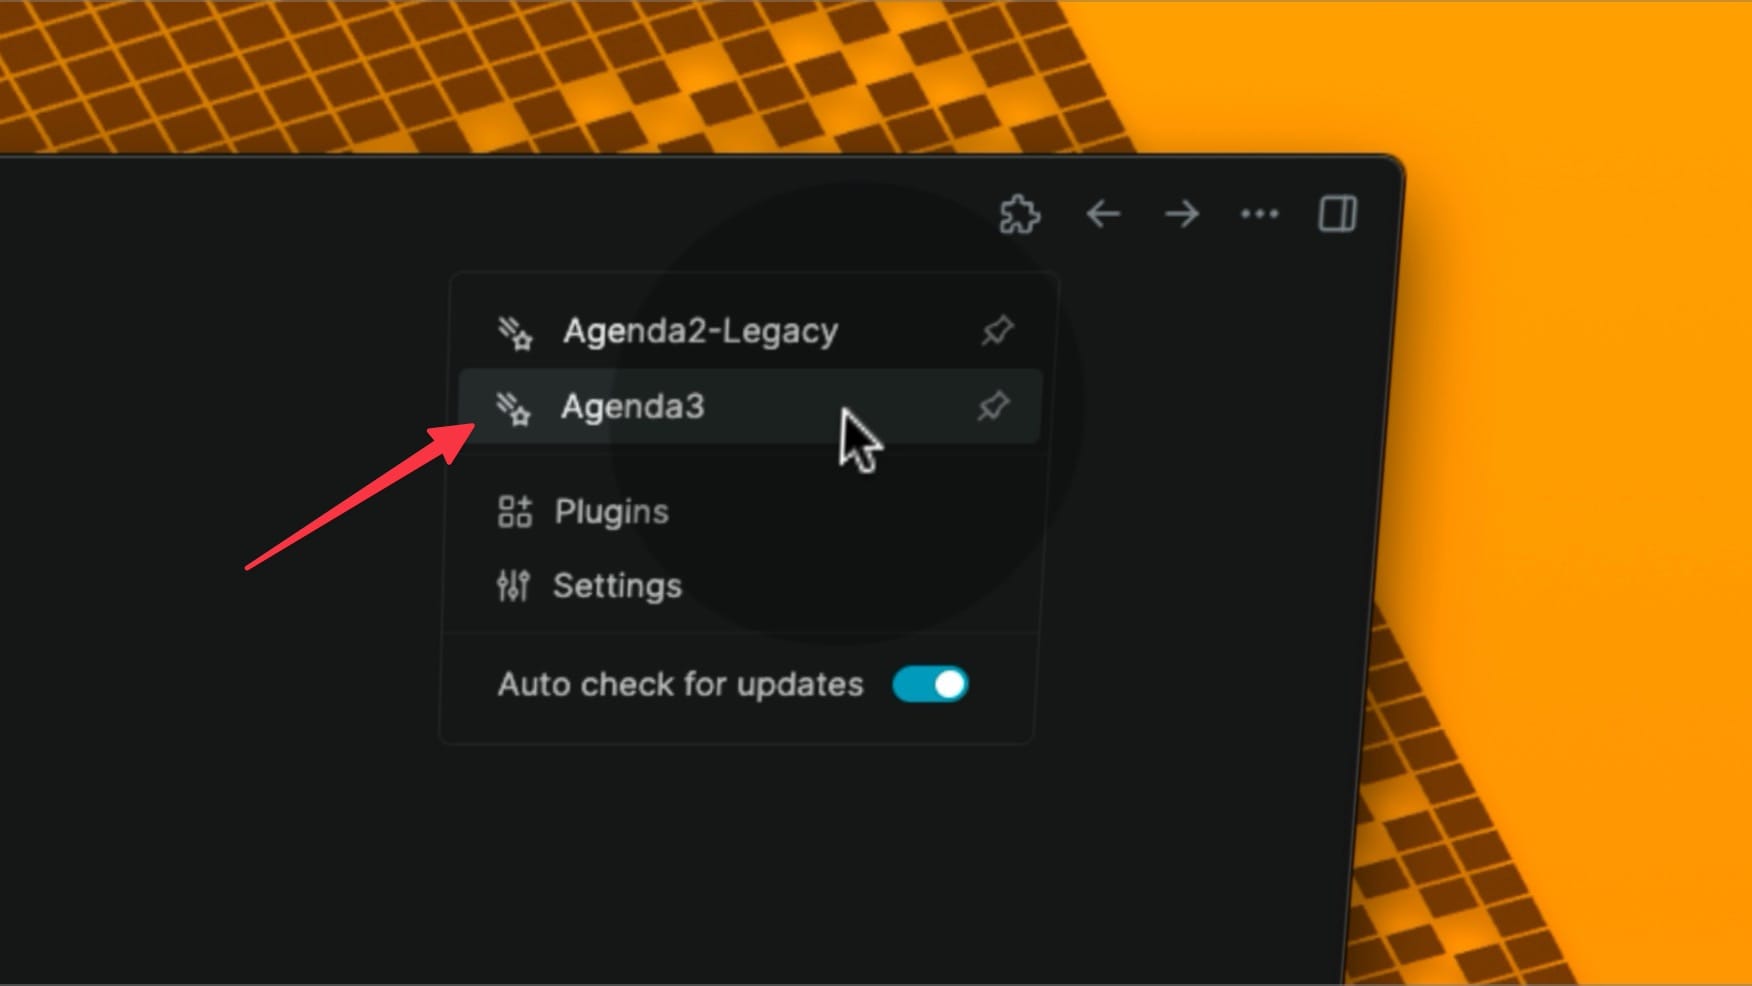
4. Click the plugins icon, and you will see two versions of the Agenda plugin. Click the Pin button next to Agenda3 to add it to your Logseq top bar.
If you want to use the legacy Agenda2 plugin, as currently it offers more features, you can use it. You can learn all about it by clicking on the link.
This guide is going to focus on version 3.0 of the Agenda plugin.
Setting up Agenda3 plugin
Before we use the Agenda3 plugin, let us go through its settings to customize a few things.
1. First, click on the plugin icon to open it.
2. Now, click the Settings button in the top-right corner to open its settings.
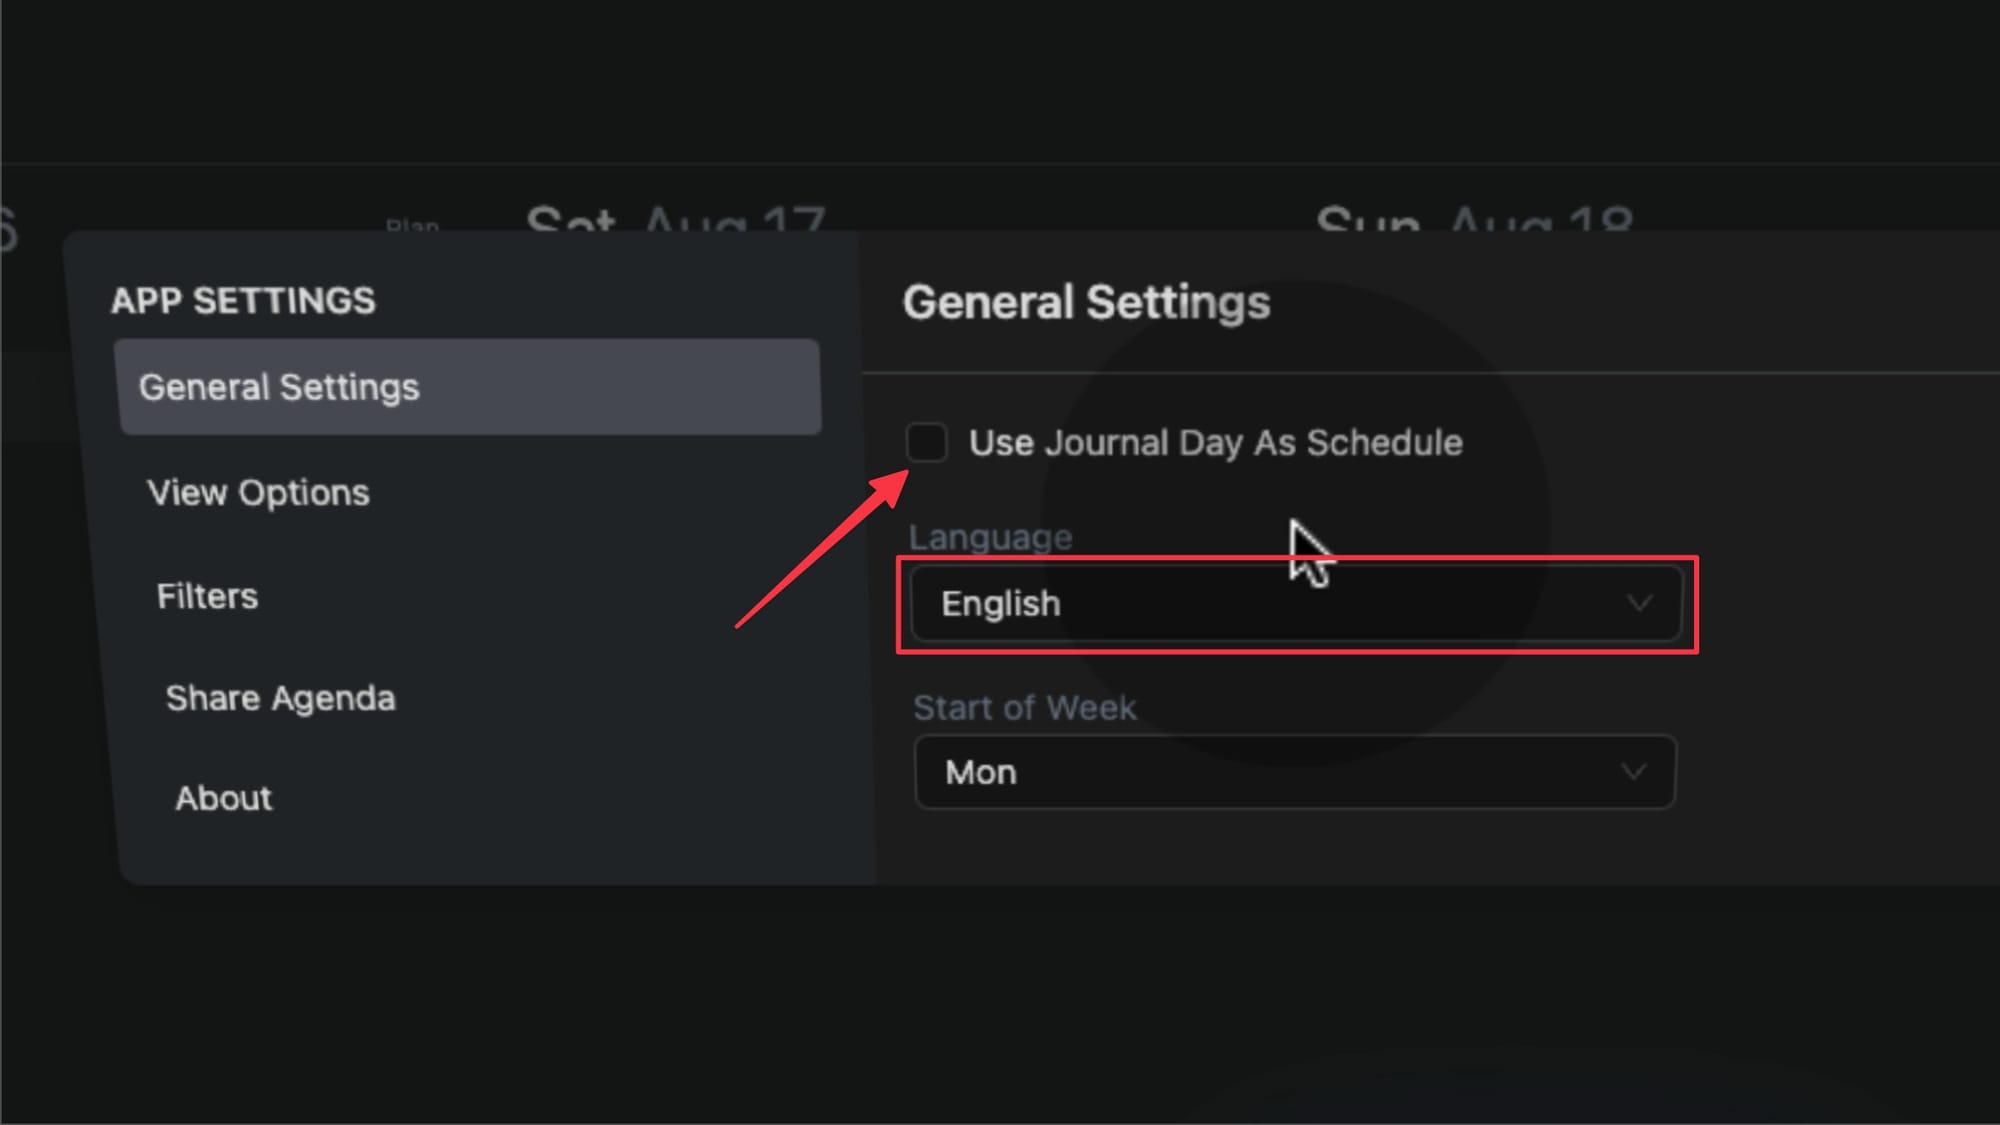
3. If you want unscheduled tasks in your Journal pages to appear in Agenda, enable the checkbox for Use General Day As Scheduled. Also, set the language to English using the drop-down menu.
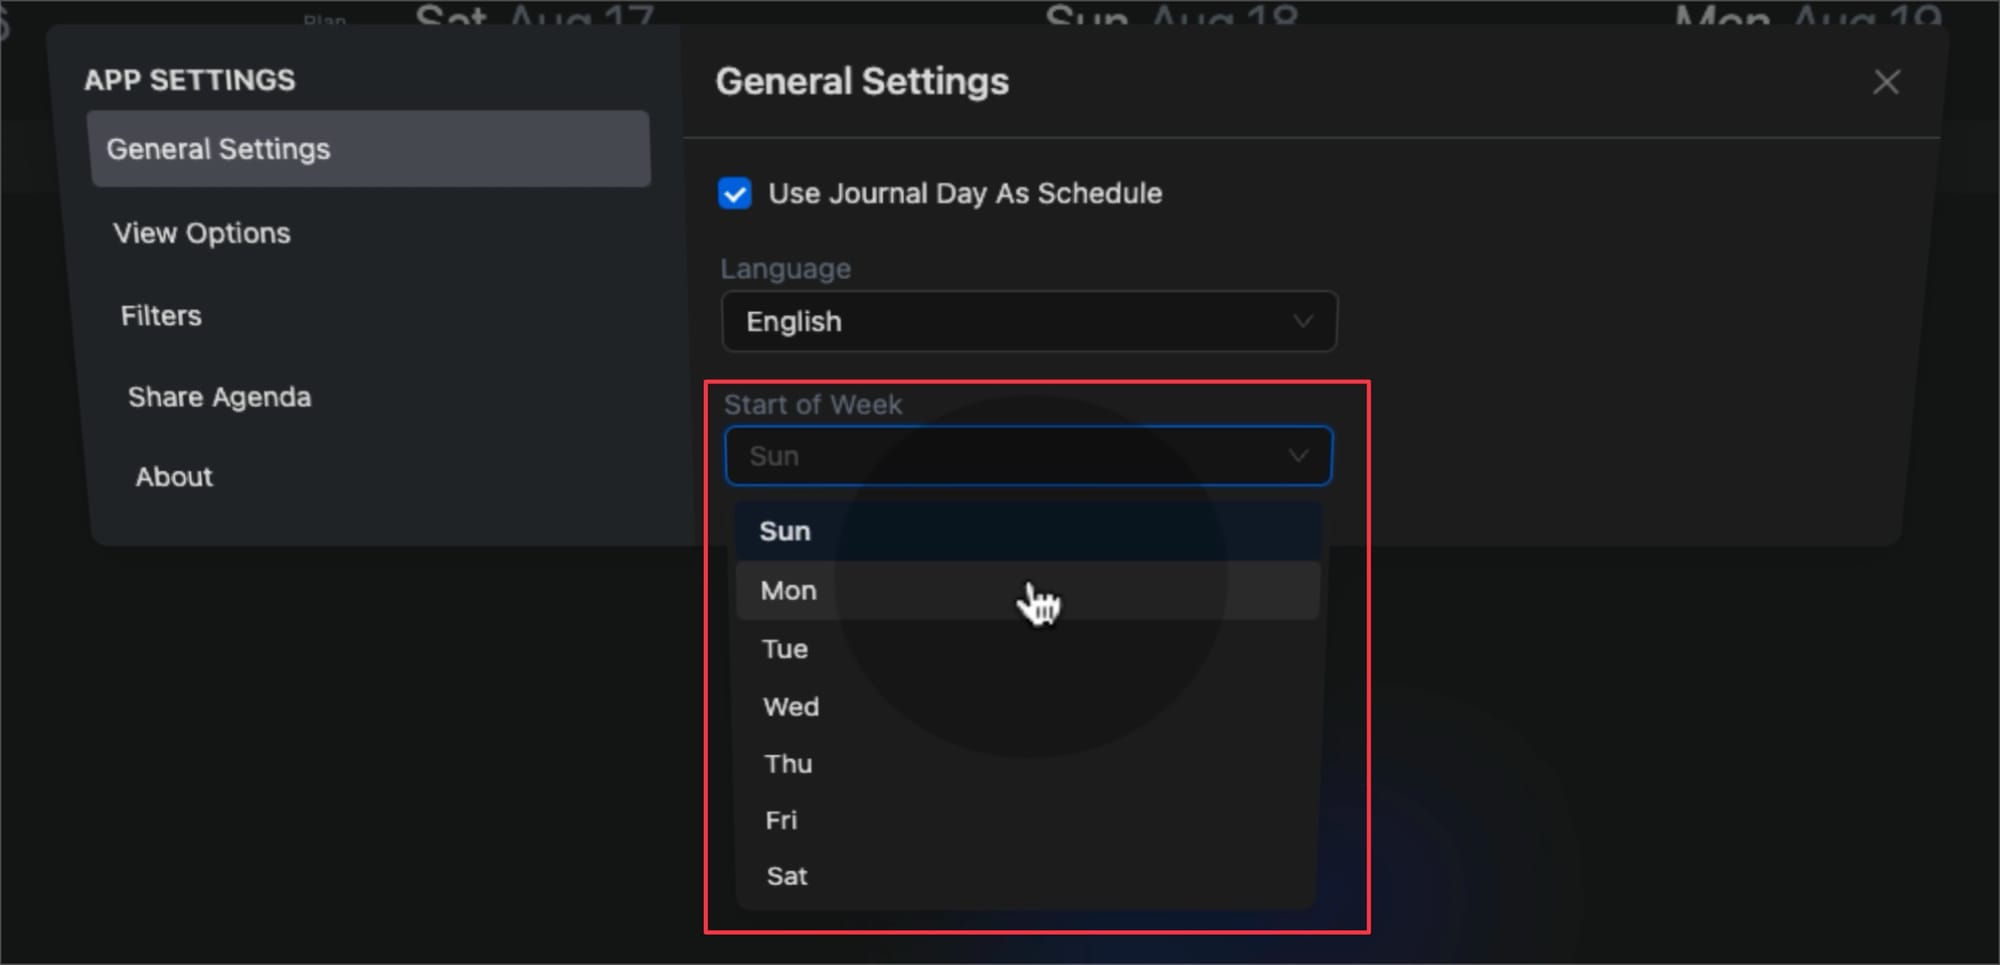
5. You can also change the start day of the week. I have set it to Monday, but you can choose Sunday or any other day.
4. Now go to View Options and enable the checkbox for Show Time Log if you want to log time for each task. You can also choose to hide completed tasks.

That’s about it. We will show you how to create filters to filter your tasks in upcoming sections. For now, these are the only customization options you need to worry about.
Before we get to next section, If you're finding this content helpful, make sure to smash that like button and subscribe to the channel so you don’t miss out on future videos.
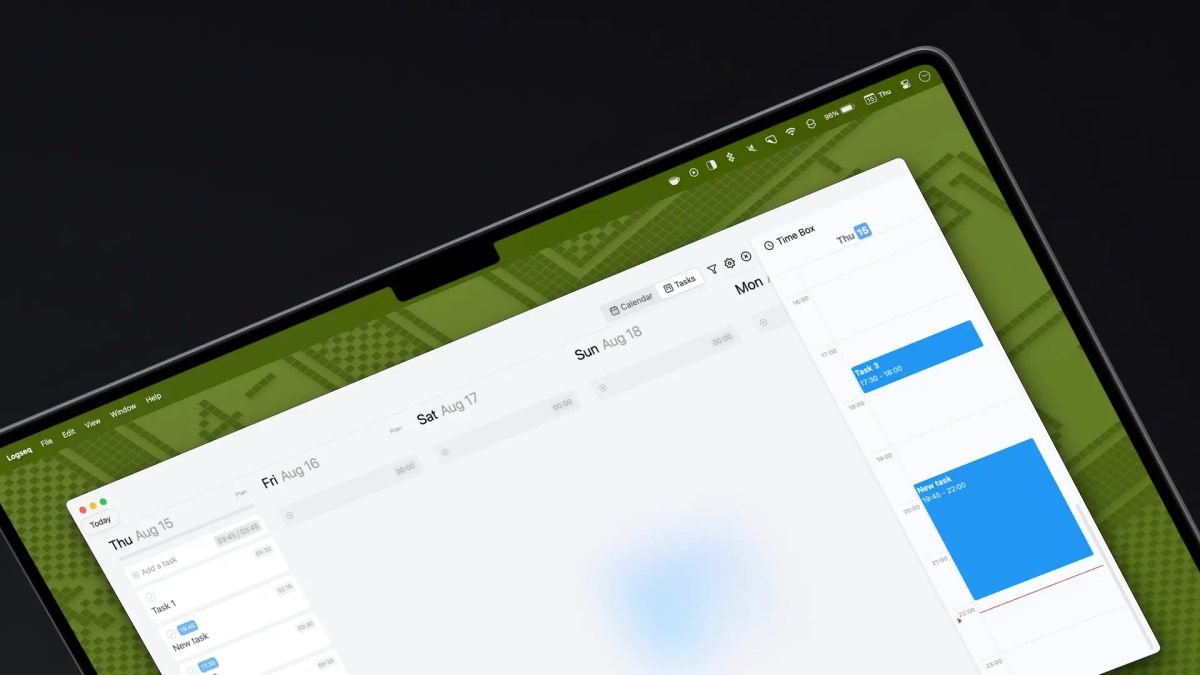
Agenda plugin Version 3.0: Calendar and Tasks views
Unlike Agenda version 2.0, which had multiple view options, the Agenda3 plugin currently only supports Calendar and Tasks views. But before we dive into these views, let’s first create some tasks on our daily notes page and a project page to see how they show up in the Agenda view.
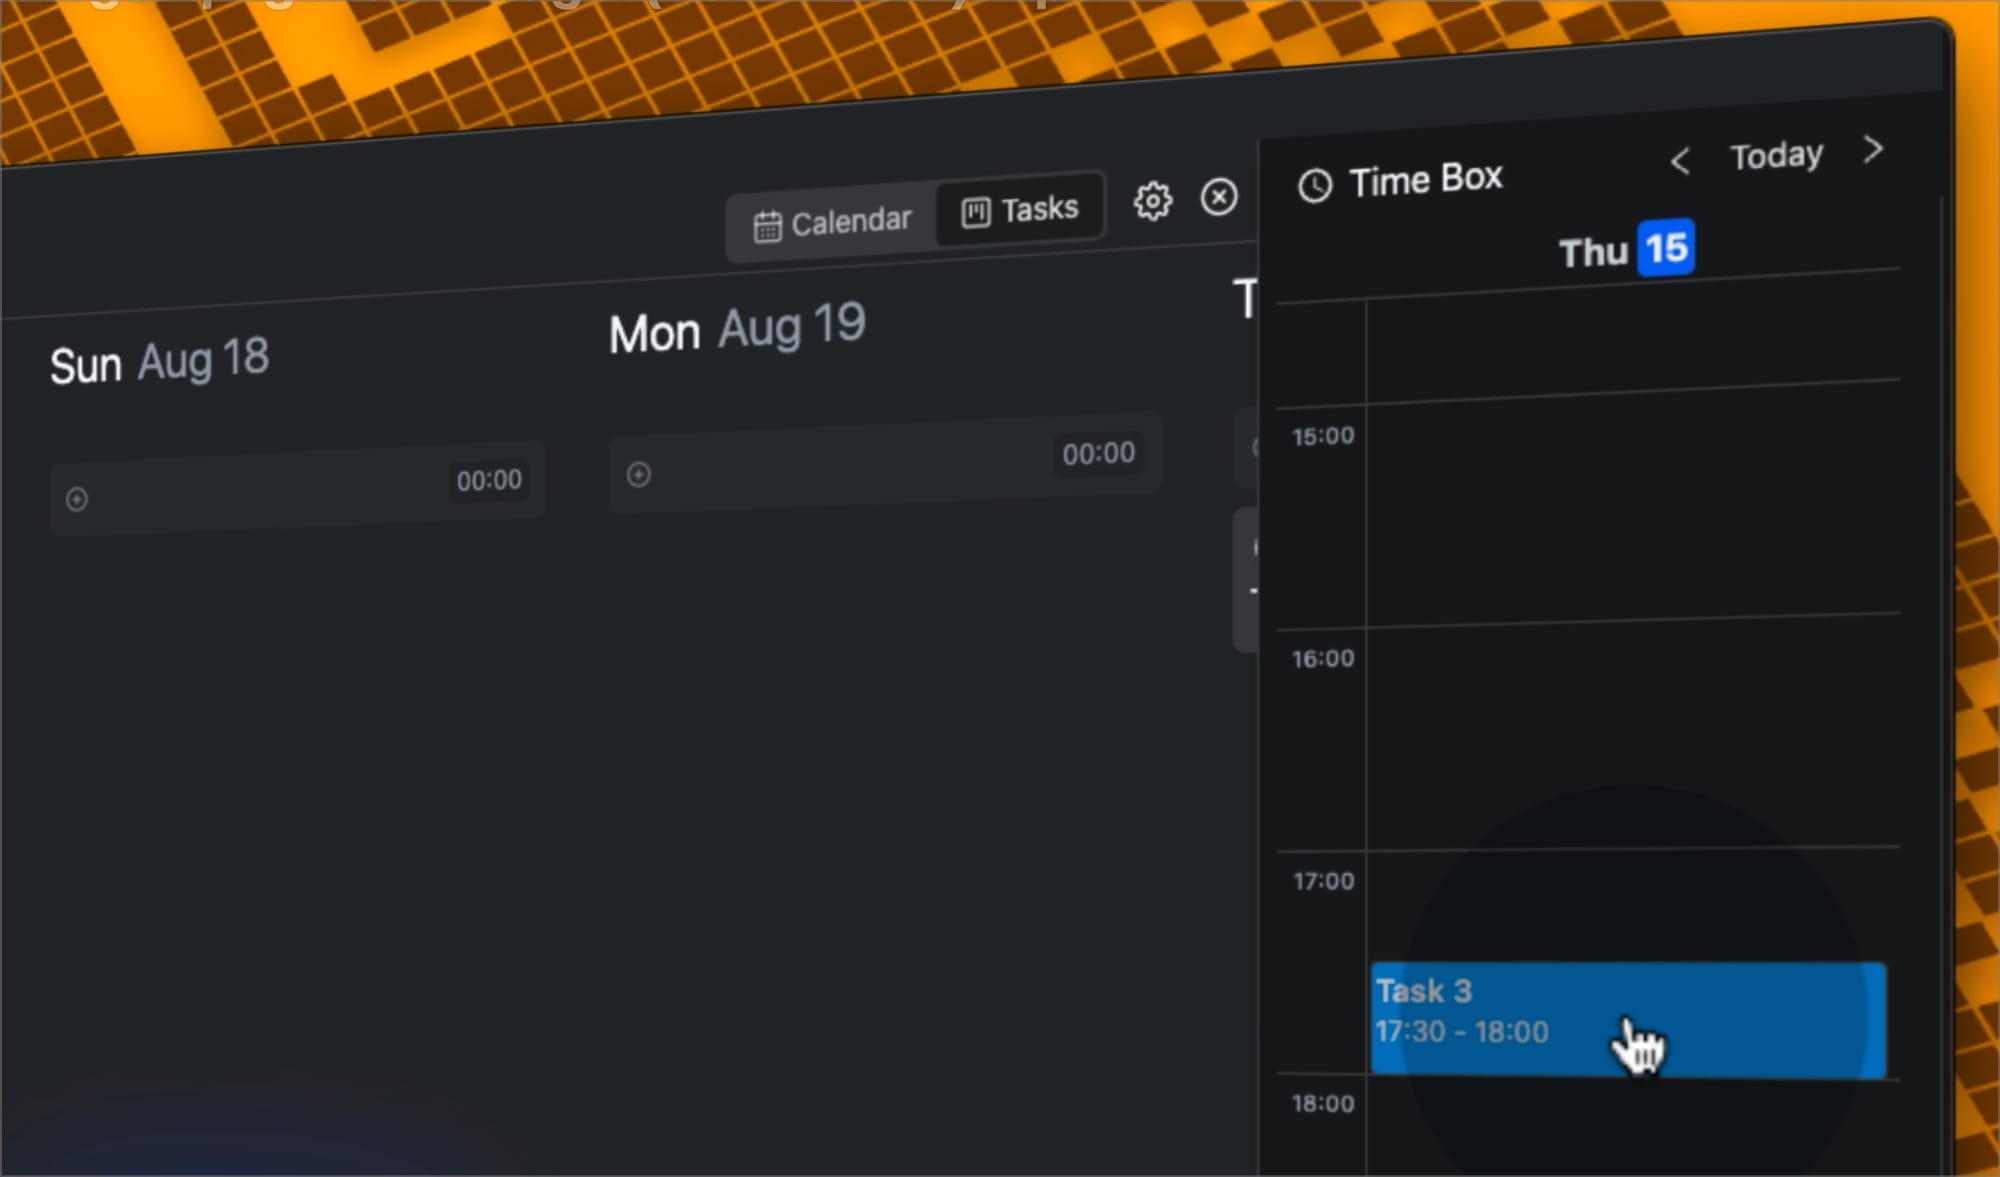
When you open the Agenda plugin, you’ll notice that all the tasks I created on the daily notes page automatically appear in the Tasks view.
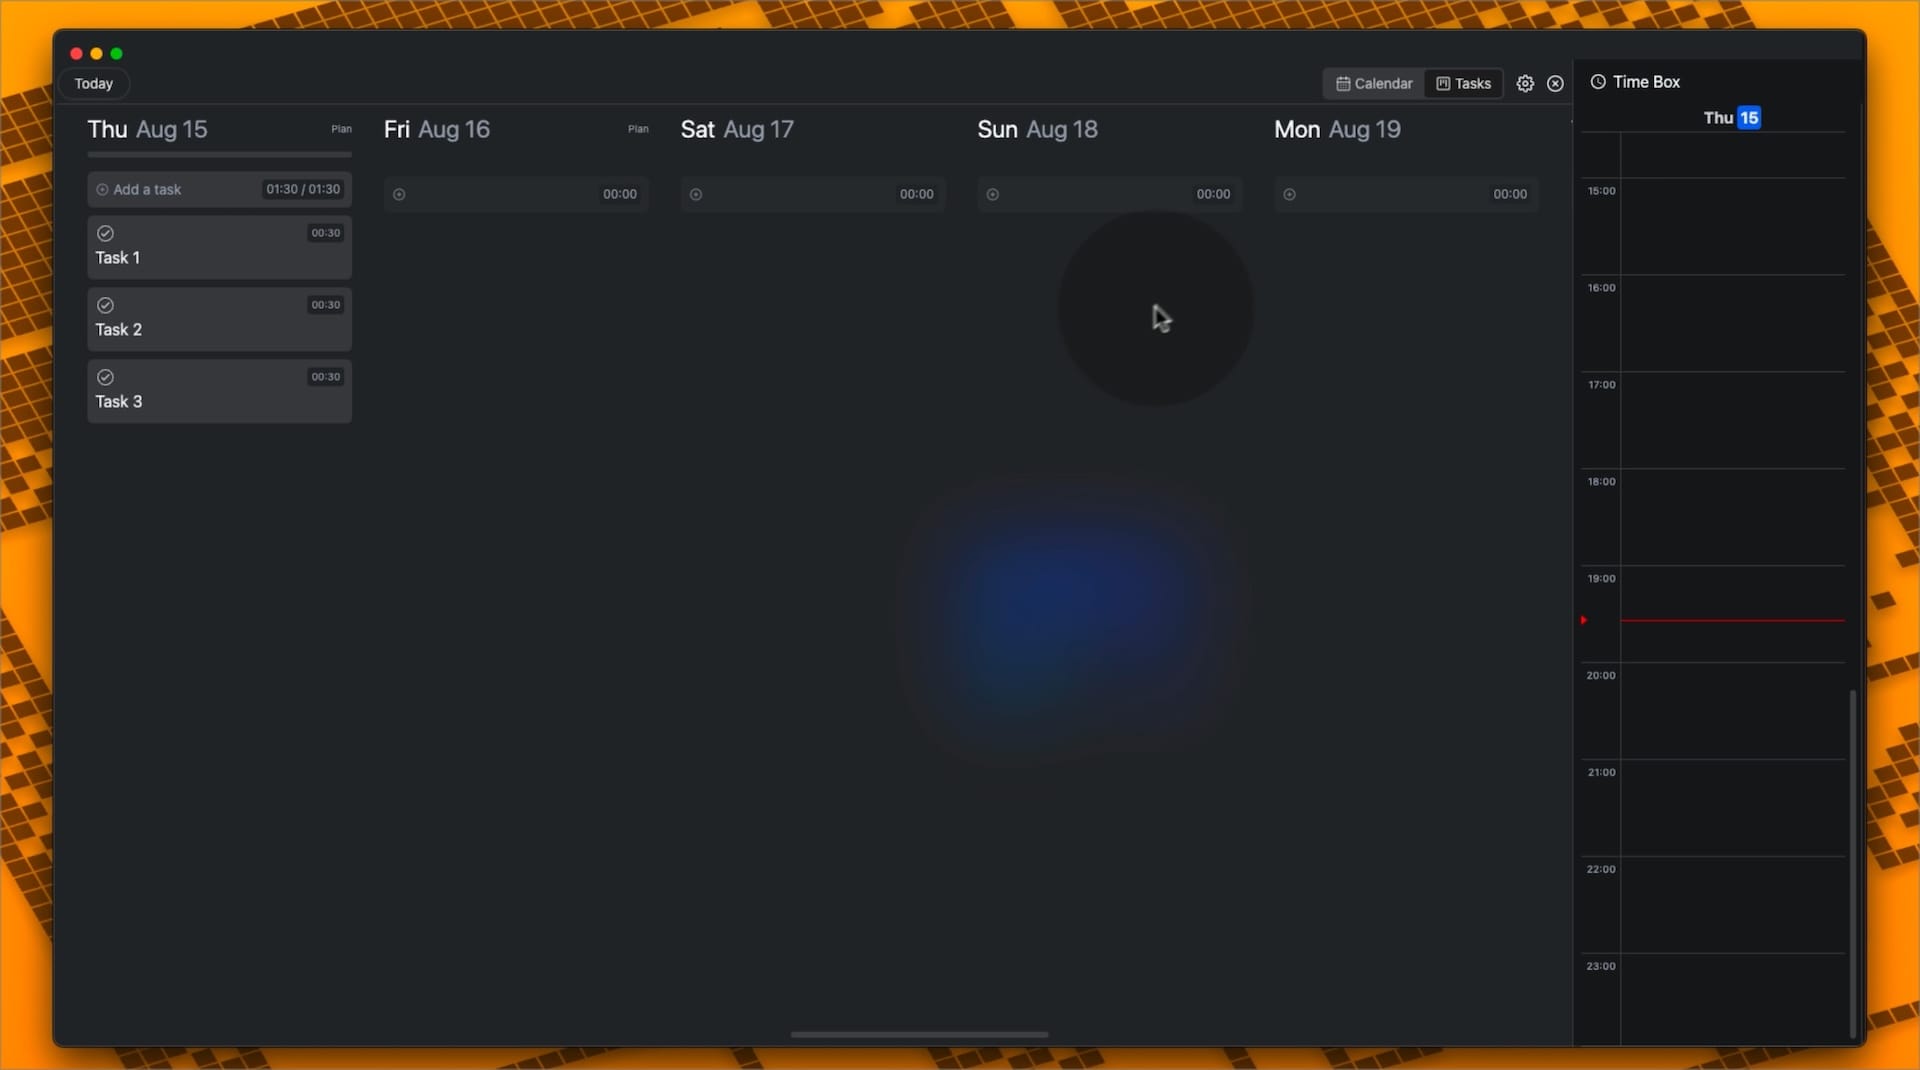
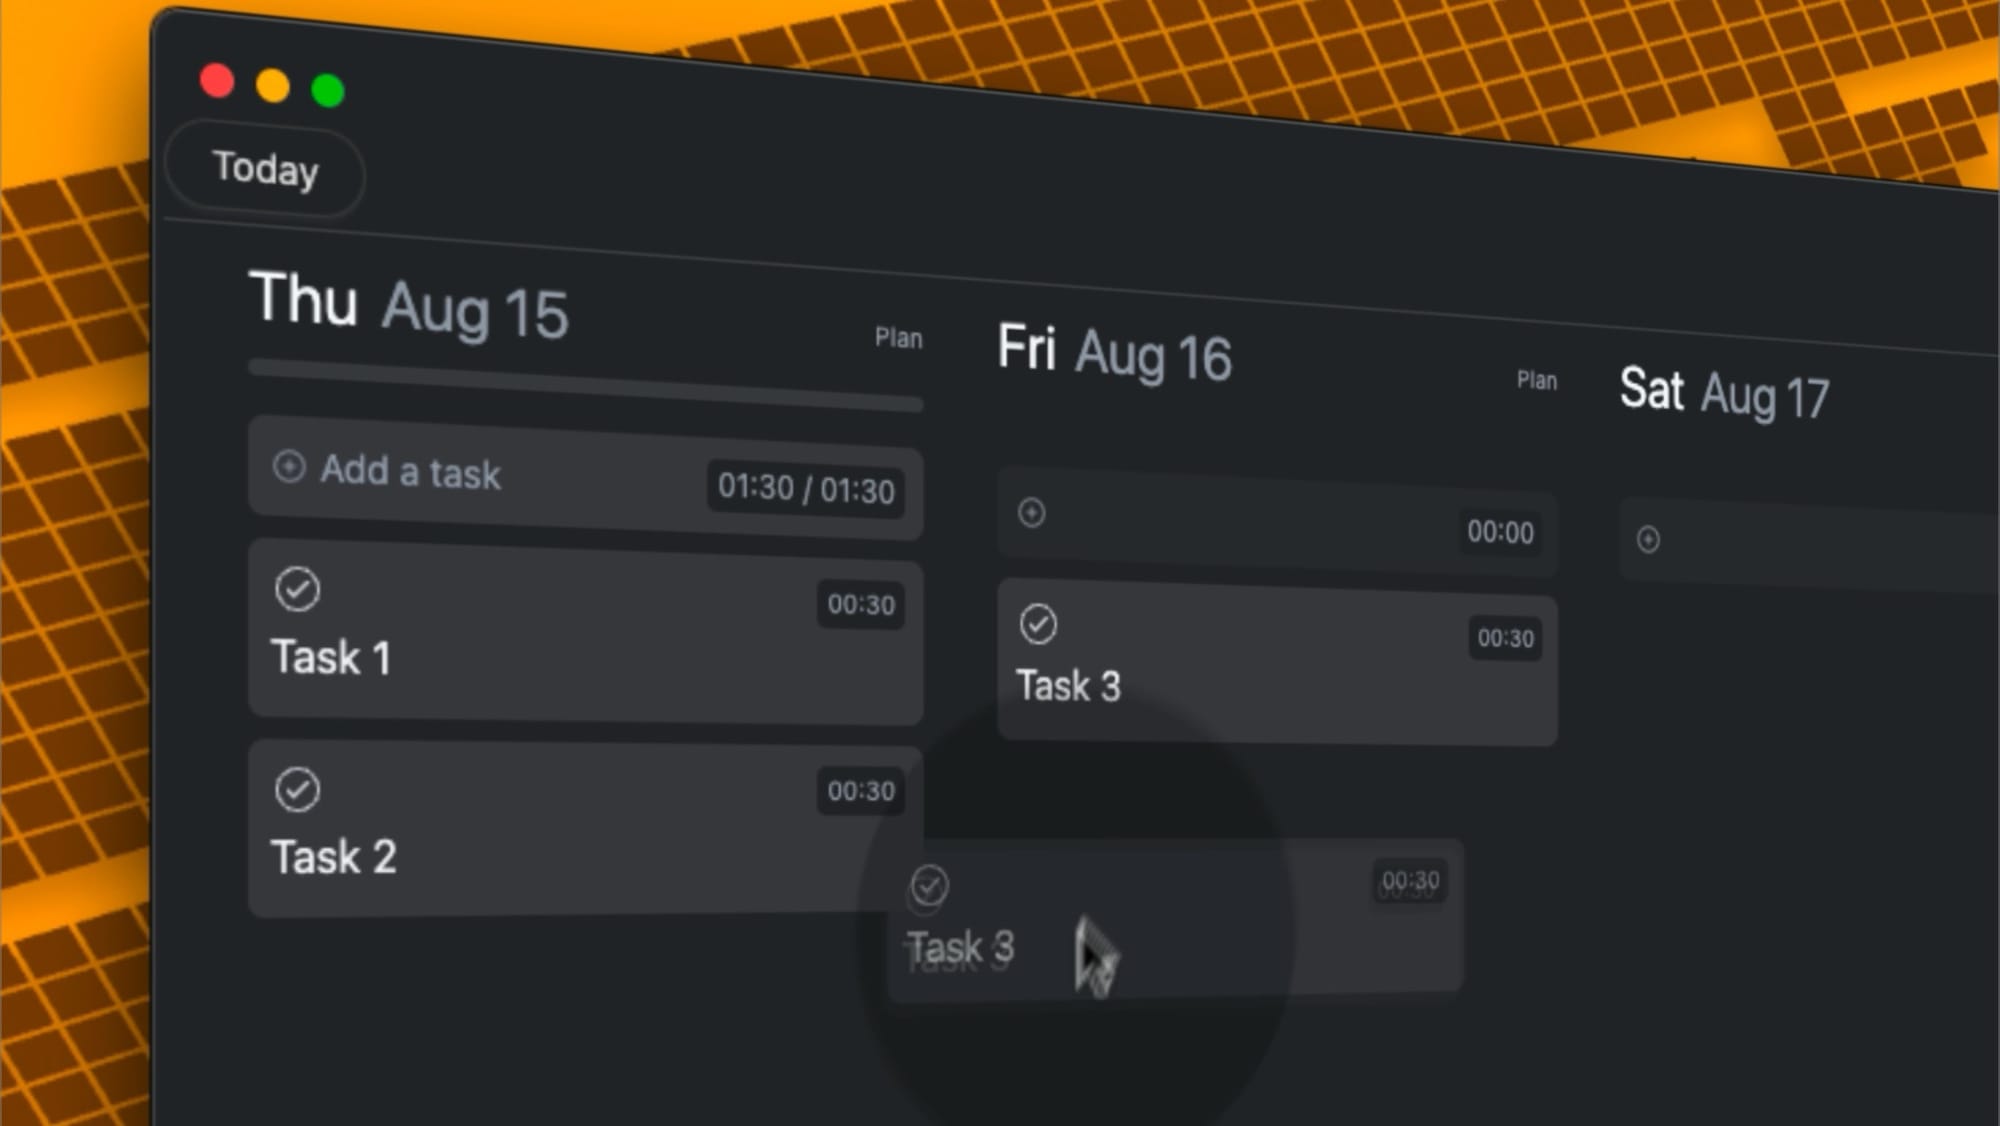
That's because we set it up to display all tasks added to the daily notes page. This view also functions like a Kanban board, allowing you to easily drag and drop tasks from one day to another to reschedule them.
On the right, you will see the Time Box option. You can drag a task on it to assign it a specific time. You can also click and drag in the Time Box to create a new task, like in Google or Apple Calendar.
You might have noticed that the tasks we created in a new project page are missing. That’s because we didn’t schedule those tasks so they are not appearing in the Tasks view, which only shows tasks that we have scheduled.
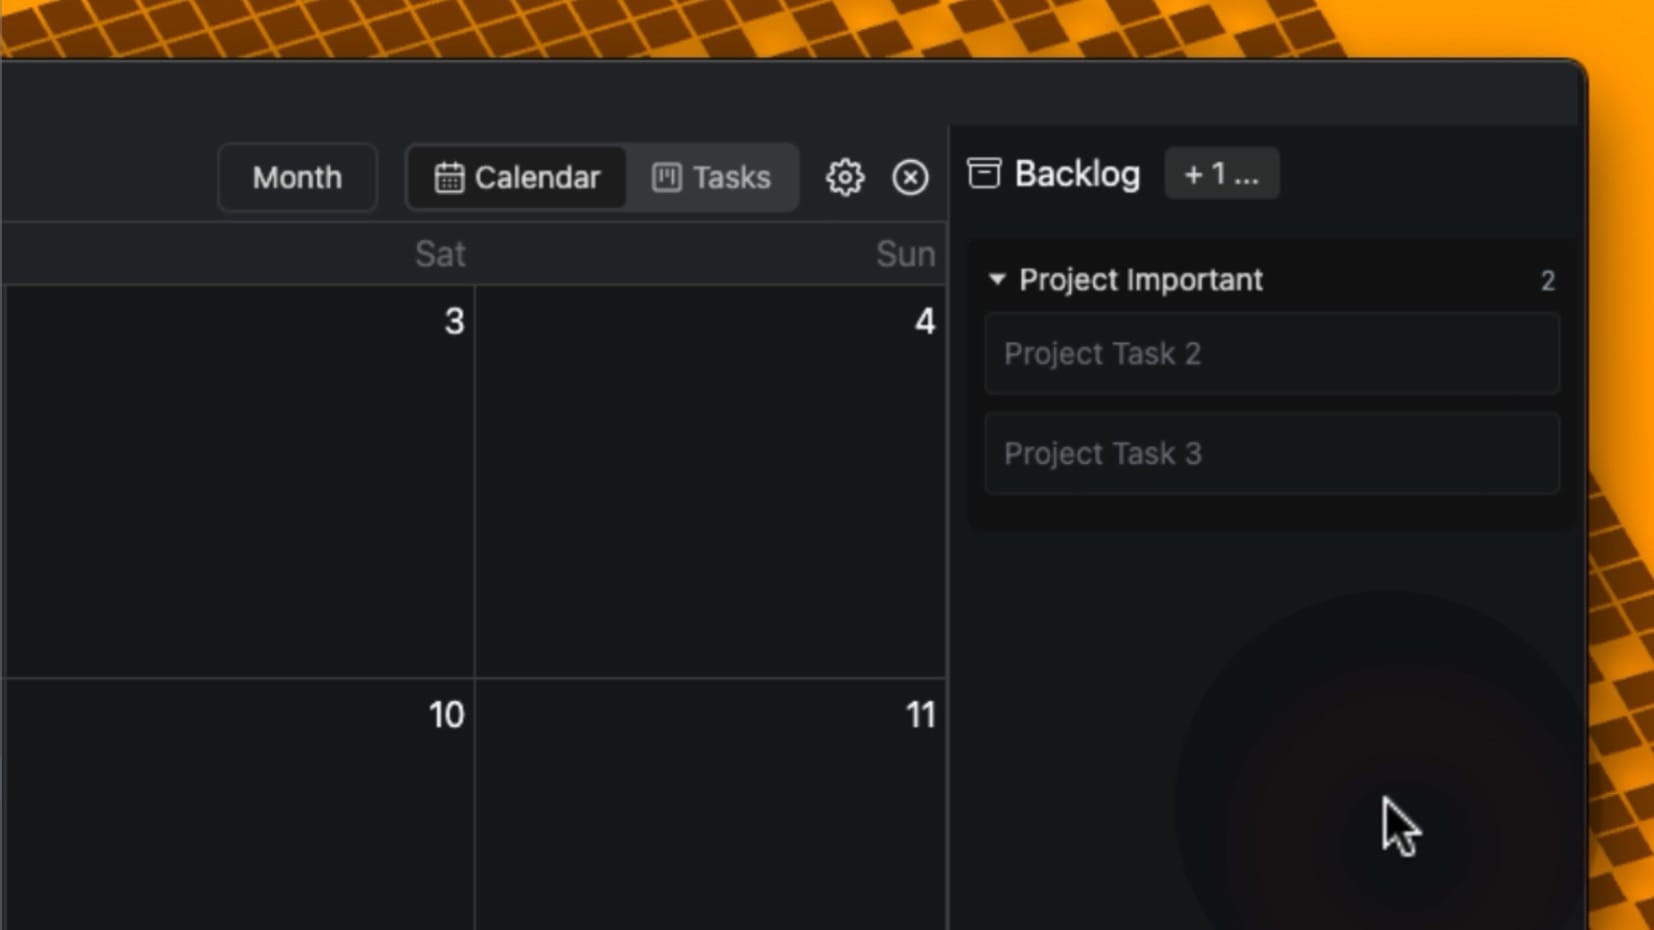
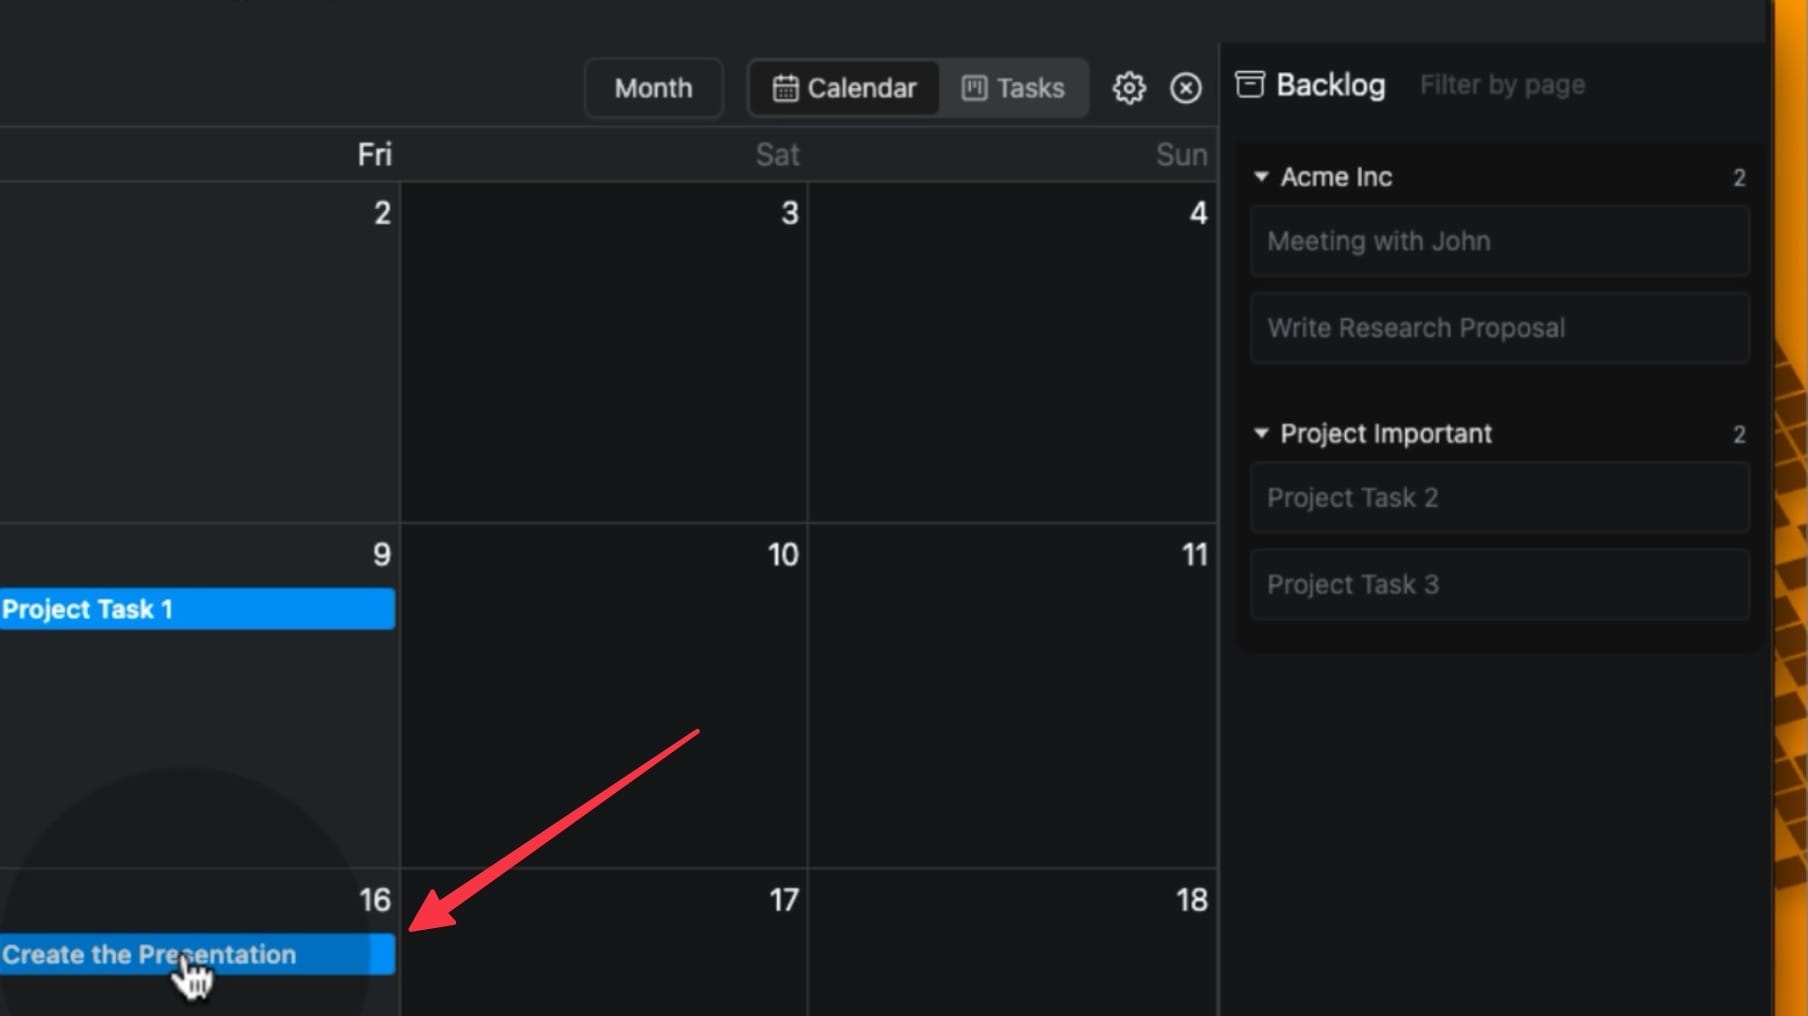
To see your unscheduled tasks, open the Calendar view. The right side of this view shows you all the unscheduled tasks you created in different pages in your Logseq directory. I can simply drag and drop these tasks on the calendar to schedule them to a date.
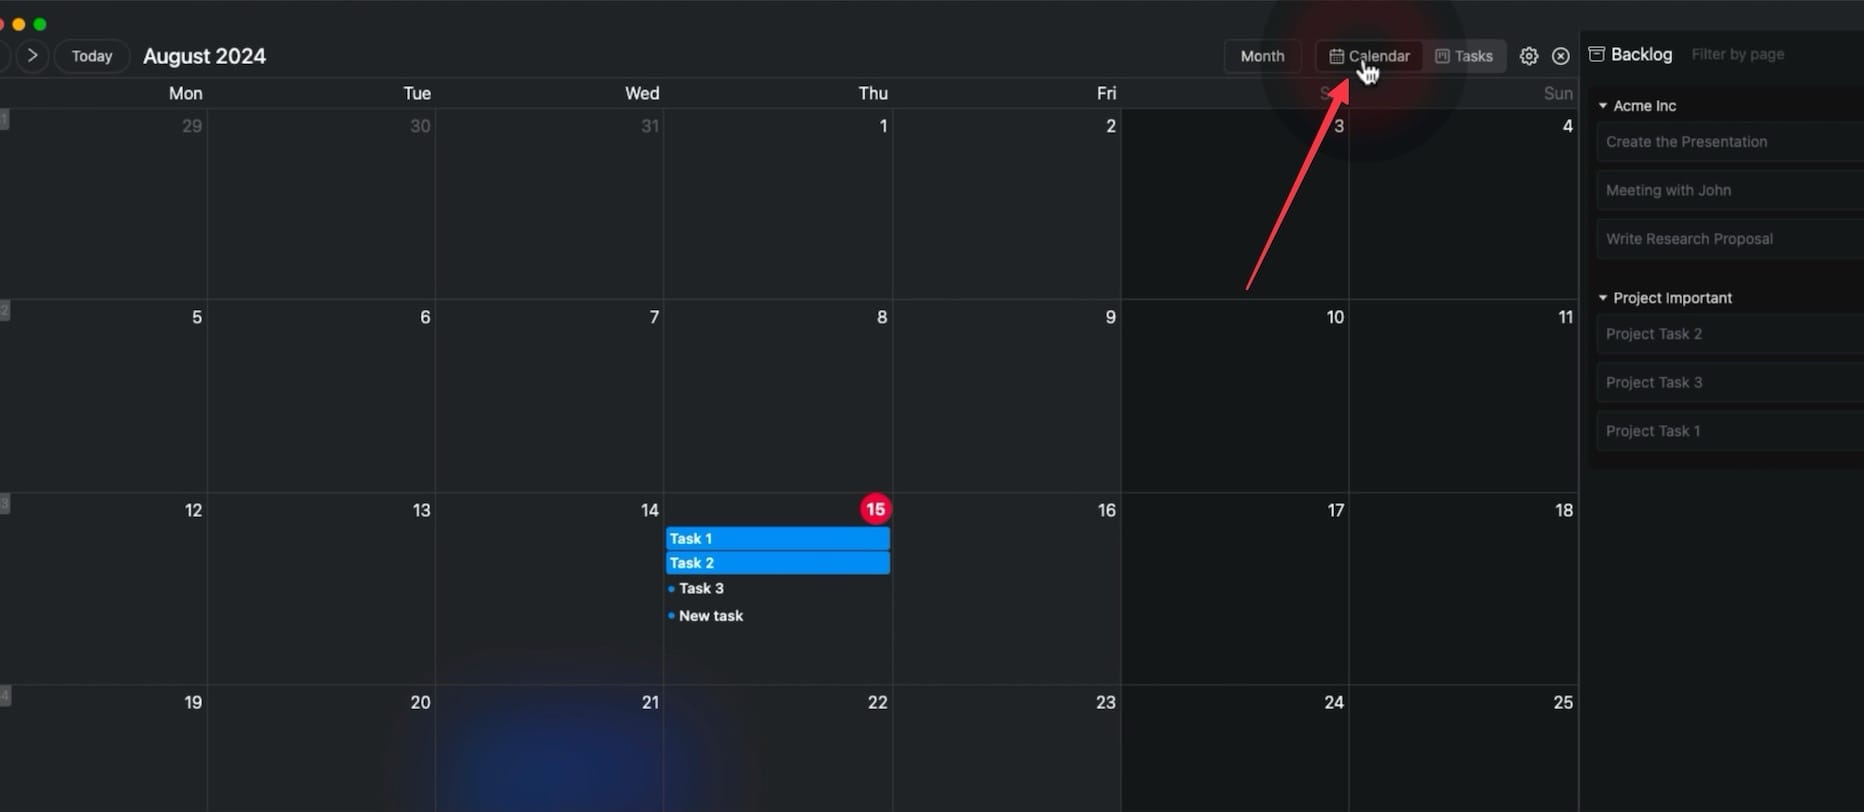
I like that I can filter tasks by page. If you have dozens of pages with open tasks, you can use this feature to view only the tasks you want to focus on at the moment.
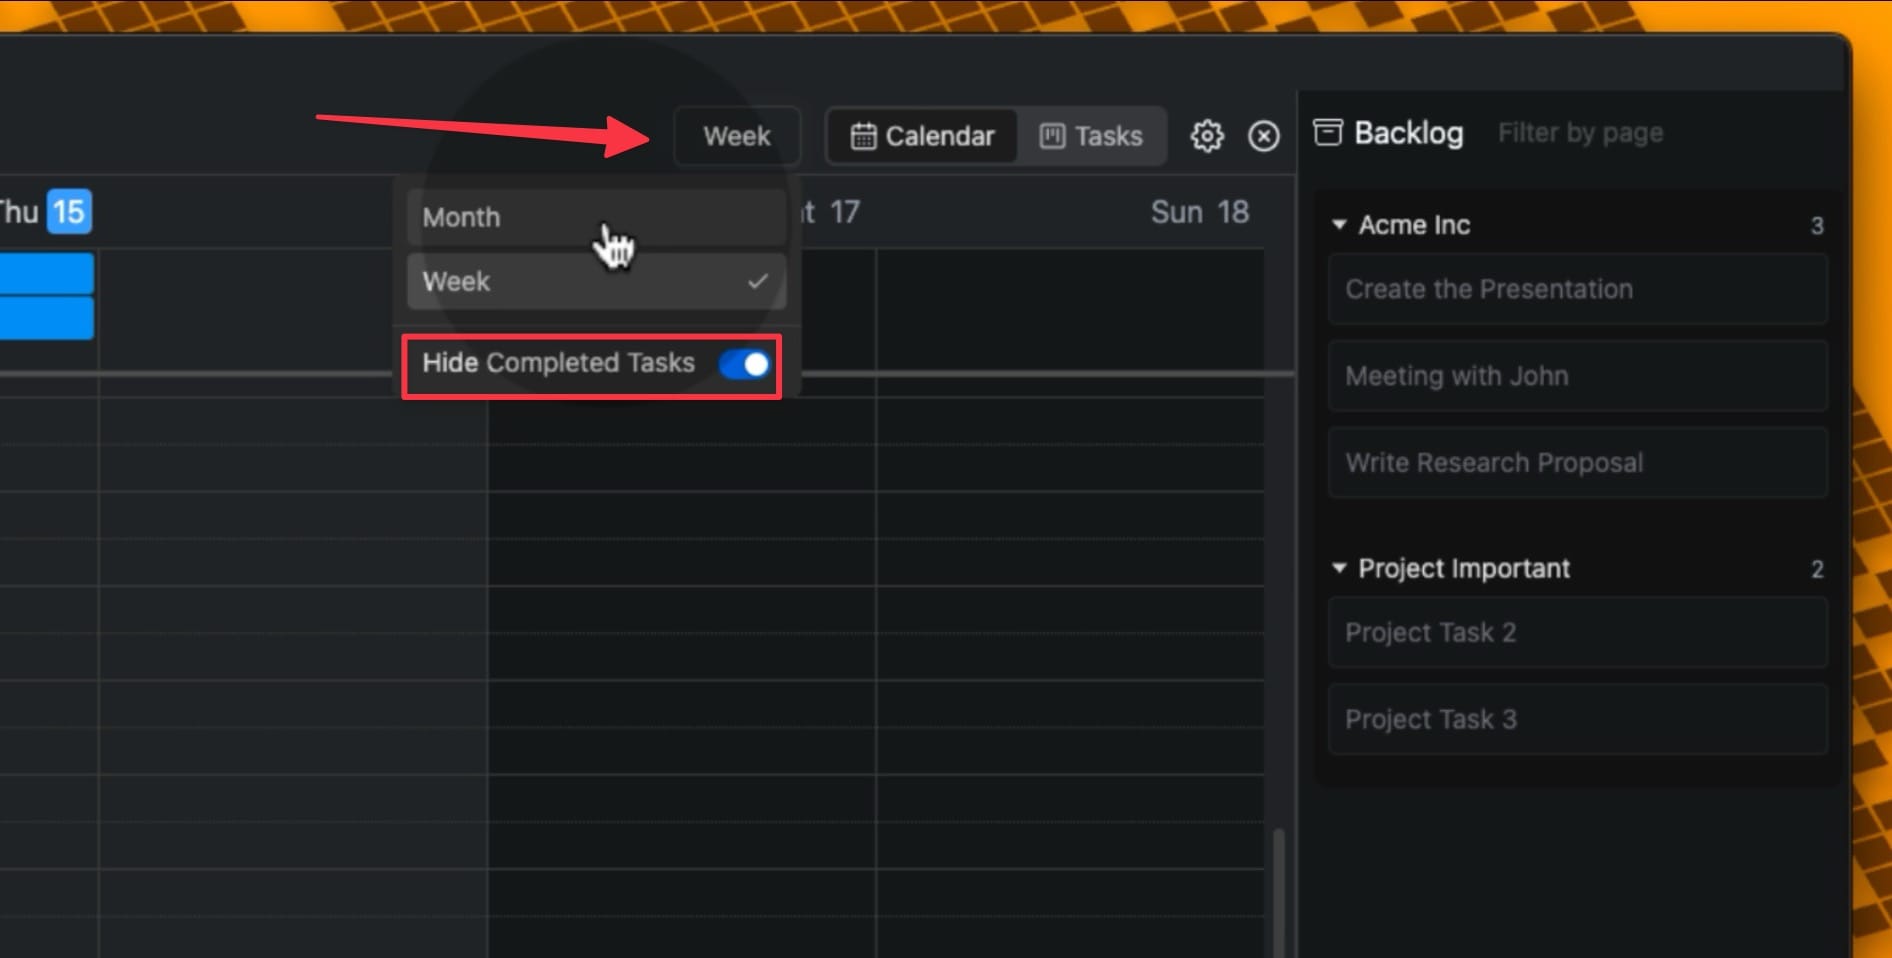
You can switch the calendar view from Month to Week and enable the toggle for Hide Completed Tasks to remove the completed tasks from crowding your calendar view.
Agenda card scheduler
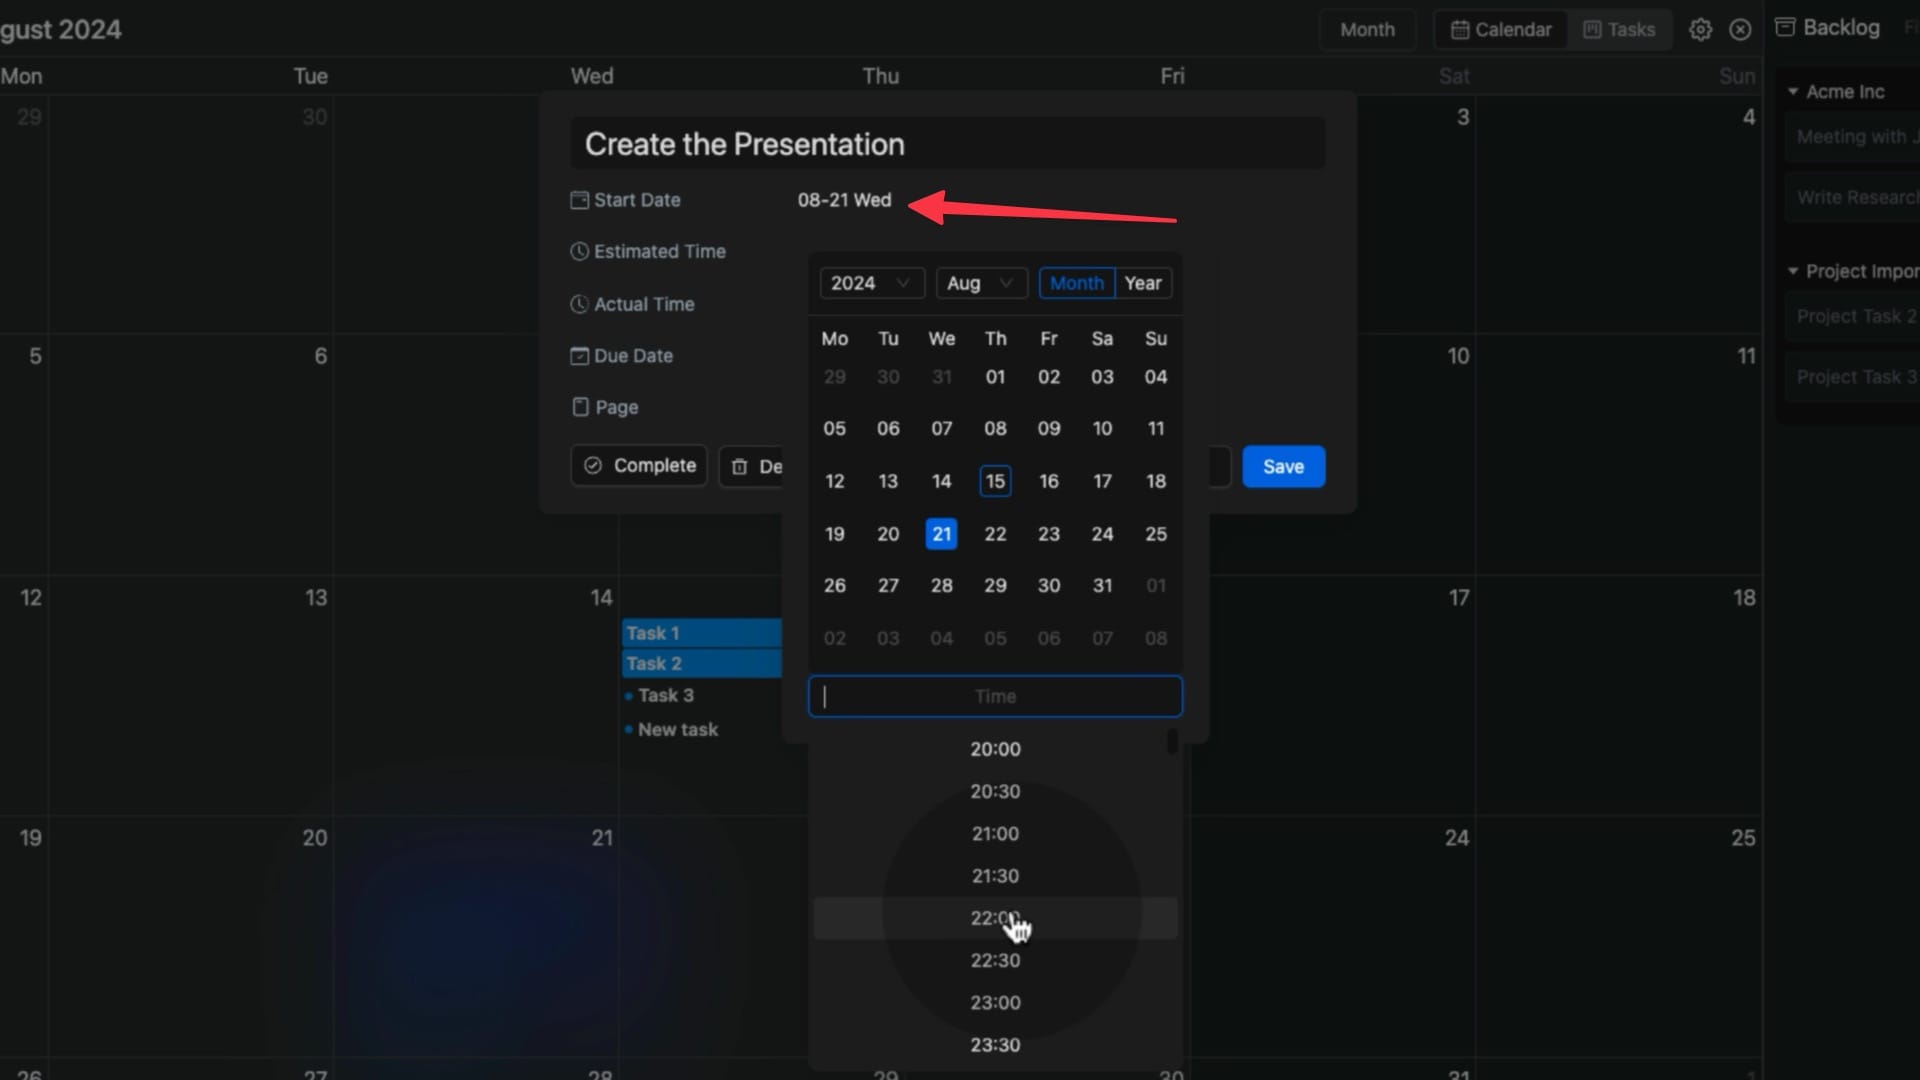
Till now, all the tasks we have created are all-day tasks as we have not scheduled them exactly on our calendar. To assign a specific time to your tasks, simply click on them in either calendar or tasks view and it will open a task card.
To assign the task to a specific time, click the date field next to Start Date. You can use the calendar to reschedule the date. Click the Time field to assign this task a specific time. By default, every task gets a block of 30 minutes.
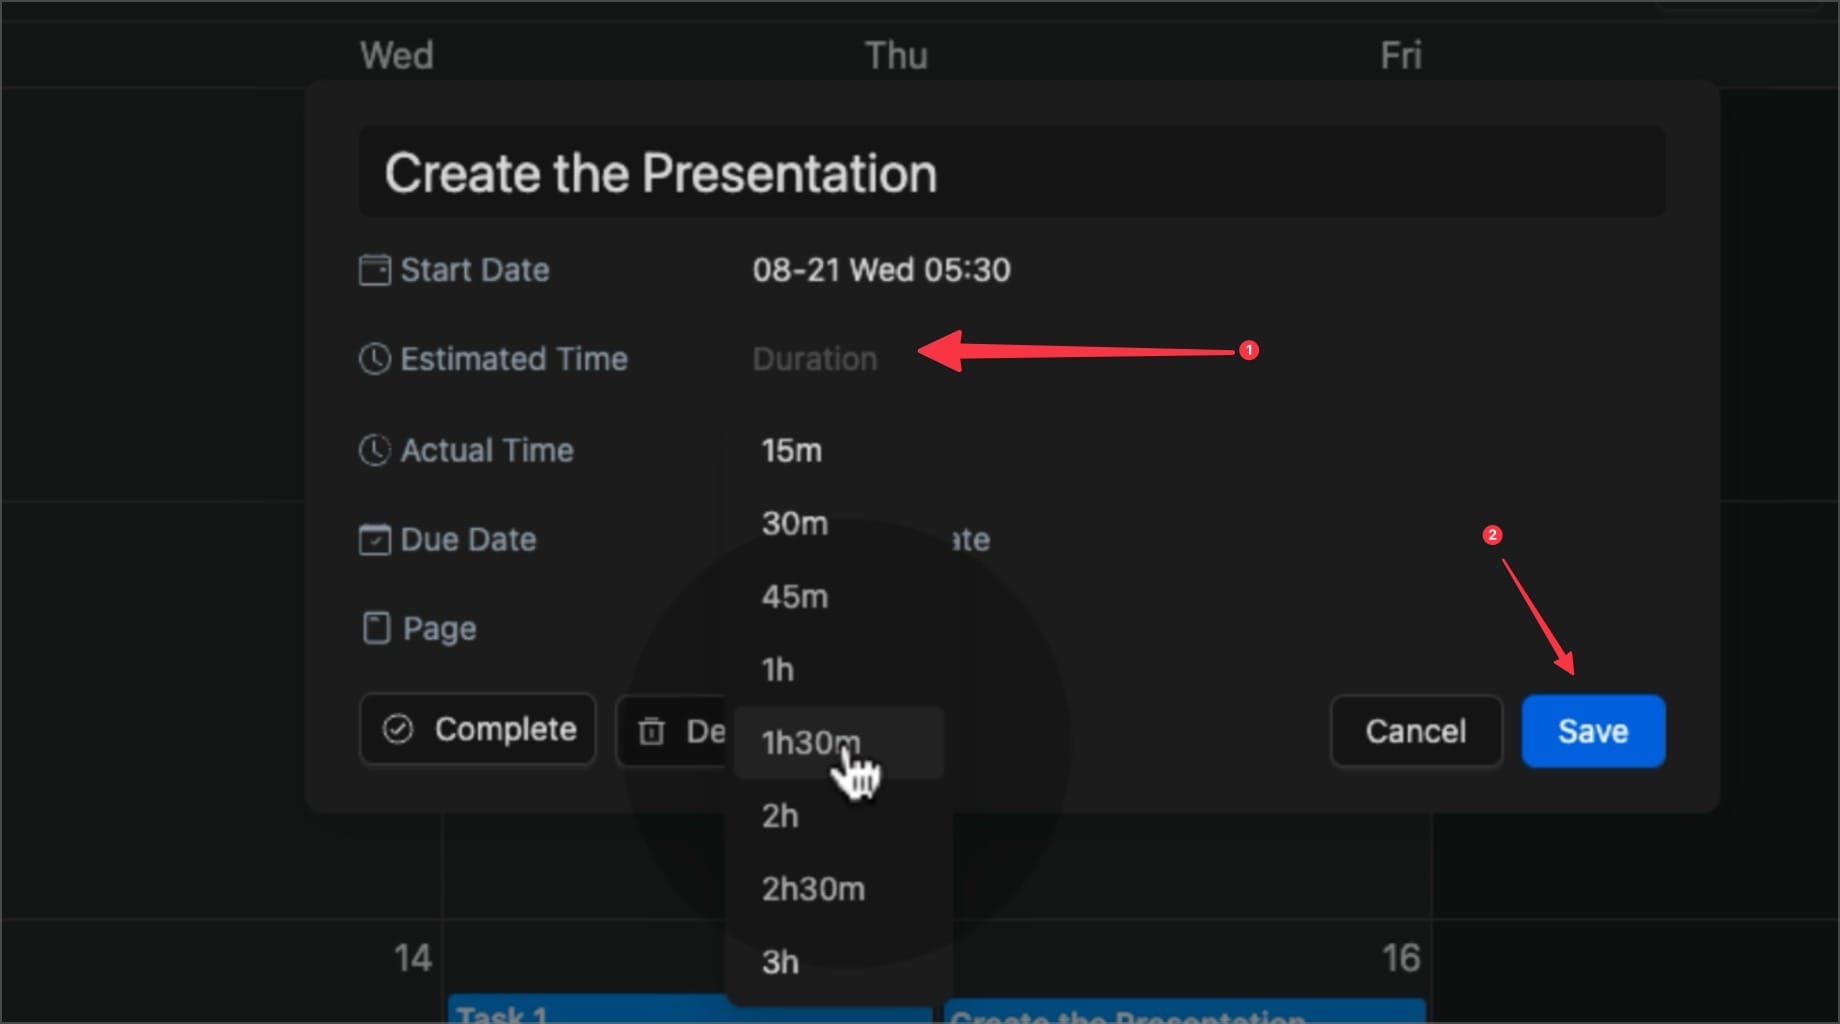
You can tweak this with the Estimated Time option. Click on Duration, pick how long you think it'll take to finish the task and hit Save to lock it in! Now, your task is all scheduled and ready to go!
But hold on, there are a couple more awesome features we need to dive into. First up is the Actual Time feature — this lets you log exactly how much time you spend on a task. You can add time in 30-minute chunks. It’s a super handy way to keep track of your progress!
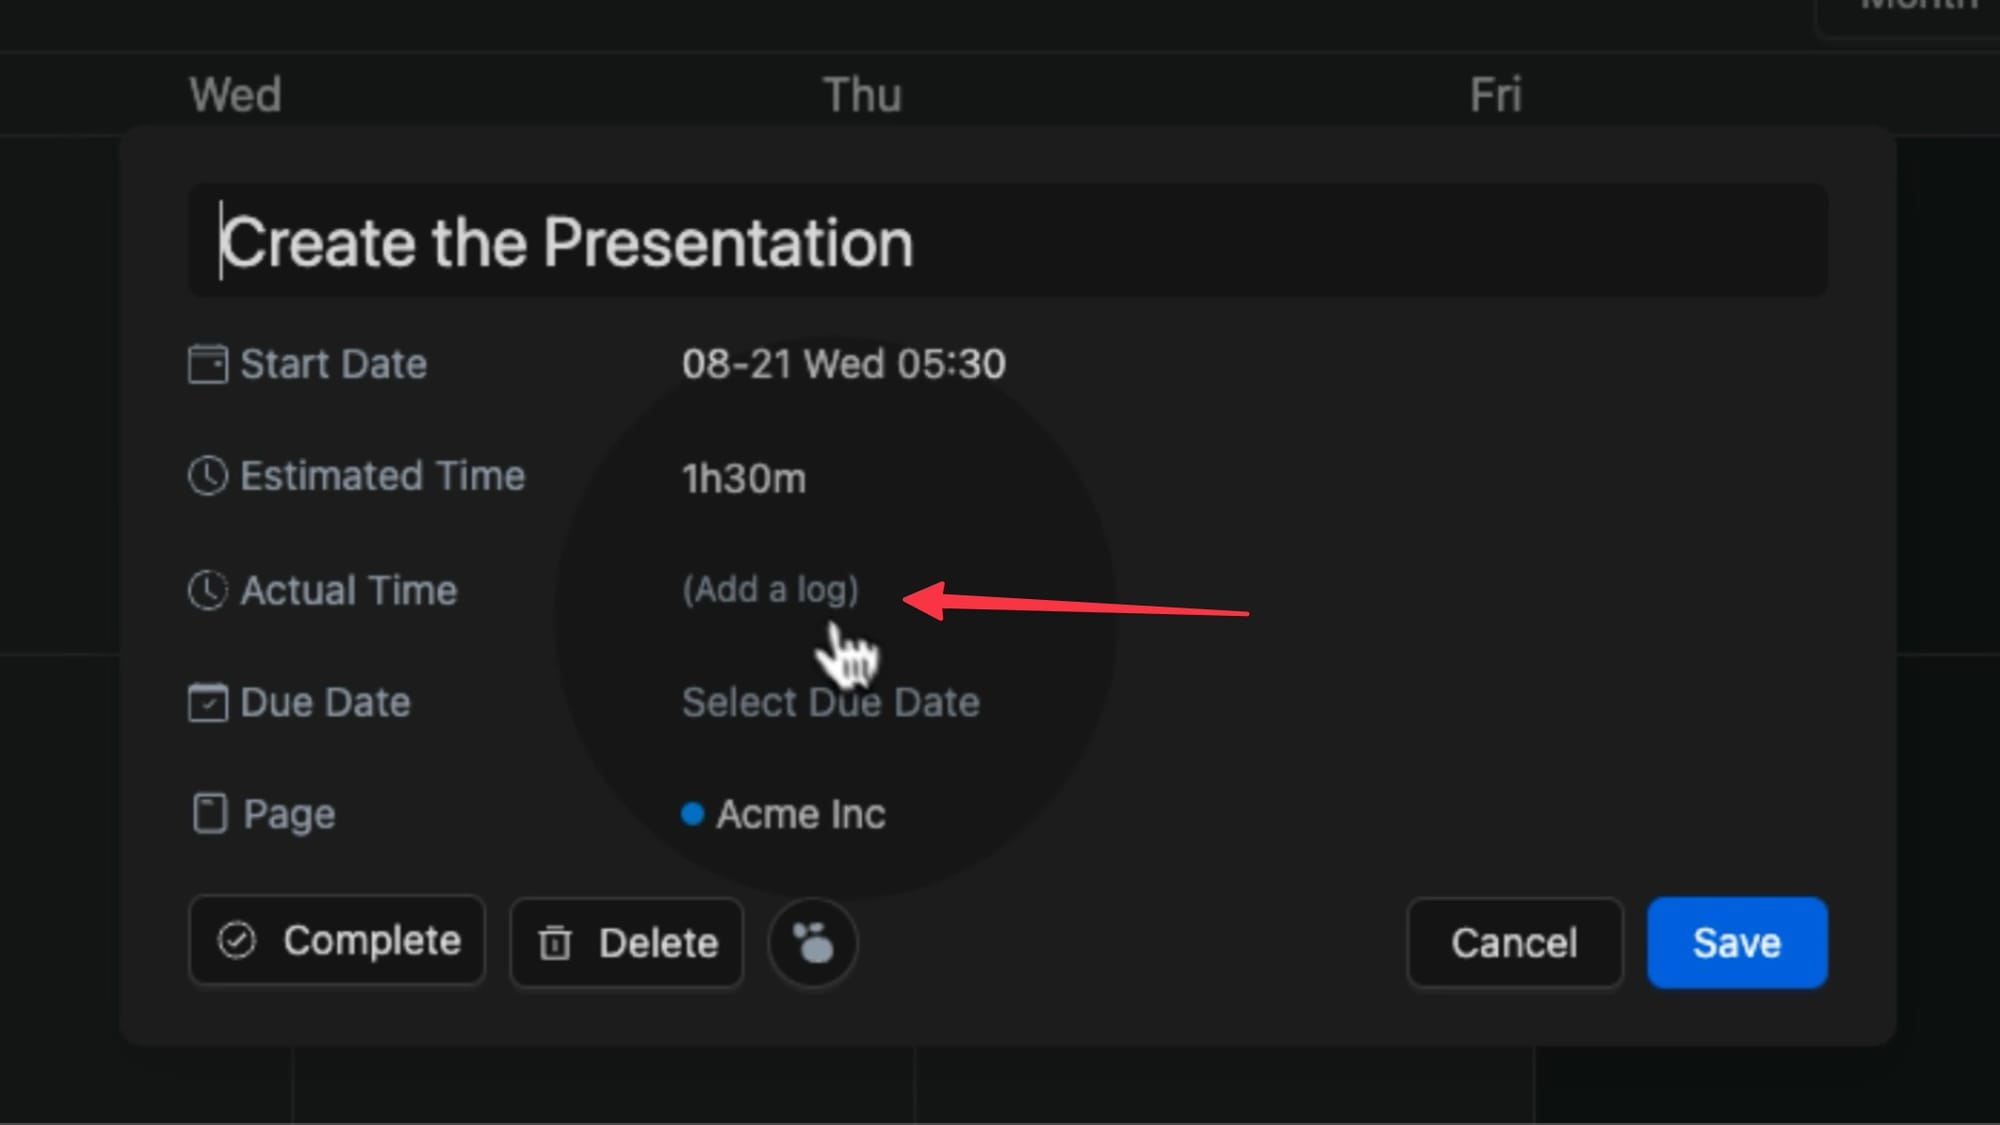
It’s a good way to see how close you were to your estimate. If you logged an extra 30-minute chunk by mistake, hover over it and click the trashcan icon to remove it.
One of my favorite features of the Agenda3 plugin is the Due Date feature. If your project is due on Wednesday, you will probably start working on Monday. The Due Date feature allows us to assign both these dates to a task.
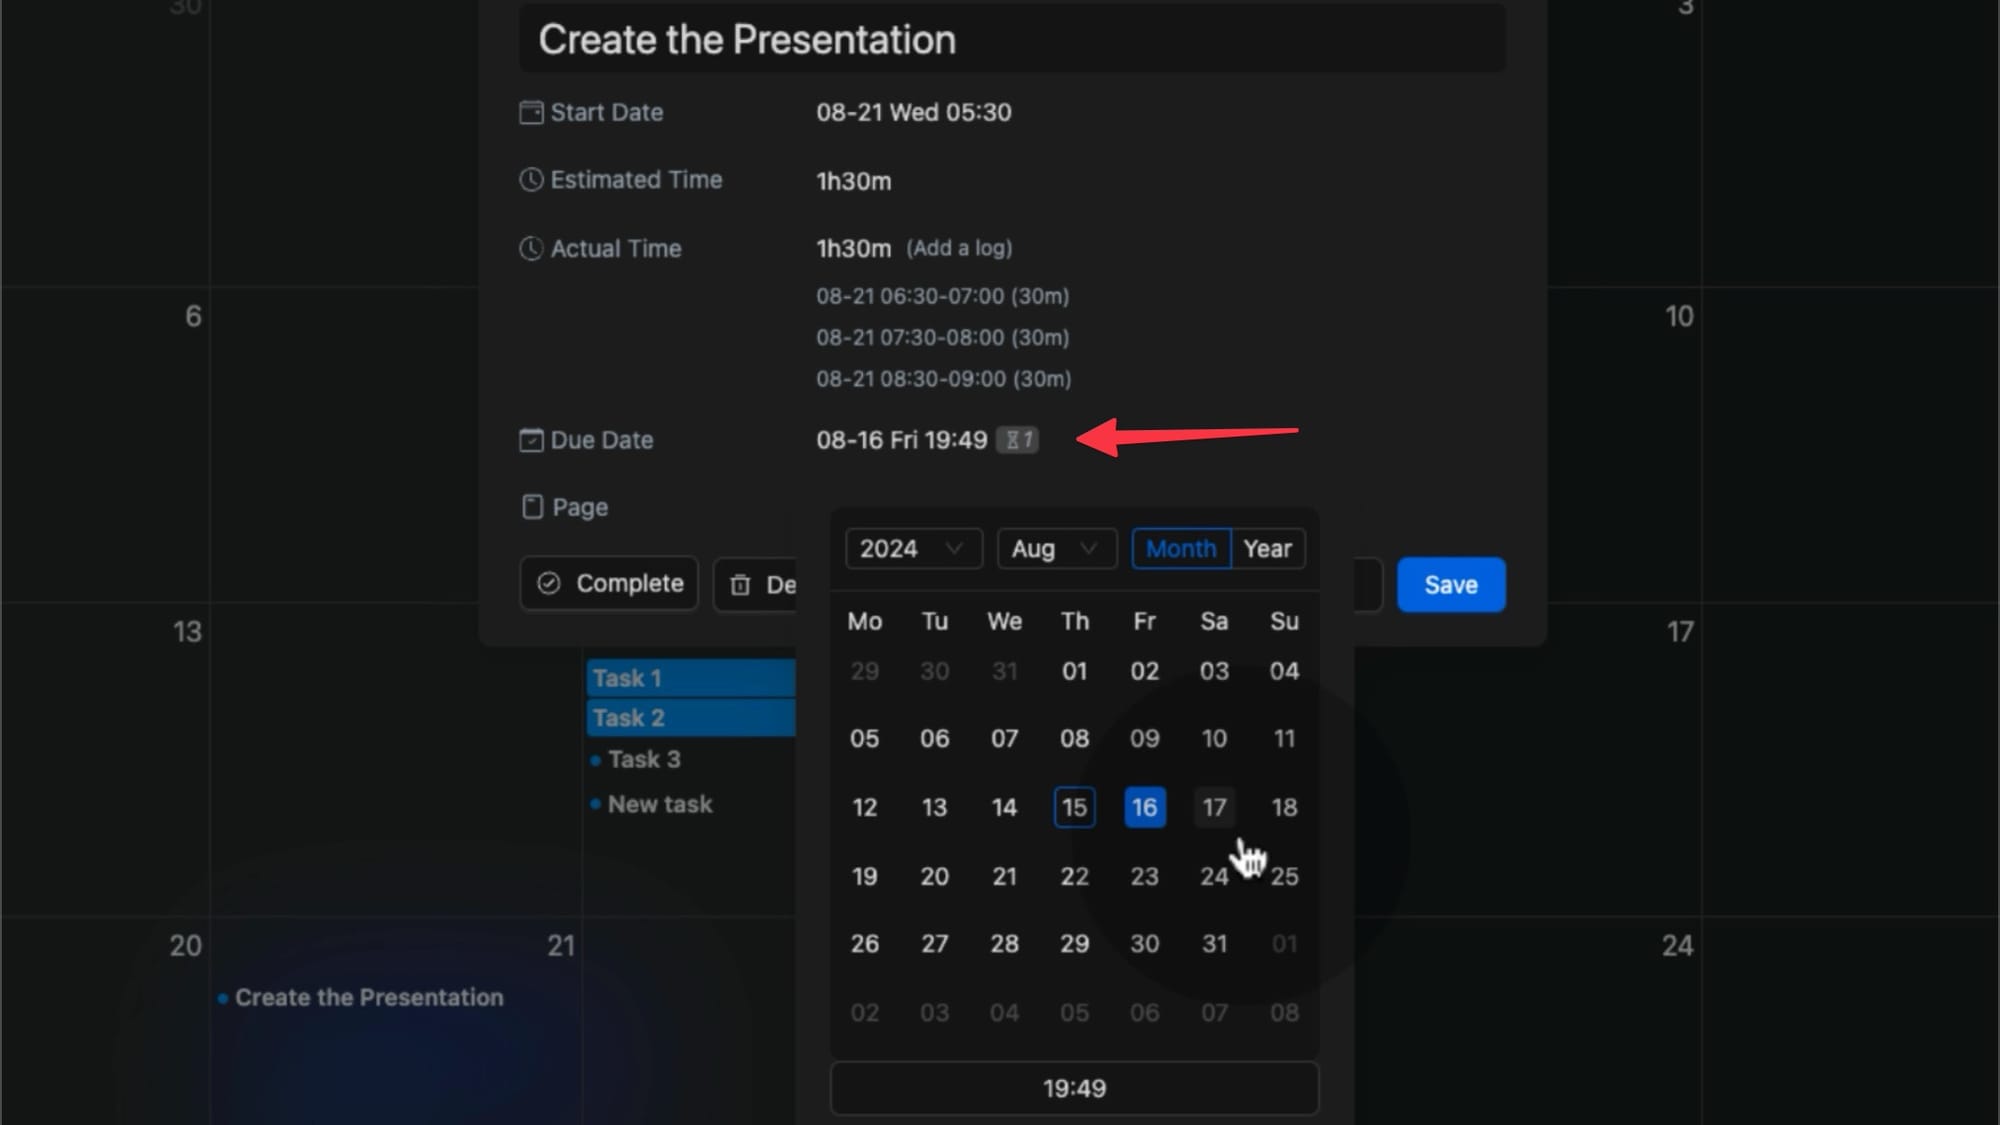
Setting the Due Date is the same as setting the start date. Click the Date field and enter the due date. What's cool is Agenda automatically adds an hourglass icon right next to the task, showing you exactly how many days are left.
From the task card, you can also mark a task as complete, delete it, or click the Logseq icon to open the task in its native location.

Scheduling task from Logseq pages
You will notice that all the changes you made are reflected as task attributes, allowing you to view your scheduled time, deadline, and more without opening the plugin.
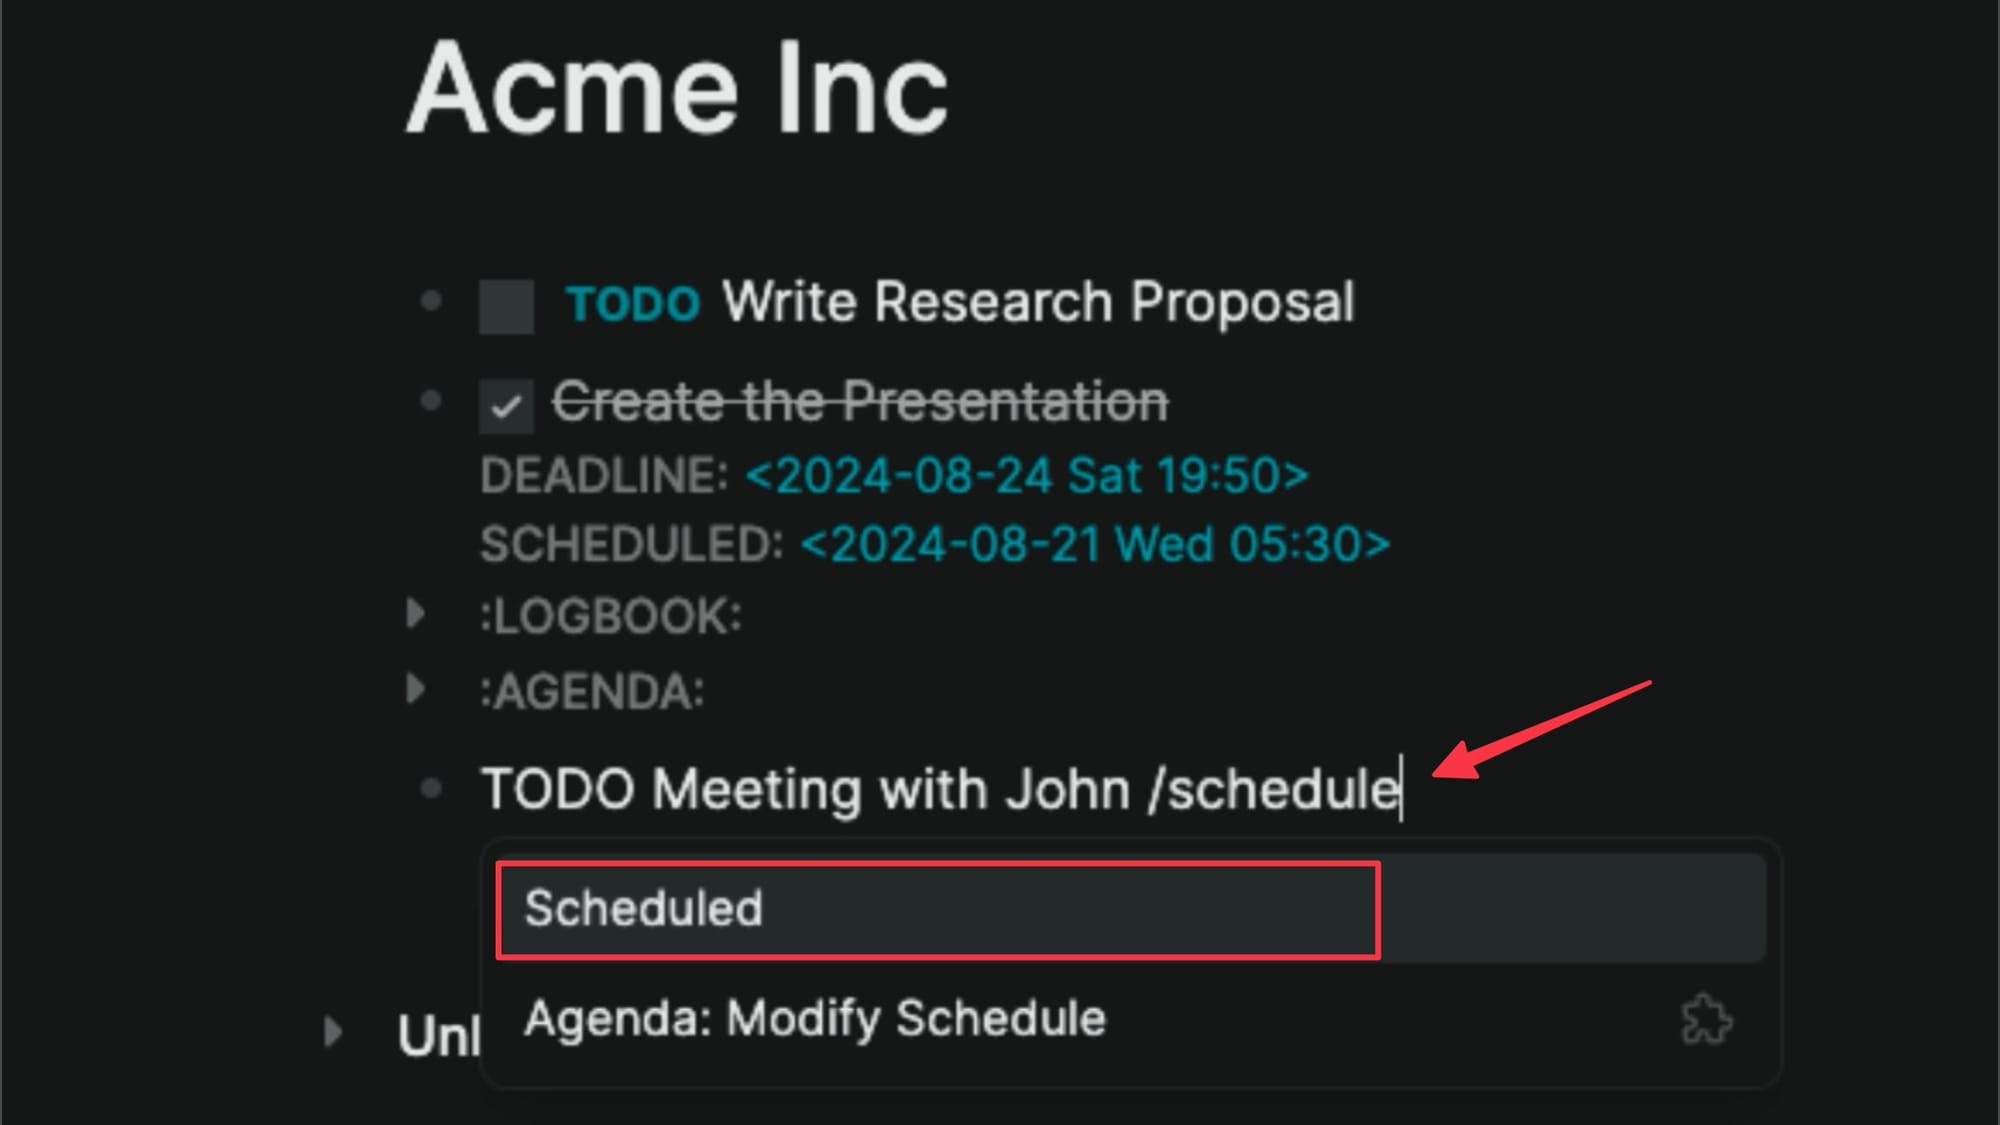
You can also schedule tasks directly from your project or journal pages without opening the Agenda view. Use the slash (/) command and type scheduled. Remember to use the native Scheduled option and not the Agenda:Modify Schedule option, as the latter only works with the previous Agenda V2 version.
The native scheduler will allow you to schedule a task to a specific date and time. However, as far as I can tell, you cannot add deadlines. That feature is only accessible from the task card inside the Agenda view.
Filter tasks in Agenda
By default, Agenda groups tasks based on the pages they belong to and their scheduled date. However, you might have an extensive project where tasks are spread across several pages. How do you filter those tasks to manage them?
That’s where Filters can help you. Agenda3 allows you to filter tasks based on tags. A simple example would be to create a filter that groups tasks with a specific tag.
Let's try this by creating a few tasks across different pages and tagging them with ProjectAgenda. Once they're scheduled, we'll see how they come together in the agenda.
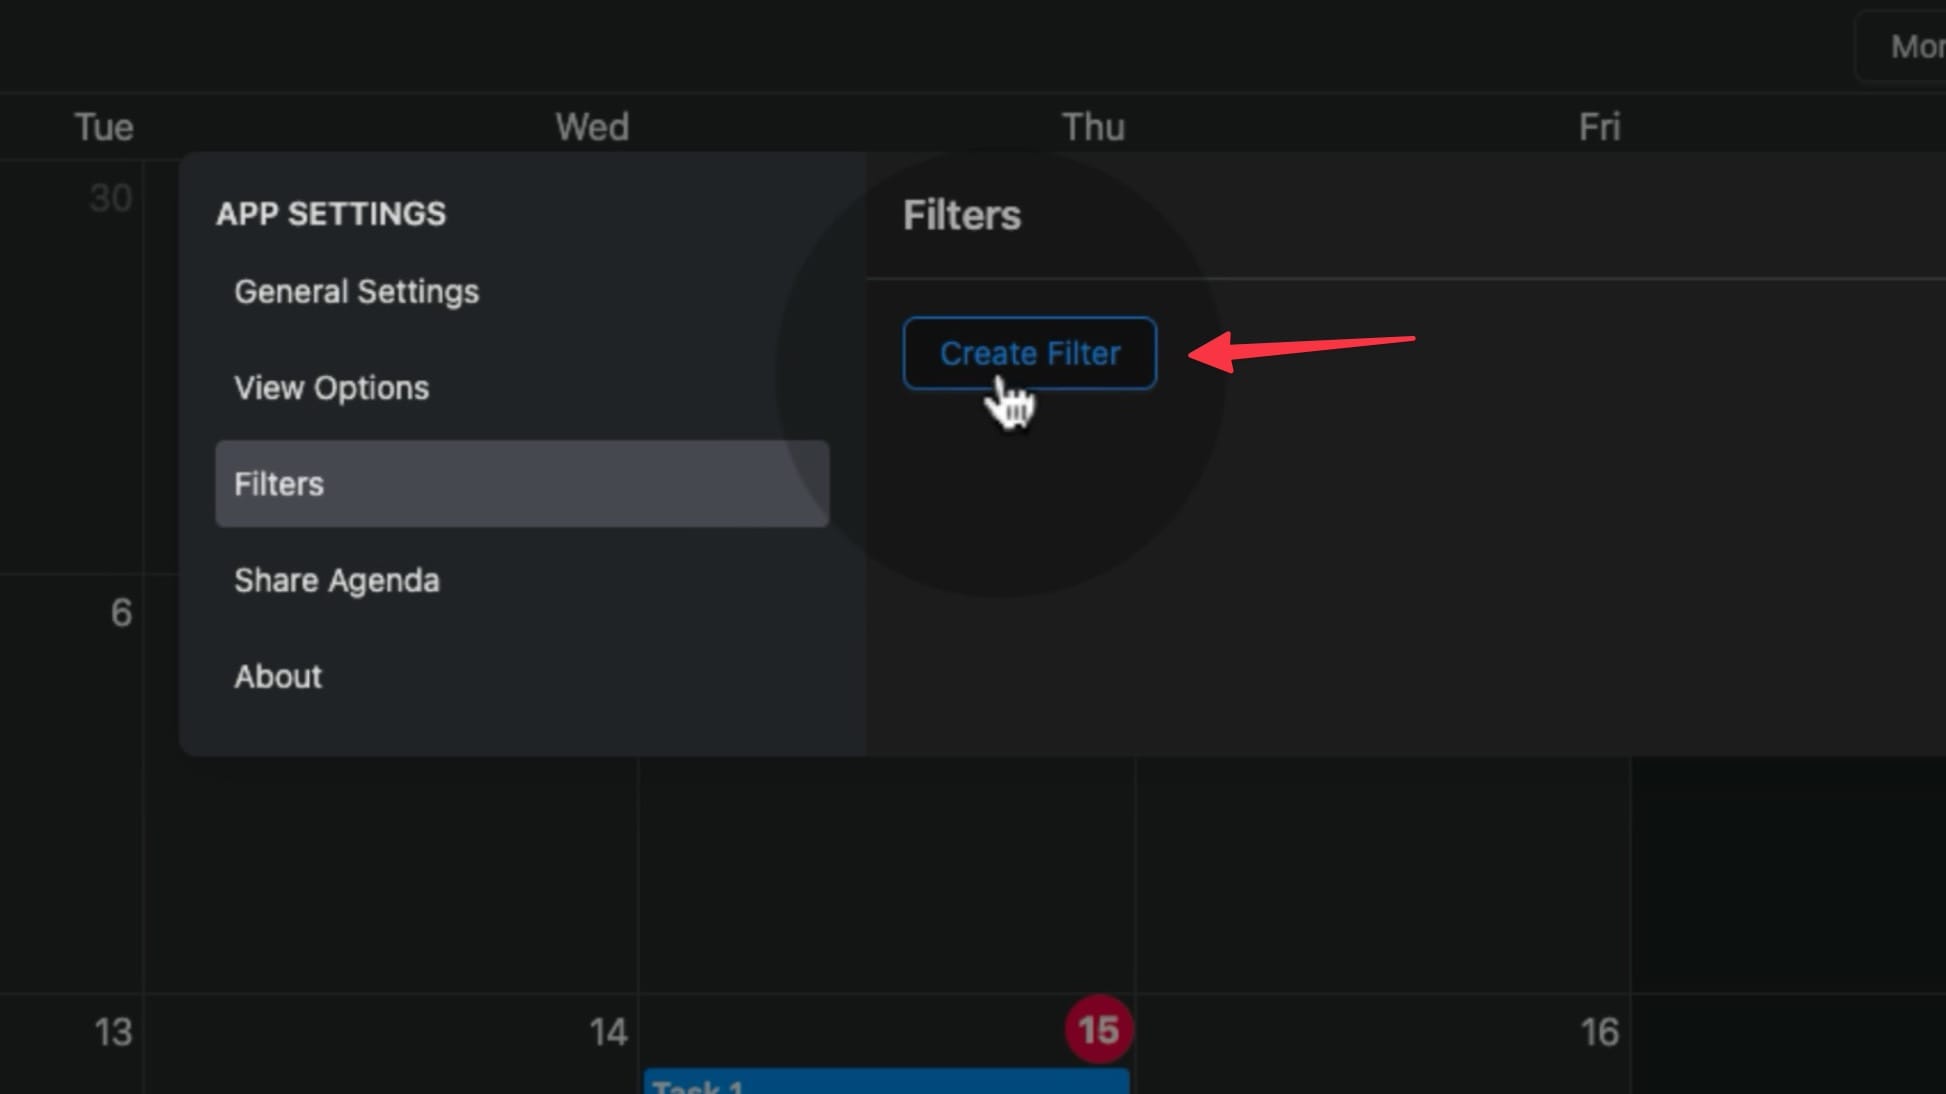
To create a filter to group these tasks, open the Agenda view and click the settings icon.
Open the Filters setting and click on Create Filter.
You can click the Filter Color button to give it a specific color. Let’s go with this bright pink color.

Give this filter a name and enter the following query.
(and (task TODO DOING DONE) [[ProjectAgenda]])
Remember to replace the tag ProjectAgenda with your own tag. Click the OK button to save the filter.

Now, close the settings page. You will notice a new funnel button next to the settings cog. Click on it and select the filter you created.

Agenda will hide all the other tasks and show you only the tasks tagged with that specific tag. And this is just a basic example. If you are fluent in writing queries, you can filter tasks based on several parameters. The one limitation of this filtering feature is that tasks need to be scheduled on the calendar for it to work.
I wish Agenda also allowed us to filter backlog tasks. That would have made task management even better.
Agenda3 plugin: final thoughts
The Agenda3 plugin also allows you to share calendar links and use a web version of the app via GitHub. Those features are beyond the scope of this video. Let us know if you want us to cover those features, and we will create a video explaining them.
We hope you liked this guide. If you have any questions, drop them in the comments. We will answer them as soon as possible.


