5 Methods to Scan Documents with iPhone
Your iPhone has a native documents scanning feature. Learn 5 ways to scan documents on iPhone using Notes, Files, and shortcuts.

You might know you can scan documents with an iPhone using the Files and the Notes app. But did you know there are multiple methods you can use to scan documents using these apps? In this guide, I will show you 5 methods to scan documents with iPhone.
Scan documents with iPhone using the Notes app
There are two methods for scanning documents on an iPhone using the Notes app. In the first method, I will cover the entire process of scanning the document, which will be the same for the next four methods. So please watch the first method before skipping to any of the next methods.
Method 1
The easy way to scan documents with the Notes app on iPhone is by using its Home Screen icon.
1. Long-press on the Notes app icon and choose the Scan Document option.
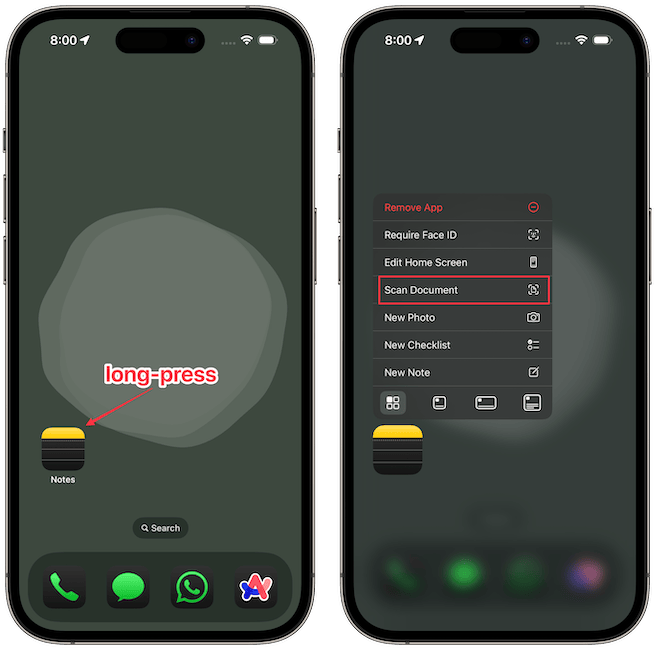
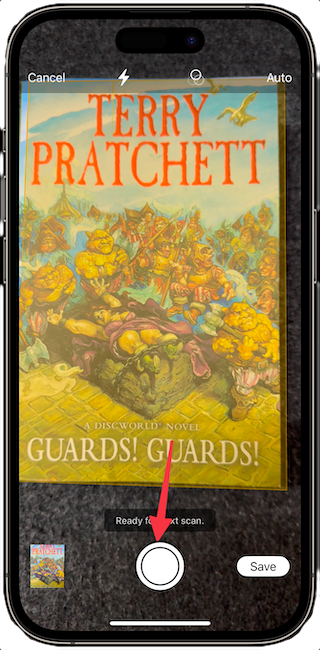
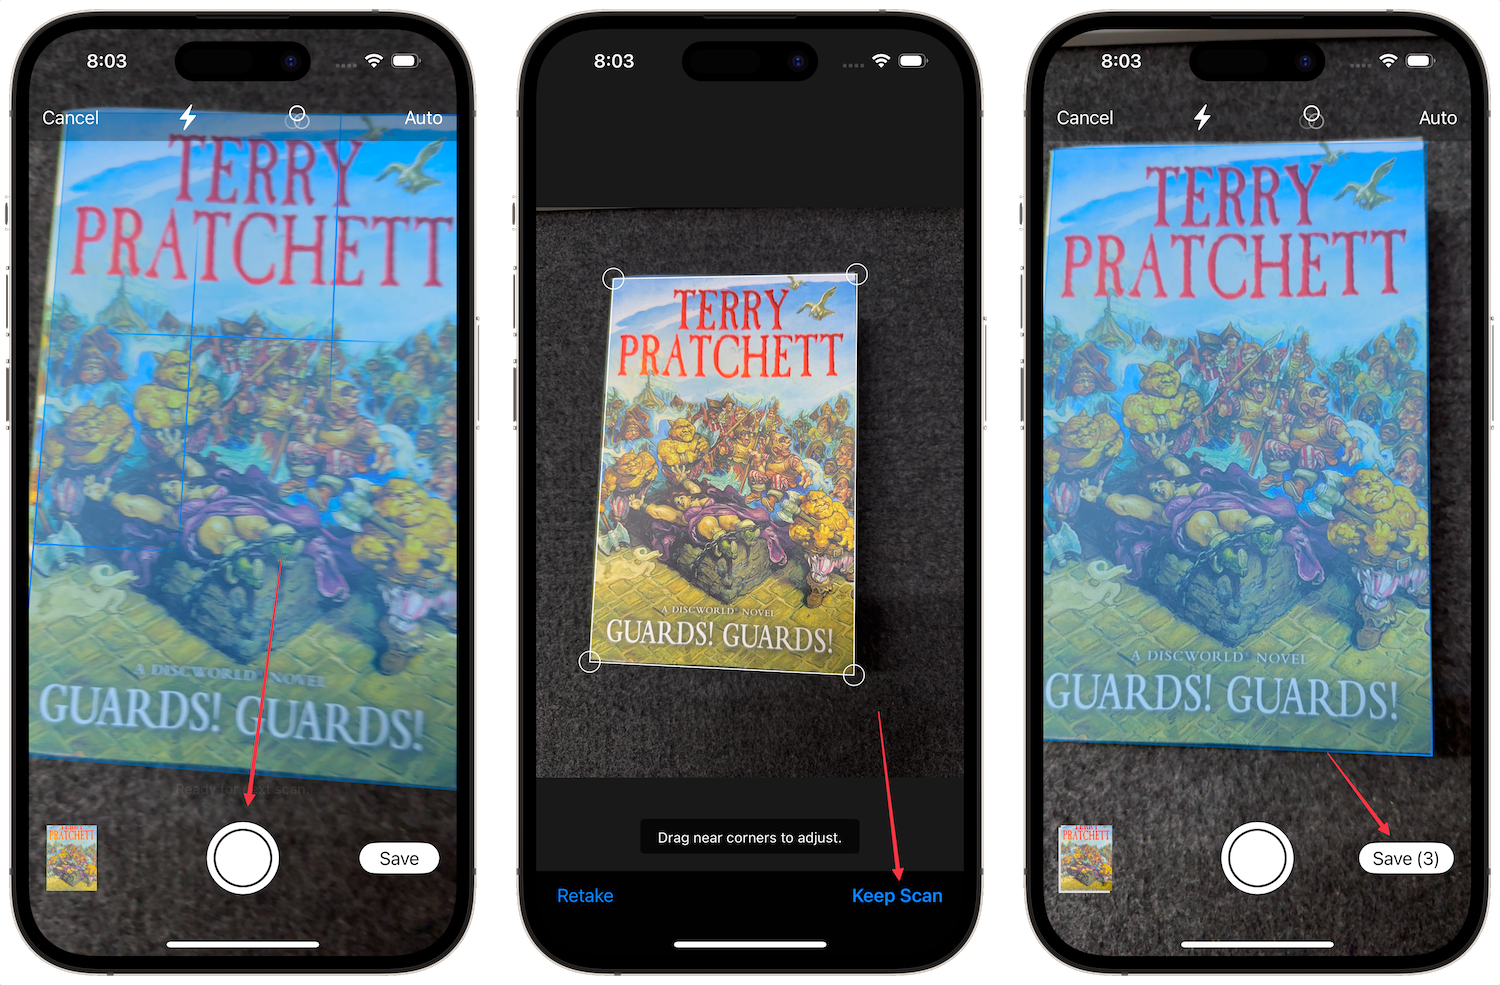
2. It will open the document scanner. Line your document in the viewfinder and wait for the app to scan it. You can also press the camera shutter icon to scan a document manually.
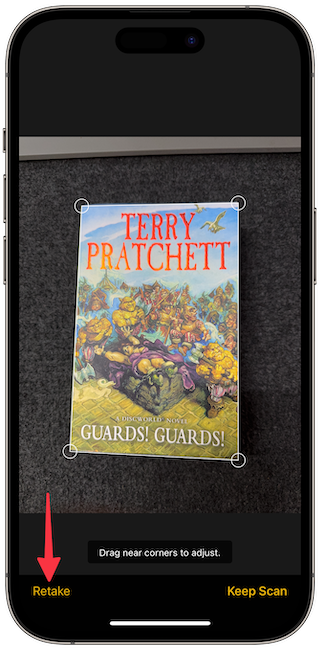
3. If you are unhappy with the scan, tap the Retake button and scan the document again.
4. You can adjust the boundary using the drag handles at the four corners. Once you are happy with the selection, tap the Keep Scan button to save it.
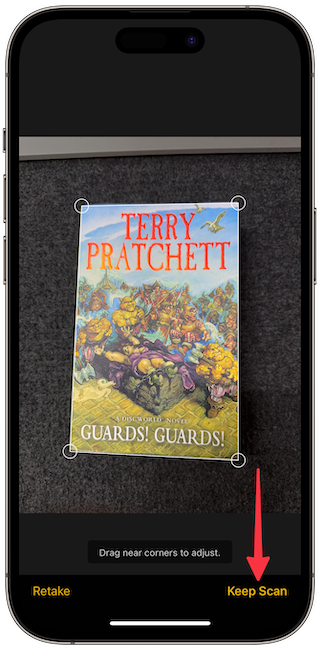
5. If there’s more than one page, repeat the process for all the pages. Finally, tap the Save button to save the scanned document.
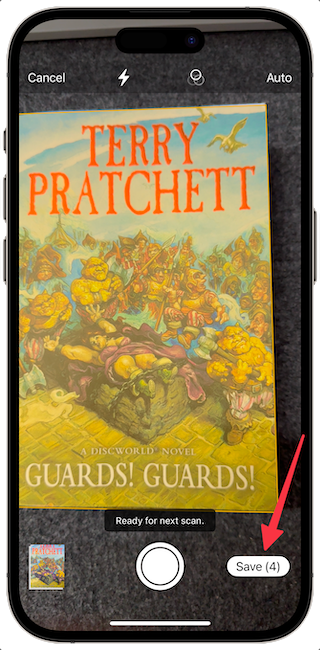
The scanning feature will merge all the scans into a single PDF file and save it to a new note. If you want individual files for each scan, hit the Save button after each scan.
If you have created a single PDF file with all documents and want to extract pages from PDF, click the link to learn how to do that.
Method 2
The first method is quick but adds the scanned document to a new note. If you already have an existing note where you'd like to add the scanned document, you can do that as well.
1. Launch the Notes app on your iPhone and open the note where you want to add the scanned document.
2. Bring up the keyboard and tap the attachment button, which looks like a paperclip.
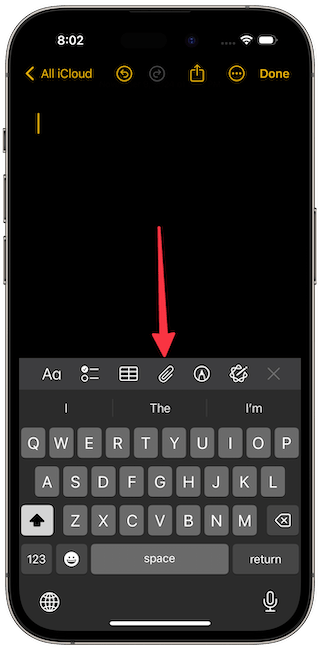
3. Tap the Scan Documents button to open the document scanner.
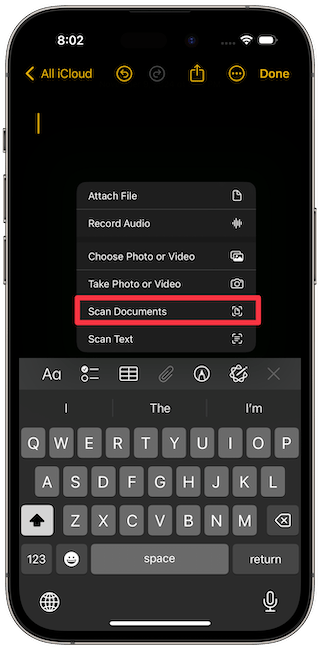
The remaining steps to scan documents are the same as the first method. Once you save the scan, it will add the document to the current note.
Scan documents with iPhone using the Files app
There are two ways to scan documents on an iPhone using the Files app, similar to how it can be done in the Notes app.
Method 3
1. Long-press on the Files app icon and tap the Scan Documents option to open the document scanner.
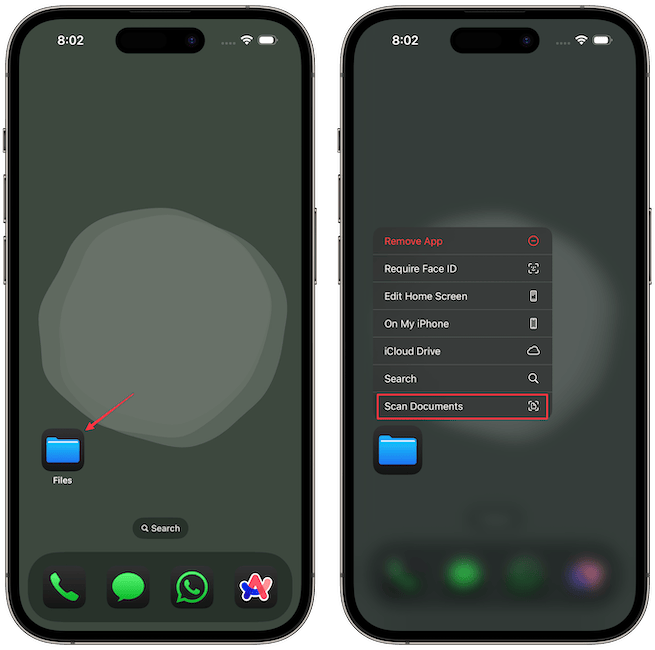
2. The next steps are the same. Tap the capture button to capture the scan, adjust the scan area using the corner drag handles if required, and hit the Keep Scan button to save it. Repeat the process to add more pages and tap the Save button.
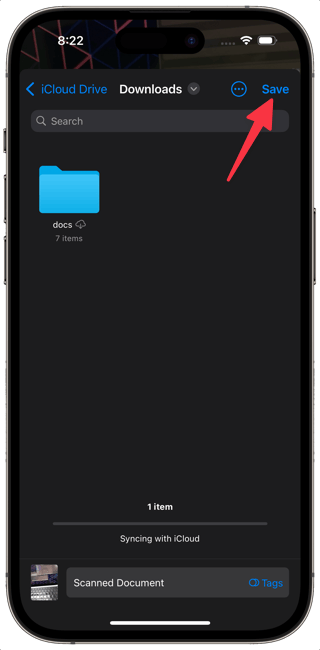
3. Navigate to the location where you want to save the scanned document, then tap Save in the top-right corner.
Method 4
You can also directly scan a document inside a specific folder in the Files app.
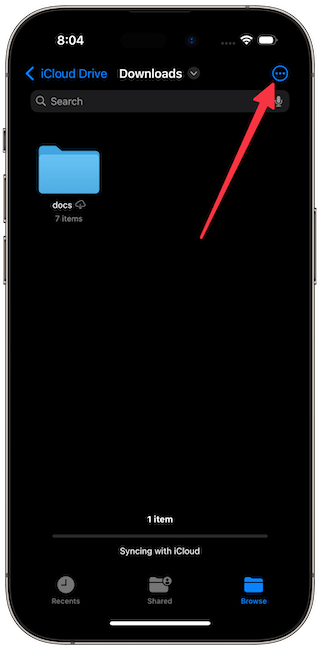
1. Launch the Files app on your iPhone and navigate to the folder where you want to save the scanned document. Now, tap the three-dot icon in the top-right corner.
2. Select Scan Documents to open the document scanner.
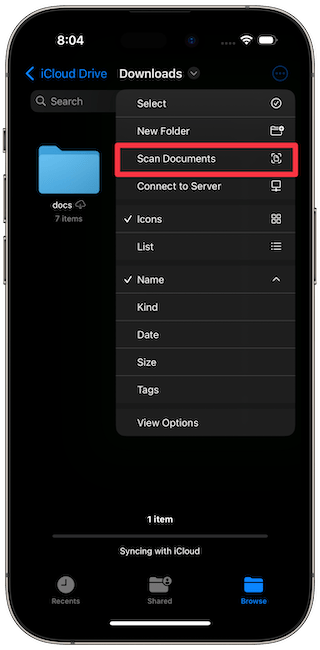
Now follow the document scanning steps to scan and save the document in the current folder.
Scan documents on iPhone using a shortcut
My favorite way to scan documents is by using a shortcut. I've added the shortcut to my Home Screen, giving me one-tap access to the document-scanning feature on my iPhone. It's now one of my favorite iPhone shortcuts.
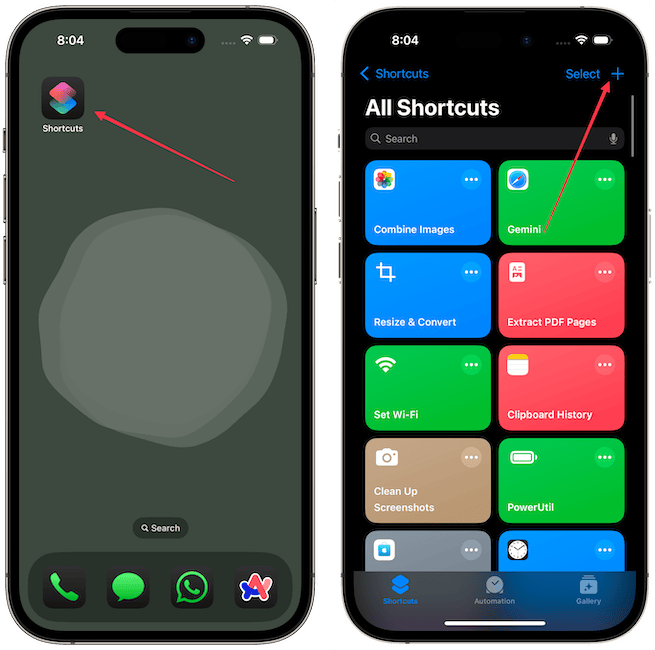
1. Launch the Shortcuts app and tap the plus (+) button in the top-right corner to create a new shortcut.
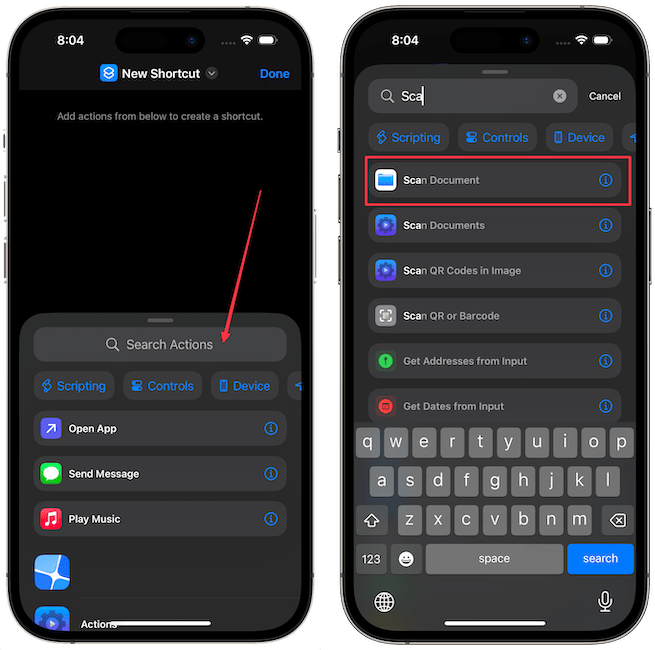
2. Use the Search Actions field to find the Scan Documents action and tap to add it to the shortcut.
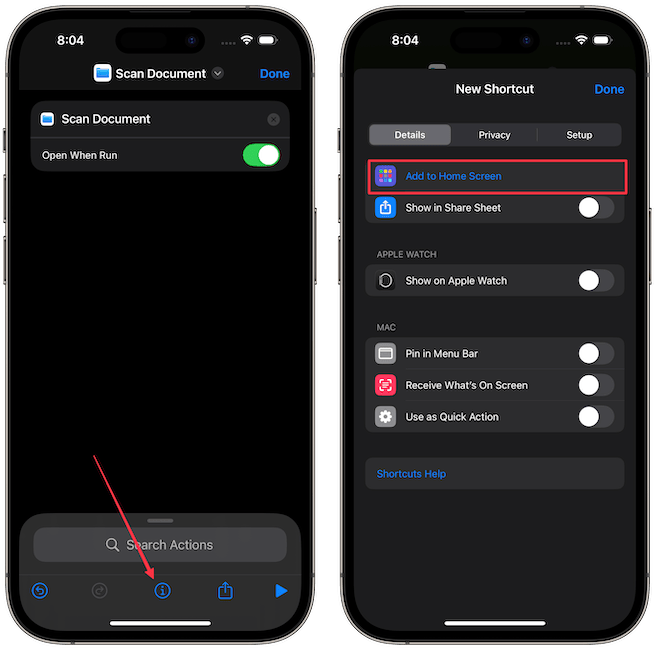
3. Tap the (i) button at the bottom and tap the Add to Home Screen option.
4. On this page, you can rename this shortcut, and assign it an icon and a color. I will leave the name as it is, but I will assign it a blue color, and use the scanner icon.
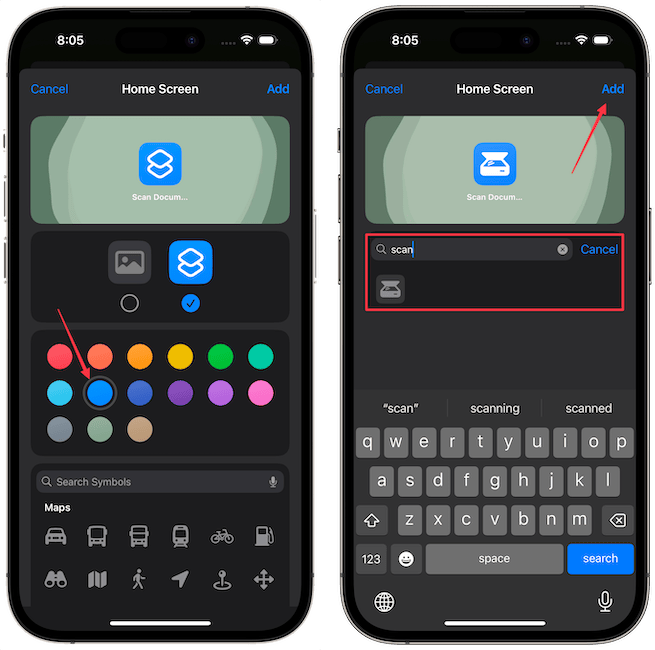
Tap the Add button to save the shortcut to the Home Screen. Now, when you tap the shortcut, it opens the document scanner, allowing you to scan documents and save them directly to the Files app.
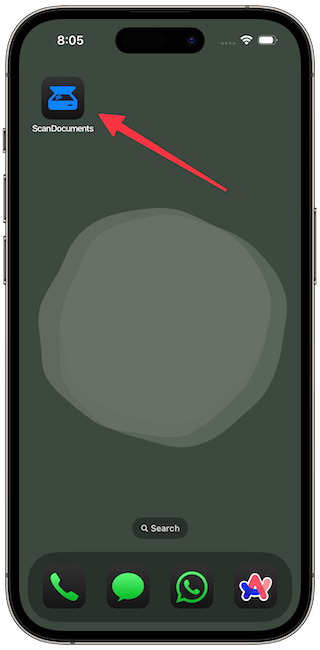
The best part of using the shortcut is that you can run it via a back tap gesture, add it to the Control Center, or launch it with the Action button. You can learn how to do that by going through the linked articles.


