5 Pro Tips to Master iPhone Mirroring on macOS Sequoia
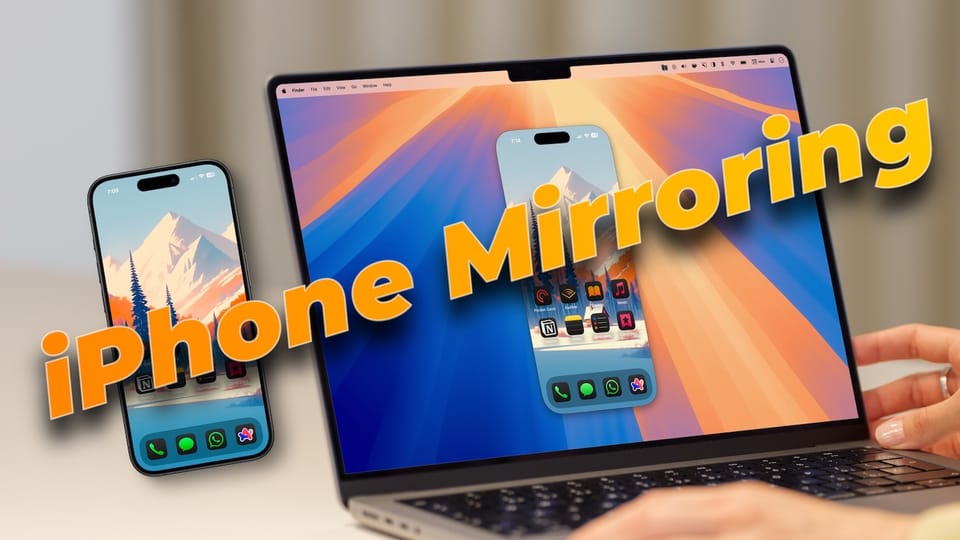
iPhone Mirroring is the feature in macOS Sequoia and iOS 18 that nobody expected. It is insanely good and works buttery smooth. But there are some hidden keyboard shortcuts and settings that you can learn to make the experience even better. Here are iPhone Mirroring Pro tips you should know.
Navigating the interface
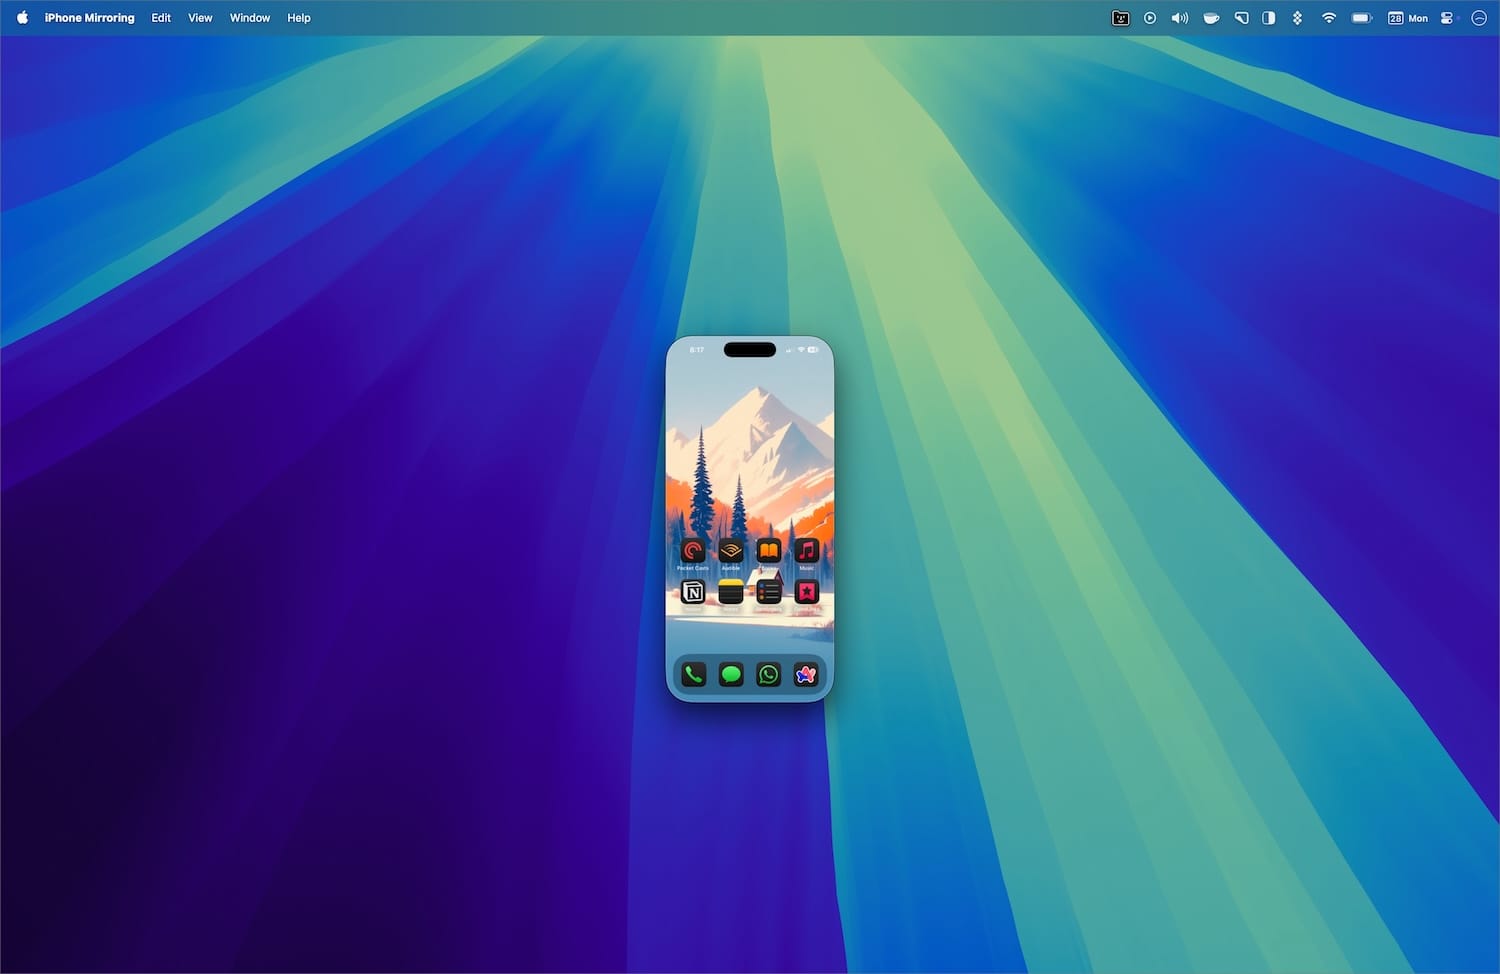
iPhone is a touch device, and translating its touch function to a pointer-based system is difficult. That said, Apple has done a good job. Let’s start with the basics. On the Home Screen, you can swipe left and right on your mouse or trackpad to navigate between home screen pages.
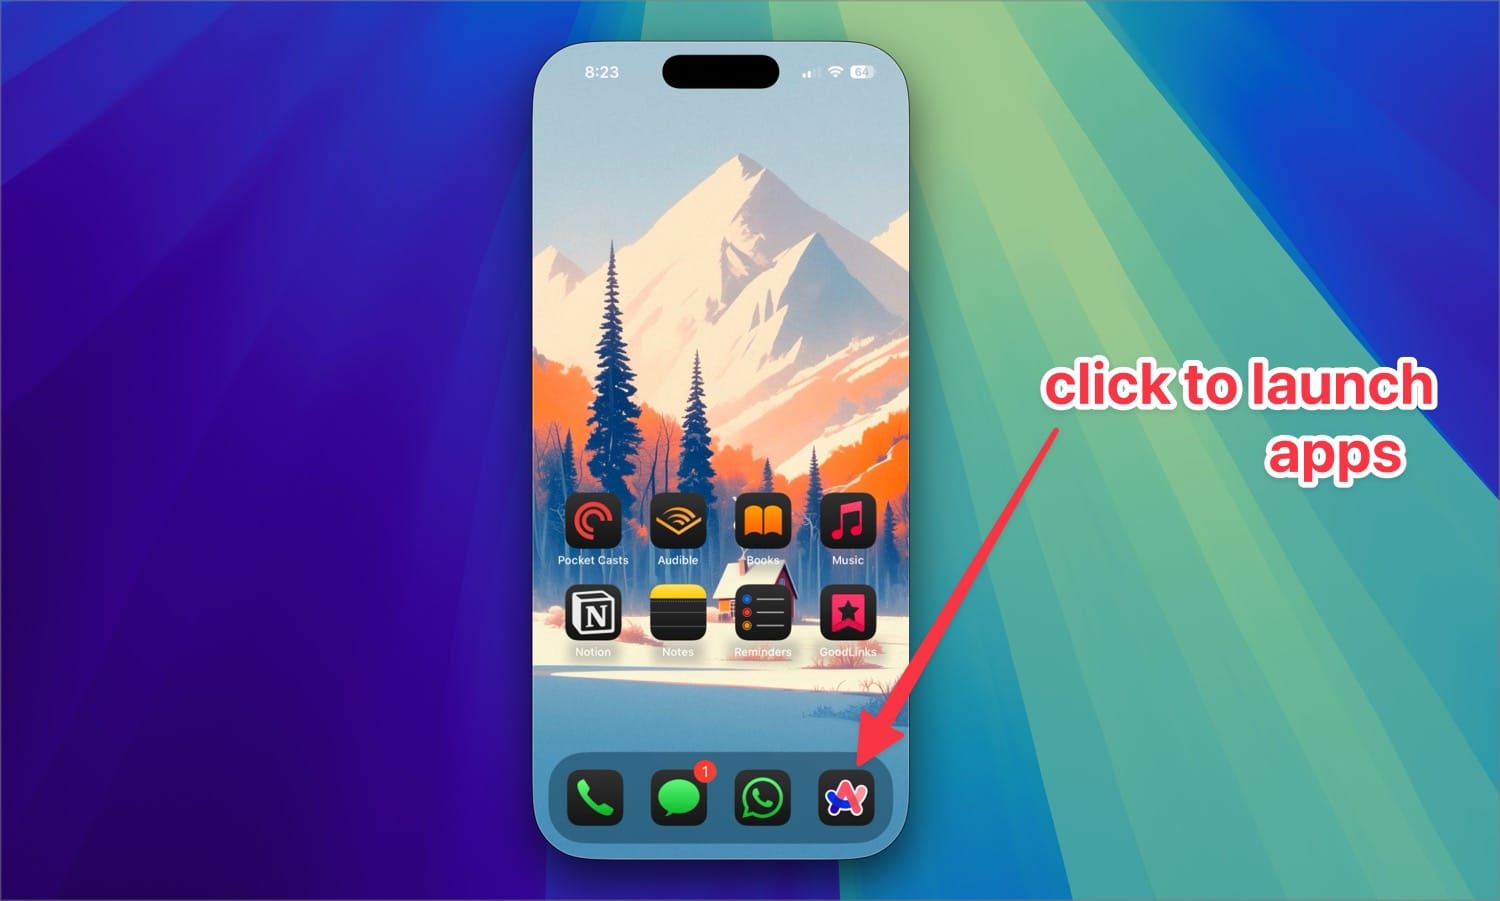
A click replicates a tap on your iPhone, meaning you can click to launch apps or interact with app elements just like you do with a tap on your iPhone.
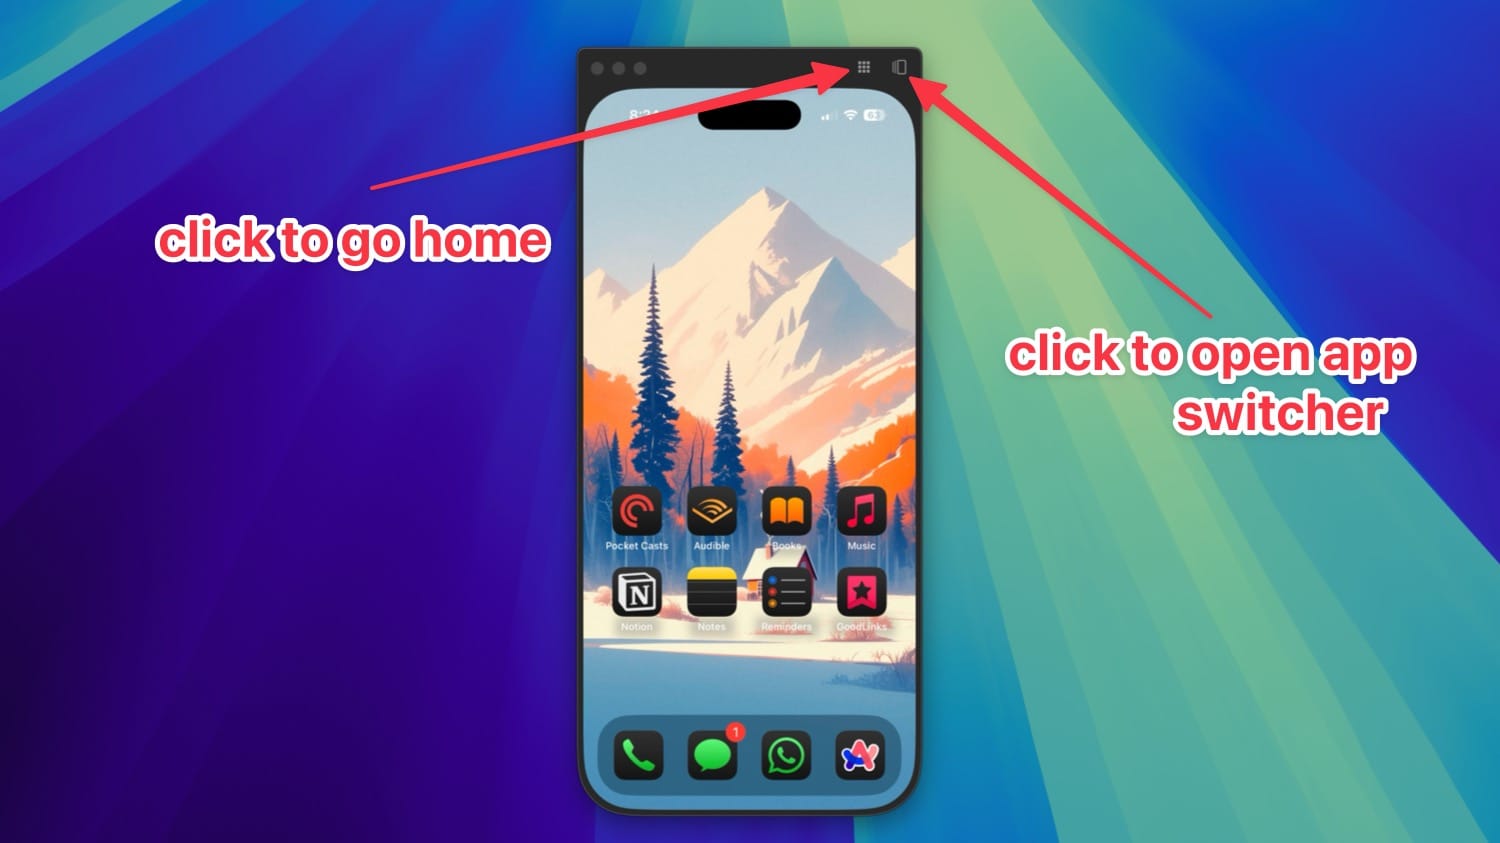
To return to the Home Screen, click the Home Bar. You can also hover over the top of the app to reveal two buttons. The left button takes you to home, while the right one opens the app switcher.
In the app switcher mode, you can swipe up on any app to close it. On the Home Screen, you can swipe down to open Spotlight Search.
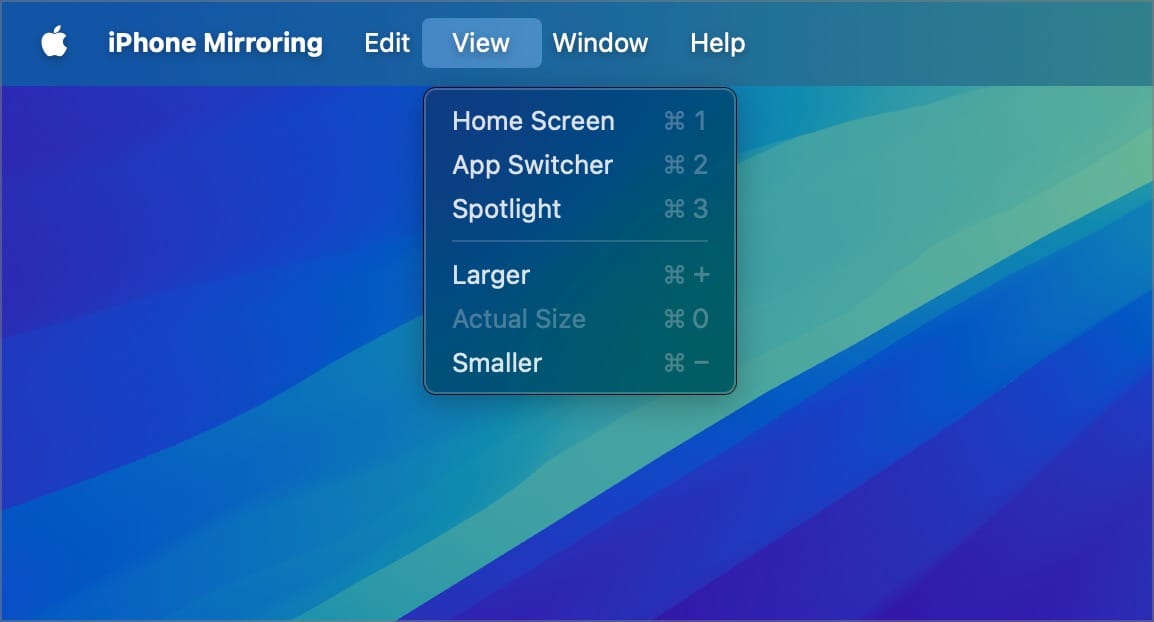
All this is intuitive, but there’s even a faster way to navigate with keyboard shortcuts, and they are easy to remember. ⌘1 takes you home, ⌘2 opens app switcher, and ⌘3 opens Spotlight search.
Make the app larger or smaller
By default, the iPhone Mirroring app mirrors the exact size of your iPhone. But sometimes, that might feel too small. You can use the keyboard shortcut ⌘+ to make it larger and ⌘- to make it smaller.
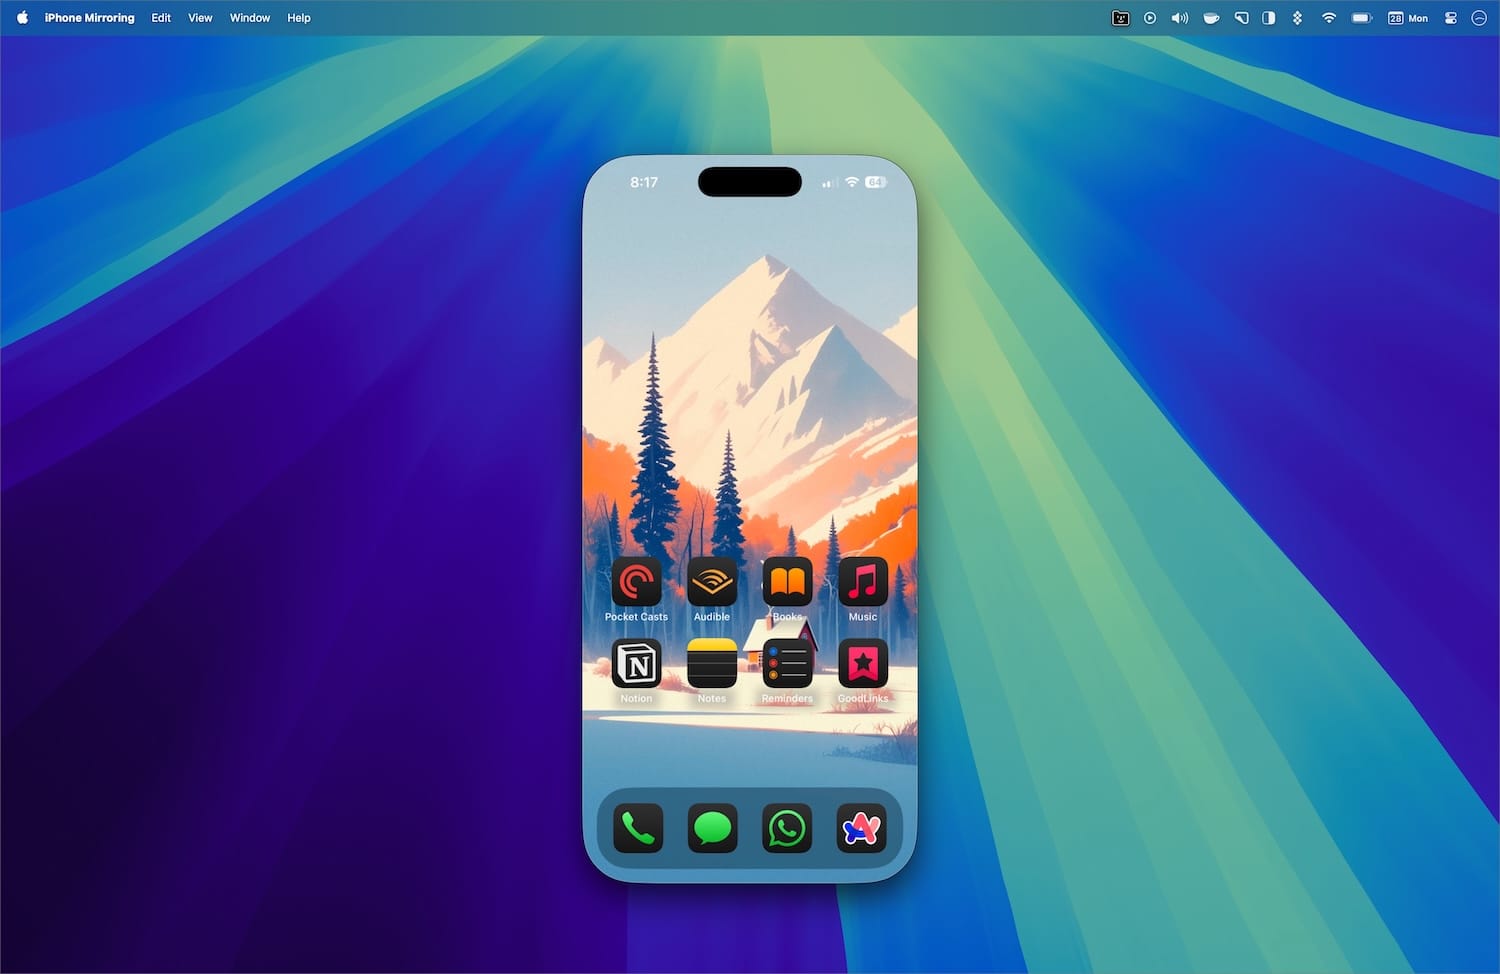
What I don’t like about this feature is that when you can change the size of the app shifts its position for no reason.
By the way, if you forget any of these keyboard shortcuts, you can open the View menu to find them.
Managing app notifications
When you set up iPhone mirroring for the first time, it will ask if you want to receive iPhone notifications. If you choose to allow notifications, this section is for you. While receiving iPhone notifications on Mac is a good feature, we don’t want to be too distracted by them.
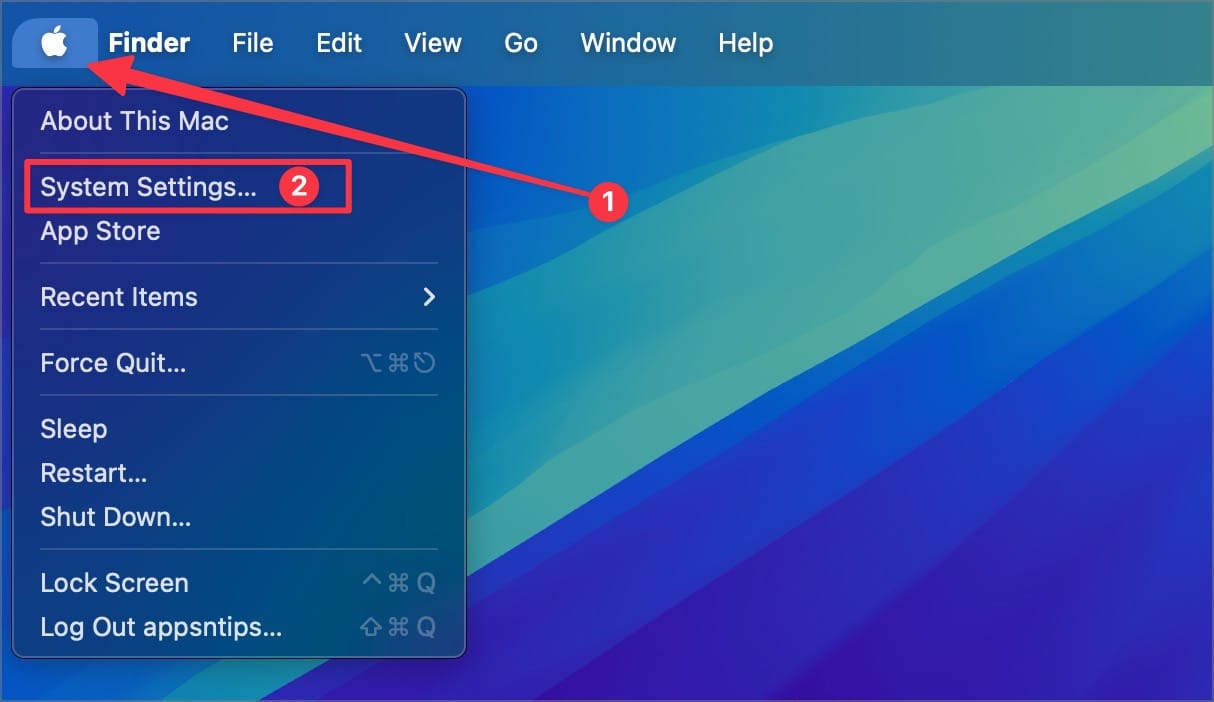
To manage notifications, open System Settings.
Go to Notification Settings and click on Allow notifications from iPhone.
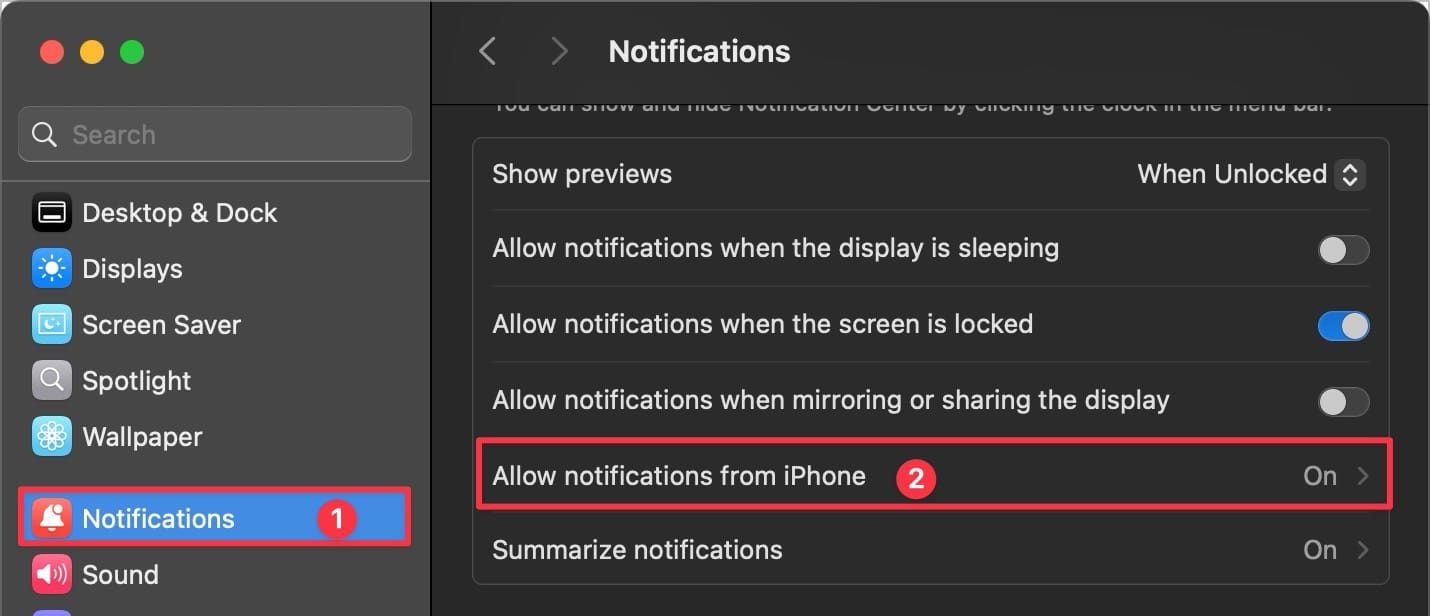
Now, disable notifications for all the apps you don’t want to see.
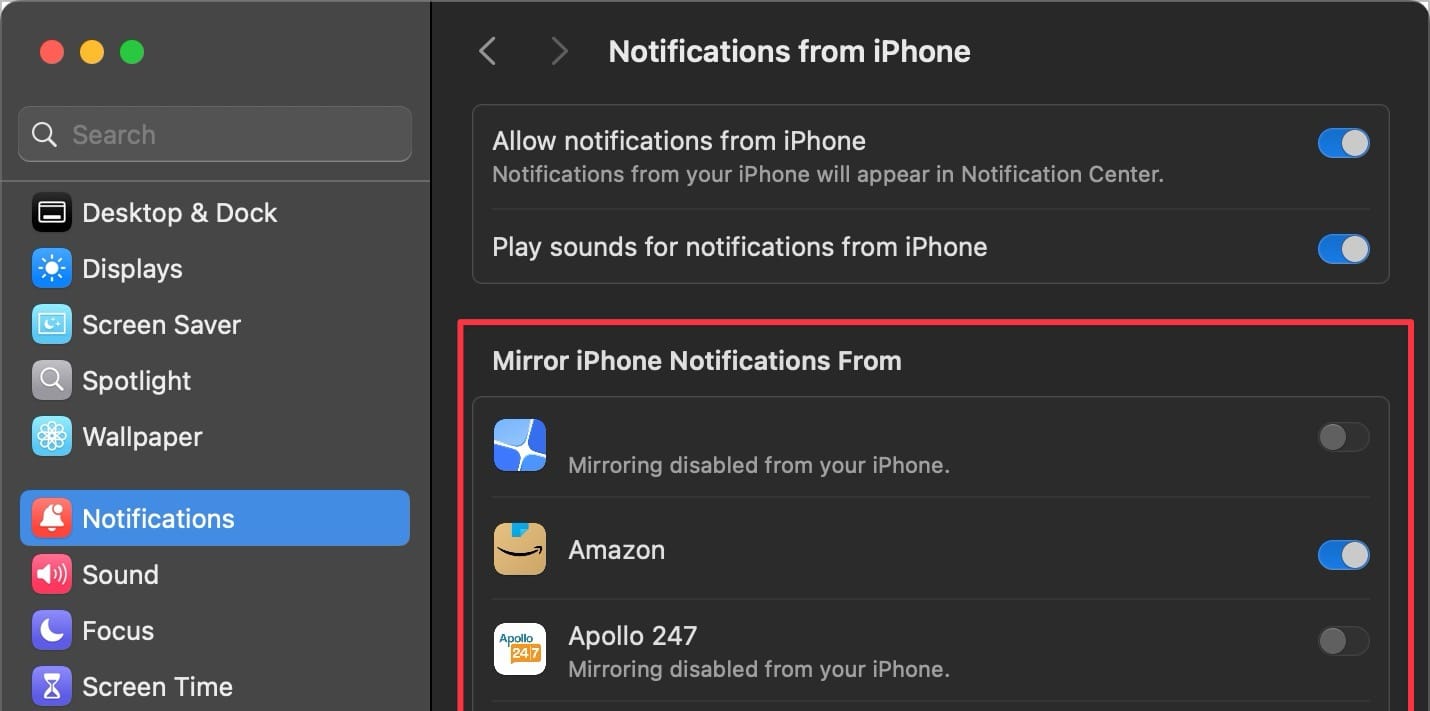
I recommend doing it for all social media apps and apps that exist on both your iPhone and Mac to prevent double notifications.
Change iPhone
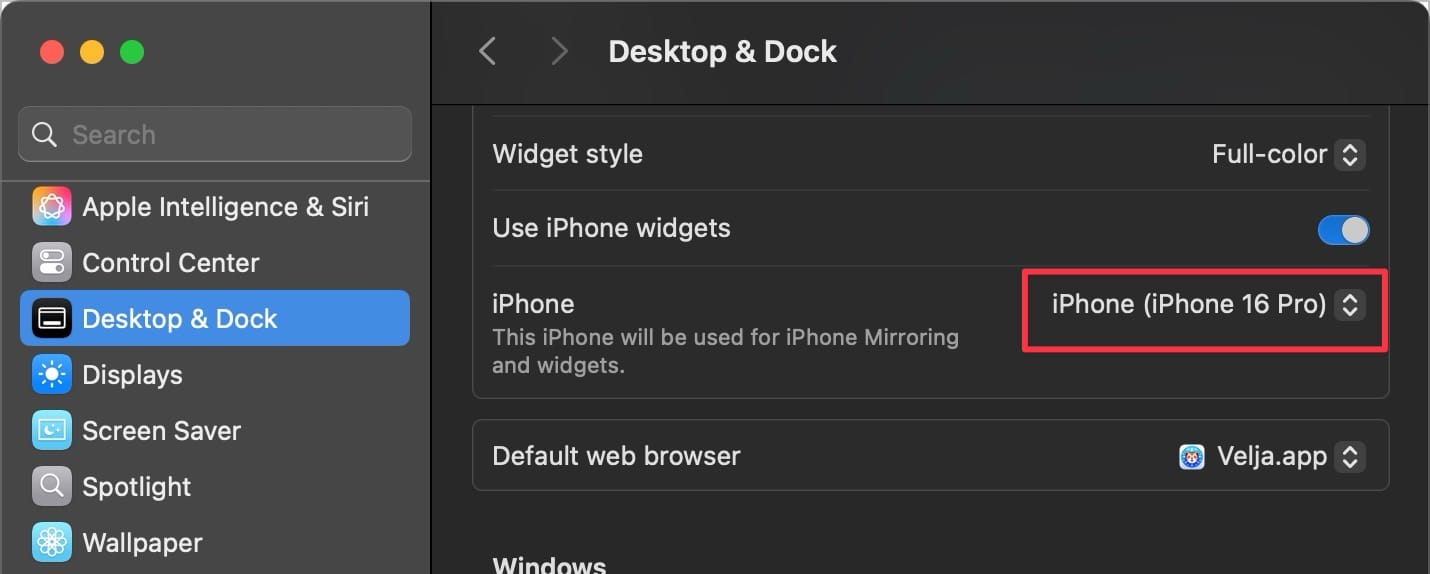
If you have more than one iPhone, you can decide which one you want to use with iPhone mirroring and switch between them. To do this, launch the System Settings.

Go to Desktop & Dock settings and scroll down to the Widgets section, and there will be an iPhone option. Click on the dropdown menu next to it and select the phone you want to use.
iPhone mirroring password
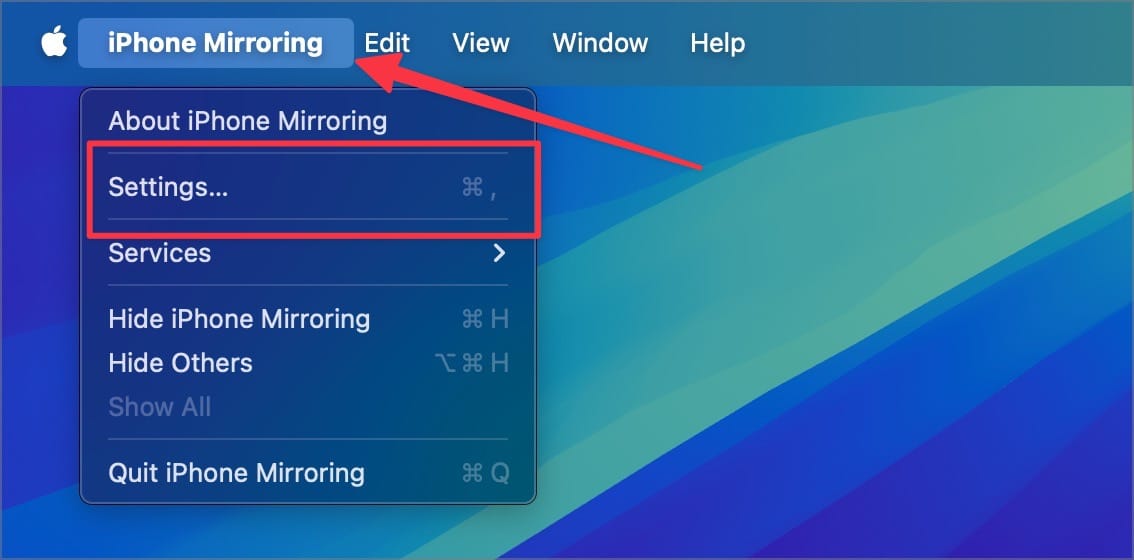
Let’s talk about security. Apple allows you to put a password on iPhone Mirroring so no one can get into your iPhone unsupervised. To set the password, open the settings page.
Now, the Ask every time option for the Require Mac login option.
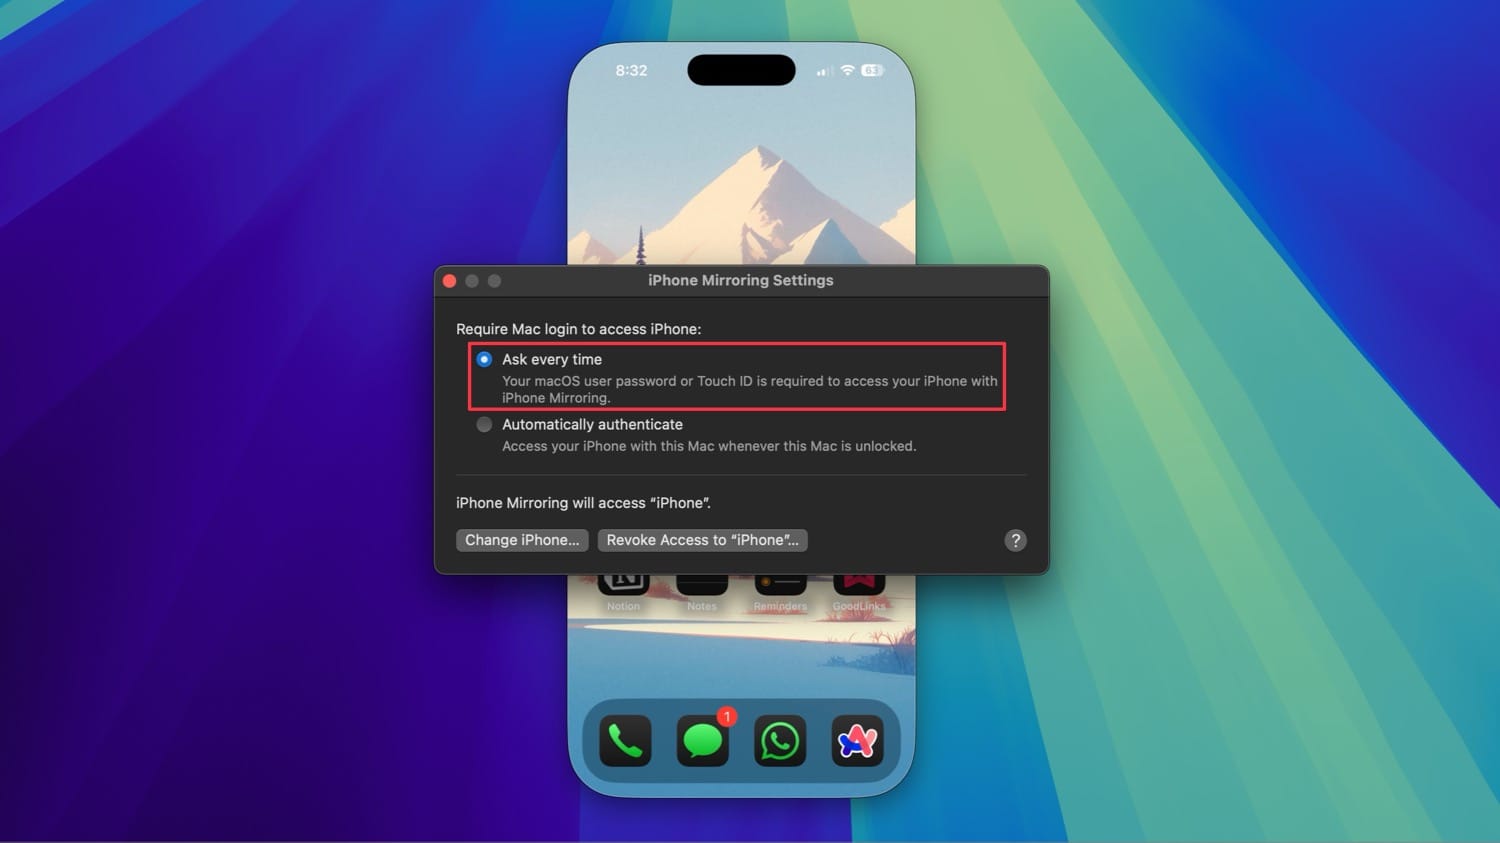
While that adds a layer of protection, I have heard several YouTubers say you should use this as a security measure on a shared Mac, which I don’t recommend. Remember that once you allow iPhone Mirroring, your iPhone password becomes irrelevant.
Even if you set the iPhone Mirroring app to ask for password every time someone opens it, it is asking for the Mac’s password, which everyone you share the Mac will have, unless everyone has a different user account.
That’s why you should remember to revoke access to your iPhone when handing your Mac to someone who knows the Mac’s login password. To do that, open the settings page by hitting ⌘, keyboard shortcut and click the Revoke access to iPhone button.
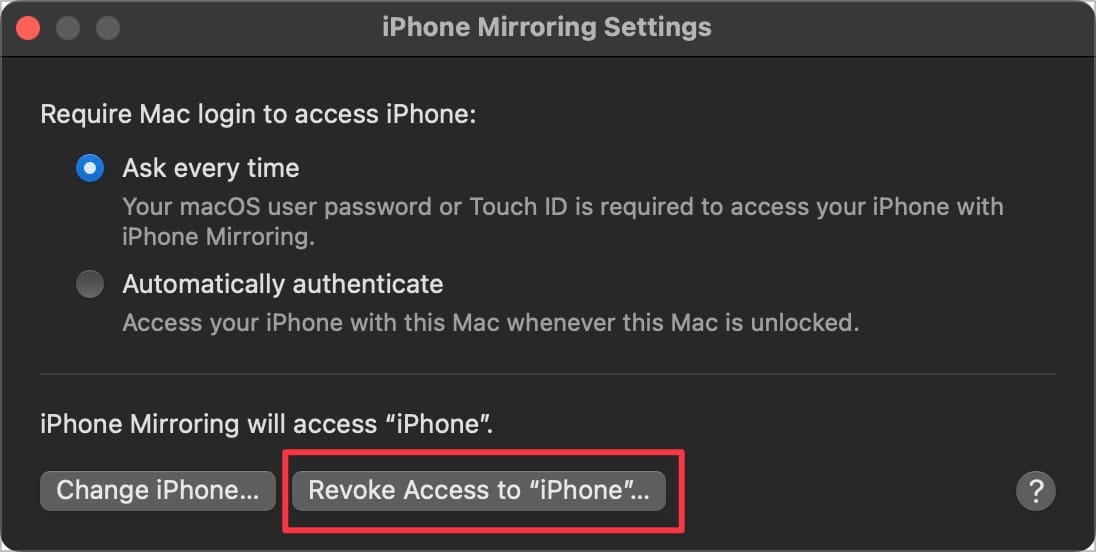
It does add an extra step when you want to use iPhone Mirroring the next time, but it’s not that bad a deal, considering the peace of mind you will have.
Use iPhone Mirroring on macOS Sequoia like a pro
I hope that you learned something new from this iPhone Mirroring guide. Click here to learn how to tile app windows on Mac like a pro.



Comments ()