15 macOS Tips to Supercharge Your Mac
Here are 15 macOS tips you can use to supercharge your Mac. Navigate text document, combine videos, use Quick Actions, and more.

When you have a save dialog opened on your Mac, instead of navigating to a folder, if it’s already open, you can drag it into the save dialog to jump to its location and quickly save the file. You can soon enable DND mode on your Mac by holding the Option key and clicking the time menu in the Menu bar. And these are just a few things your Mac can do you don’t know about. In this video, I will share 15 macOS tips that make you an ultra-productive Mac user.
1. Navigate text document
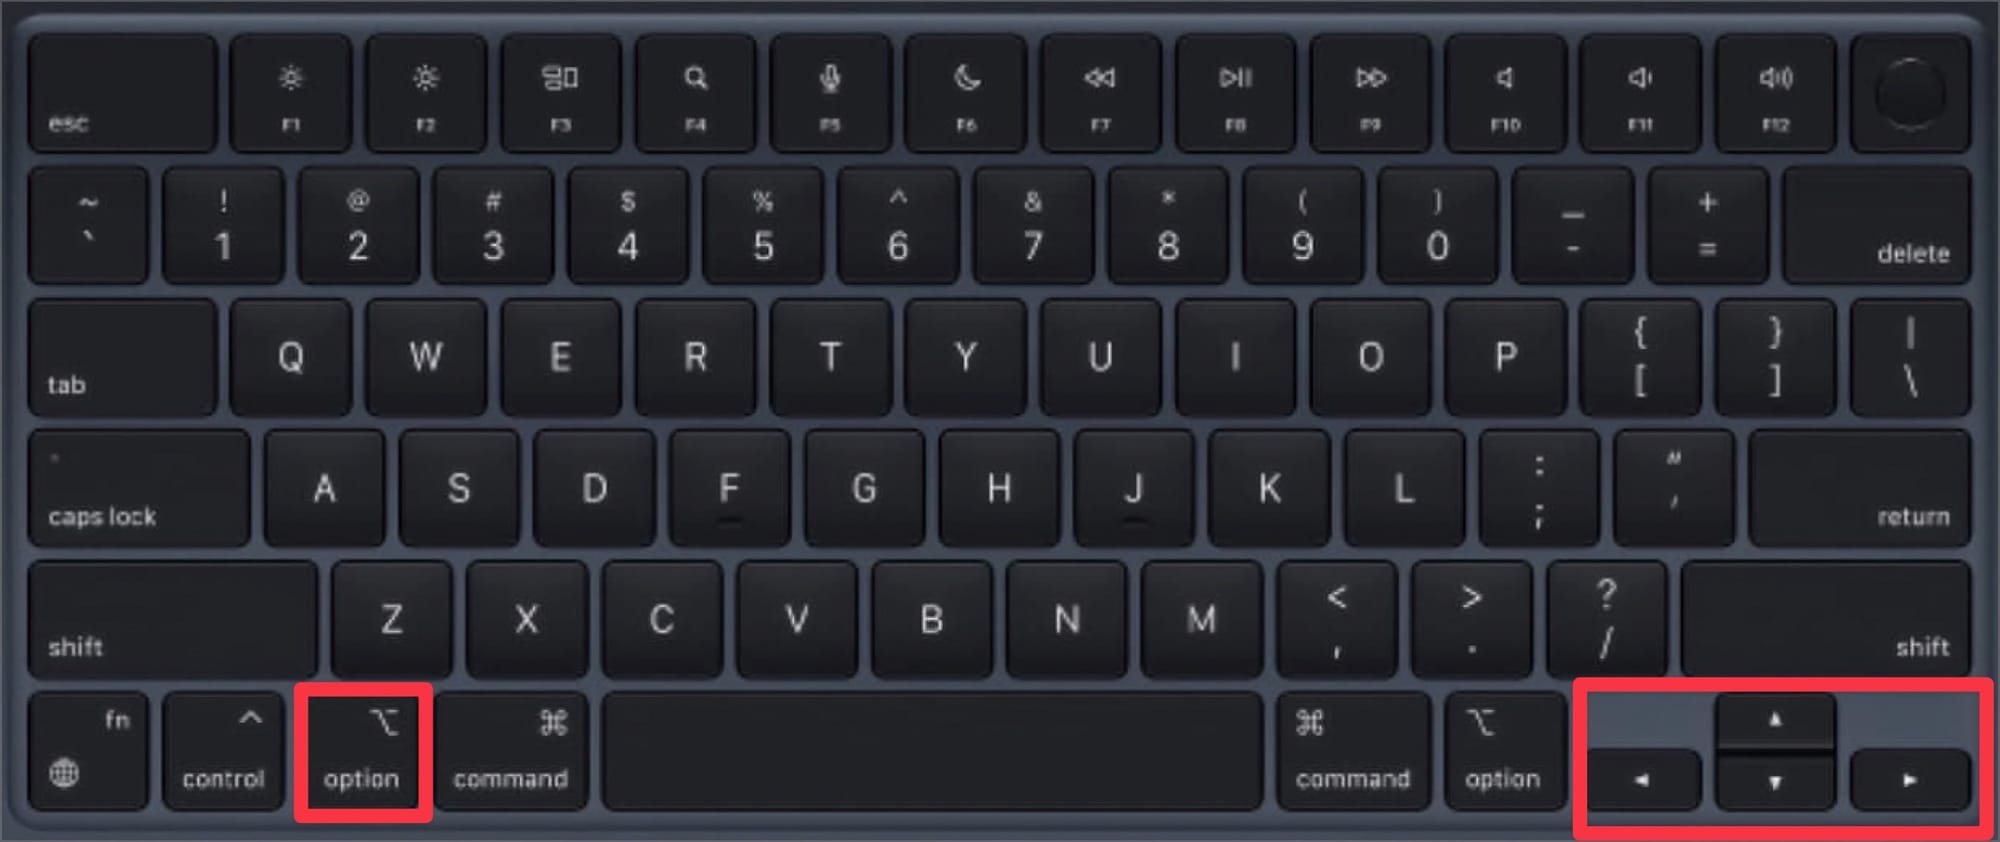
When you have a text document open, you can easily navigate it using simple keyboard shortcuts. Hold down the Option (⌥) key and use the left and right arrow to move one word at a time. Use the up and down arrow to move between paragraphs.
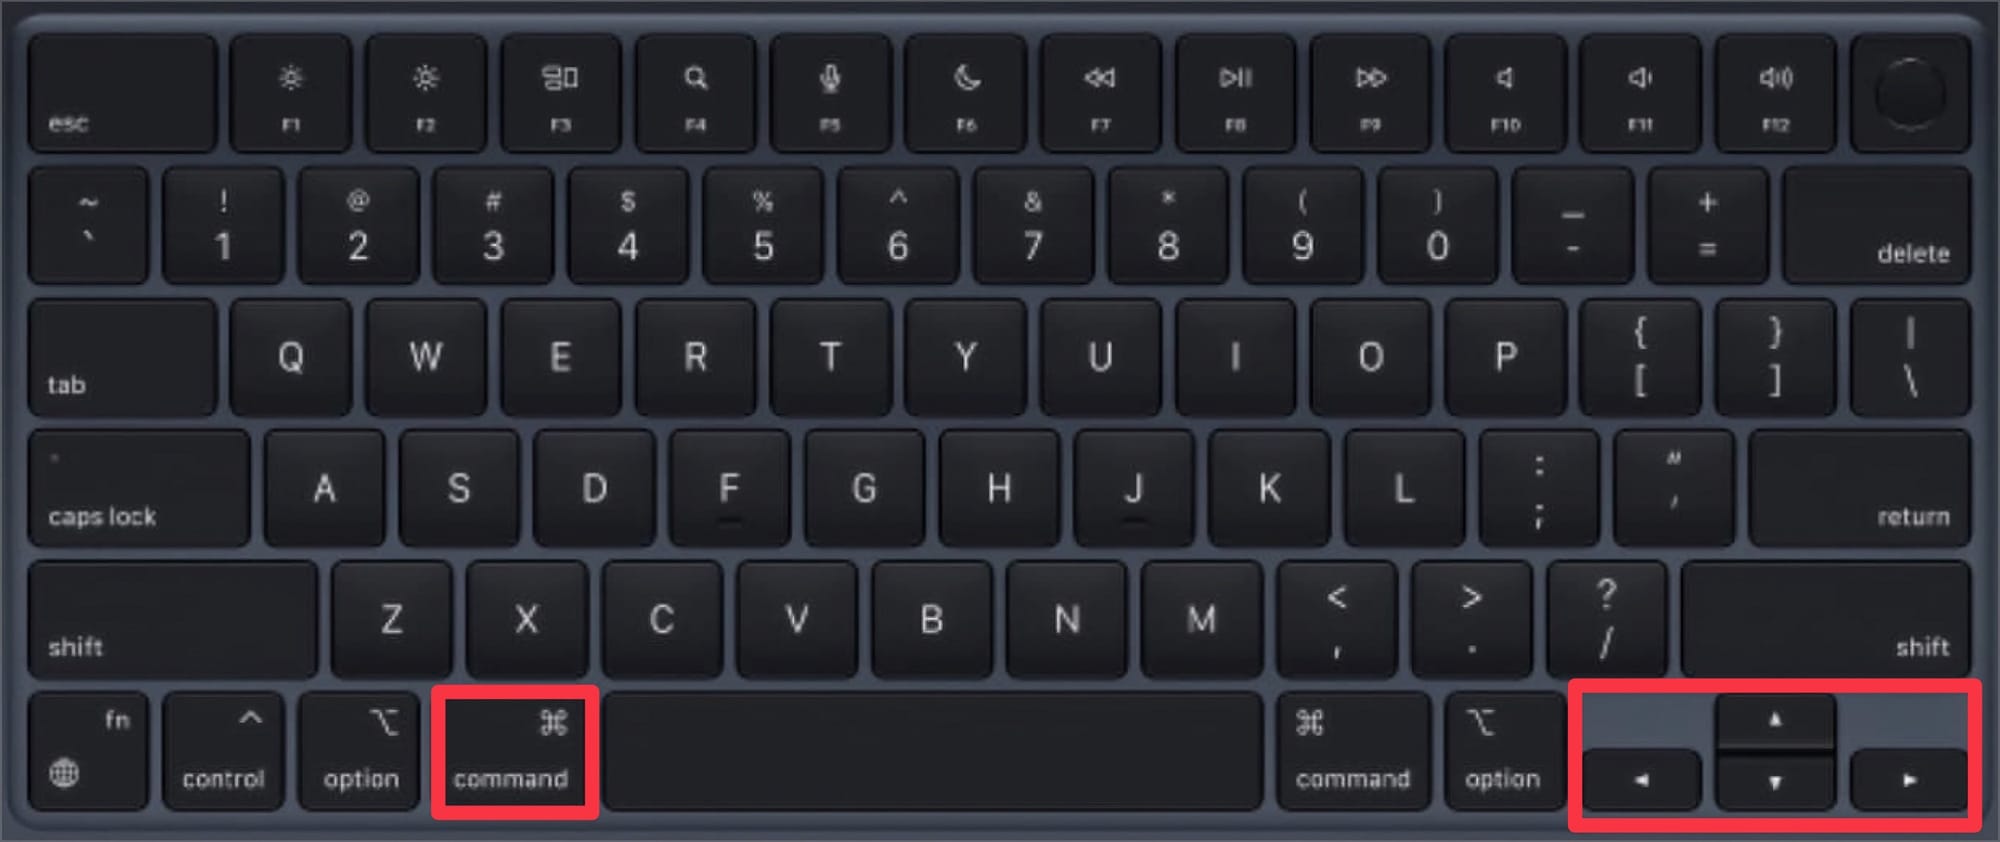
Instead of the Option key, hold down the Command (⌘) Key and move the cursor to the start and end of the line using the left and right arrows. If you want to go to the bottom or the top of the document, use the up and down arrow instead.
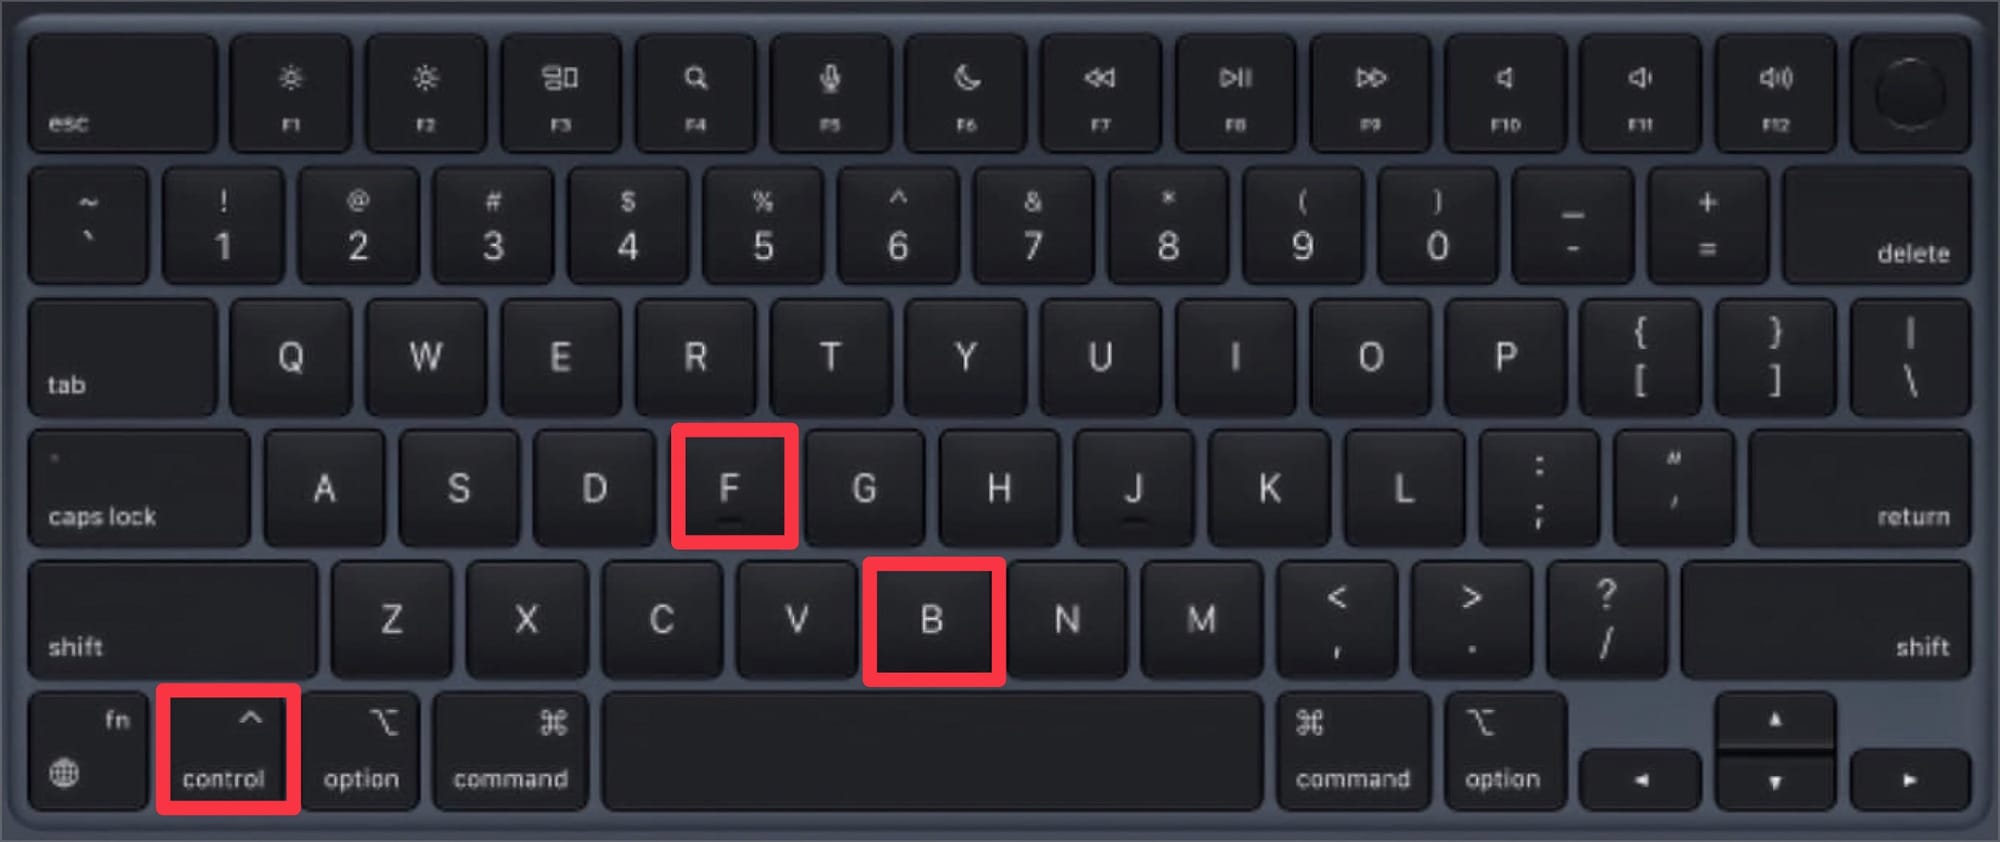
You can also hold down the Control (⌃) key and use the keys F and B to go forward and backward one character at a time.
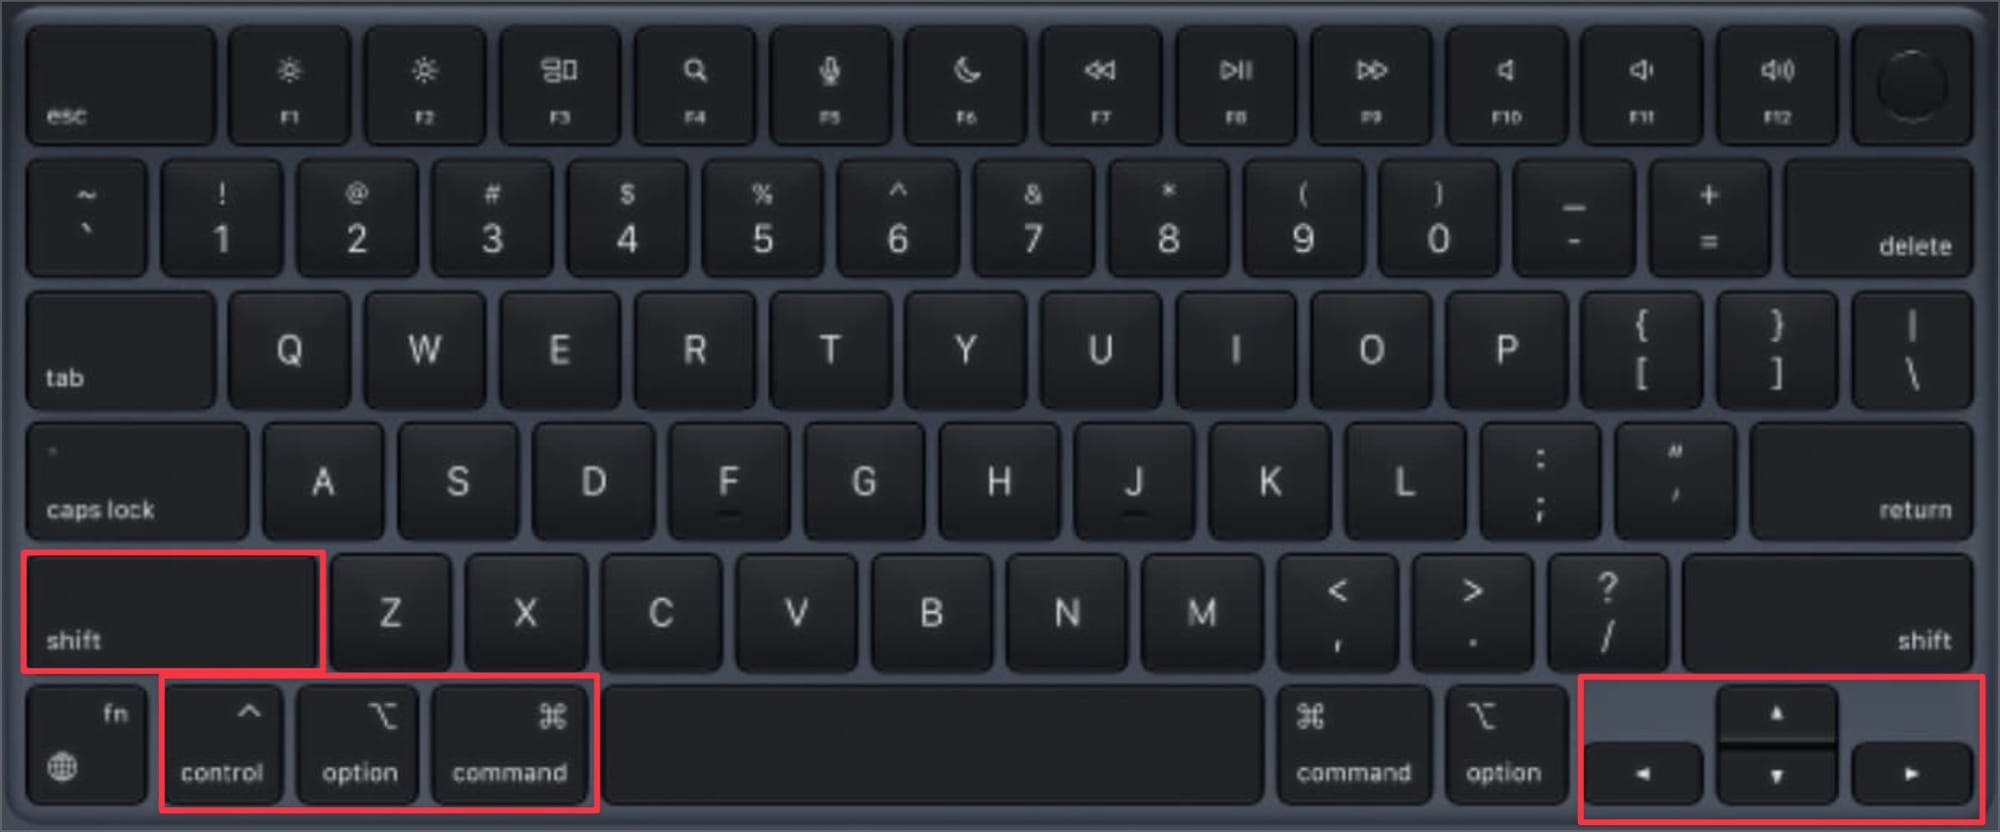
Add the Shift key to any of these combos, and you will move the cursor and select the text. For example, I can hold down ⌥⇧ keys and use the up or down arrow to select the entire paragraph.
2. Remember the Word
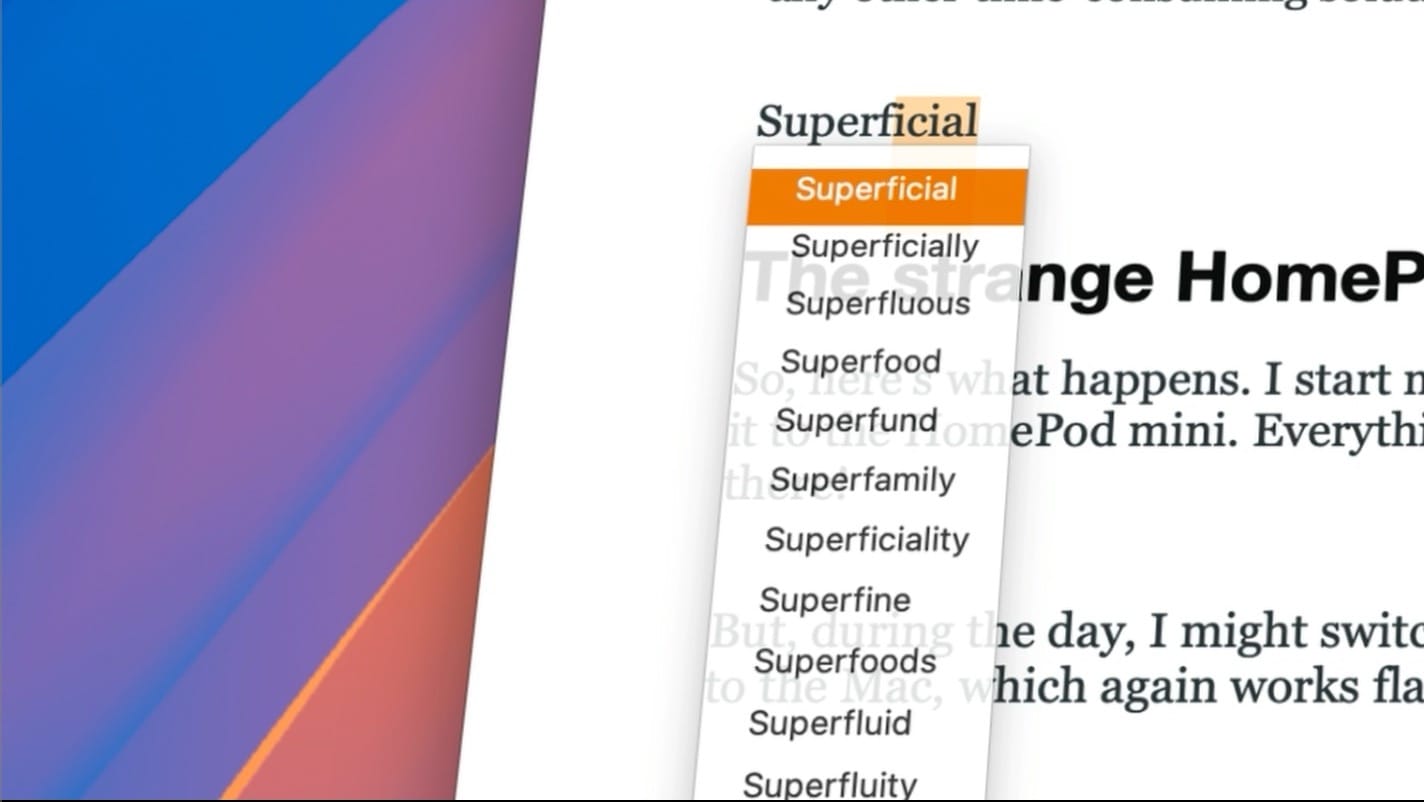
While working on your document, if you forget the exact word or its spelling but remember the first few letters of it, you can easily get suggestions by typing the letters and using the Function+F5 keyboard shortcut.
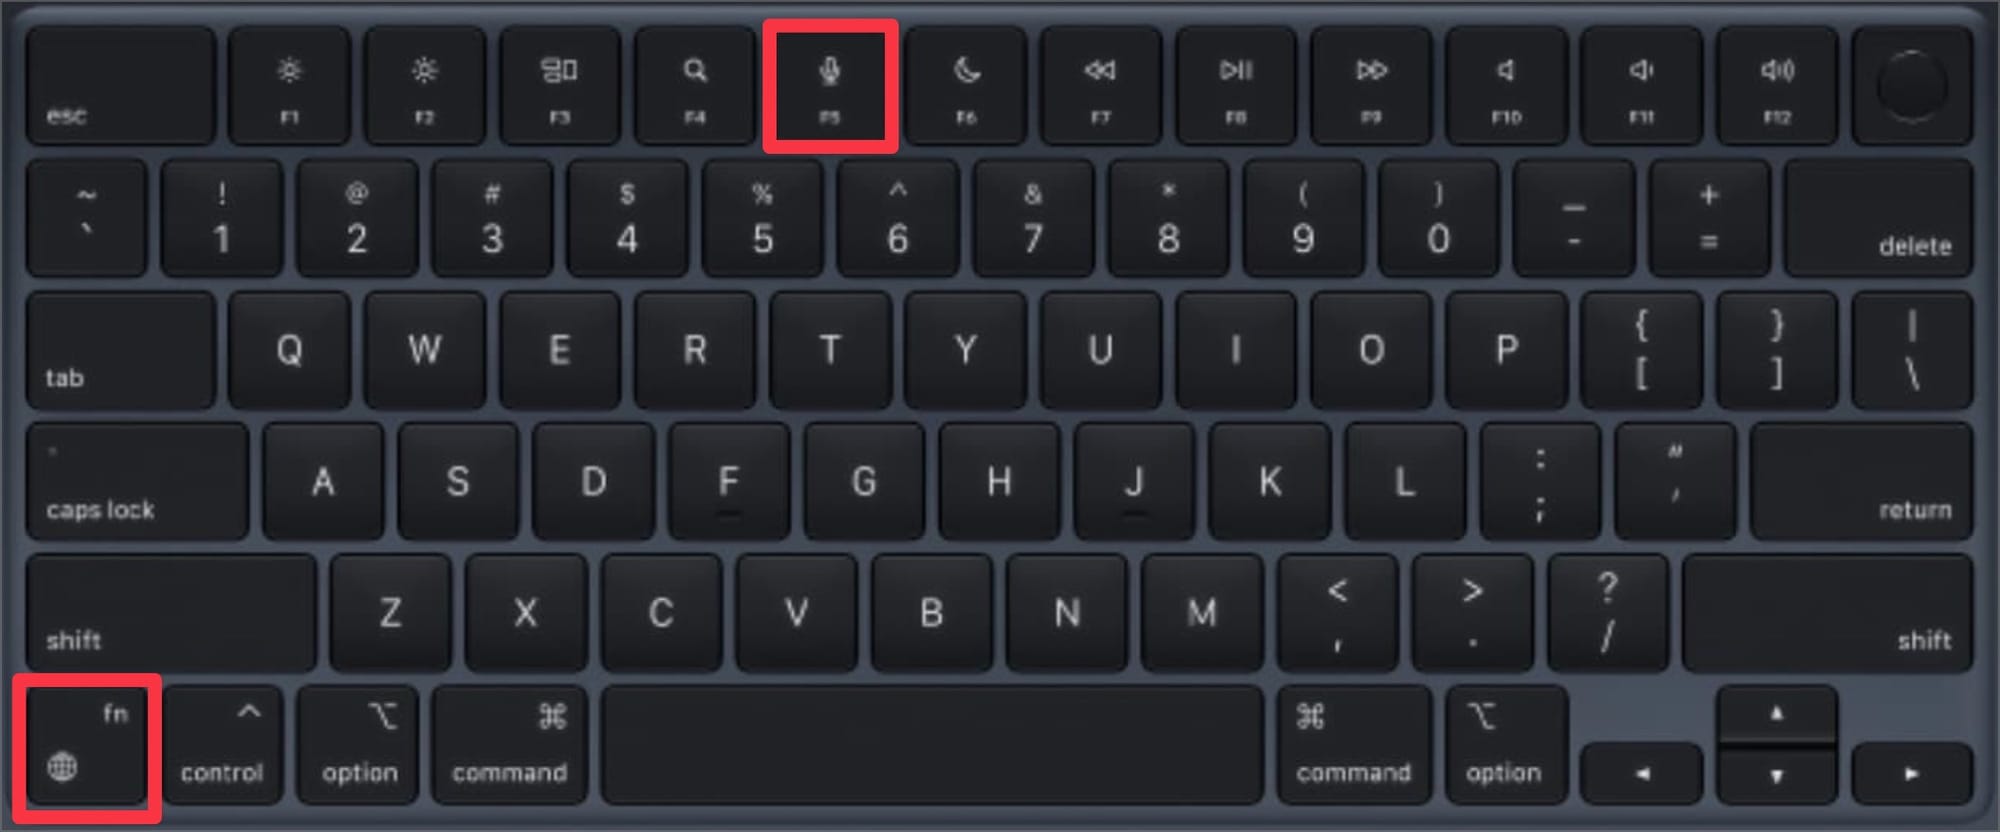
It will give you a list of words starting with those letters and you can easily find the one you are looking for.
3. Easily share open documents
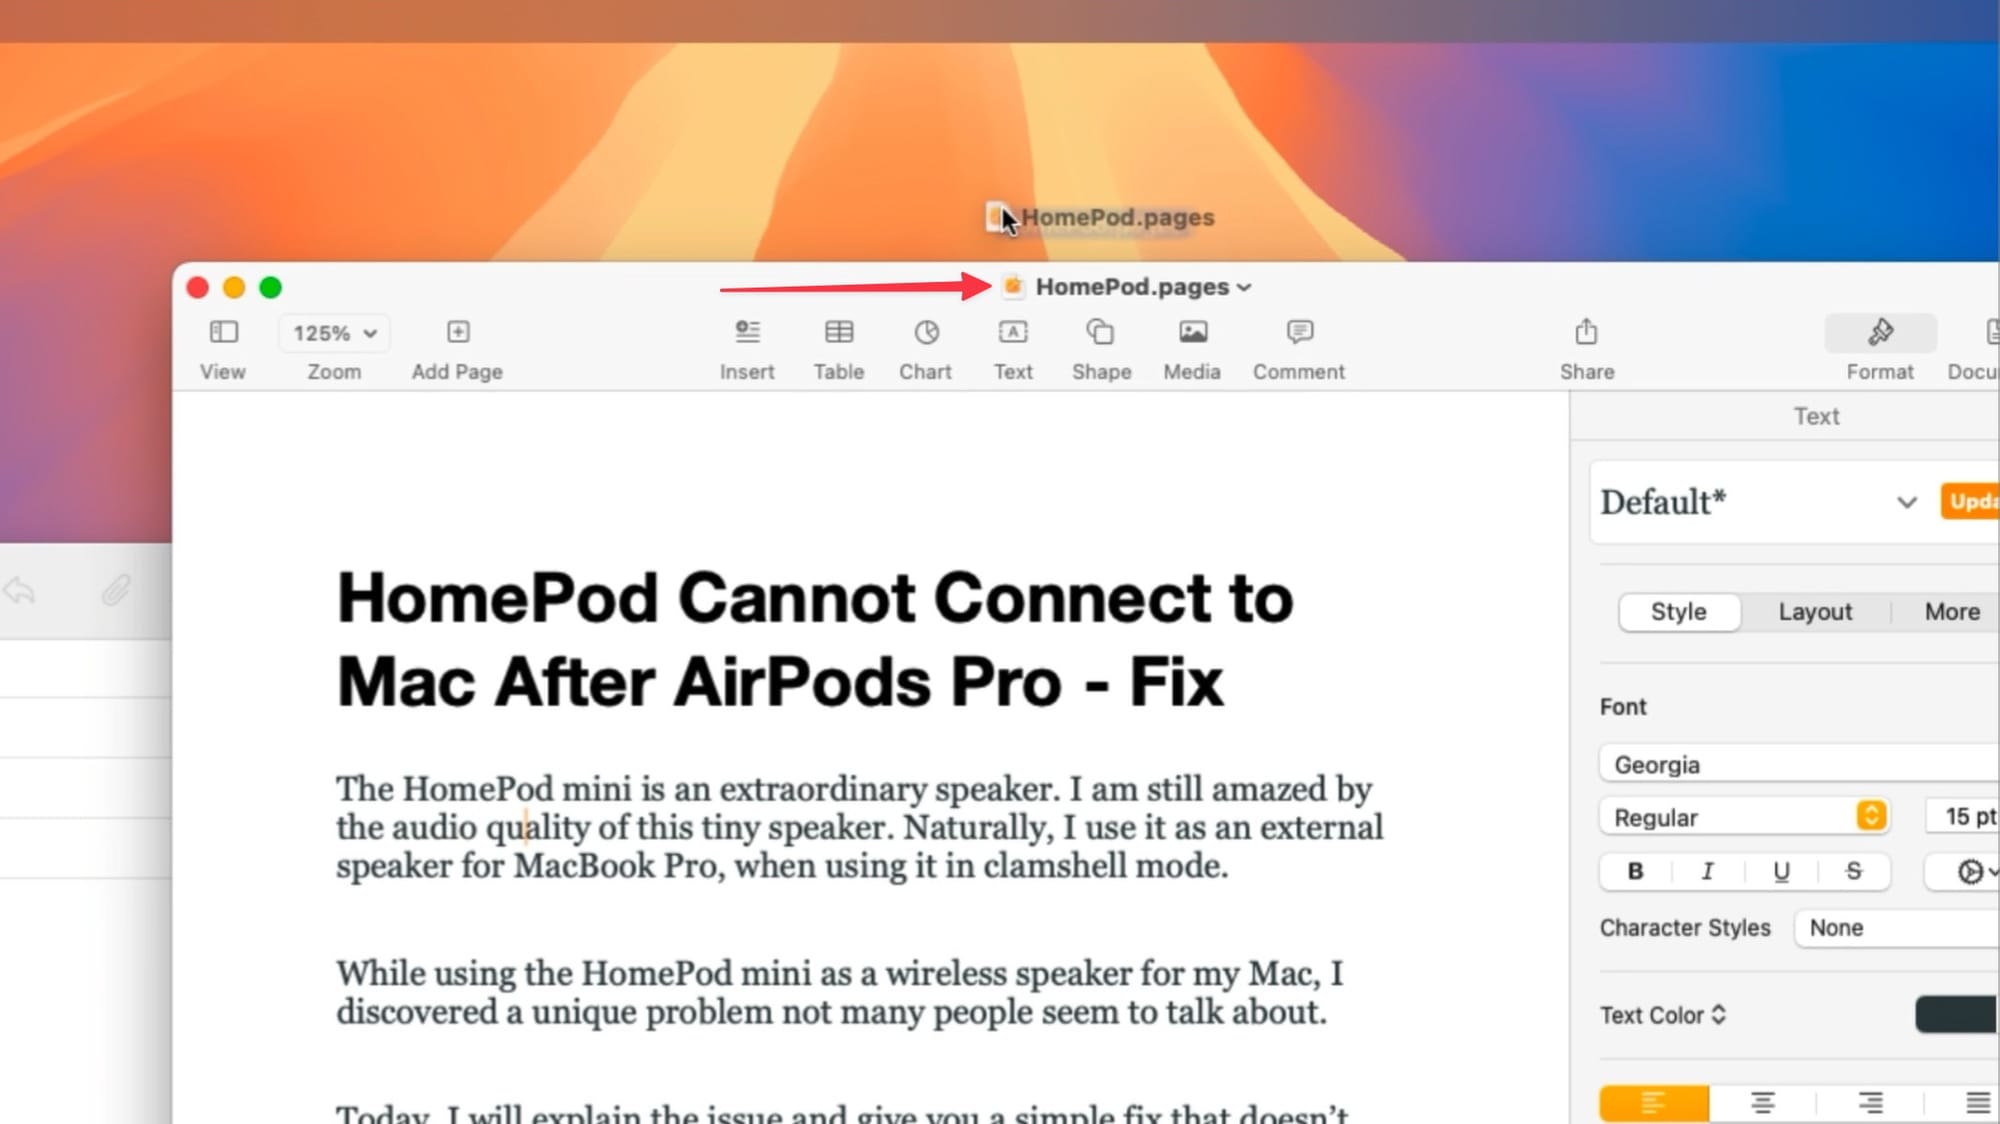
On that note, if you want to share the document you are working on, instead of navigating to the folder where it’s saved, click and drag the document icon in the top bar and drop it into the app you want to share. This works with images too. You only have to hover over the image name to reveal the file icon.
4. Open file location
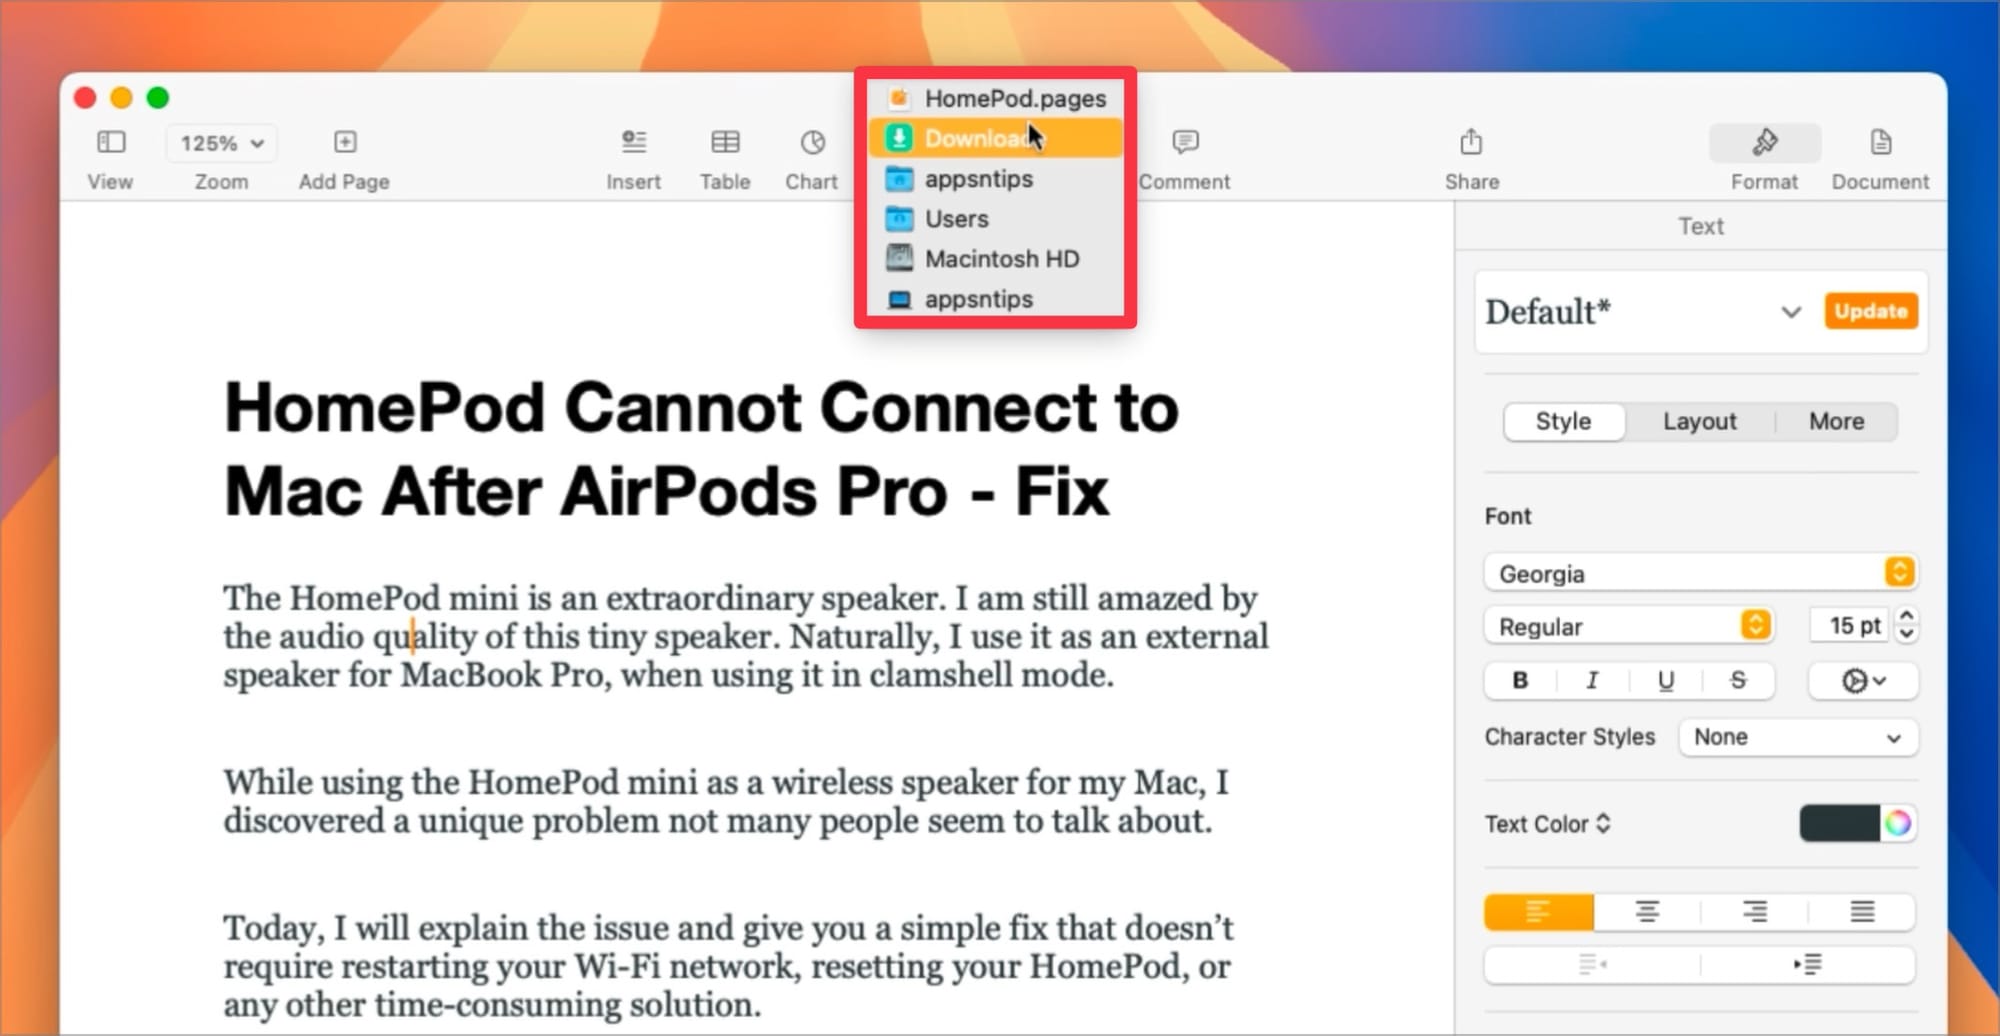
You can also quickly open the document file in its location. Hold the Command (⌘) key and click on the name to reveal the file path. The top-most item is the folder where your file is located. You can click on it to open the file location.
5. Quick Actions
One of the most powerful features of Mac that most users aren’t aware of is Quick Actions. Select a bunch of images, right-click, choose Quick Actions, and you can convert them into a PDF.
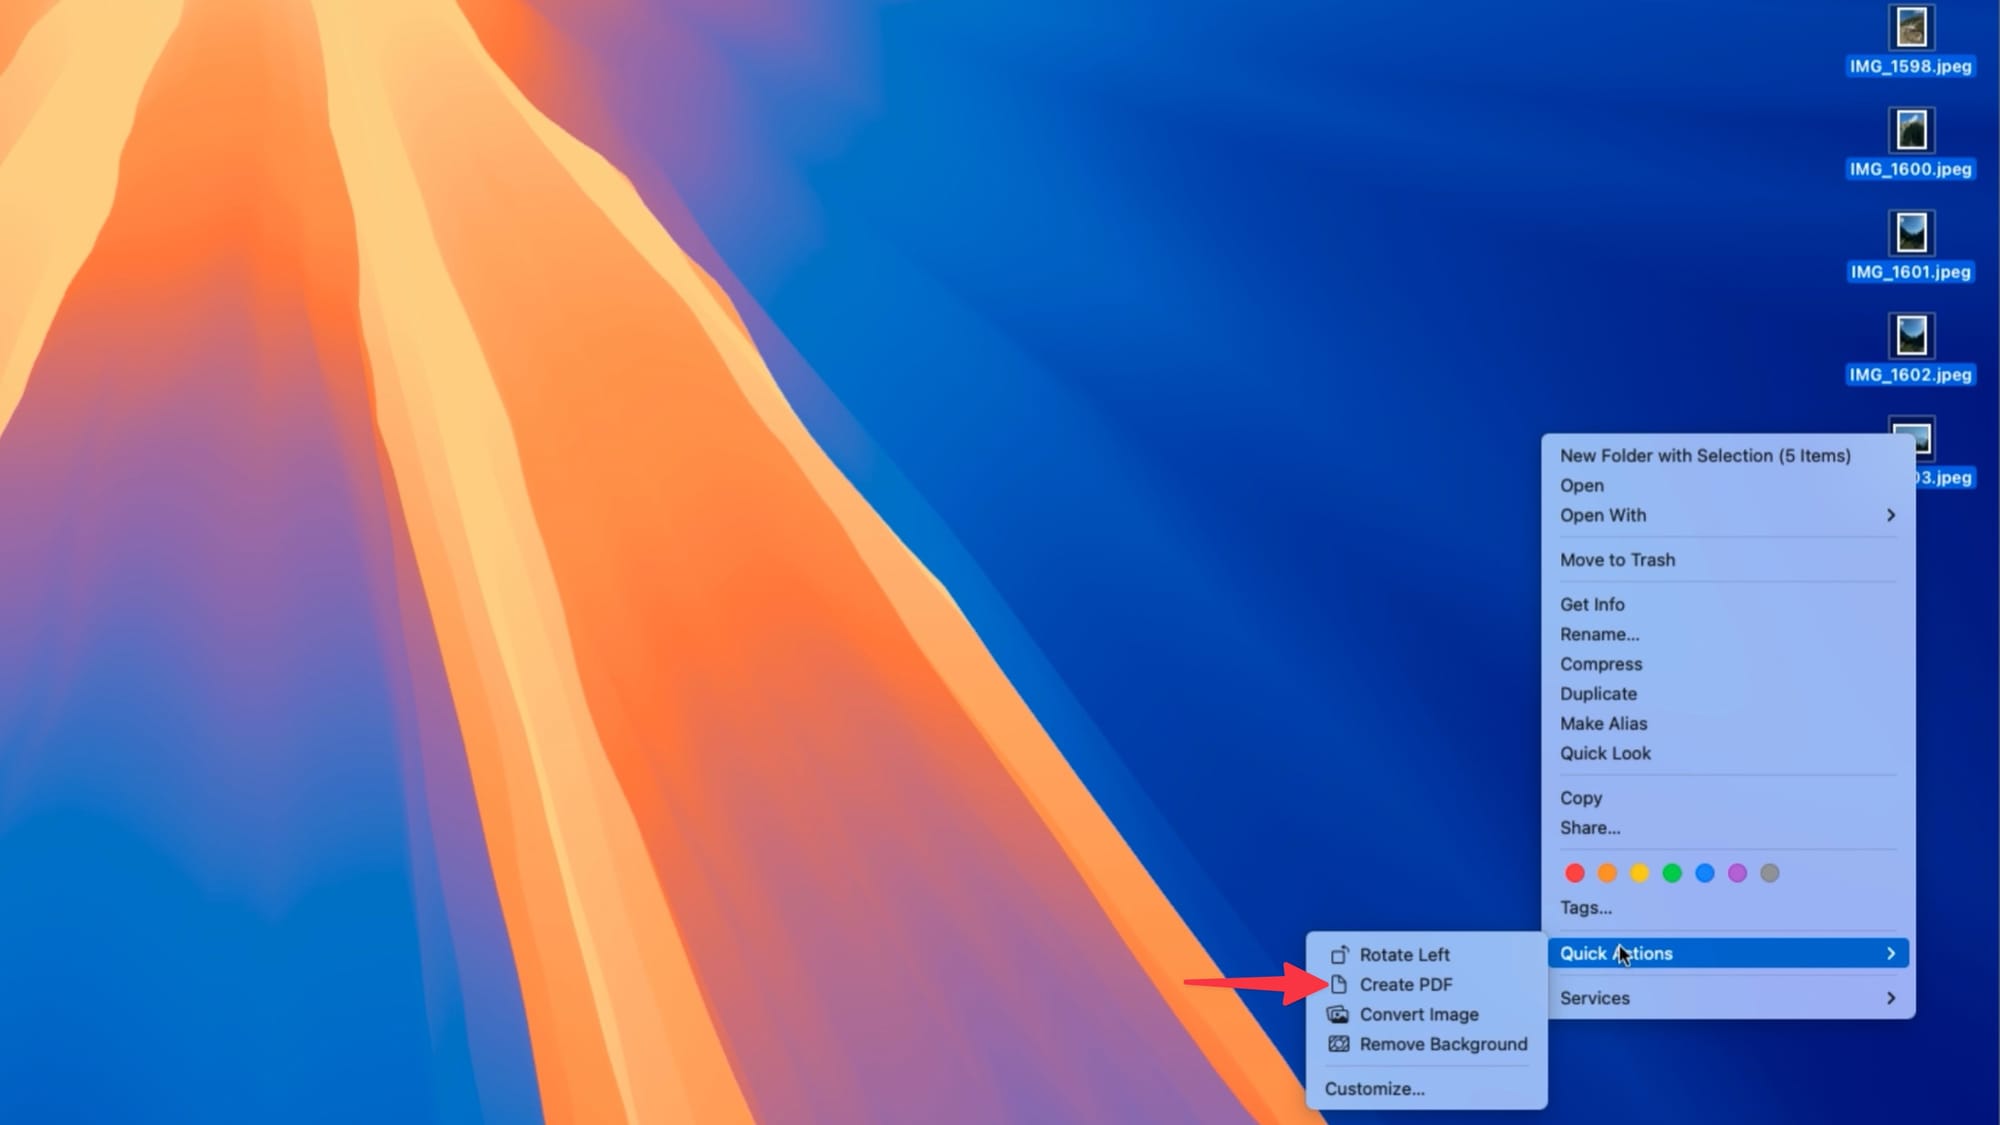
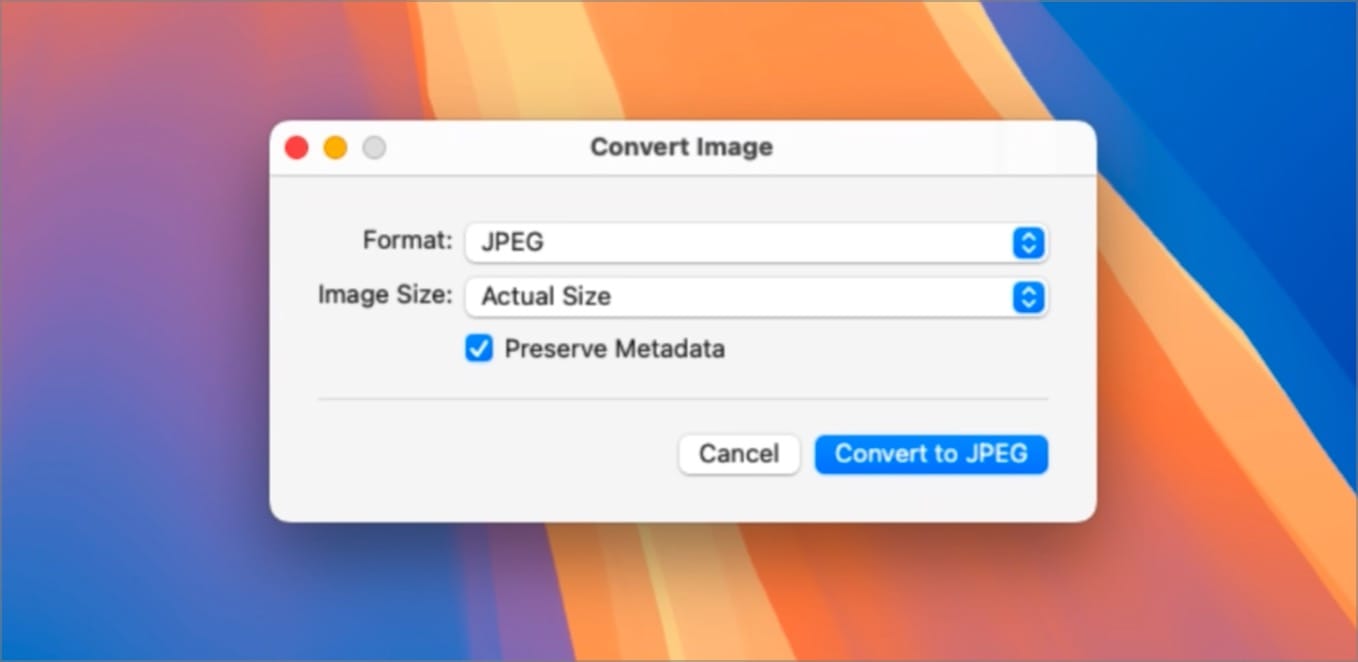
You can also convert images between PNG, HEIC, and JPG formats without opening any photo editing app.
6. Bulk Rename Files
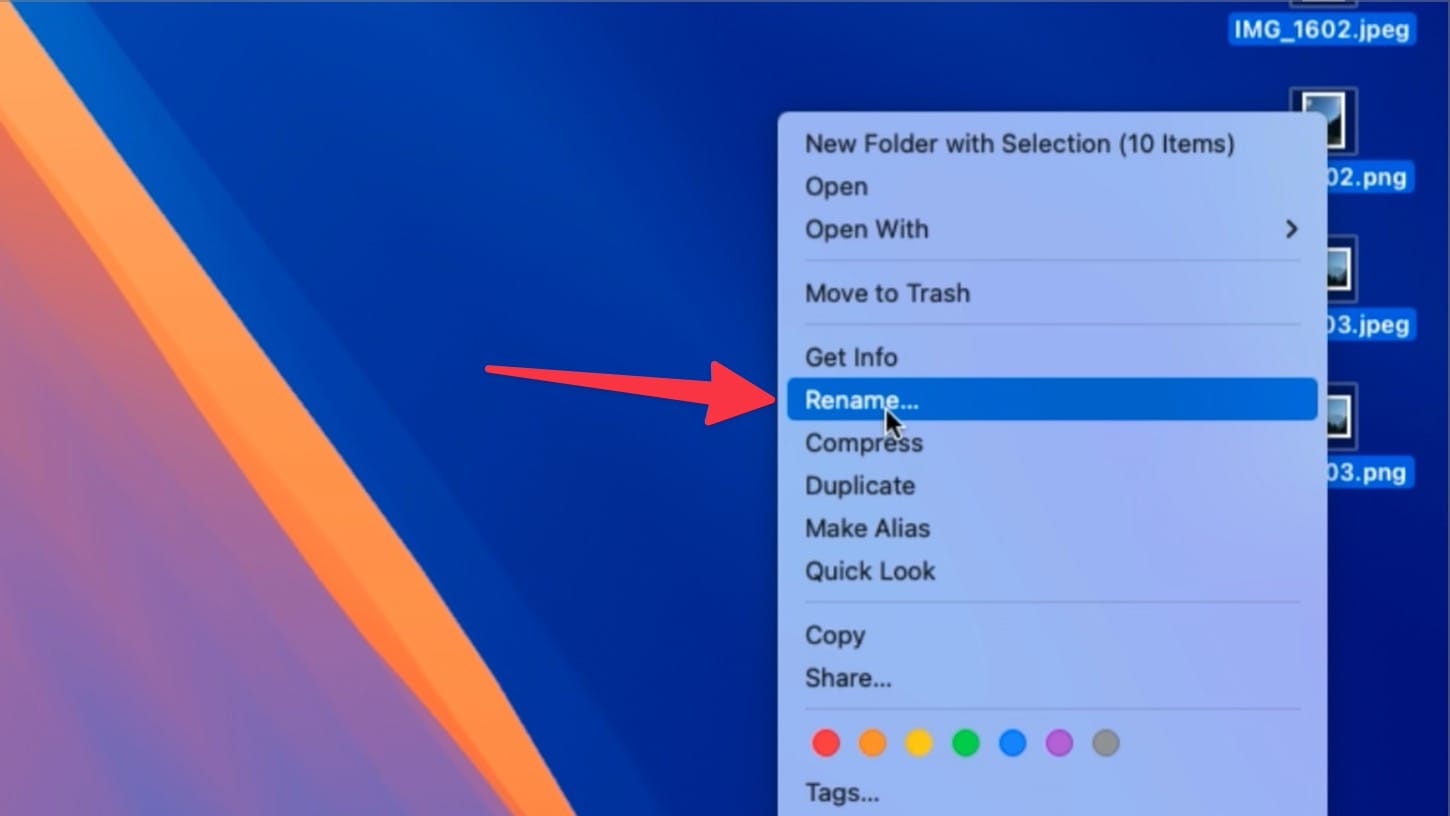
While you are in the right-click menu, you can also rename a bunch of files quickly. Select the file, right-click, and choose the Rename option.
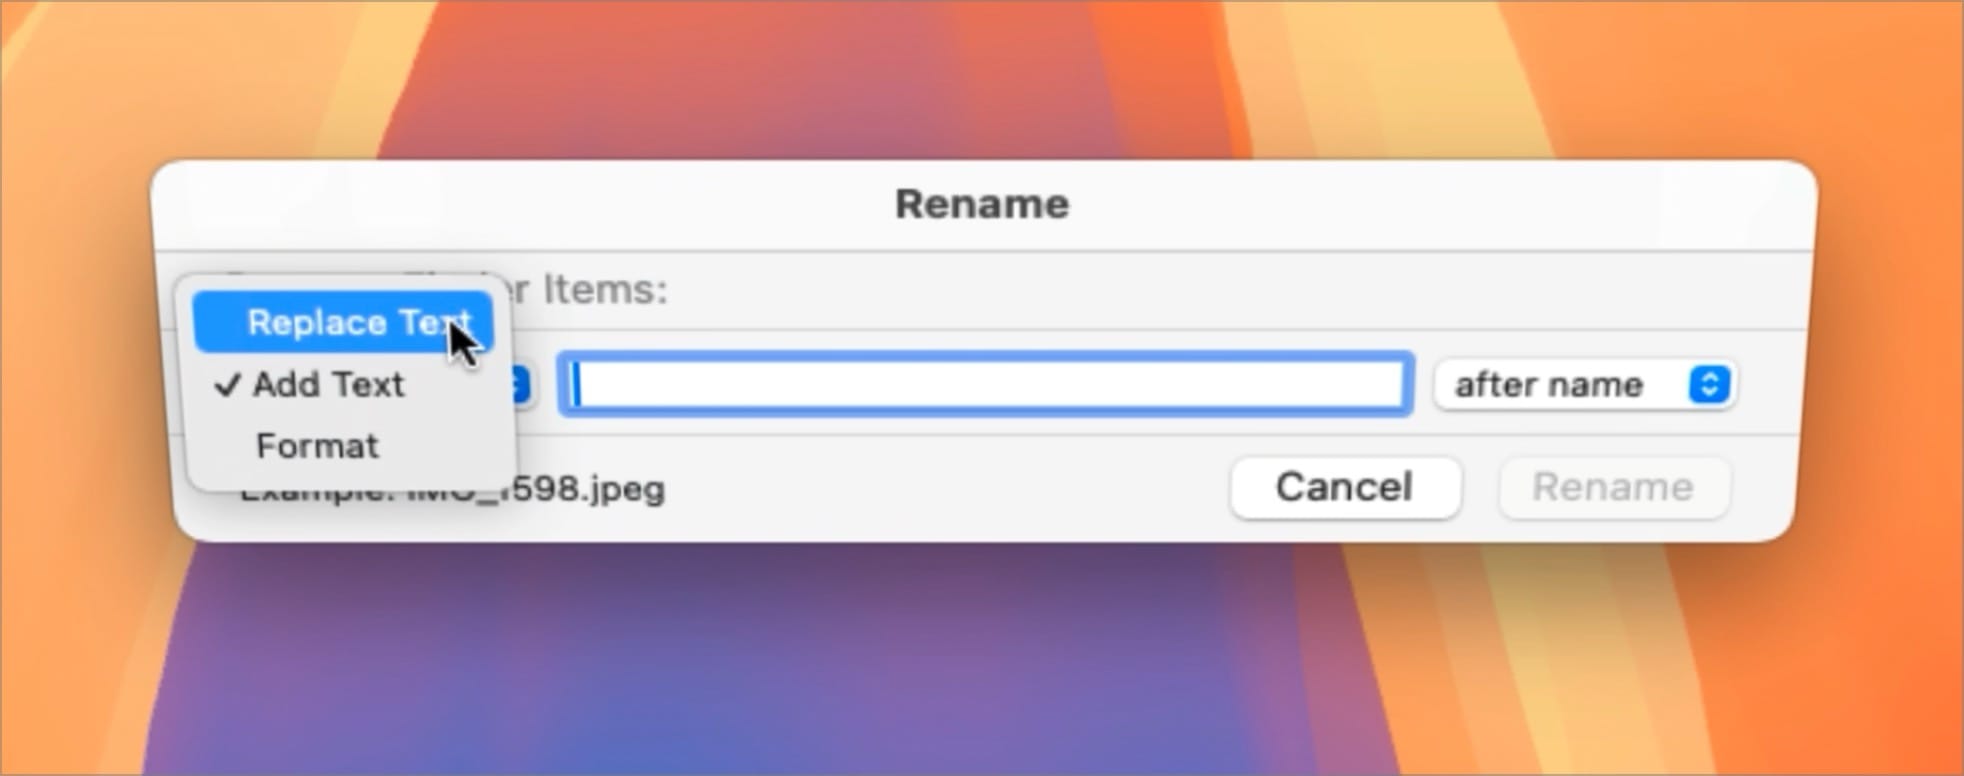
You can choose to replace or add text in existing file names or use the Format option to add your custom naming scheme.
7. Rotate and Trim Videos
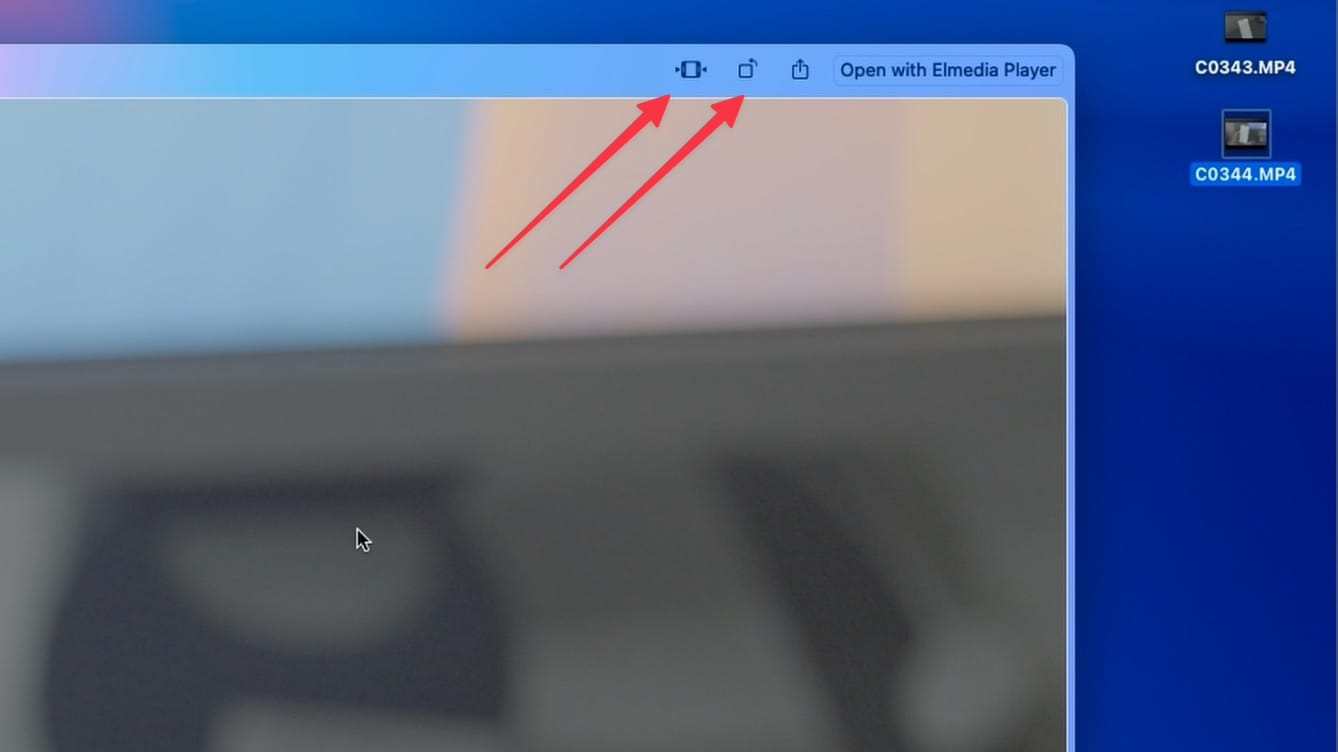
If you have a video file, you can use the Quick Actions menu to trim or rotate it. A better way to do it is by using the Quick Look feature. With the video selected, hit the Space Bar to open the Quick Look. You can use the trim button at the top to trim the video. There’s also a rotate button that you can use to rotate videos however you want.
8. Combine Videos
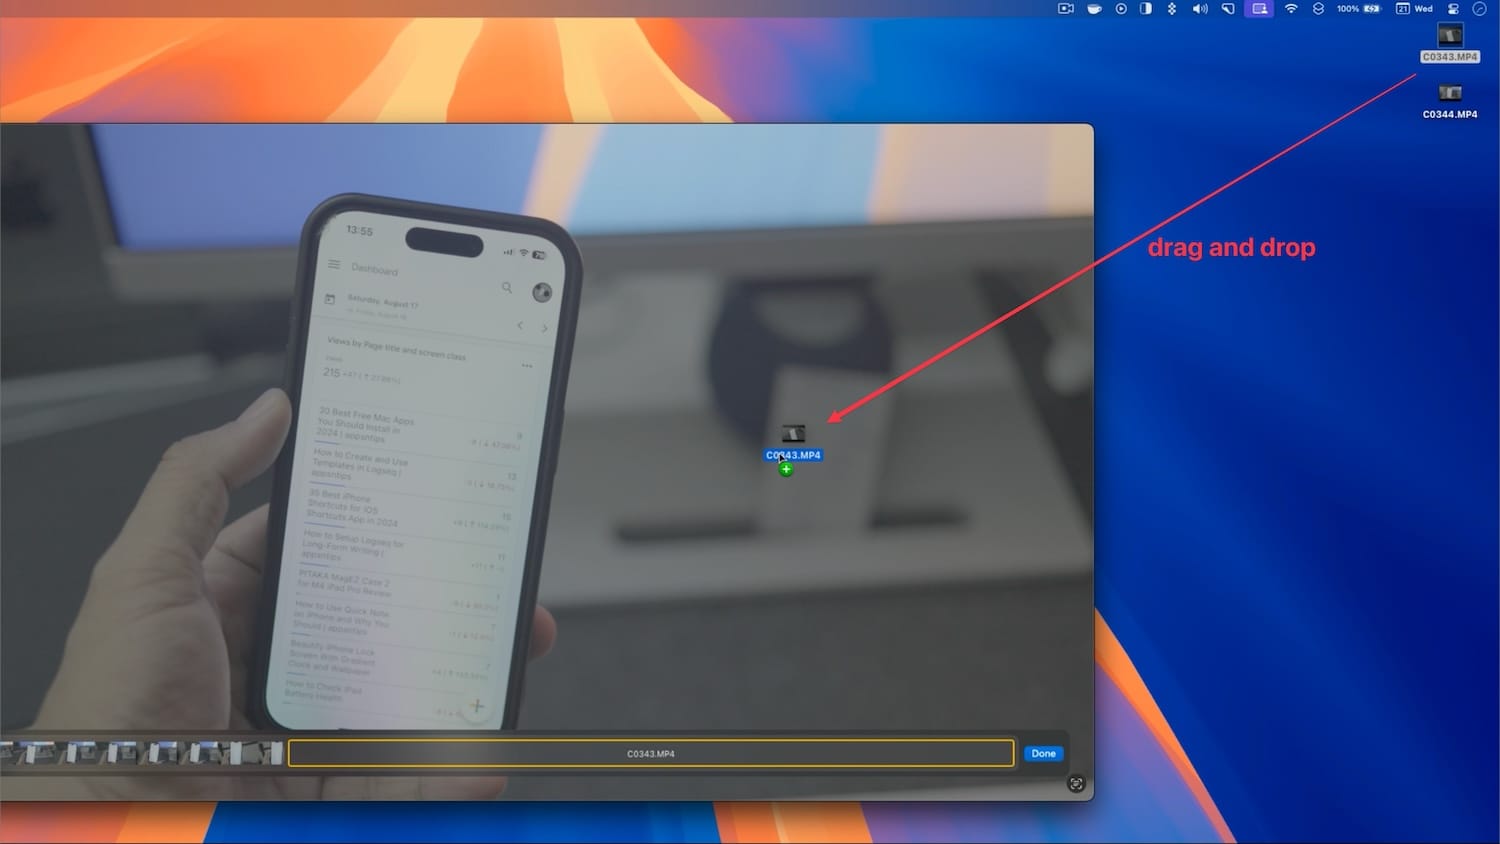
I learned about this recently and was blown away by it. If there are two videos that you want to combine, you can do so without using any video editing app. Open the video you want to be at the start in QuickTime Player and drag the second video on top of it. It will automatically add the second video at the end of the first clip.
9. Capture a video frame
QuickTime has another hidden feature that you will love. Say you are watching a video and want to capture a still frame from it. You can take a screenshot, but that will restrict the image resolution to the captured area of the screen.
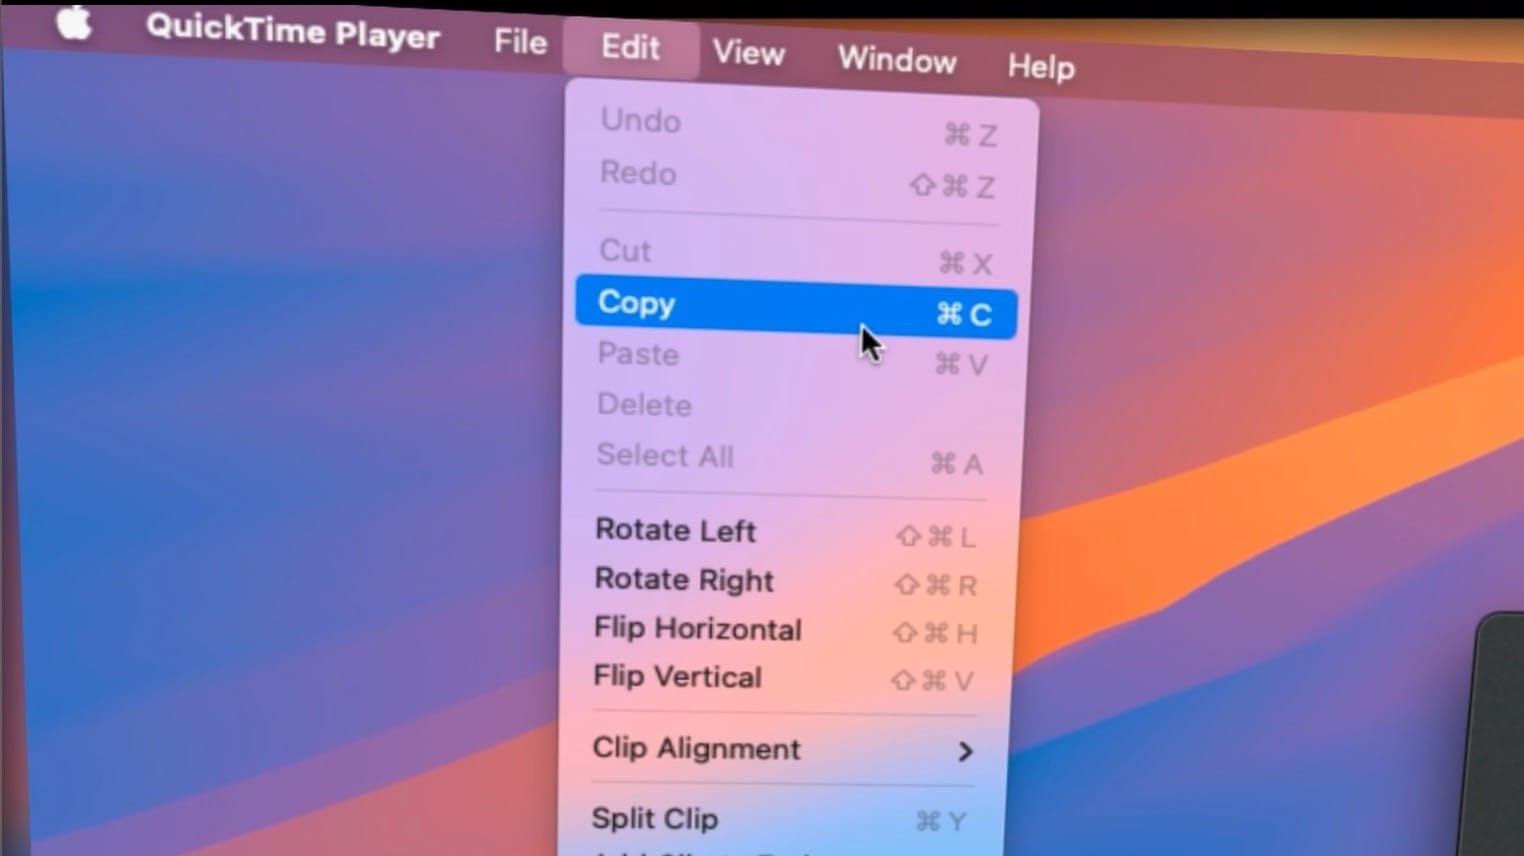
The easiest way to capture a still frame of the video while preserving its actual resolution is to open the video in QuickTime Player, go to the Edit menu, and choose the Copy option. Alternatively, just hit the ⌘C keyboard shortcut.
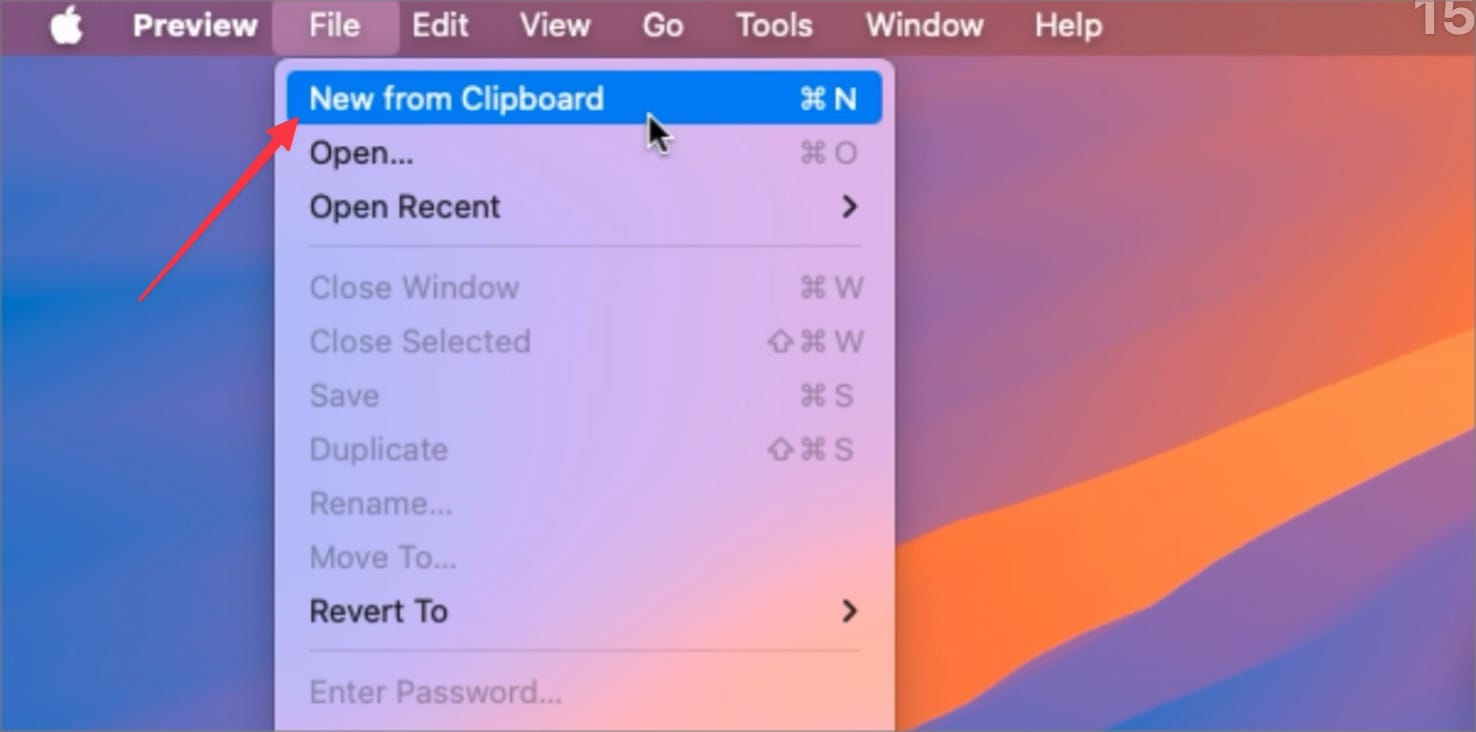
Now open the Preview app, go to File, and click the New from Clipboard option. Or just the ⌘N keyboard shortcut. Now you have the still frame in its original resolution.
10. Minutely adjust the volume and brightness
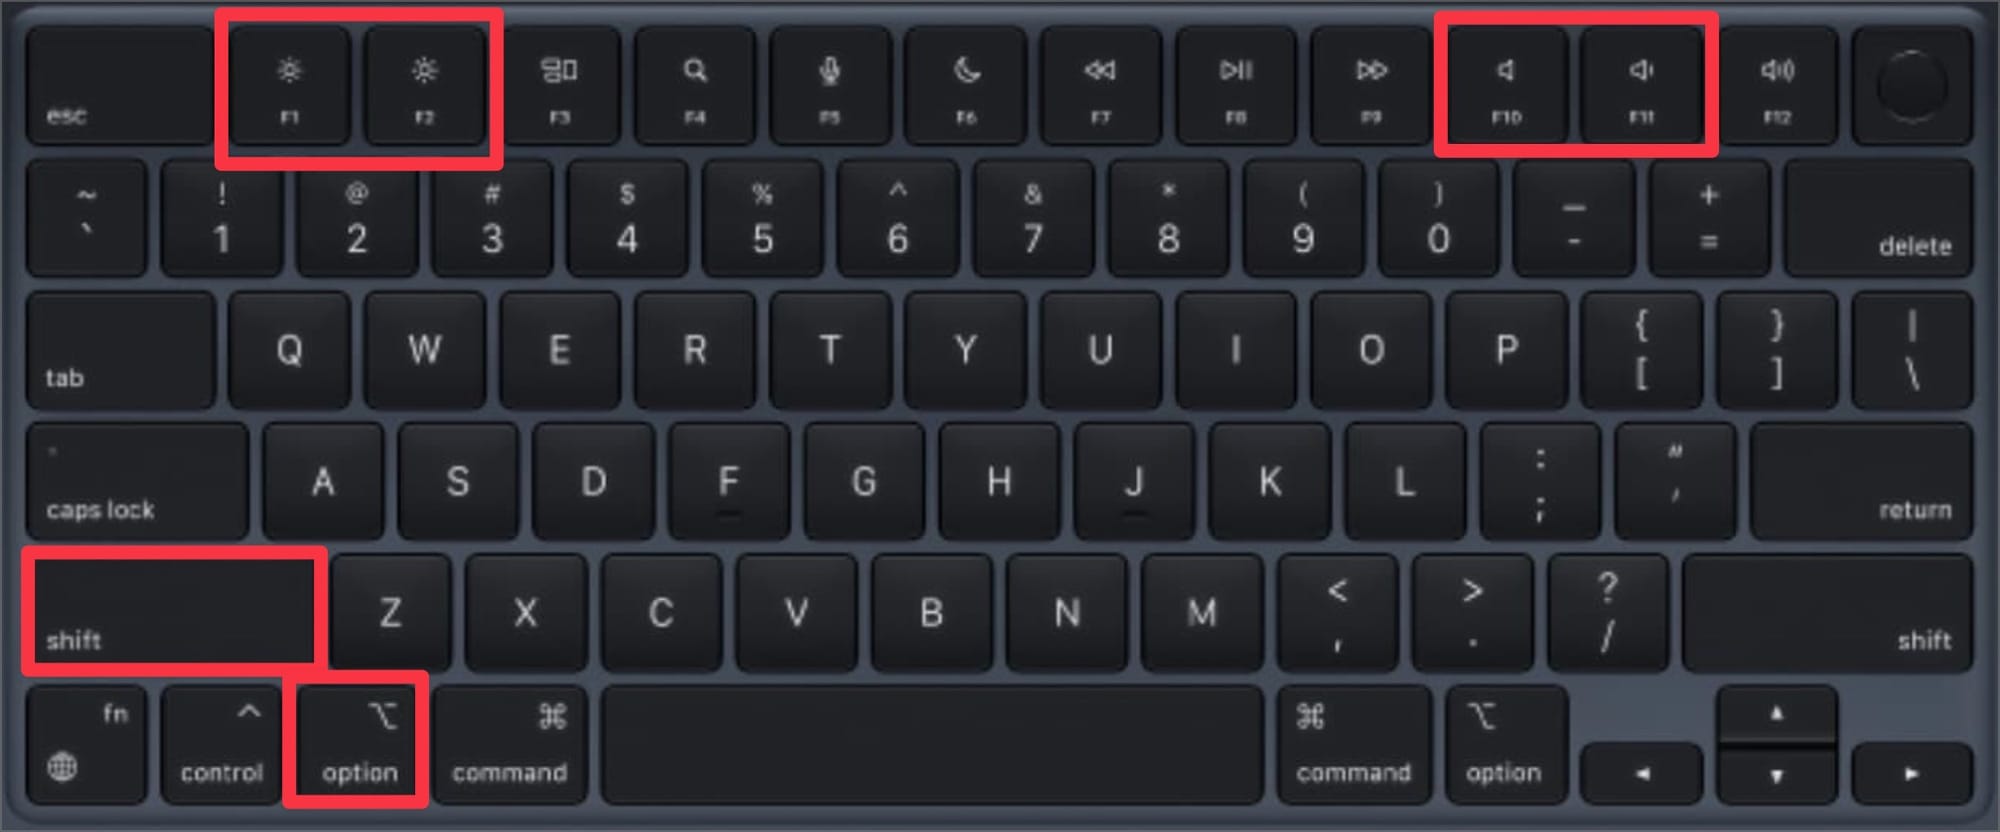
Your Mac’s keyboard has built-in volume and brightness control. But not many people know that you can hold down the Shift (⇧) and Option (⌥) keys to adjust these values in the quarter for greater control.
11. Hide everything but the current window
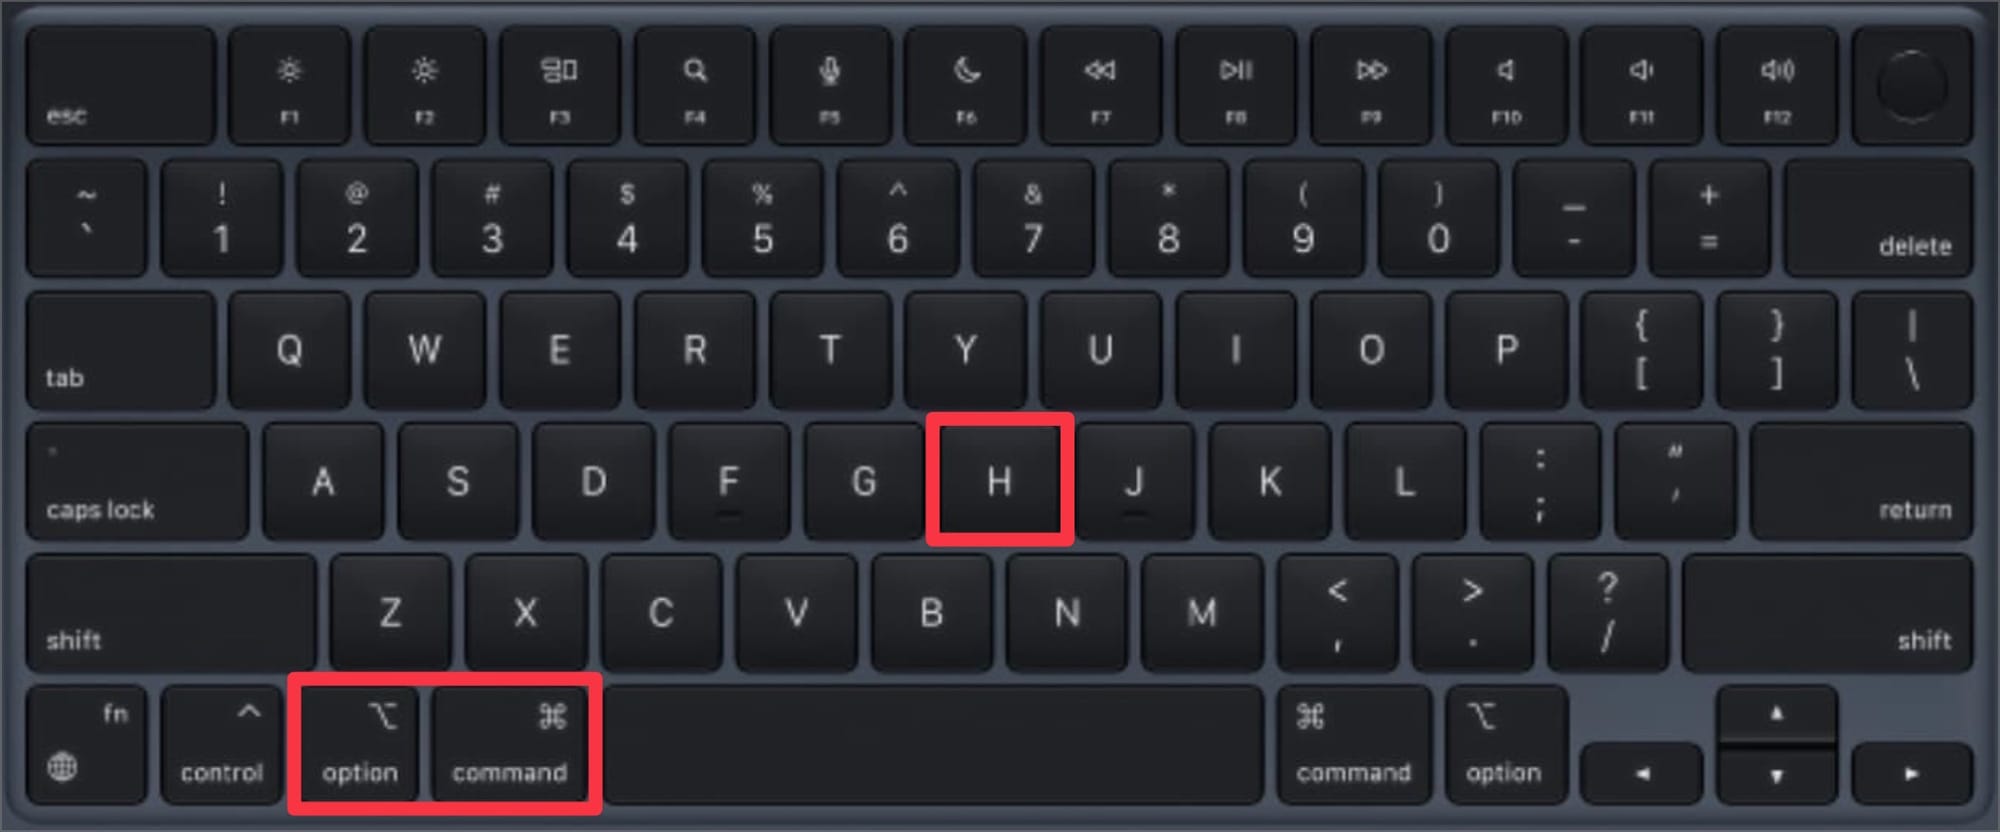
Too many open windows can result in a crowded workspace. Instead of hitting ⌘H to hide windows one by one, keep the app you want to work on as an active window and hit the ⌘⌥H keyboard shortcut to hide all the other app windows at once.
12. Hide, move, and resize Dock
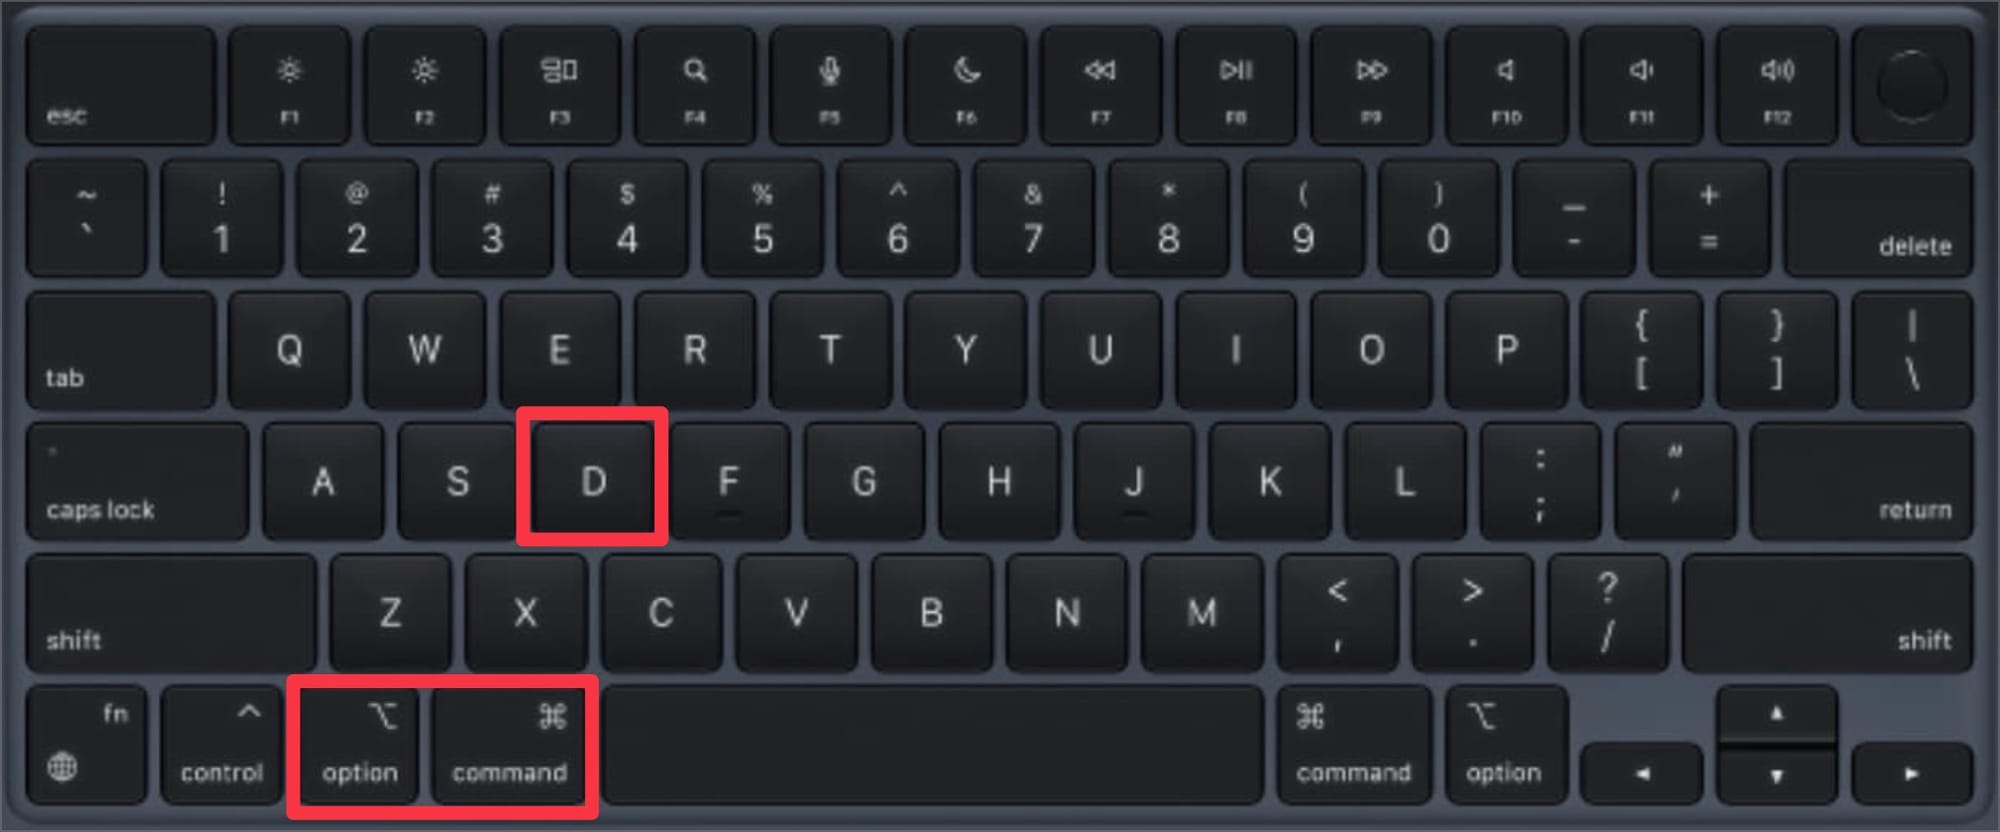
If you need extra workspace, you can hide the Dock using the ⌘⌥D keyboard shortcut. You can also resize the Dock without opening the System Settings.
Click and drag on the divider line between the apps and the trash can. To move the Dock from the bottom of the screen to the left or right, hold down the Shift (⇧) key and click and drag the Dock to the left or right of the window.
13. Quick Access Emoji Keyboard
There’s no obvious way to access your emoji keyboard on Mac. It’s not an issue in chat apps like Messages or WhatsApp, as they have built-in emoji keyboards. But what if you want to add an emoji in a document or anywhere else?
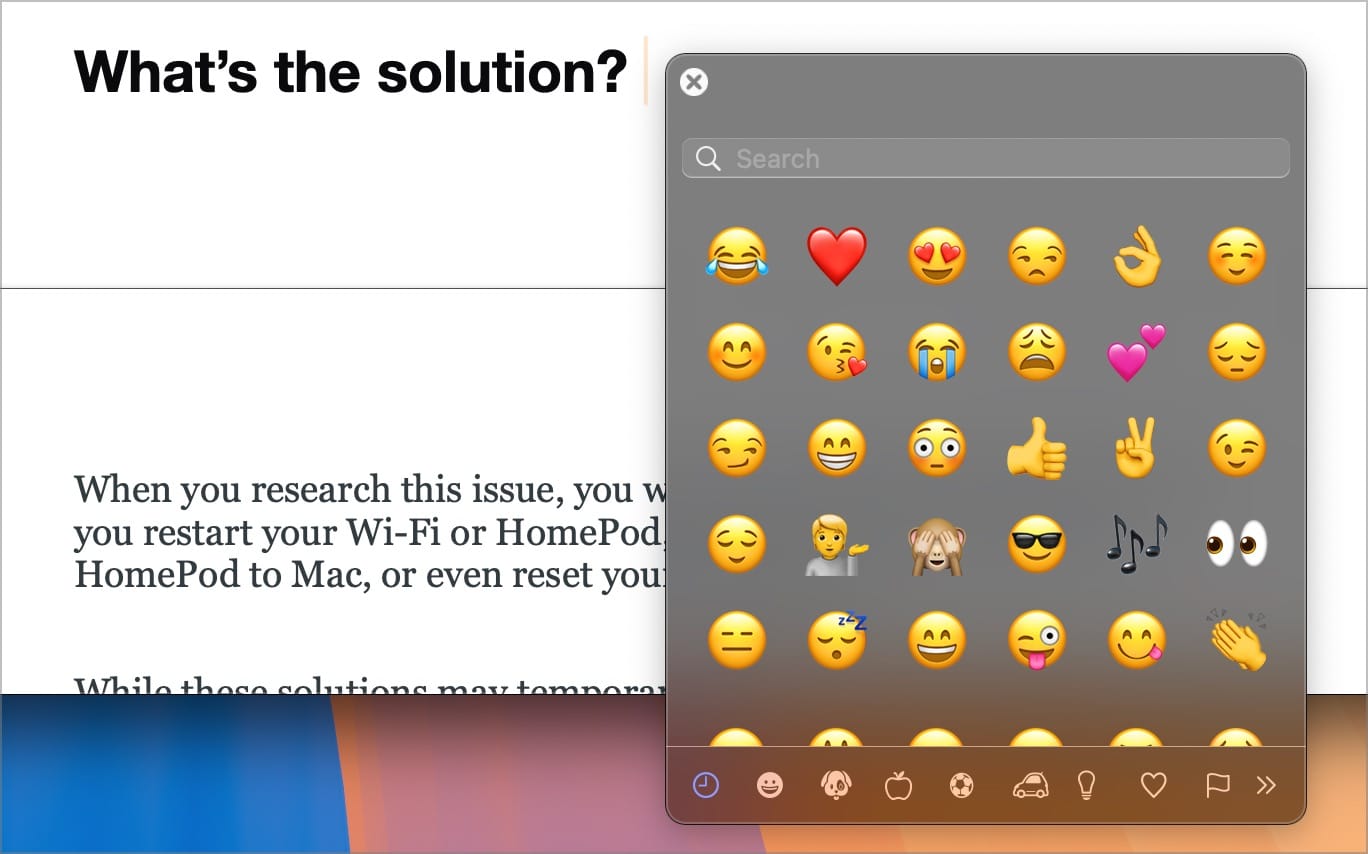
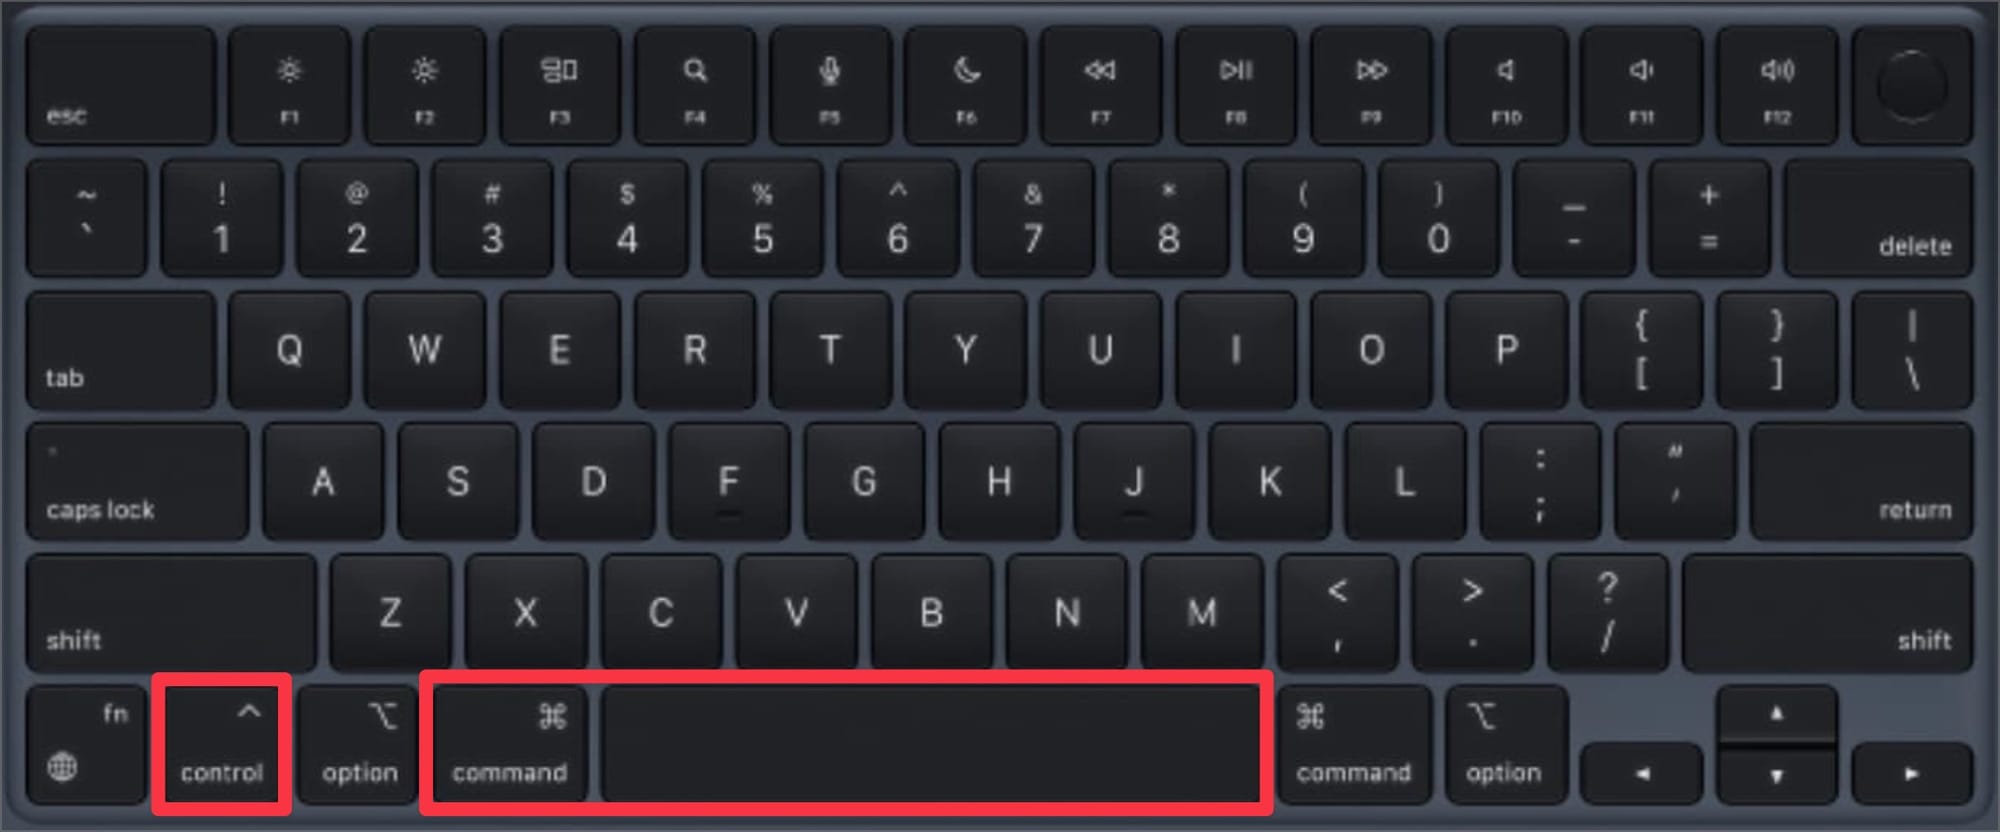
Hit the keyboard shortcut Command+Control+Space, and it will instantly appear at your cursor location.
14. Quick AirDrop
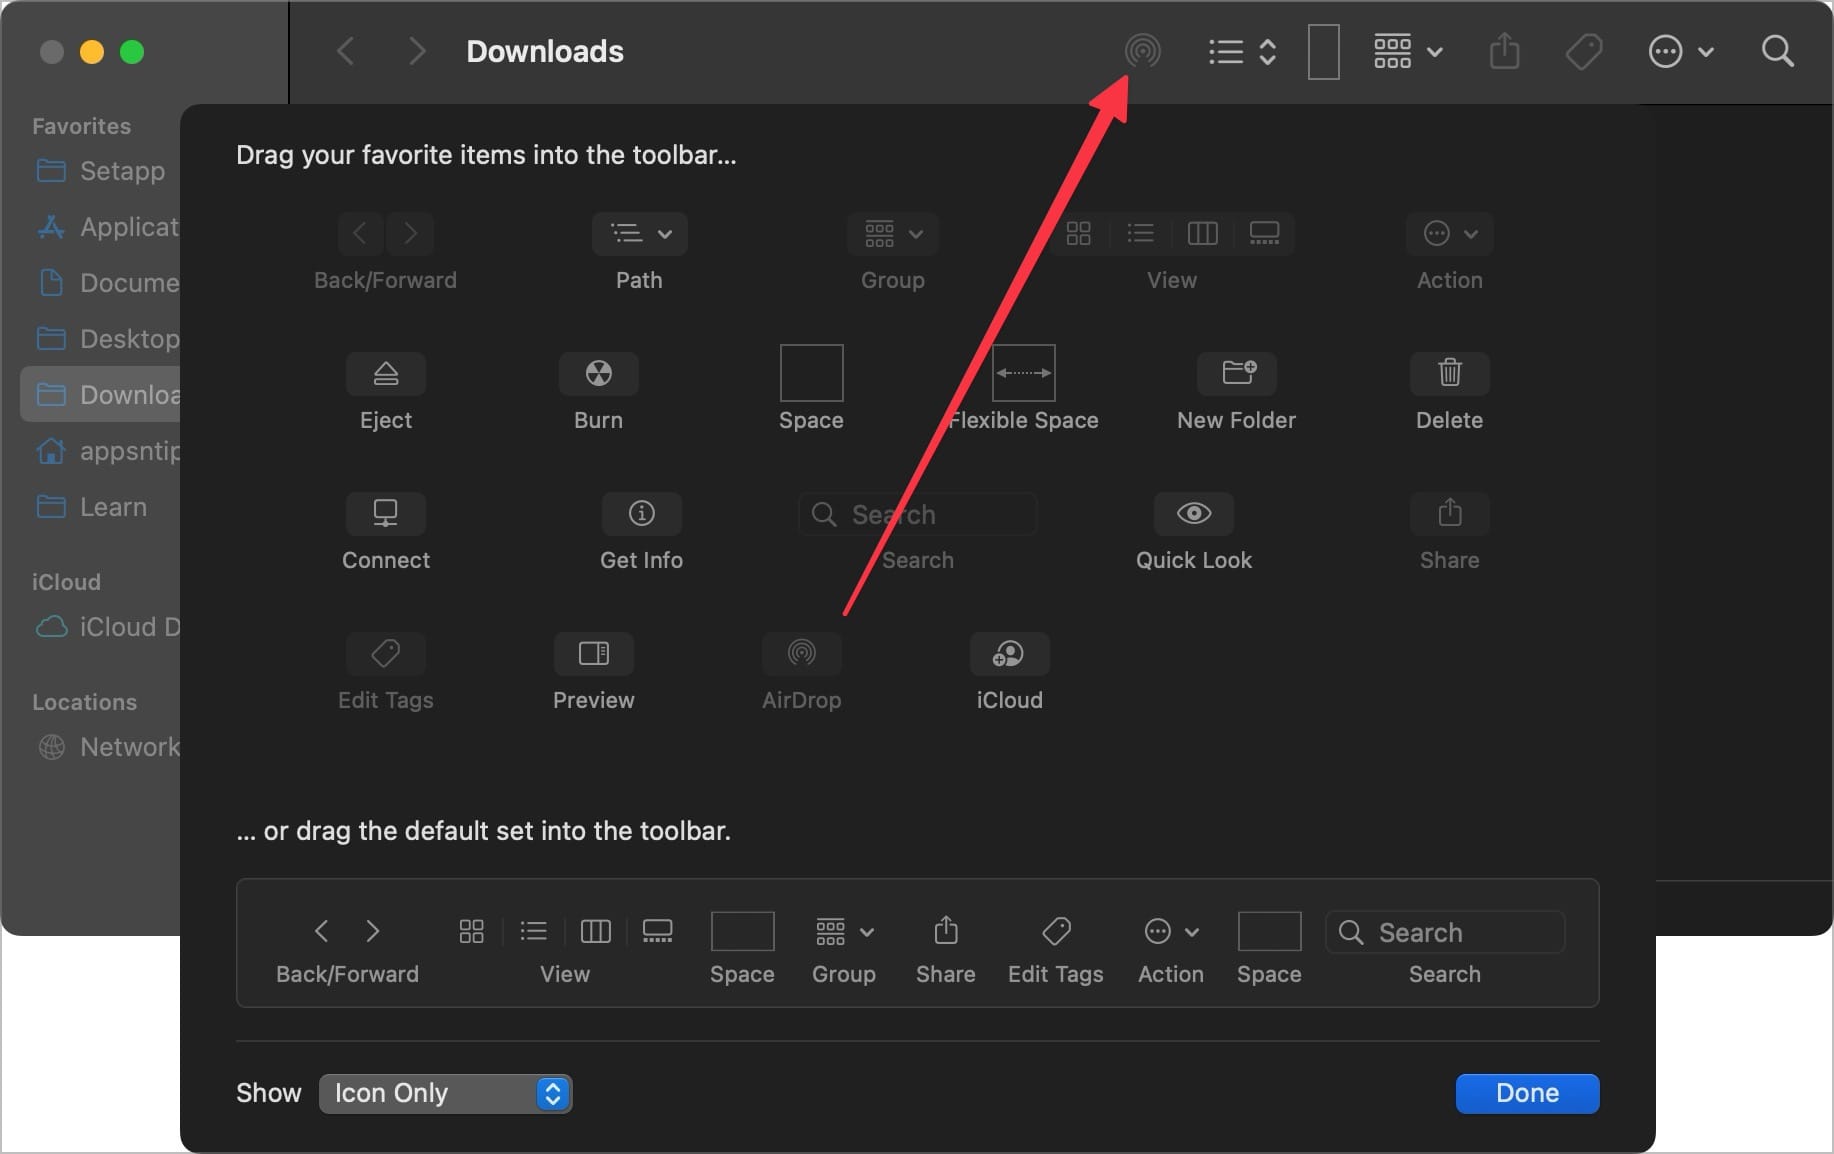
Searching for AirDrop in the right-click menu is cumbersome. That’s why, I recommend you add the AirDrop icon to your Finder window to quickly access it.
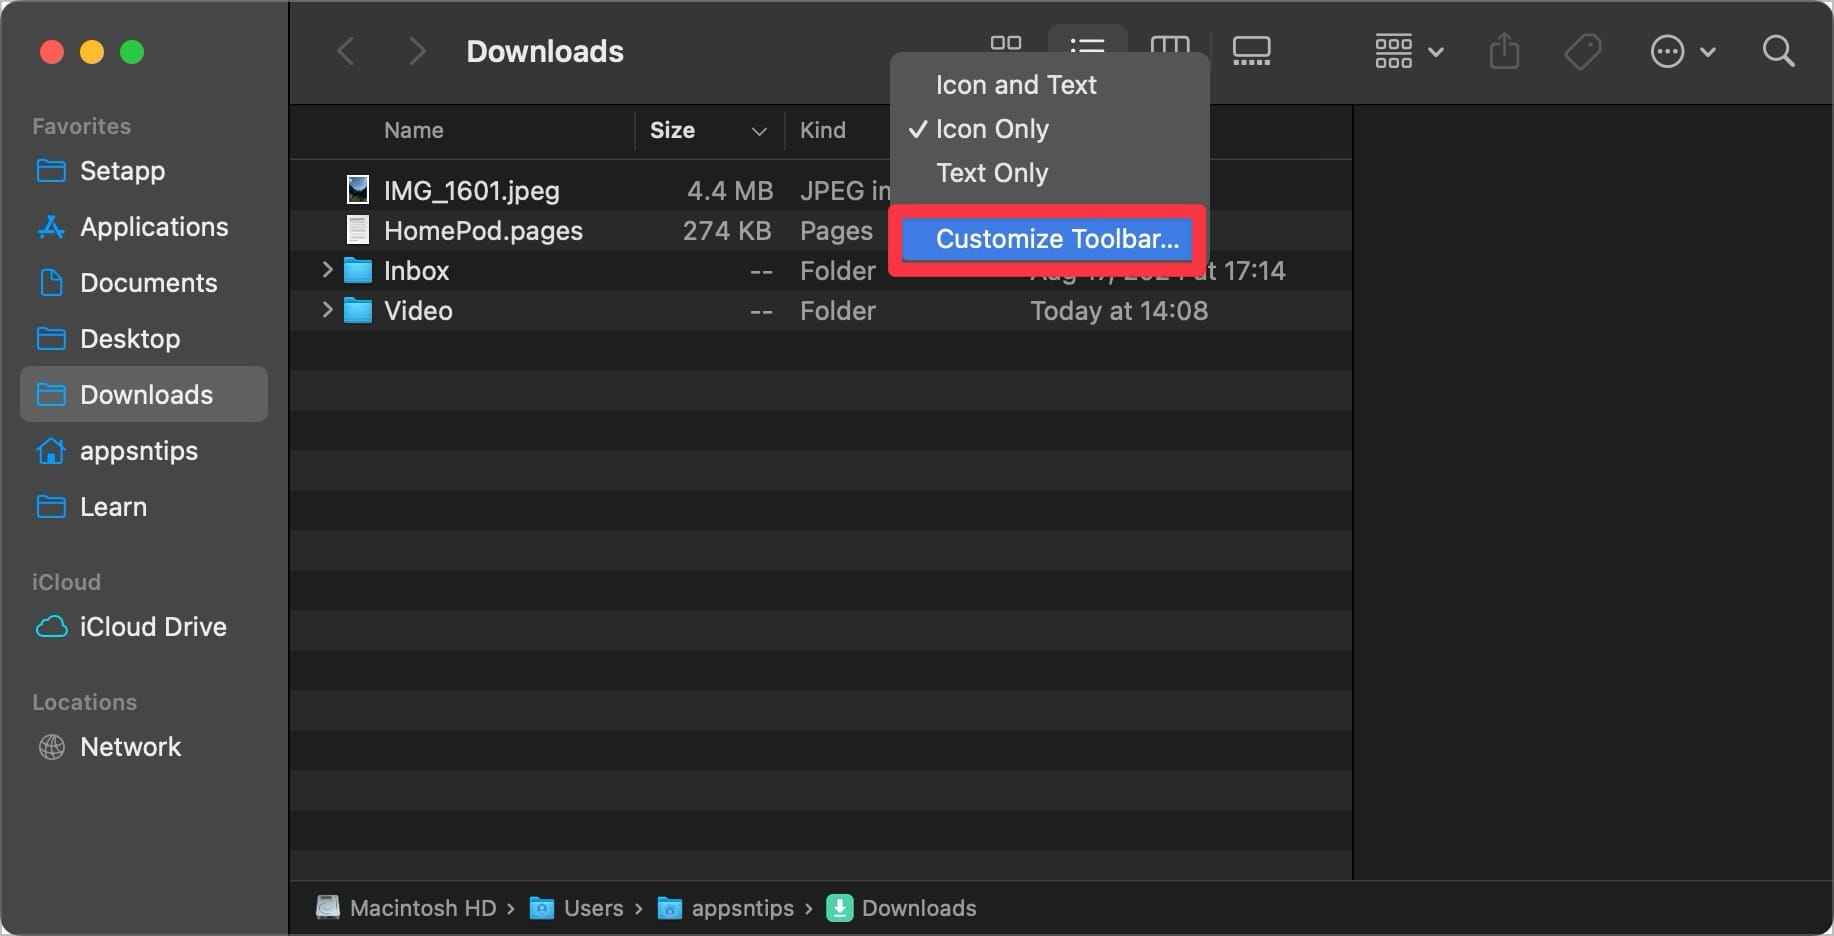
Right-click on Finder, choose the Customize toolbar option, and drag and drop the AirDrop icon. Next time you want to share anything, click to select it and hit the AirDrop icon to share it.
15. Spotlight Tips
The Mac’s Spotlight is not just for searching files and launching apps. You can use it to convert currencies and other units of measurement, track live flight data, find weather forecasts, and so much more. Check our Spotlight tips article to learn more.

That ends our article on the best macOS tips to supercharge your Mac. Before you go, click here to find 10 tips to clean your Mac to make it faster.


