How to Share Folders in Apple Notes and Grant Read Only Privilege
Apple Notes in iOS 13 and macOS Catalina is getting a new Shared Folder Feature.

Notes App is getting a ton of new features with iOS 13 and macOS Catalina. From new organization options to extensive search features, the new Notes app finally seems to be in a place where it can replace third-party Notes app for me. For the next few months, I am going to try the Notes app and share my opinions with you. One of the biggest features of the new Notes app is the ability to share entire folders of notes.
In iOS 12, you could only share individual notes which was a nightmare. Well, Apple has solved this problem with the new update. In this article, I am going to show you two simple methods you can use to share folders in the Notes app in iOS 13 and macOS Catalina. I will also show you how you can grant read-only permission which is also a new feature in the Notes app.
Sharing Folders in Apple Notes App
You can share folders in the Apple Notes app both on Macs and iPhones. In this article, we are going to see how you can share folders for both these devices.
Sharing Folders in Apple Notes App on iPhones and iPads
There are several ways you can share folders in the Notes app. Here are the two best methods you can use.
Method 1
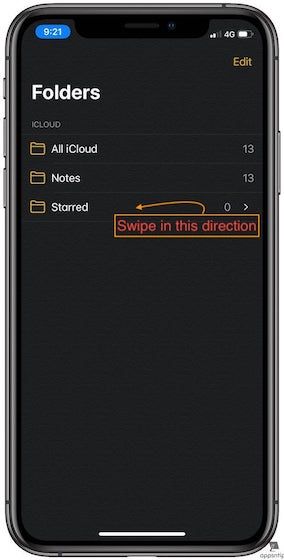
1. Launch the Notes app and swipe right to left on the folder that you want to share.
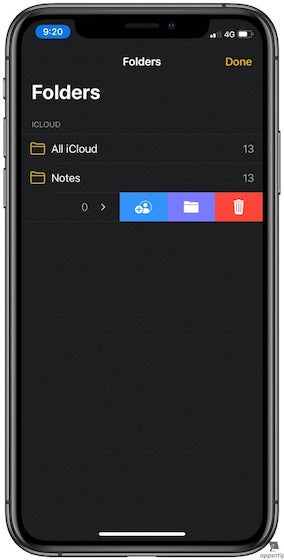
2. Now, click on the “Share” button which is the left-most button (the one in blue).
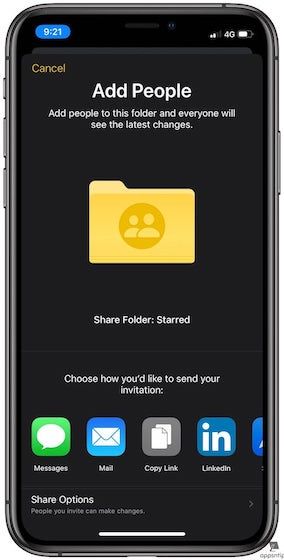
3. Here, you can select how you want to share the folder. You can use all the usual sharing options including iMessage, Mail, or just copy the link and share however you want to.
Method 2
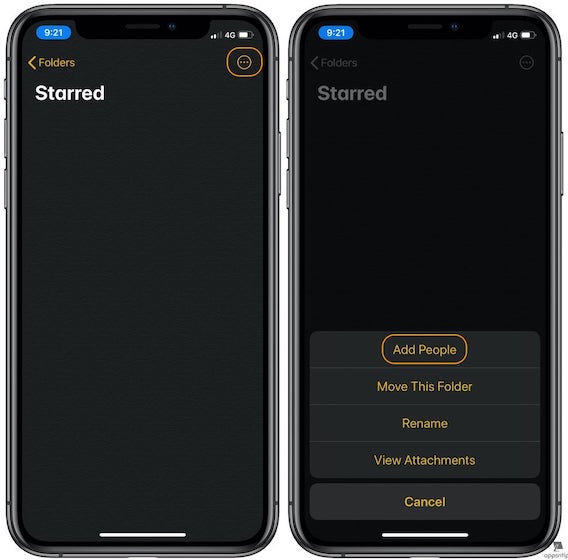
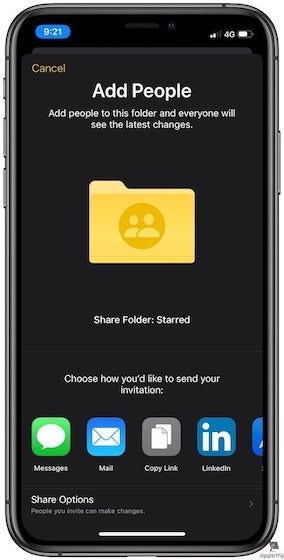
1. Launch the Notes app and tap on the folder you want to share to open it. Now tap on the three-dot menu at the top right and select the “Add People” option.
2. Now choose how would like to share the link, just like in Method 1.
Granting Read Only Privileges in Shared Folders in iOS 13
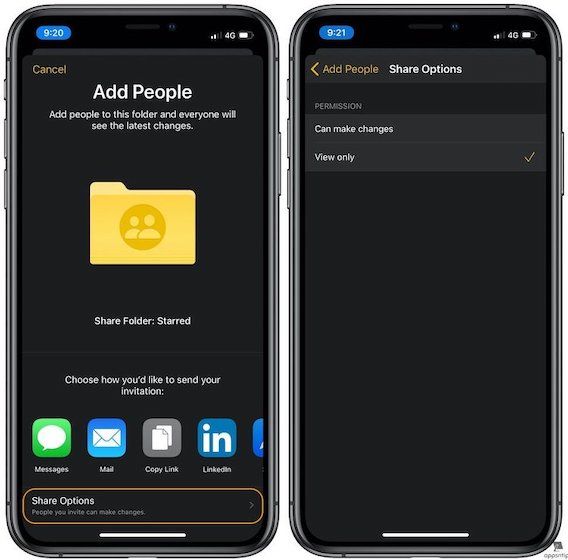
Another new addition to the sharing feature in Apple Notes is the ability to manage permissions or privileges. Previously, once you shared a note with someone, they had all the access and could easily edit the notes. In iOS 13 and macOS Catalina, now when you share a note or a folder, you can choose to grant read only privilege which ensures that the other party can view the note but cannot edit it. Here is how you can grant read only privileges in Apple Notes app.
- The process is pretty simple. Once you are in the Share Sheet, just tap on the "Share Options" button at the bottom. Here select the "View Only" option and you are done.
Sharing Apple Notes Folder in macOS Catalina
Sharing a folder in Apple Notes in macOS Catalina is pretty straight forward. Just launch the Notes app and follow the below steps.
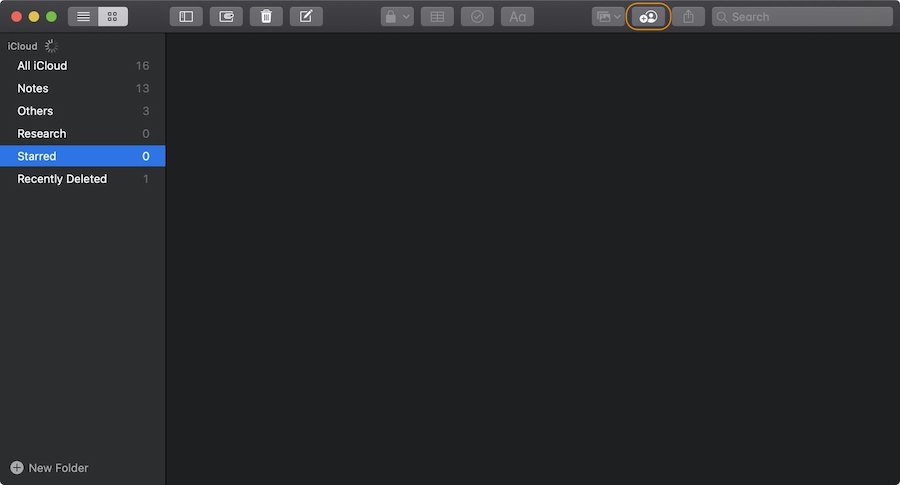
1. Click to select the folder you want to share and then click on the Share button at the top.
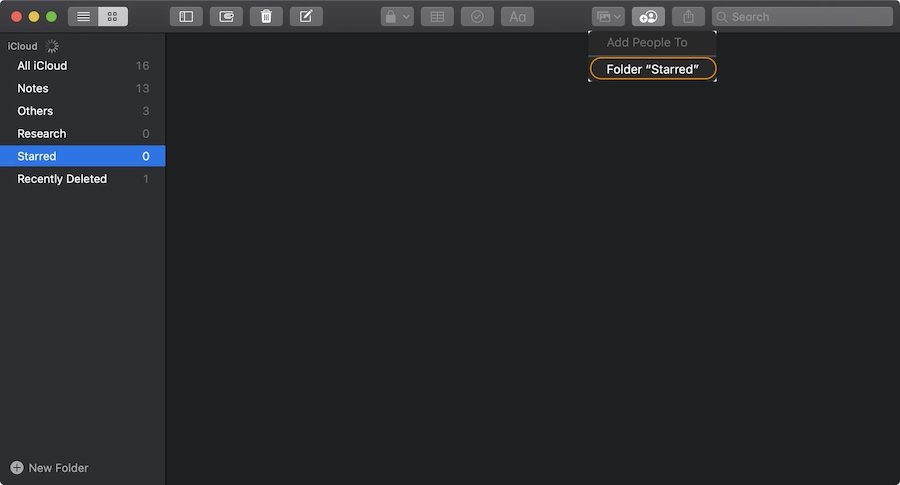
2. Now, click on the name of the folder and it will open the Share Sheet.
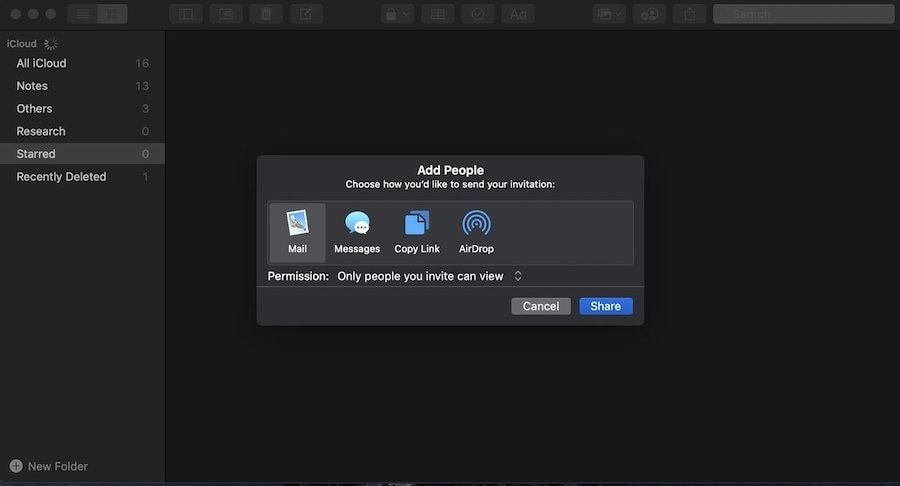
3. Click on the drop-down arrow button to select your sharing preferences. This is where you will choose whether you want to grant editing or view only permissions.
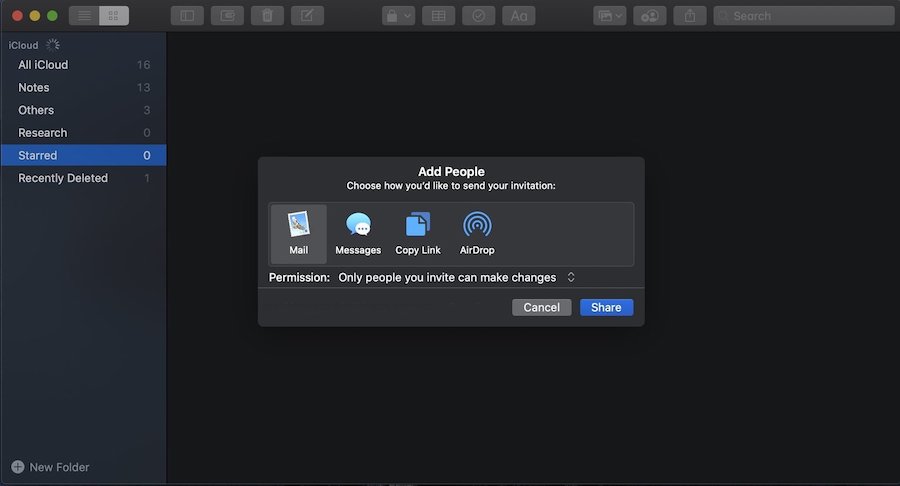
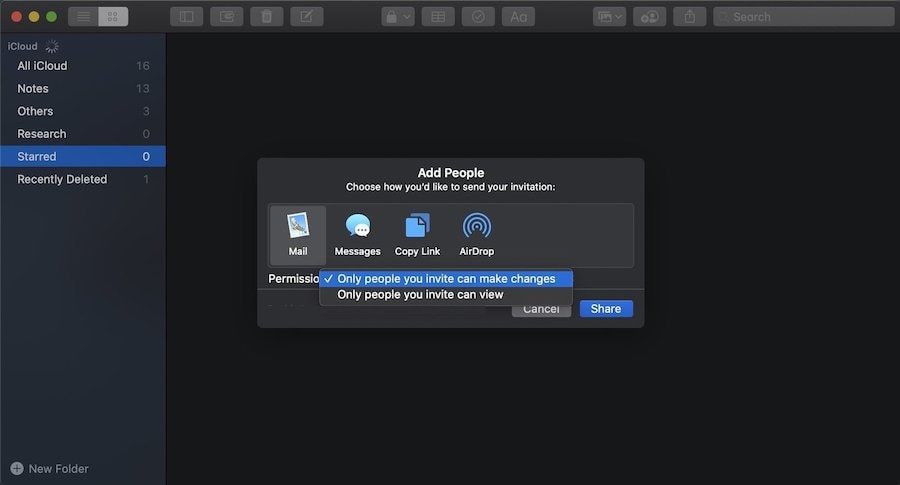
4. The last step is to choose the method you want to use to share the folder. Once you decide, click on the Share button to share the notes folder.
Sharing Apple Notes Folder in macOS Catalina and iOS 13: Final Thoughts
Apple has made it easy to share folders in Notes app both in iOS 13 and macOS Catalina. Apart from allowing the user to share folders in notes, Apple has allowed them to grant read only privilege which was not present in the previous versions of the Notes app. Notes App is also bringing tons of other new features and we will be publishing new tutorials covering those. Don’t forget to follow us on Twitter to receive notifications for every new article.


