How to Set up Menstrual Cycle Tracking in Apple Health in iOS 13

One of the biggest health-related features coming with iOS 13 is the new menstrual cycle tracking in the Apple Health app. Apple launched this feature as a new addition to the growing health-related aspect of the Apple Watch. However, even if you don’t have an Apple Watch, you can set up cycle tracking in the Apple Health app. This is big news for women as the most popular period tracking apps on the App Store were found to sell users’ data for profit. The Vice reported this back in May 2018 and the reports of more and more apps doing the same have come out since then.
Just thinking about my most private data getting shared for profit sends a shiver down my spine and hundreds of thousands of women if not millions had to suffer this as there was no safer alternative. With Apple launching the “Cycle Tracking” feature as part of iOS 13 and watchOS 6, now at least iPhone users can track their periods without the fear of their data being sold. In this article, we will show you how you can set up the menstrual cycle tracking feature in iOS 13 on your iPhone.
Setting up Cycle Tracking in iOS 13 on Your iPhone
The new cycle tracking feature in Apple Health app is extensive and lets you not only track your periods but also give you period predictions based on your data, fertile window prediction, track your flow, period symptoms, and more. And Apple encrypts and protects all the data you enter here just like all your other health data. Now, let us see, how we can set up period tracking in the iPhone.
Steps to Set up Period Tracking in Apple Health in iOS 13
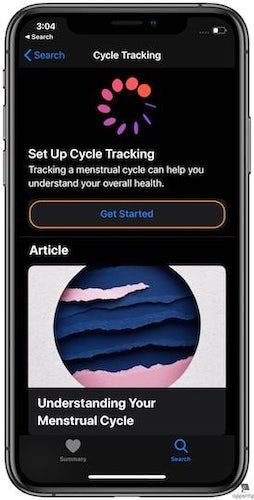
1. Launch the Apple Health App and then tap on the “Search” button marked in the picture below. Here, tap on “Cycle Tracking”.

2. On the next page, Apple will give you brief information about menstrual cycle tracking which you can read. Once ready, tap on the “Get Started” button.
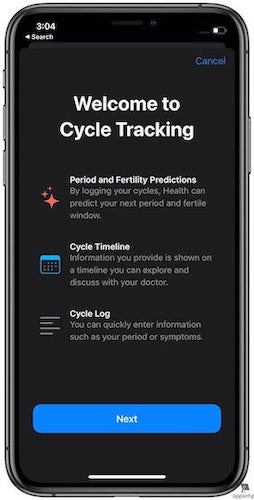
3. On the next page, Apple will give you an overview of what the App can do for you. Click on “Next” to proceed.
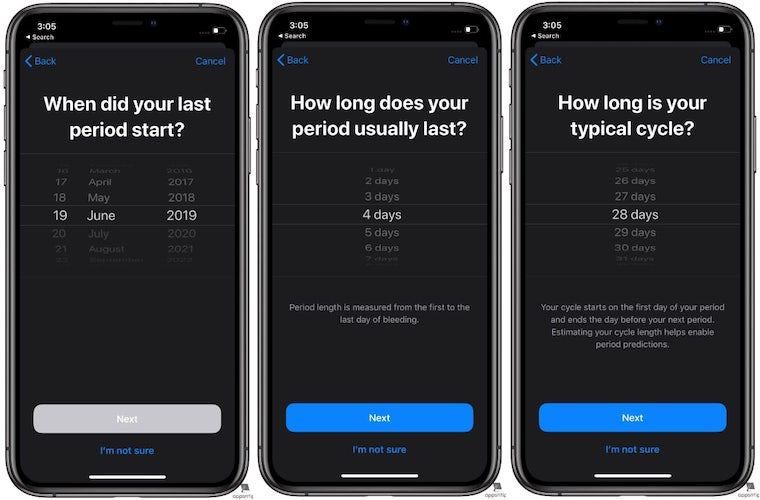
4. Now, Apple will walk you through the setup process. You will enter three key pieces of information; “When did your last period start?”, “How long does your period usually last?”, and “How long is your typical cycle?”. Enter the info to the best of your abilities and click on “Next” to proceed. Don’t fret too much as the app will correct itself once you enter current data regularly.
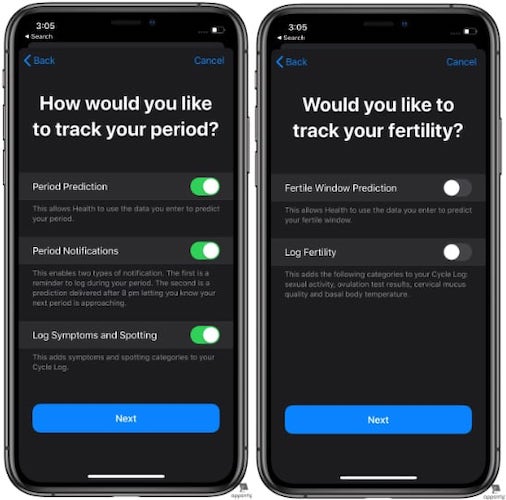
5. On the next two pages, the app will ask you about the data that want the app to track and provide you. There are five key metrics that you can track which include “Period Prediction”, “Period Notifications”, “Log symptoms and spotting”, “Fertile Window Prediction”, and “Log Fertility”. you can read a brief description of each of these metrics. Choose the ones you want to enable. Again, don’t think too much into it as you can change your decisions inside the Health app after completing the setup.
6. On the next three pages, the app will explain its chart. Solid Red represents your logged periods. Shaded Red represents upcoming periods based on predictions, and purple dots represent the days you have logged period symptoms such as headache, cramps, and more.

That ends the setup process and you can now start tracking your periods. In the next section, we will show you some key components of the app and how you can use them.
Using Cycle Tracking in Apple Health on Your iPhone
The homepage of cycle tracking in your Apple Health app is where you will find all the relevant data and the ability to add metrics. I have marked the image with different numbers which I have explained in detail below.
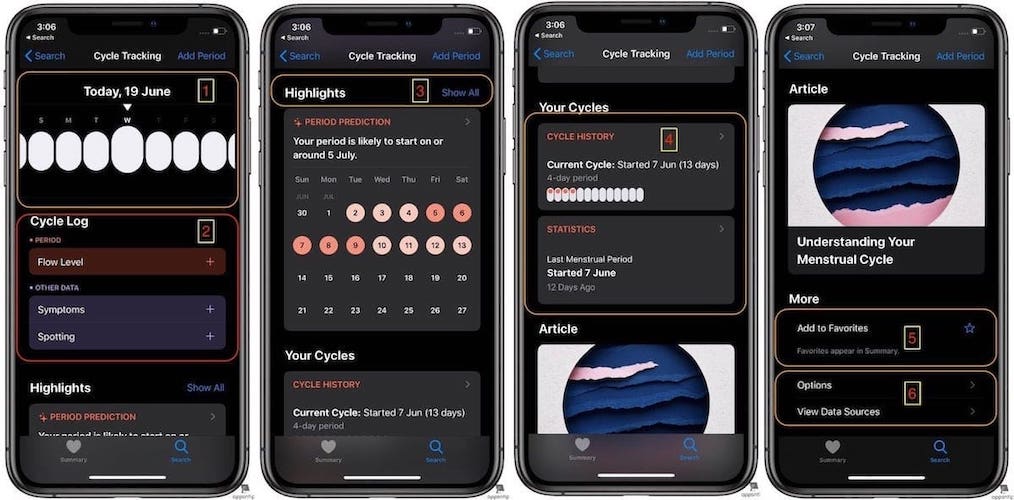
1. This is where you will see the calendar representation of the period. Remember, the three different color schemes that we discussed above. They will show up here showing you logged periods, period prediction, and logged symptoms.
2. Under the “Cycle Log” subheading, you will find three different data metrics which you can log for your periods. They include “Flow Level”, “Symptoms”, and “Spotting”. Just click on the “+” button to add your data.
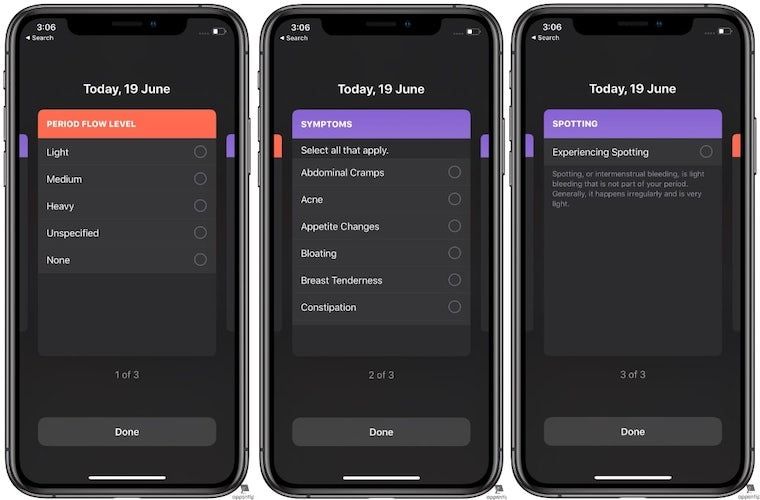
Once you click on the plus button you fill find different metrics which you can choose. For example, for flow, you can choose light, medium, heavy, unspecified, and none. You can find the included options for all the three metrics in the image below.
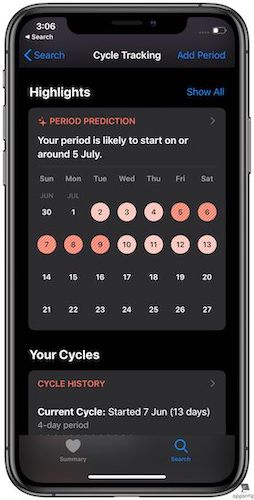
3. You can click on the “Show All” button under the Highlights section to see the highlight for the current month.
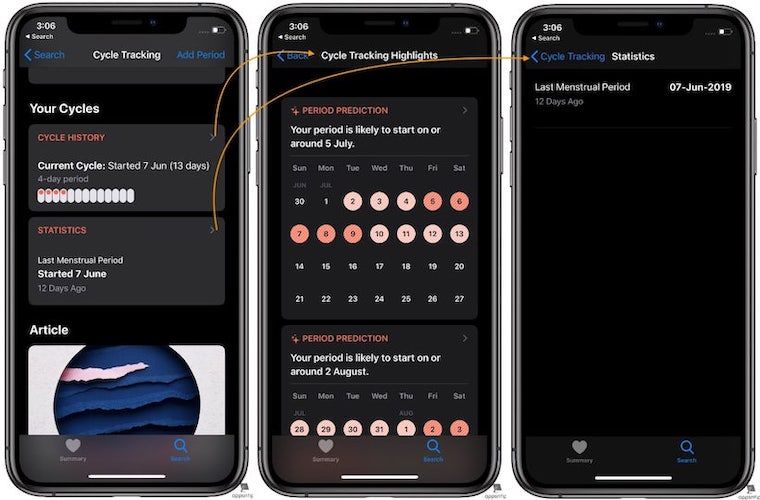
4. “Cycle History” and “Statistics” is where you can see all your past data and edit them if you want to.
5. “Add to Favorites” is what you will tap to make sure that the cycle tracking data is shown with all the other data in the “Summary” page of the health app.
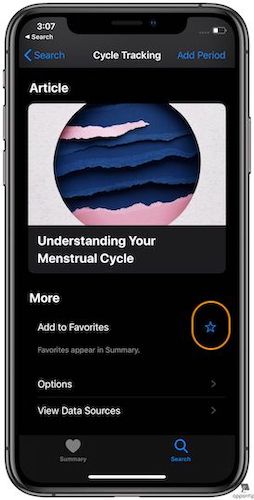
6. Options is where you will select the data you want to enter and track. It is far more inclusive than what you were presented in the setup process. So take your time to configure it to include everything that you want to track.
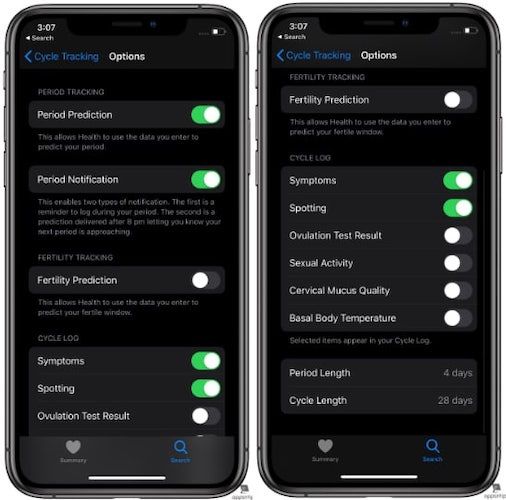
Finally, “View Data Sources” is the place where you will go to see what data points you are entering in the Health app for tracking your periods.
That is everything that you need to know about tracking your periods in the Apple Health app. If you have already updated to iOS 13, you can start tracking your periods right now. If you are waiting for the public beta or stable release, be sure to come back to this article, when you are ready-to-use Cycle Tracking feature in the Apple Health app.
Track Your Periods Privately with Apple Health in iOS 13: Final Thoughts
I am thrilled that Apple has finally released this feature. In fact, when I was covering Apple’s WWDC19 event live on Twitter, this was one feature that got the most likes and retweets. I am just happy that now women will now be able to track period and won’t have to deal with data sharing and theft. That’s all I have for this article. If you liked this article, don't forget to share this on your social media profiles.


Comments ()