How to Schedule Email Using the Default Mail App on Mac
Learn how to schedule an email using the default Mail app on Mac.

The default Mail app on Mac has been languishing for a long time. This has led users to test out third-party email apps that have leap-frogged the Mail app when it comes to features. With the new macOS 13 Ventura update, Apple has finally decided to close the gap with the competition by releasing neat features like email scheduling and Undo Send. In this article, we are going to cover the first feature. Here is how you can schedule an email using the default Mail app on Mac.
Schedule Email Using the Default Mail App on Mac
Like all the other Apple features, scheduling email on Mac using the default Mail app is very easy once you learn it. Note that you will have to update your Mac to the macOS 13 Ventura to utilize this feature.
1. Use Spotlight to launch the Mail app on your Mac.

2. Click on the compose button to start a new email.

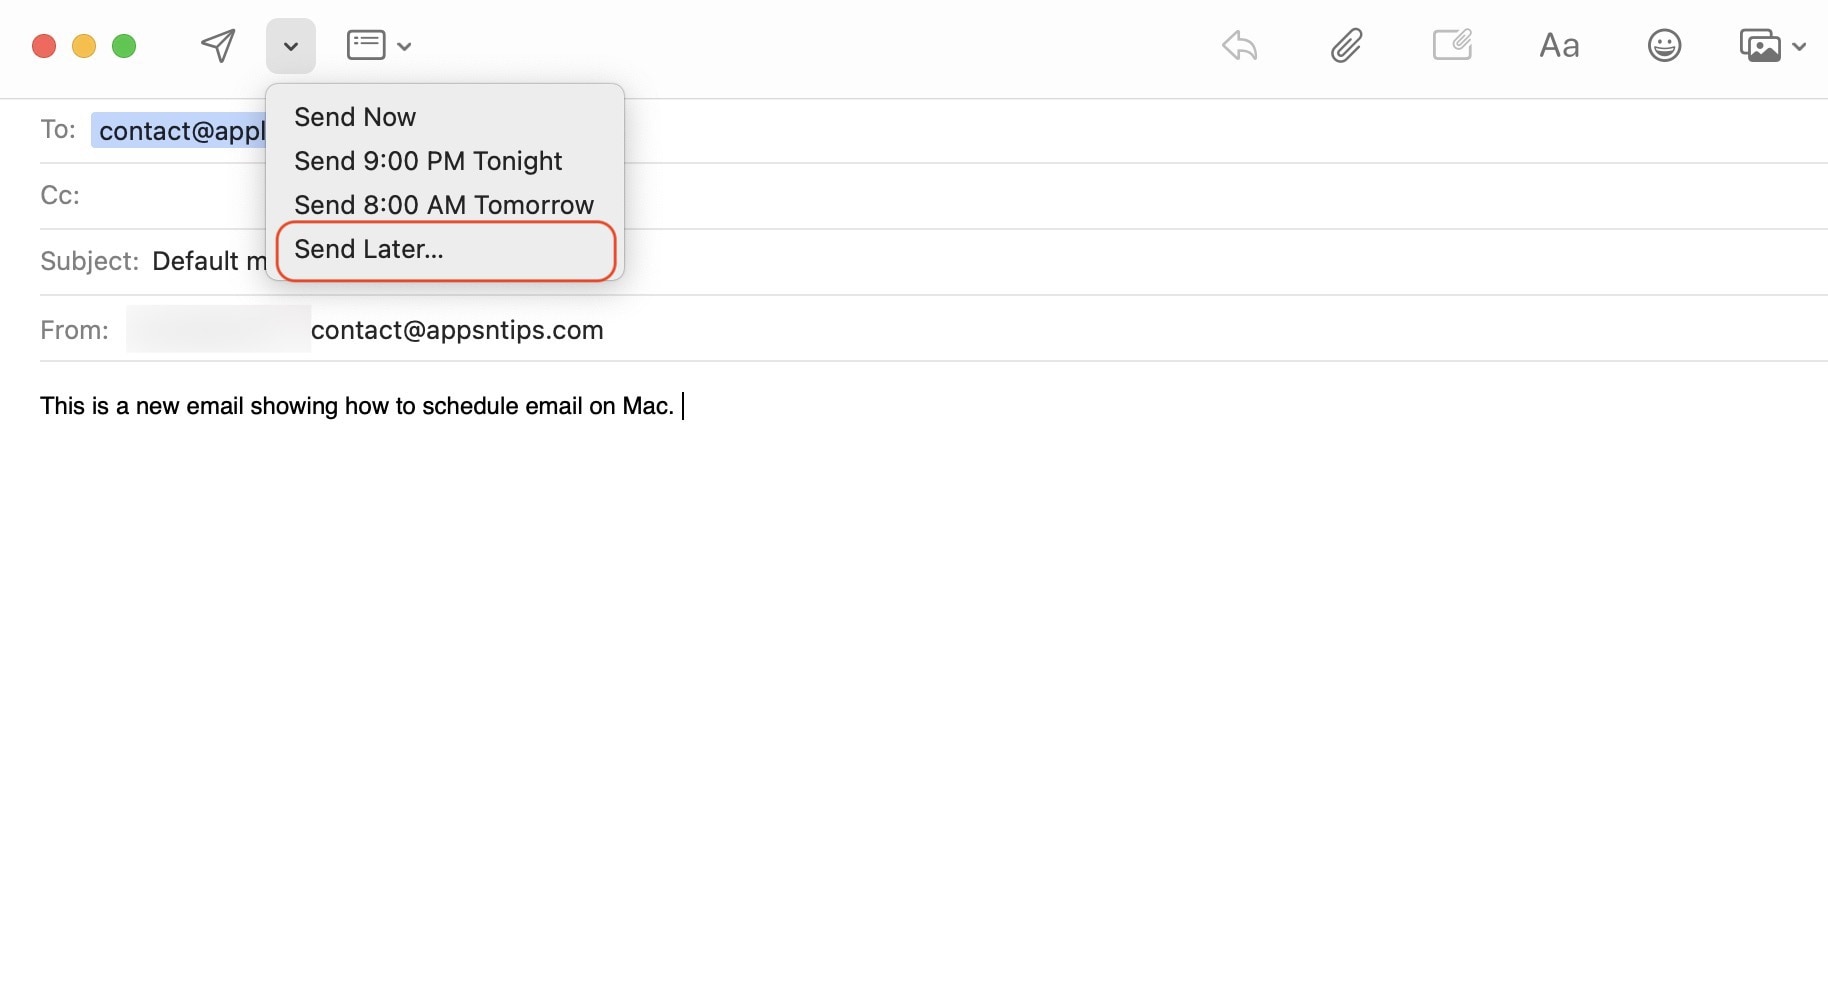
3. When you want to send the email, click on the dropdown menu next to send mail icon.

4. Select any of the suggested times or click on Send later to choose your own time.
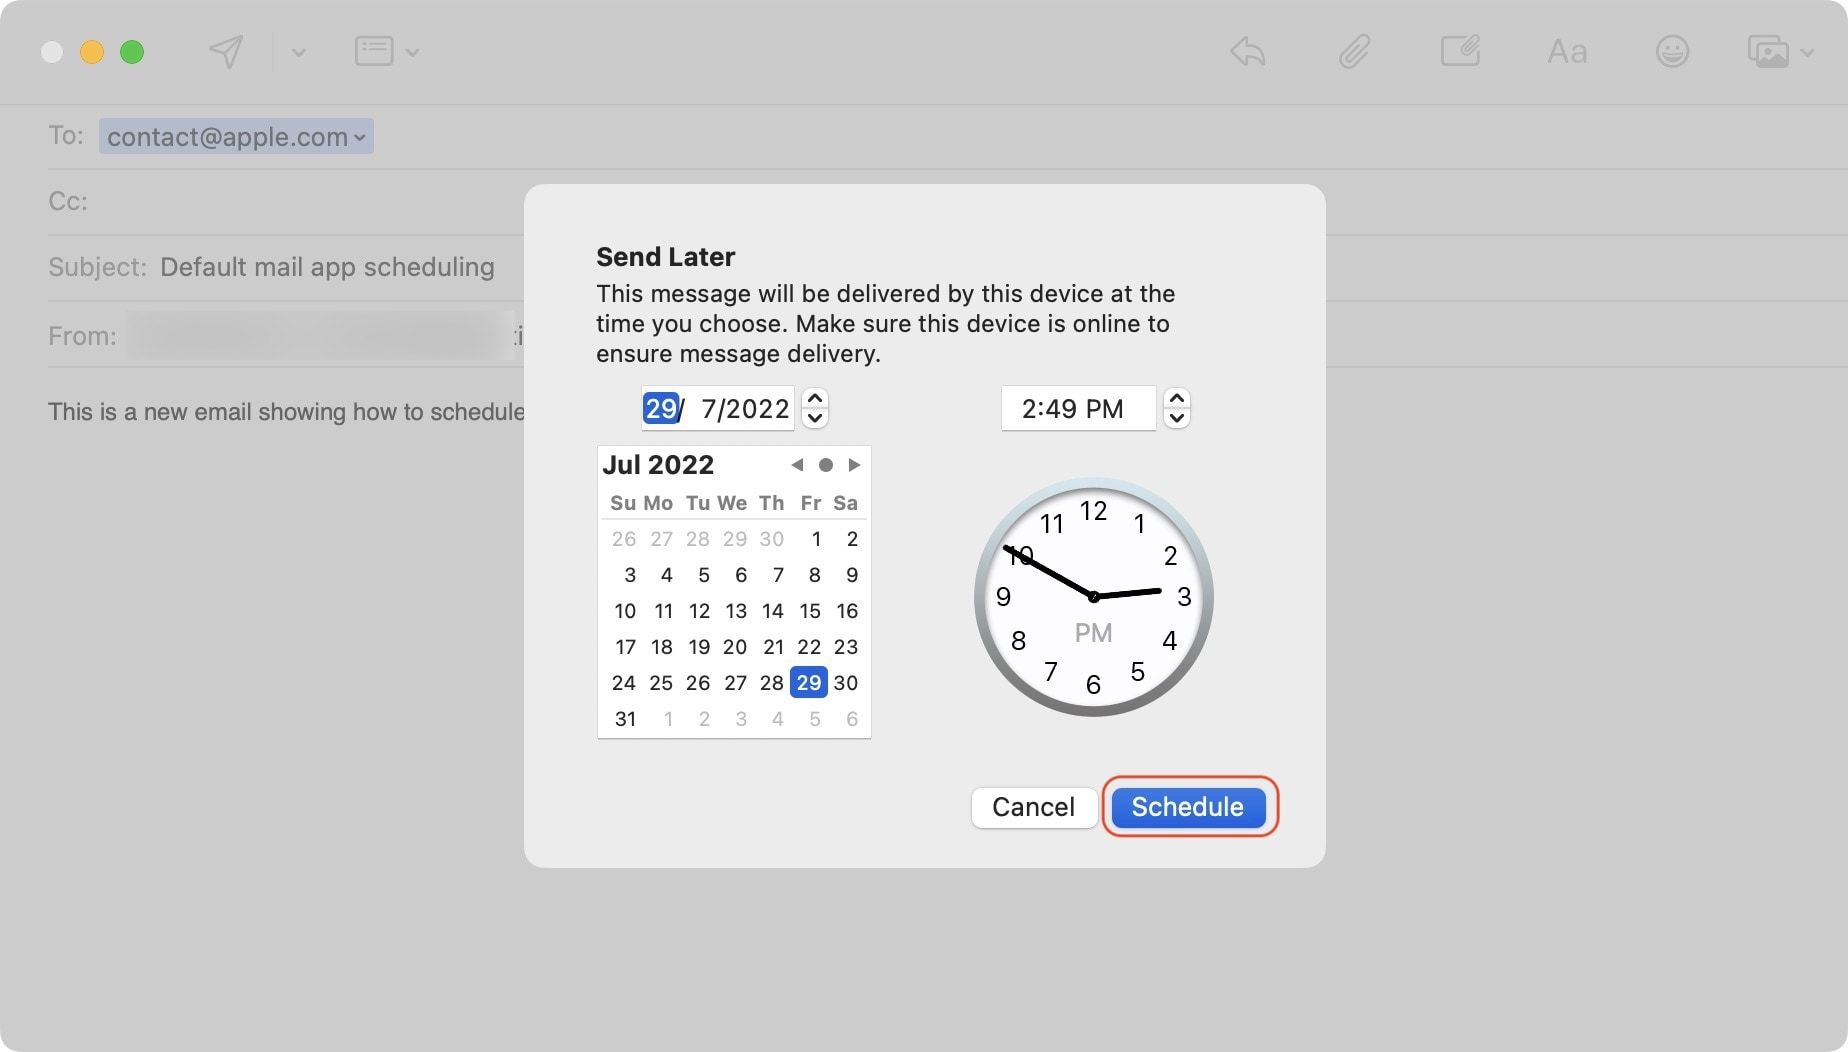
5. Set the time and date and click on Schedule to schedule the email.
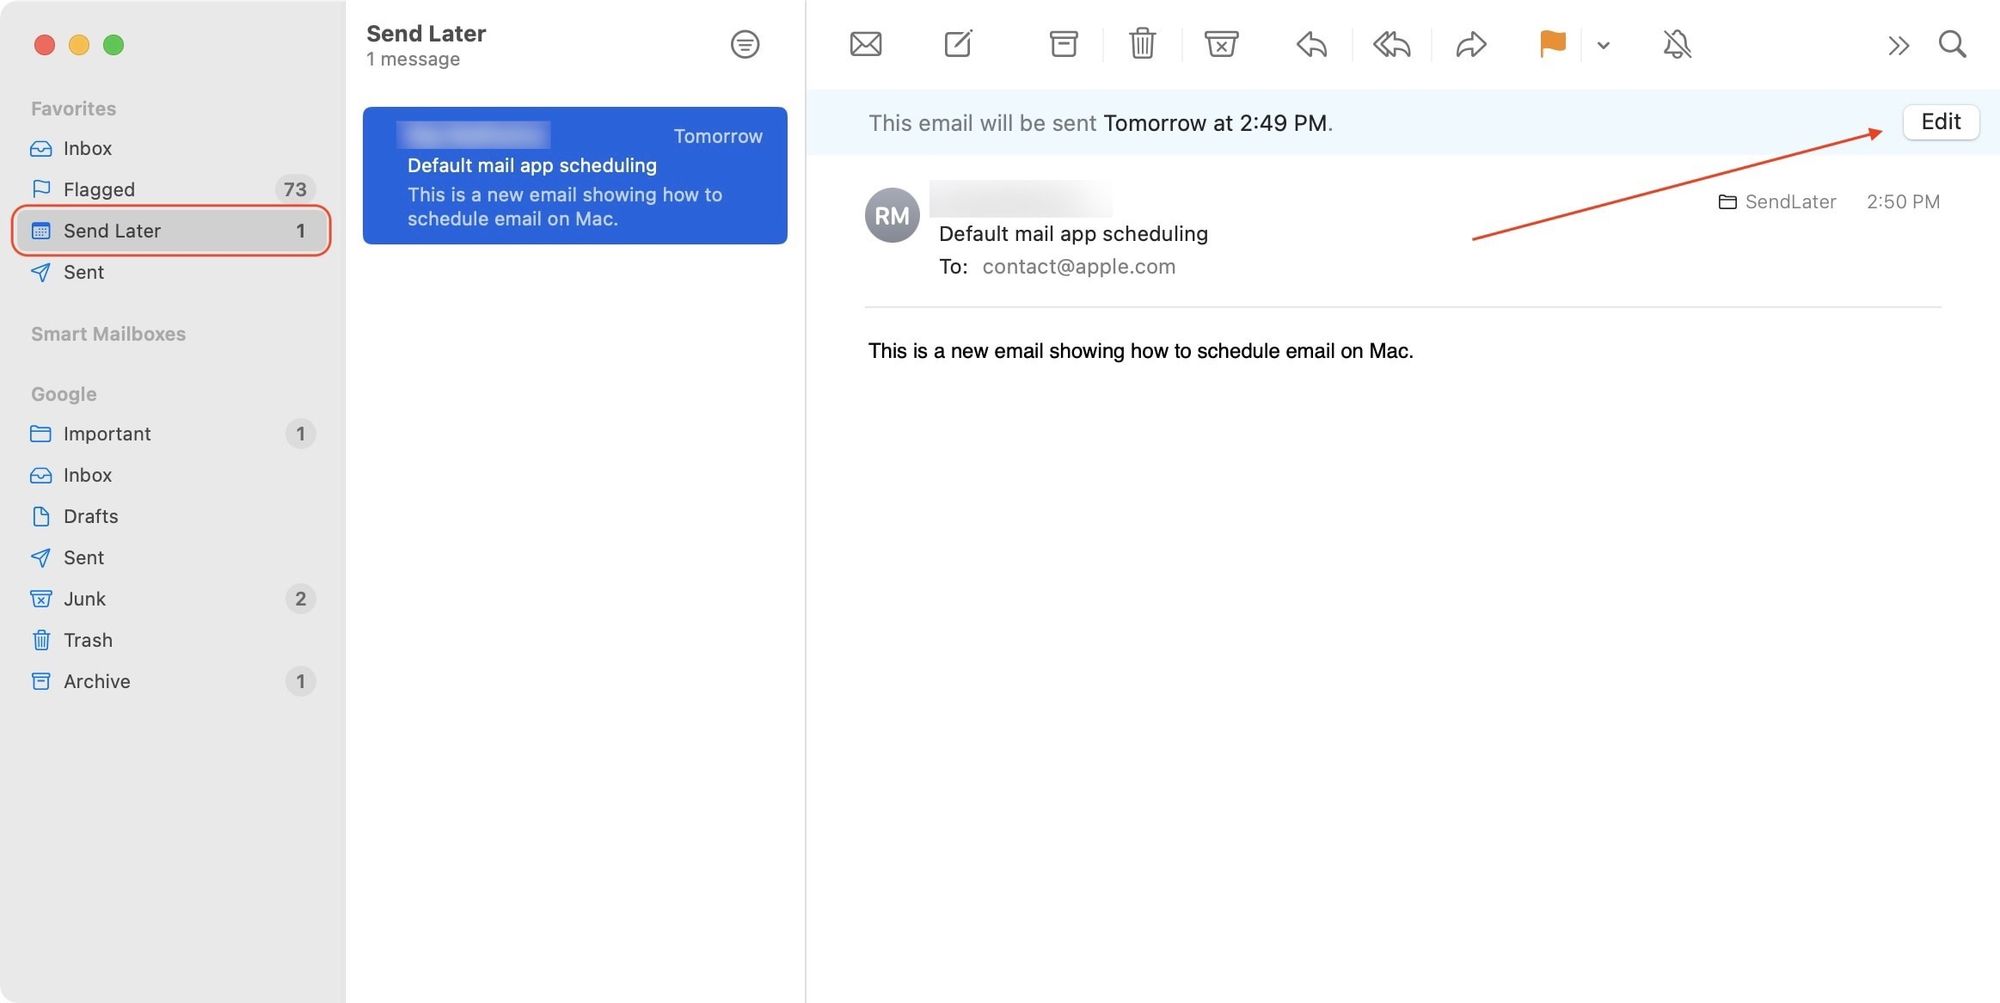
6. Your email will now appear in the Send Later section. You can change the scheduled time by clicking the Edit button.
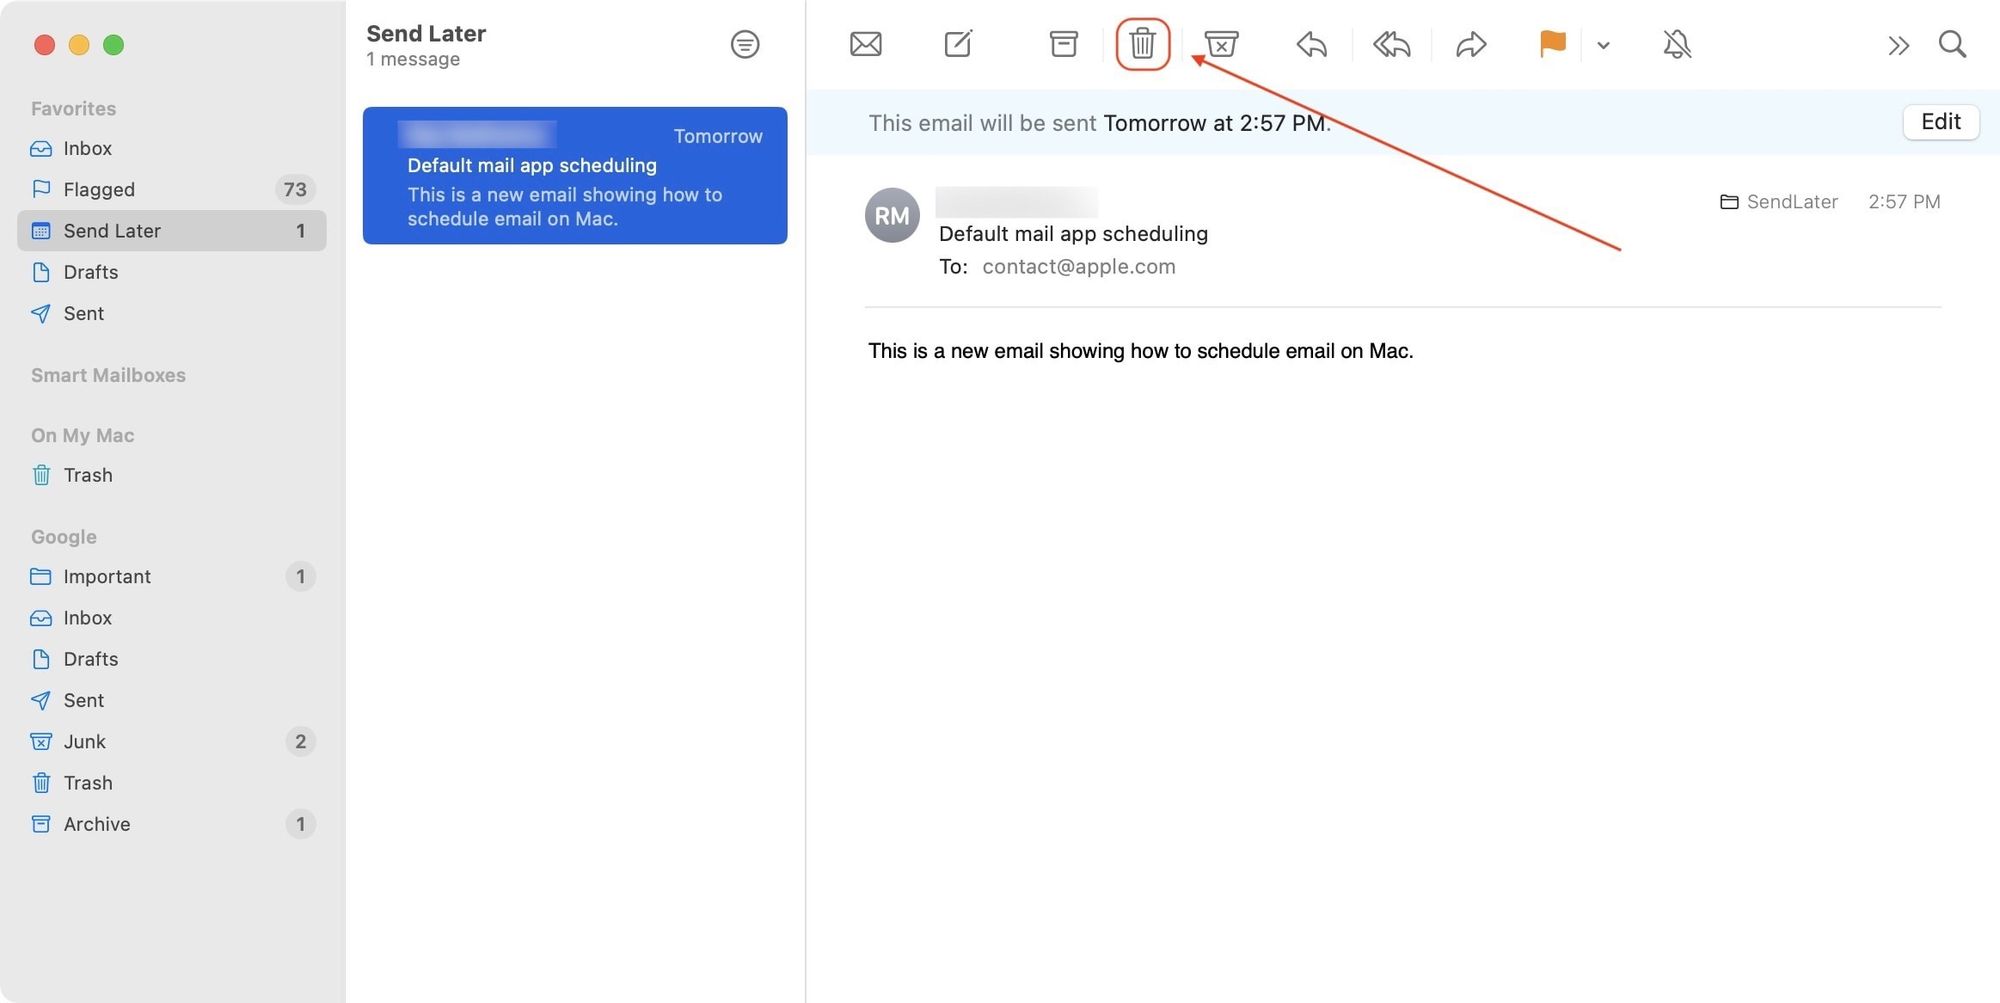
7. To cancel the email, simply click on the Delete button to delete the email.
Use the Mail app to schedule email on Mac: final thoughts
So that is how you can use the default Mail app to schedule email on your Mac. If you liked this article, check out articles on editing and un-sending messages and using Stage Manager. Both features are coming with the new macOS Ventura update. If you want to keep on top of these articles, do not forget to follow us on Twitter to get notified whenever a new article goes live.
