How to Publish from Obsidian to Ghost
Want to publish your Obsidian notes online. Here is how you can publish from Obsidian to Ghost.

In just two years, Obsidian has become one of the best note-taking apps on the market. Whether you want to take sporadic notes or want to create your personal knowledge management system, Obsidian can handle it. One thing that differentiates a PKM system from a normal note-taking system is that it lets you connect ideas, synthesize new ideas, and create something new.
If you want to share your creations with the world creating a newsletter or a personal blog still is the best option. We run our website on Ghost and consider it one of the best platforms that let users share their content. The best part about Ghost is that it is highly customizable and links with all the apps of your choice. For example, you a link your Obsidian app with Ghost and directly publish your notes. Here, we will show you how easy it is to publish from Obsidian to Ghost.
Publish from Obsidian to Ghost
If you don’t know about Ghost, it’s a free and open-source content management system that offers features like a built-in membership platform, native search and comments, and more. The best part is that you don’t need to learn to code if you are happy with their native templates, which will be more than enough for most users.
If you go for their paid plans (which start as low as $9/month), you don’t even have to worry about hosting, SSH certificates, and everything else that requires technical knowledge. You can sign up for the service and get started. We loved the platform so much that we moved our website from Squarespace to Ghost, back in 2020. Most of the problems we had with Ghost when switching back in 2020 have been resolved. For example, the Ghost platform now offers native comment and search integration.
With all that said, let’s get to our guide and see how you can publish your Obsidian notes and share them with the world. First, we will set up Obsidian to work with Ghost. Then we will see how publishing from Obsidian to Ghost works.
Set up Obsidian to publish notes on Ghost
To set up Obsidian to work with Ghost we will use a community plugin and Ghost’s built-in custom integration feature. Here are the steps you should follow to connect your Obsidian app with Ghost.
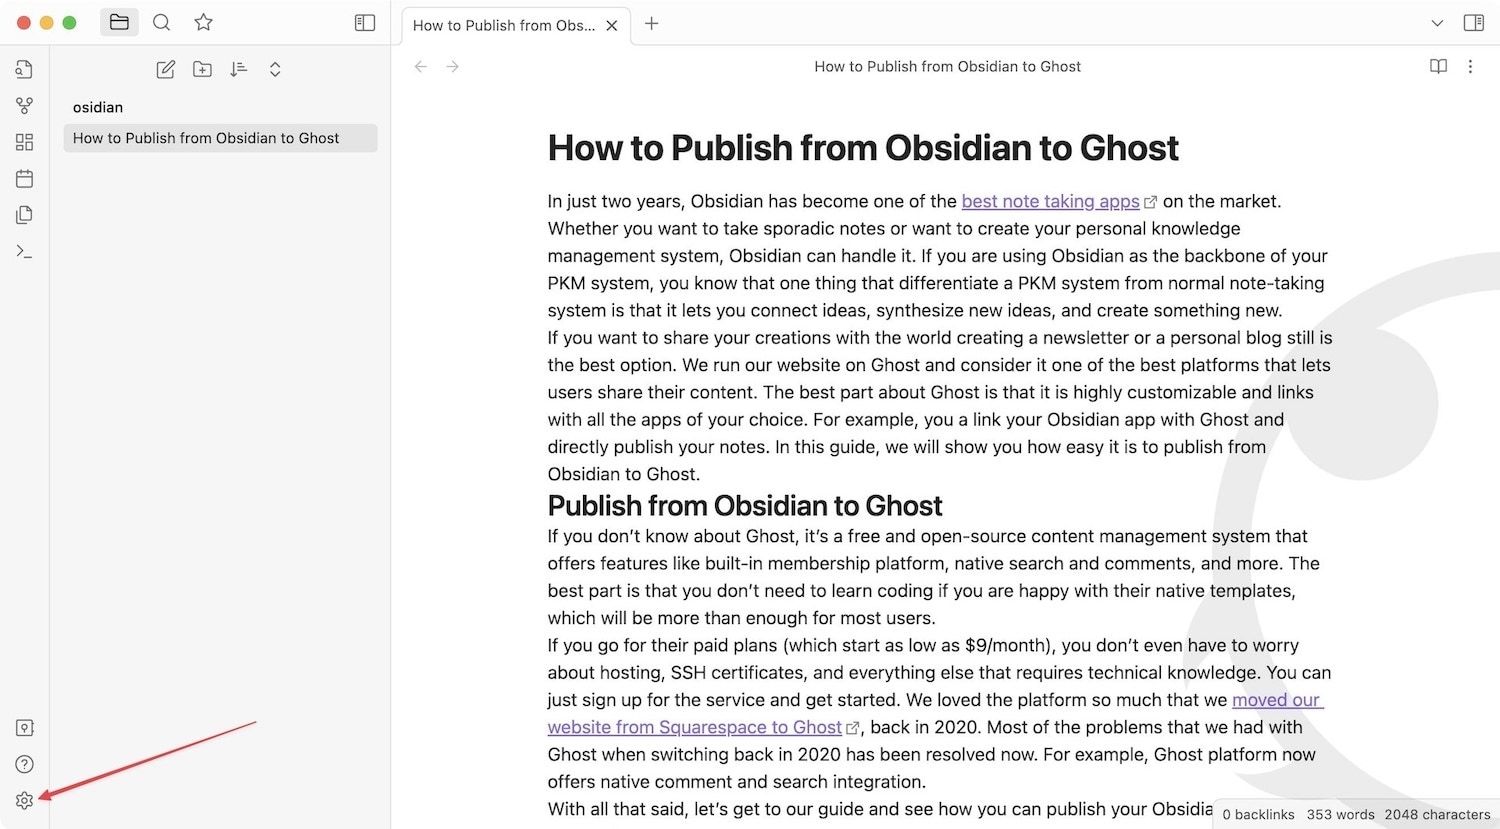
1. Launch the Obsidian app on your computer and click the Settings button.
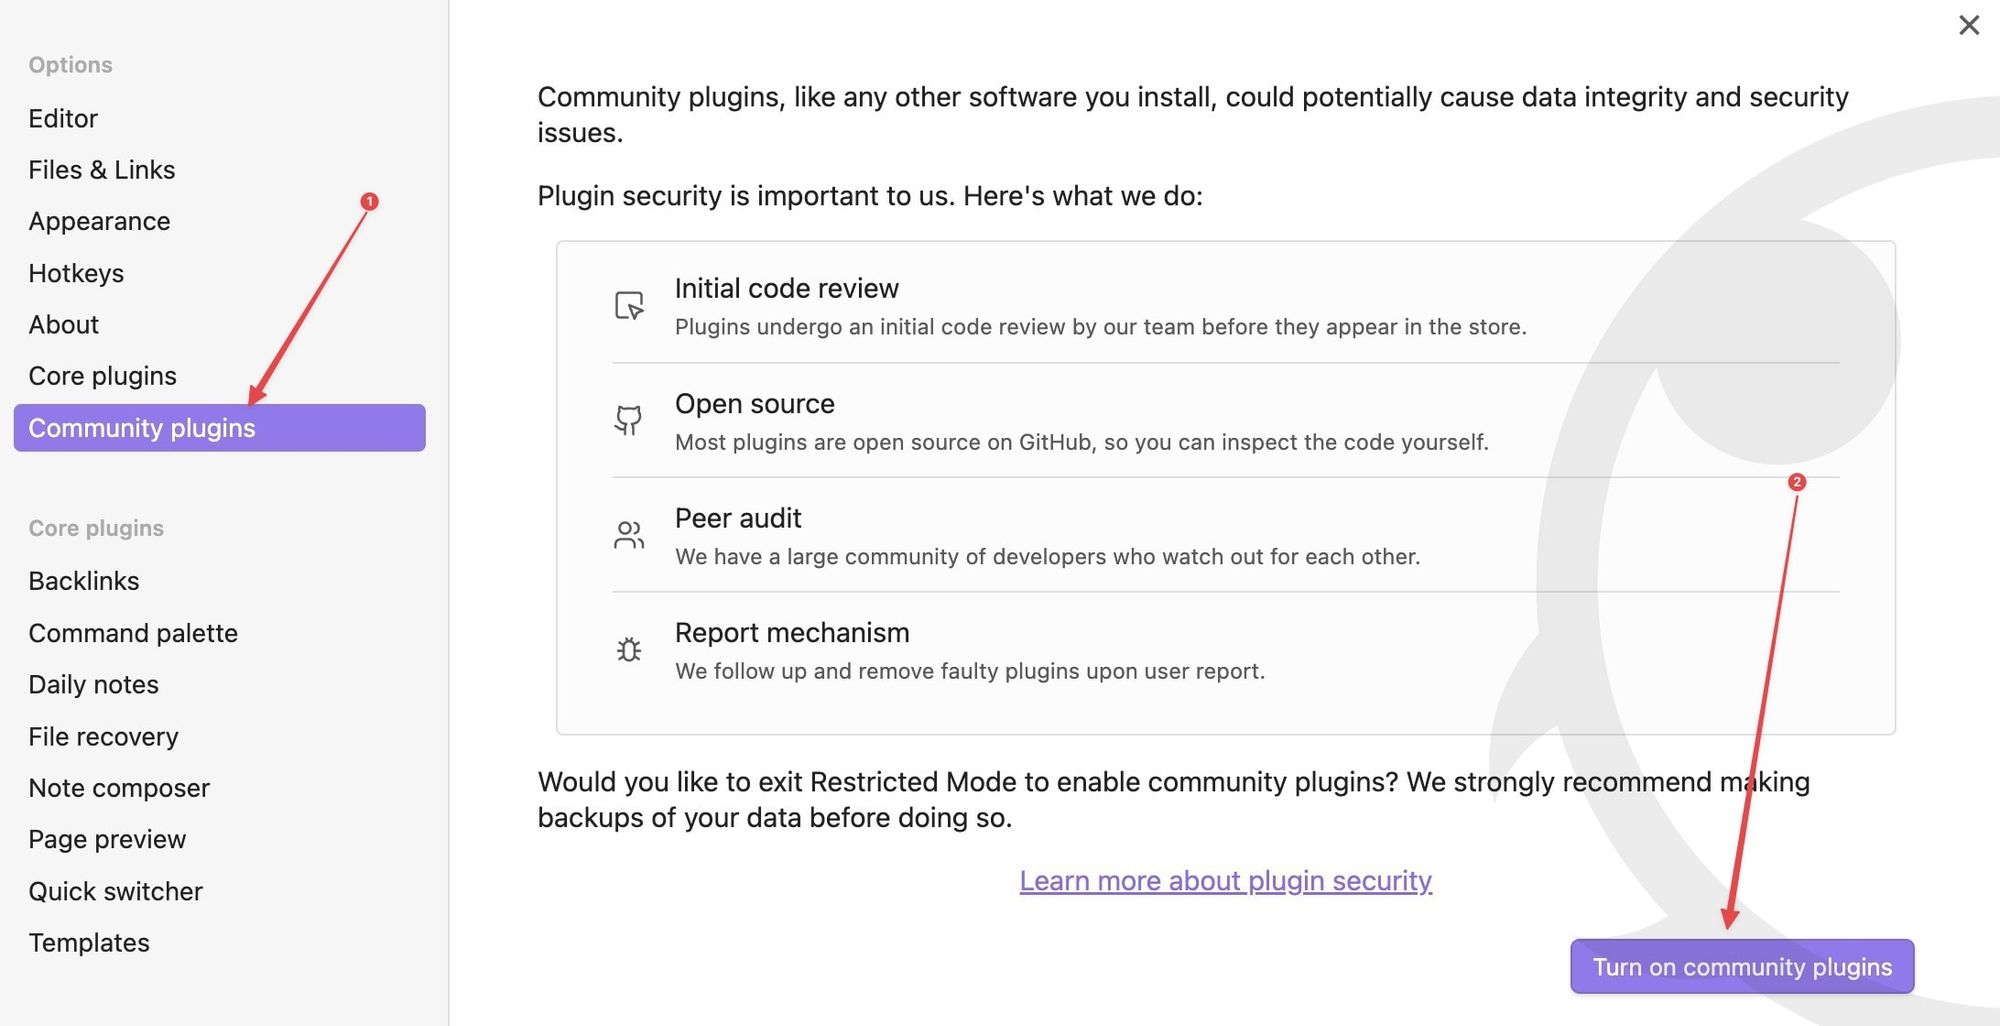
2. Most of you will already be using community plugins with your Obsidian vault. However, if you don’t, open the Community plugins setting and click the Turn off community plugins button.
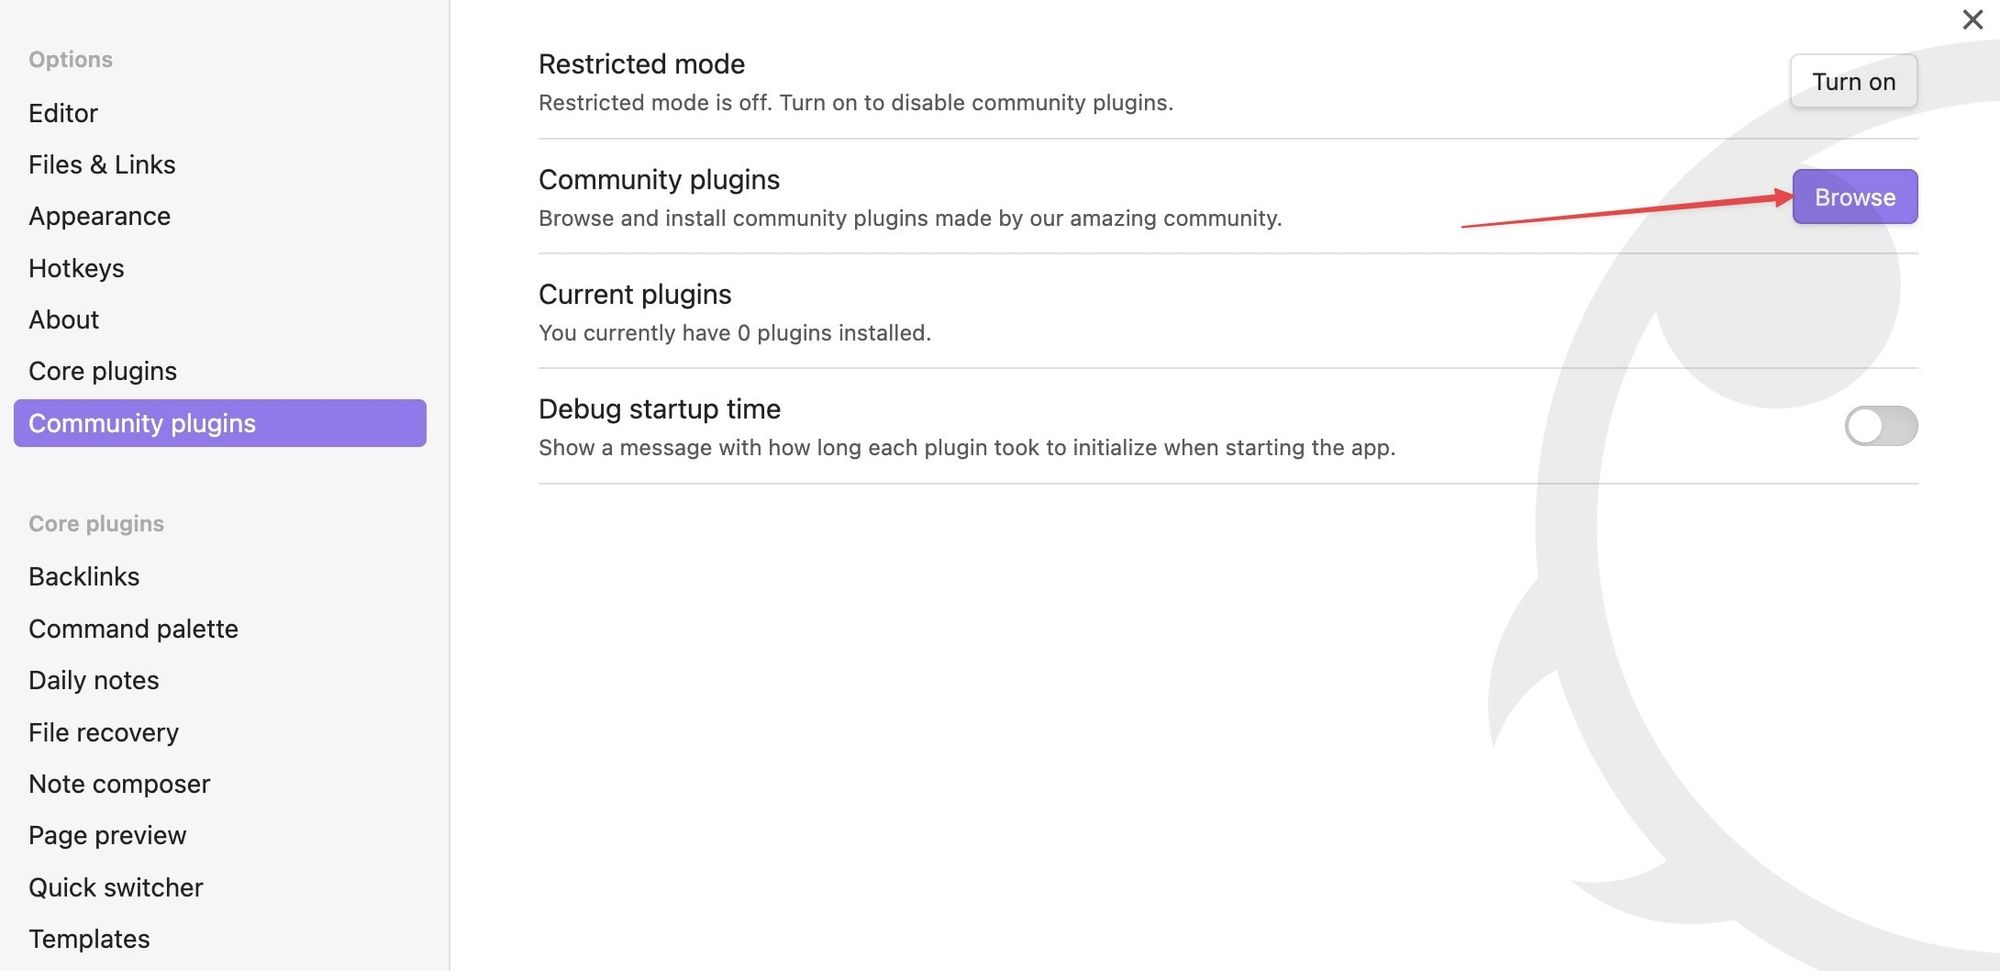
3. Click the Browse button and search for Ghost.
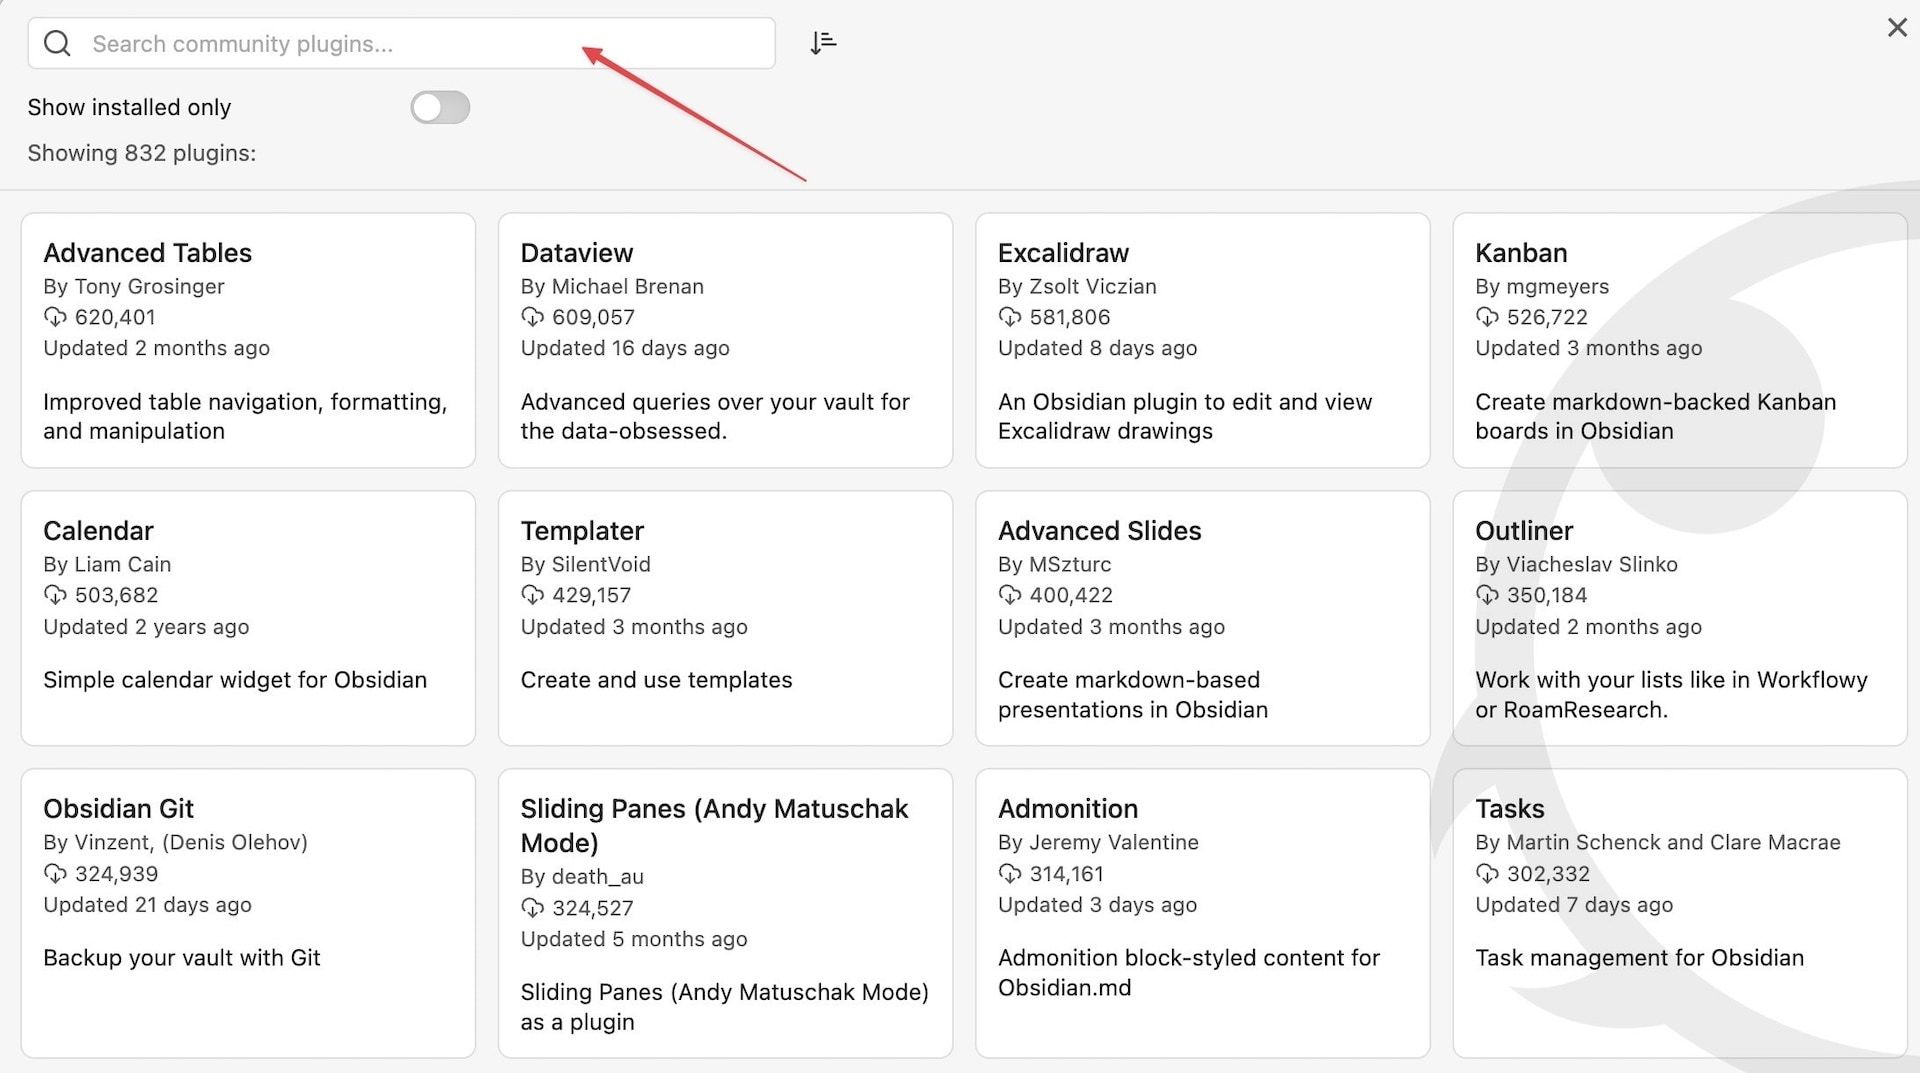
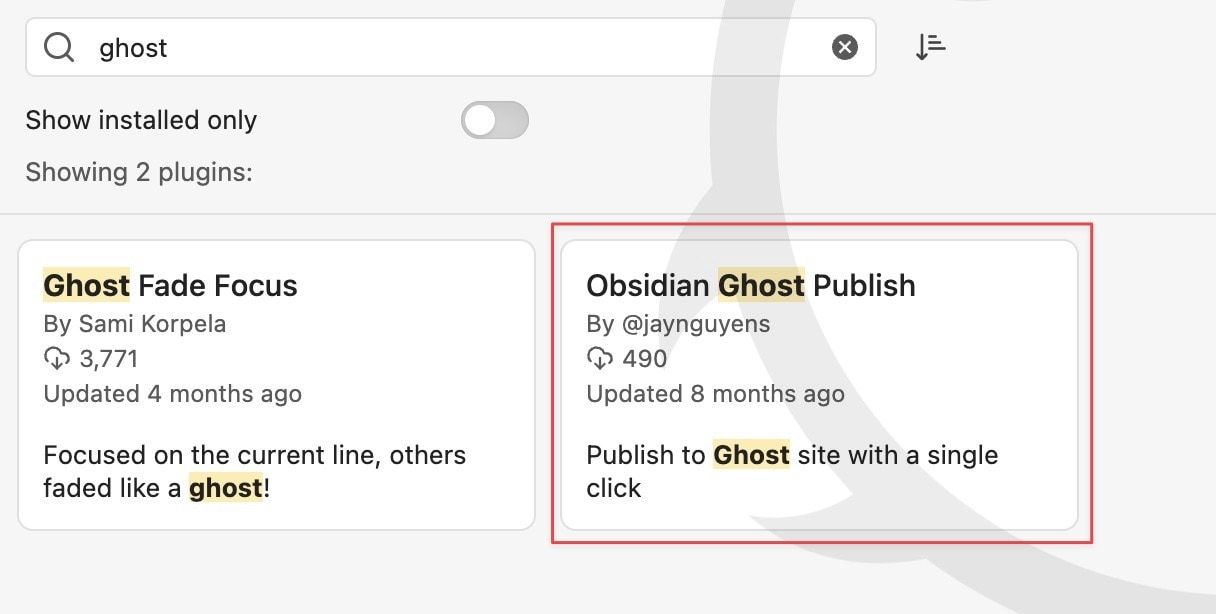
4. Click on the Obsidian Ghost Publish plugin and use the Install button to install it.
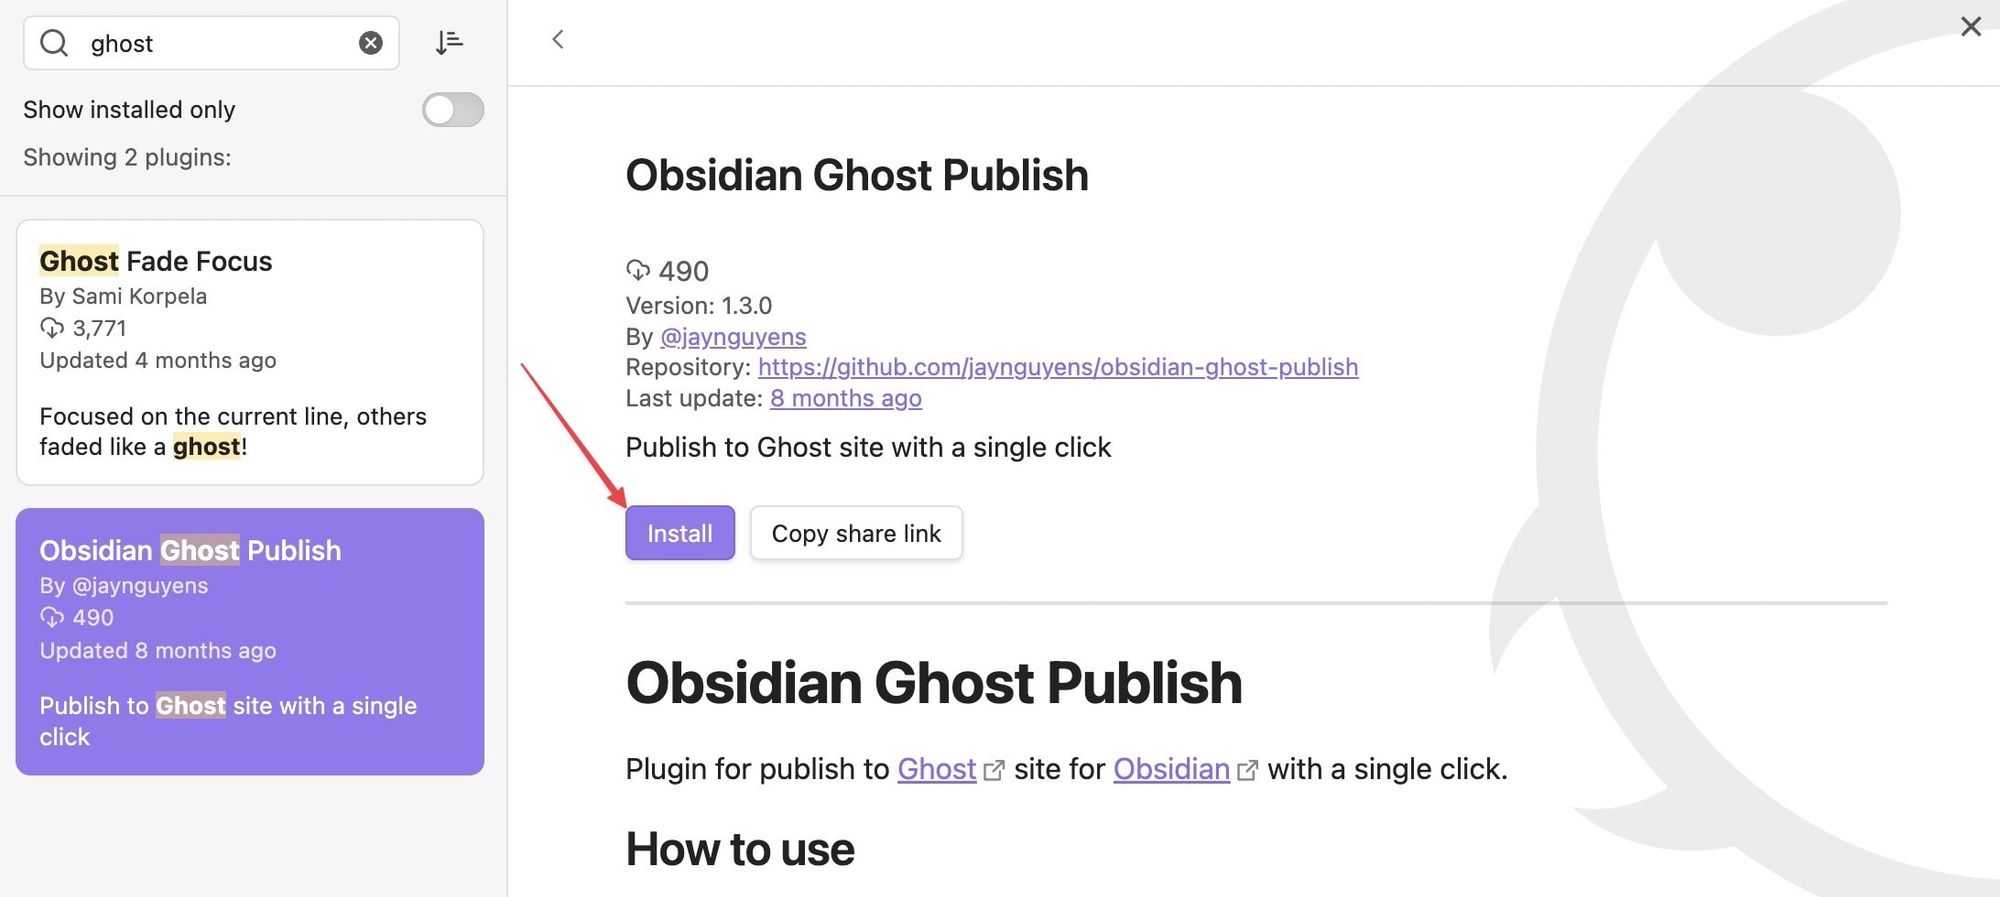
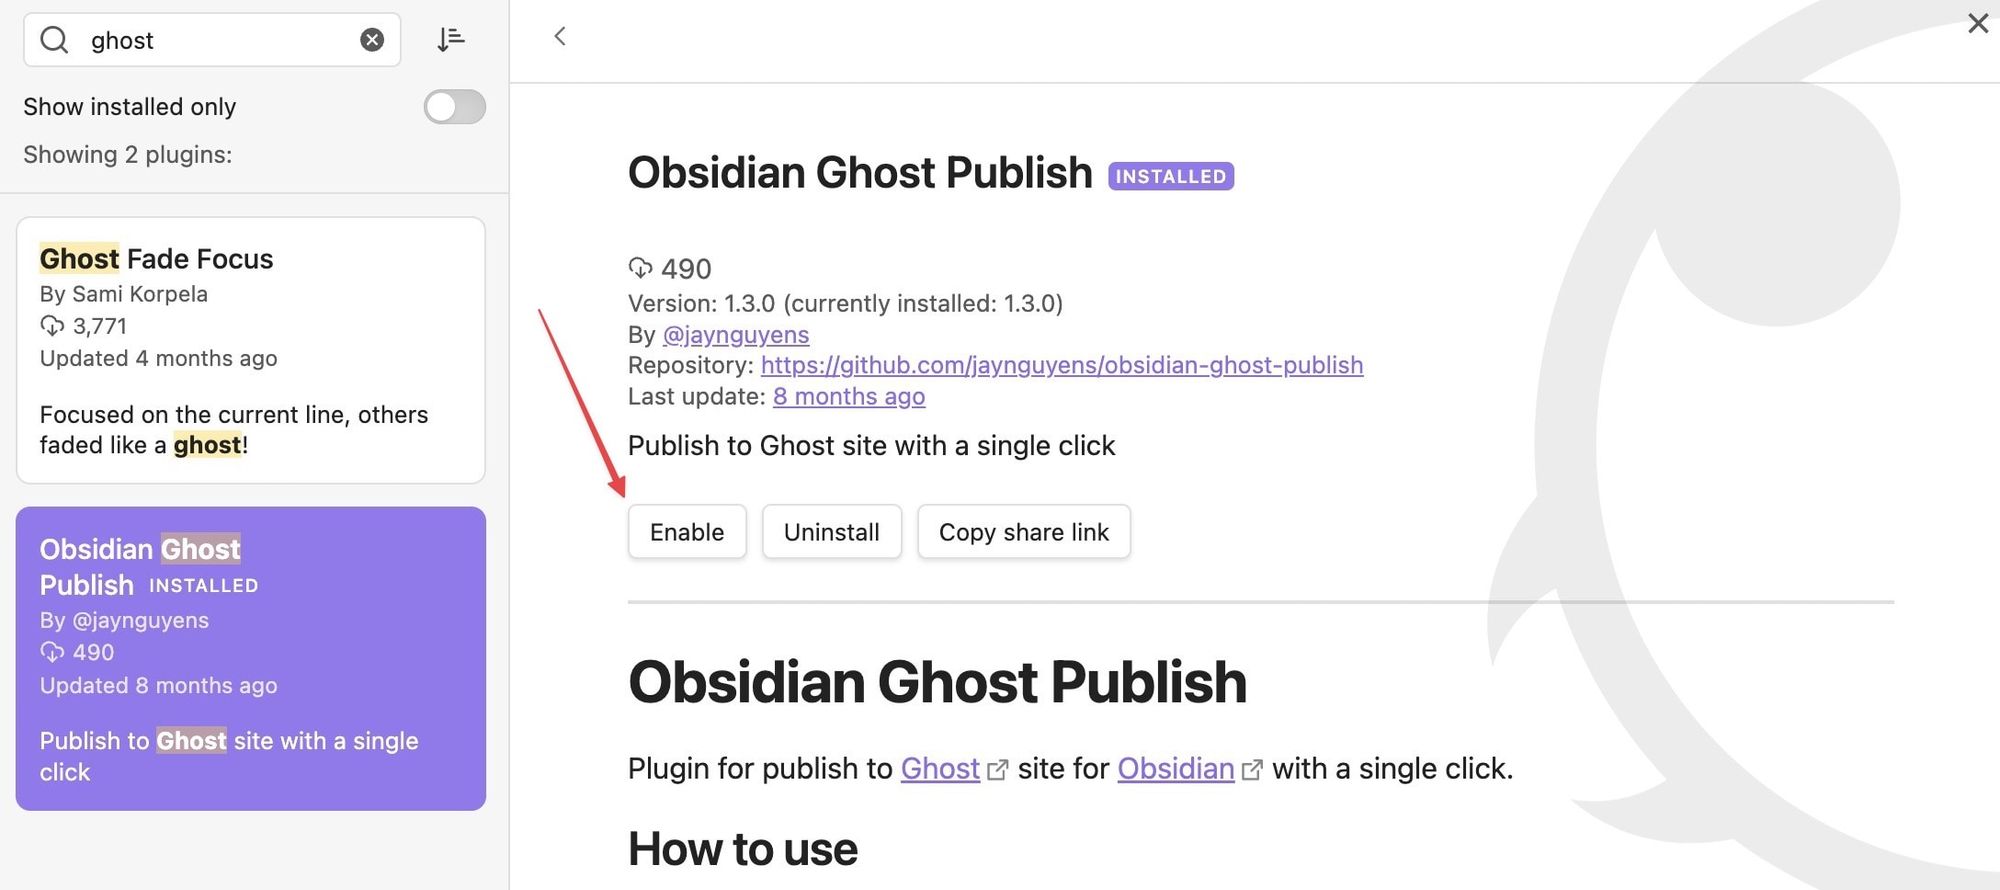
5. Click the Enable button to enable the plugin and then click the Options button.
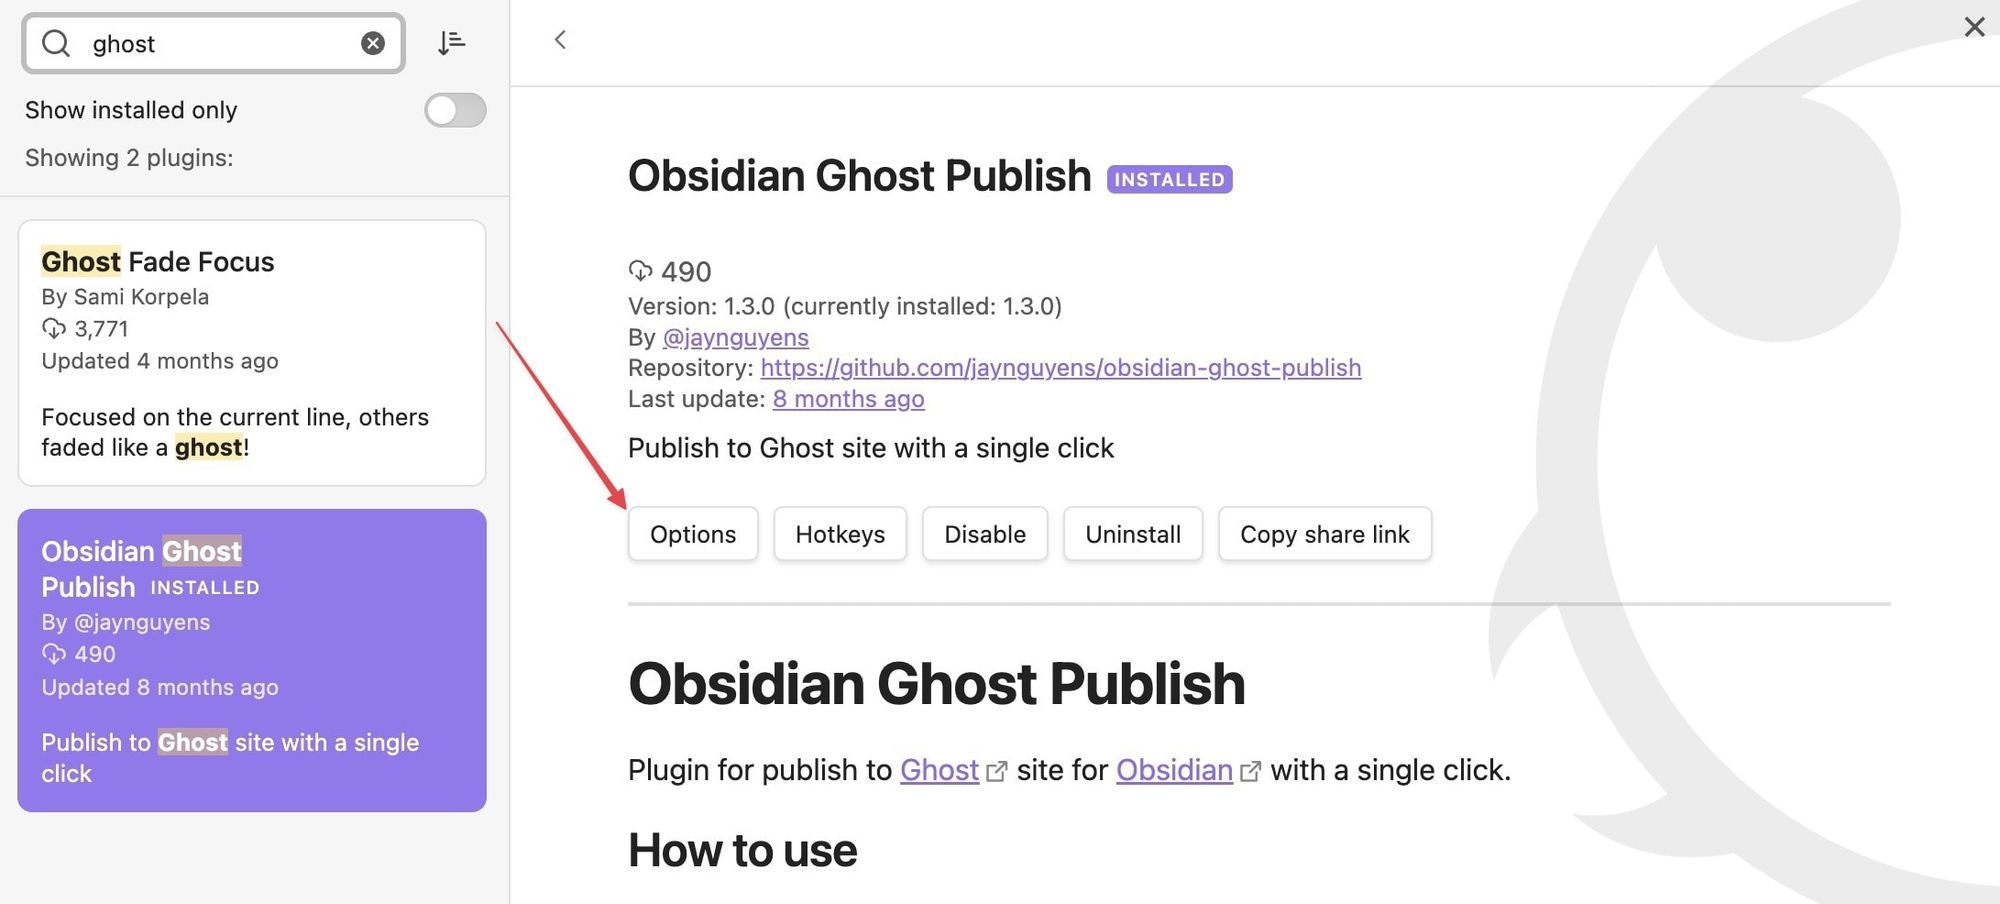
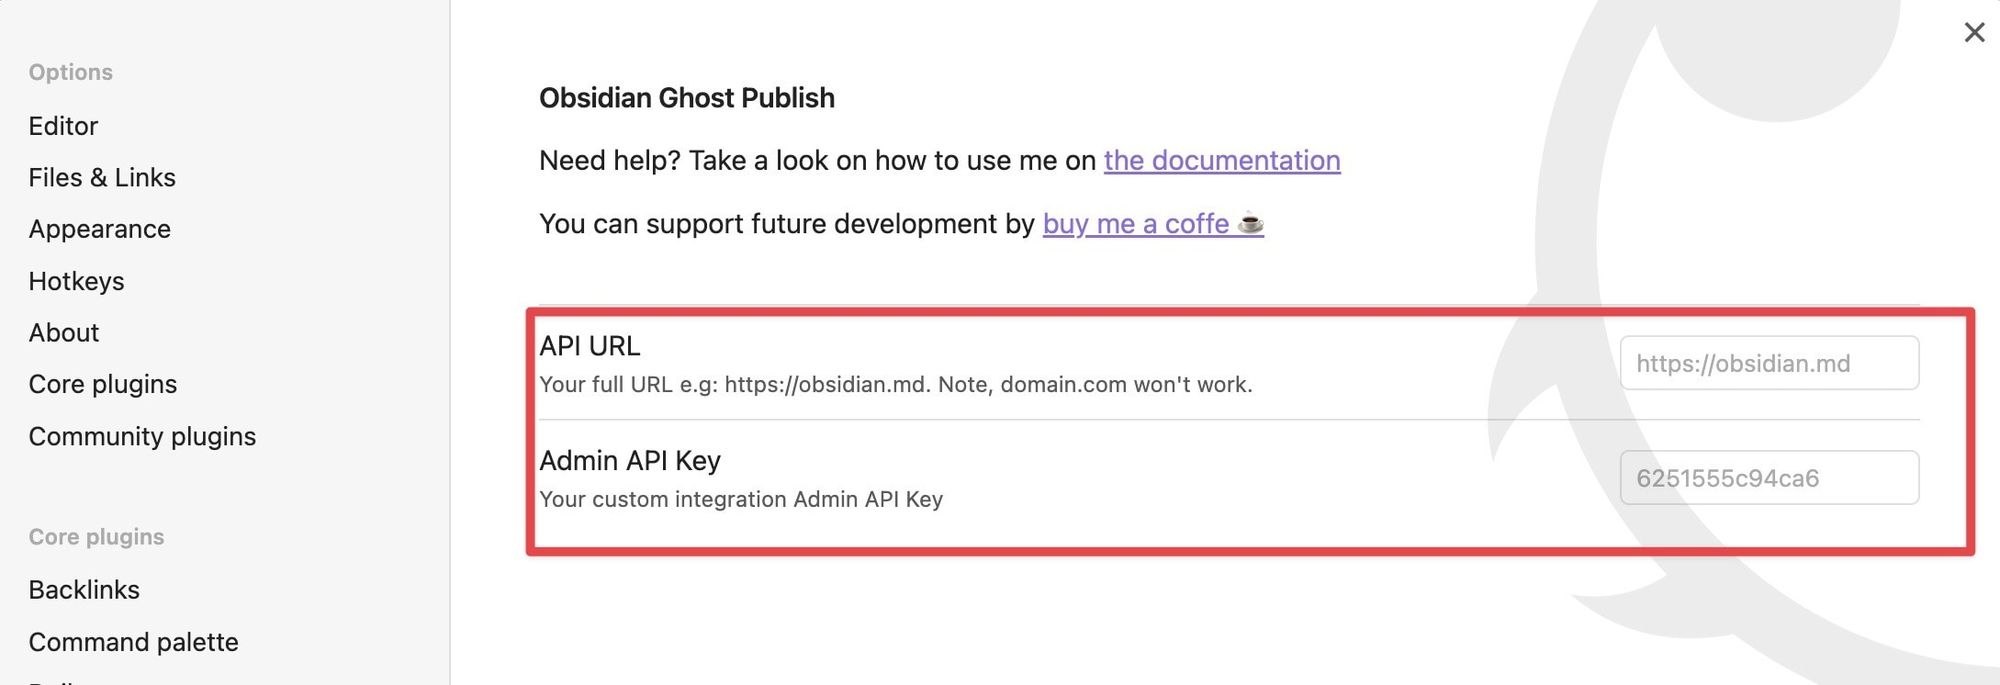
6. As you can see, you now need the API URL and Admin API Key to connect your ghost blog to Obsidian.
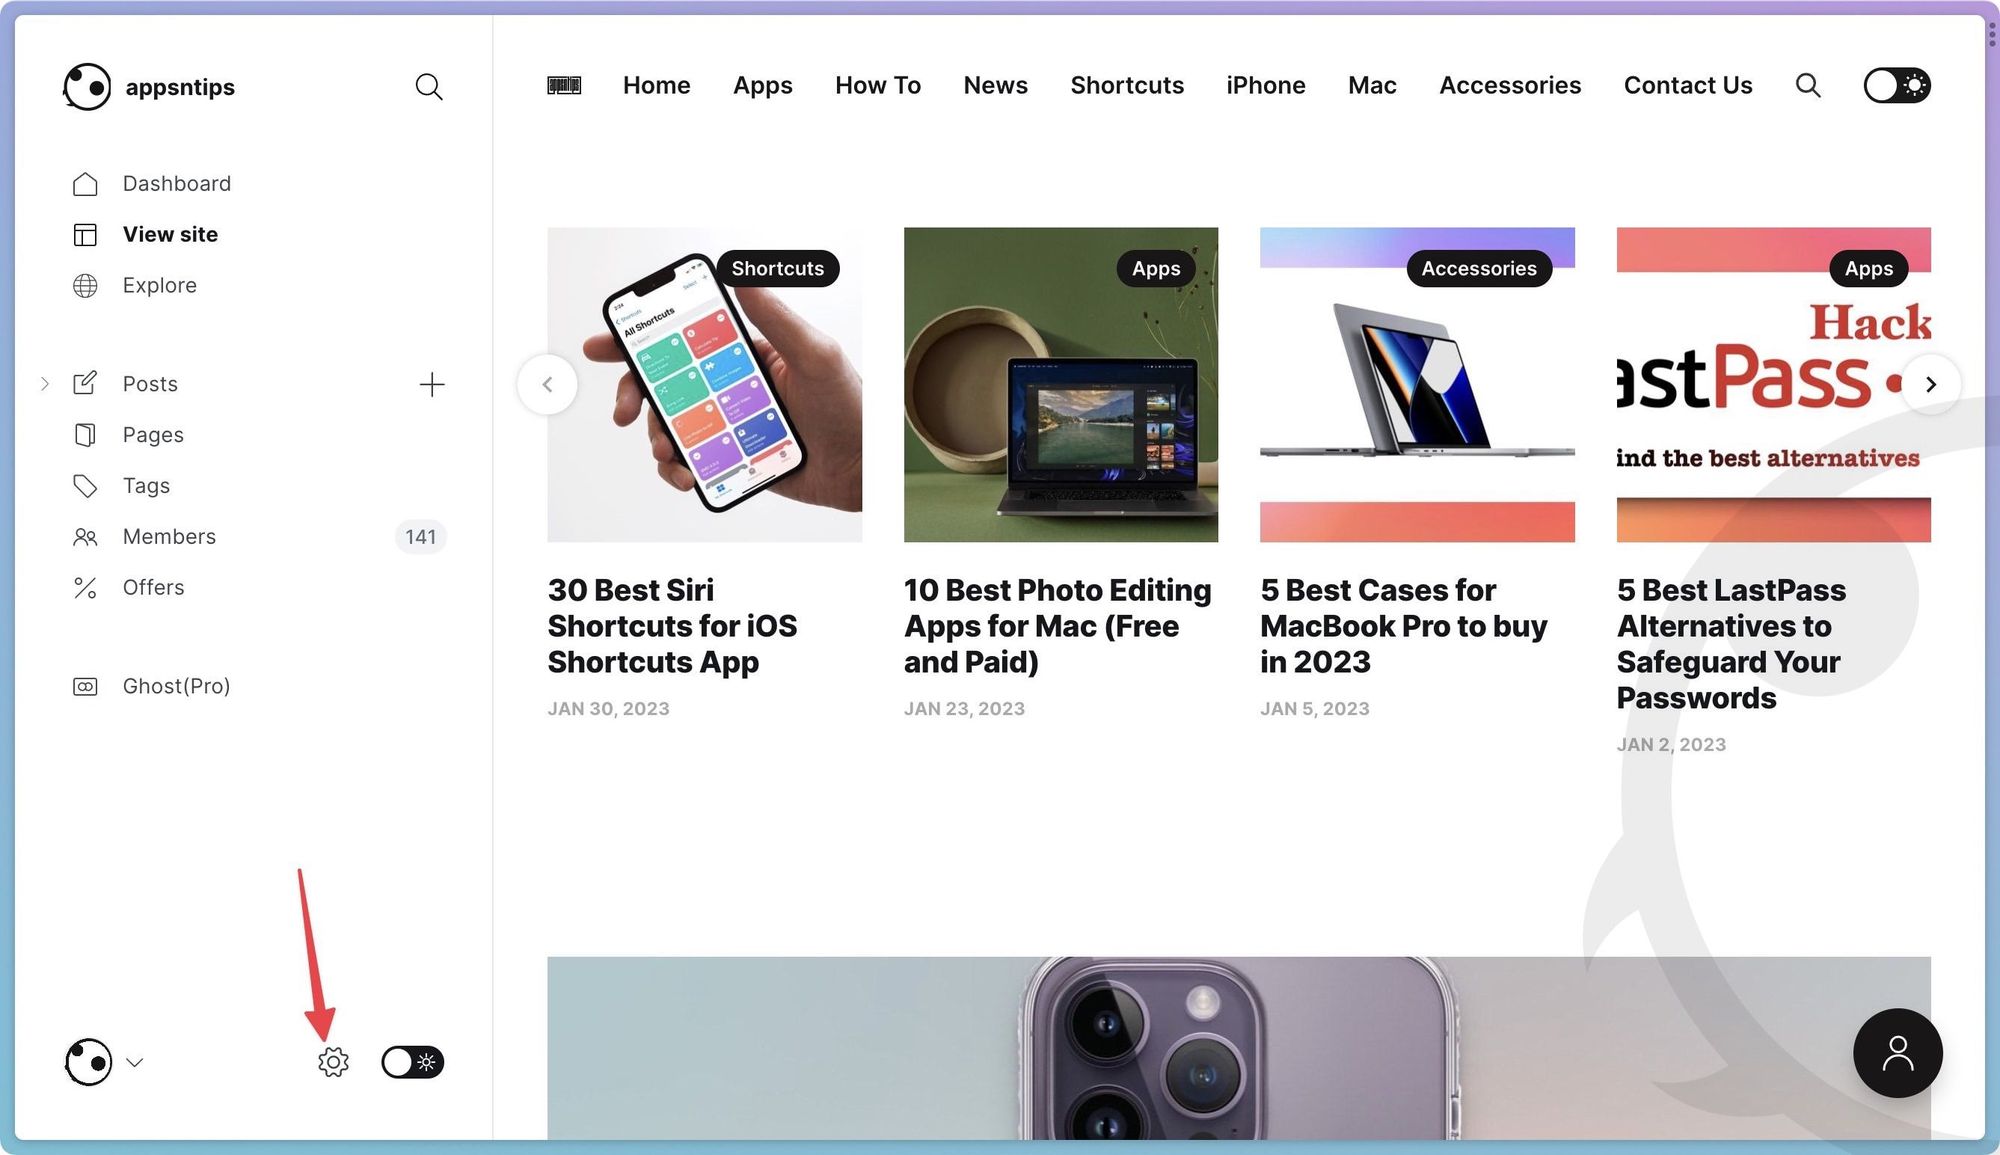
7. Open Ghost CMS in your browser, log in with your account and open its Settings page.
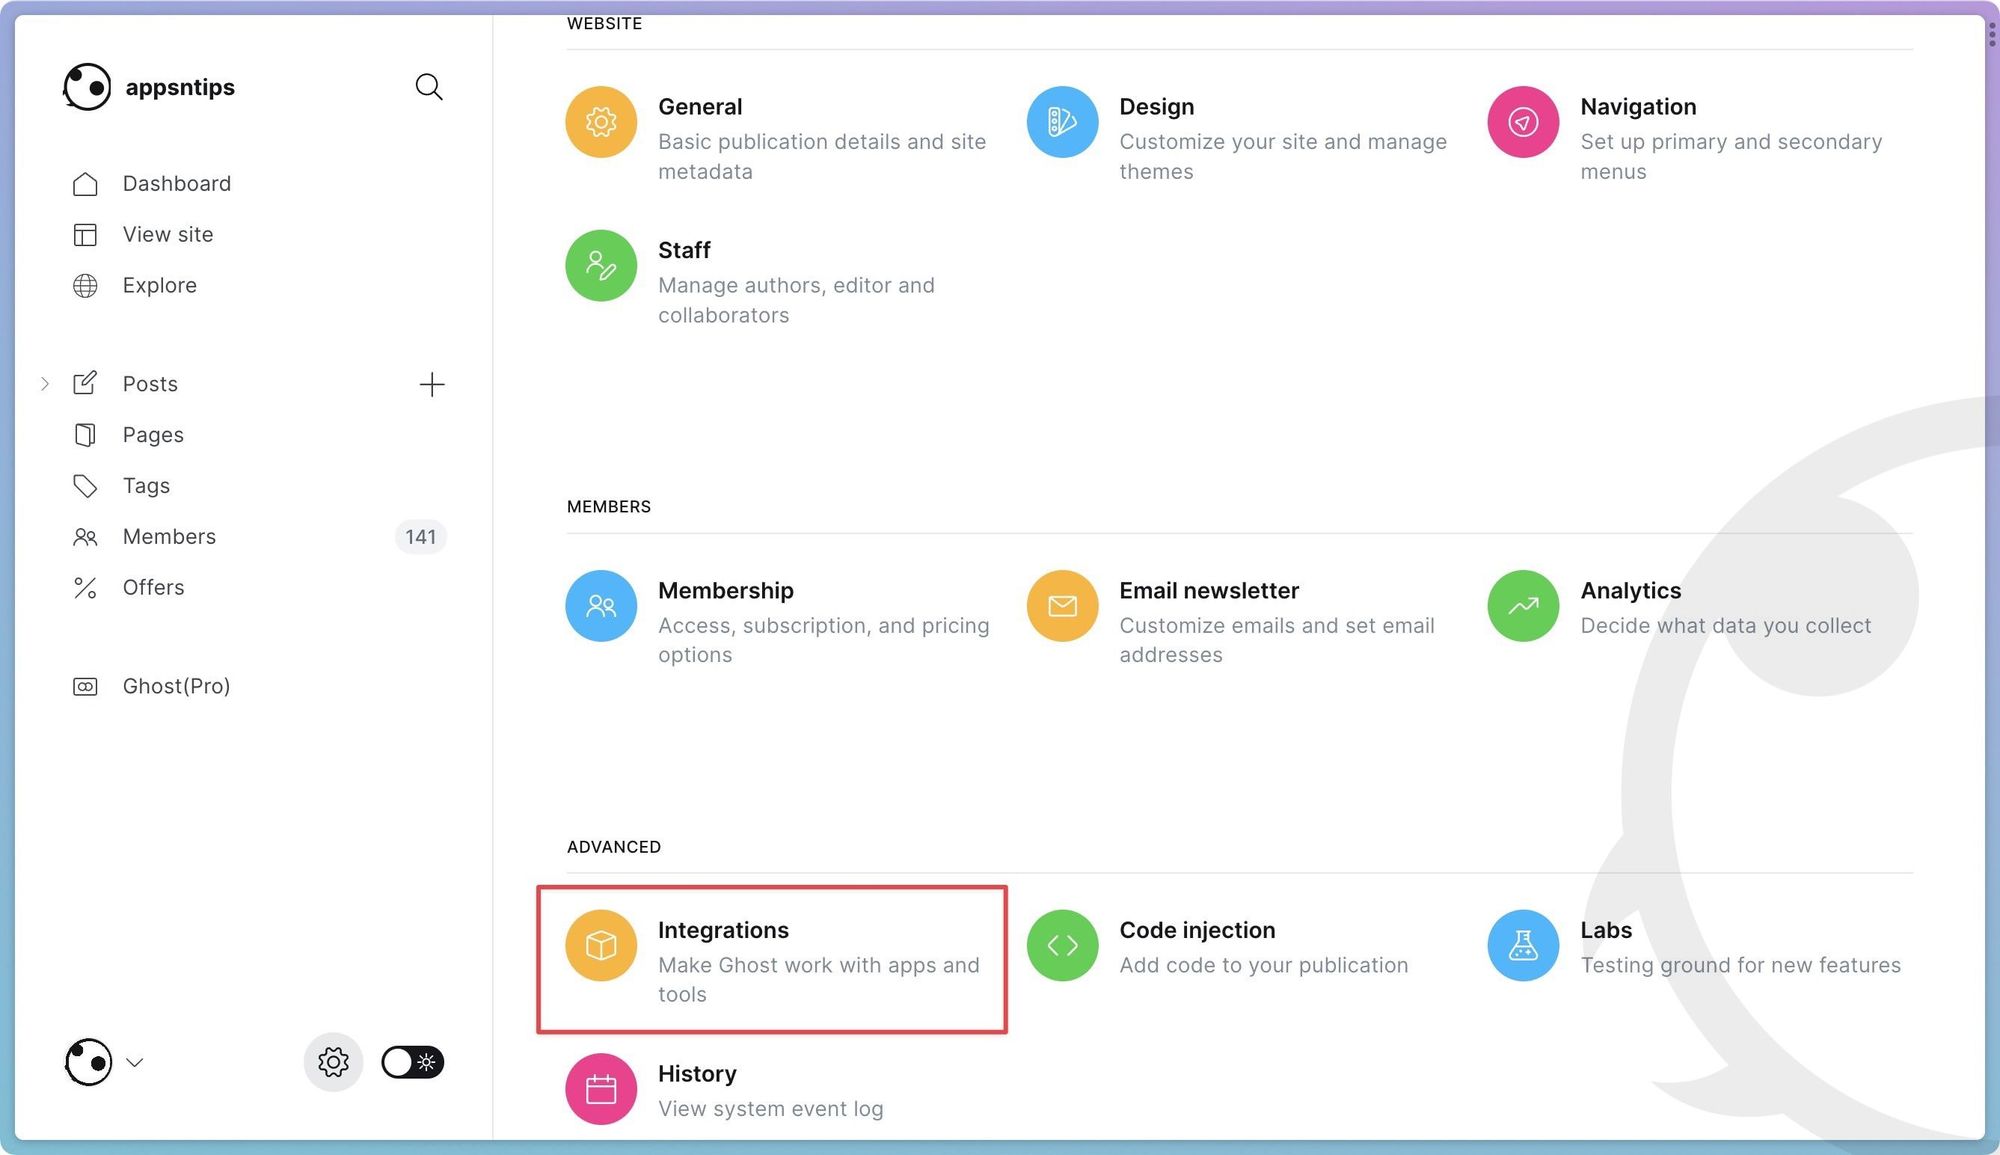
8. Click on the Integrations option.
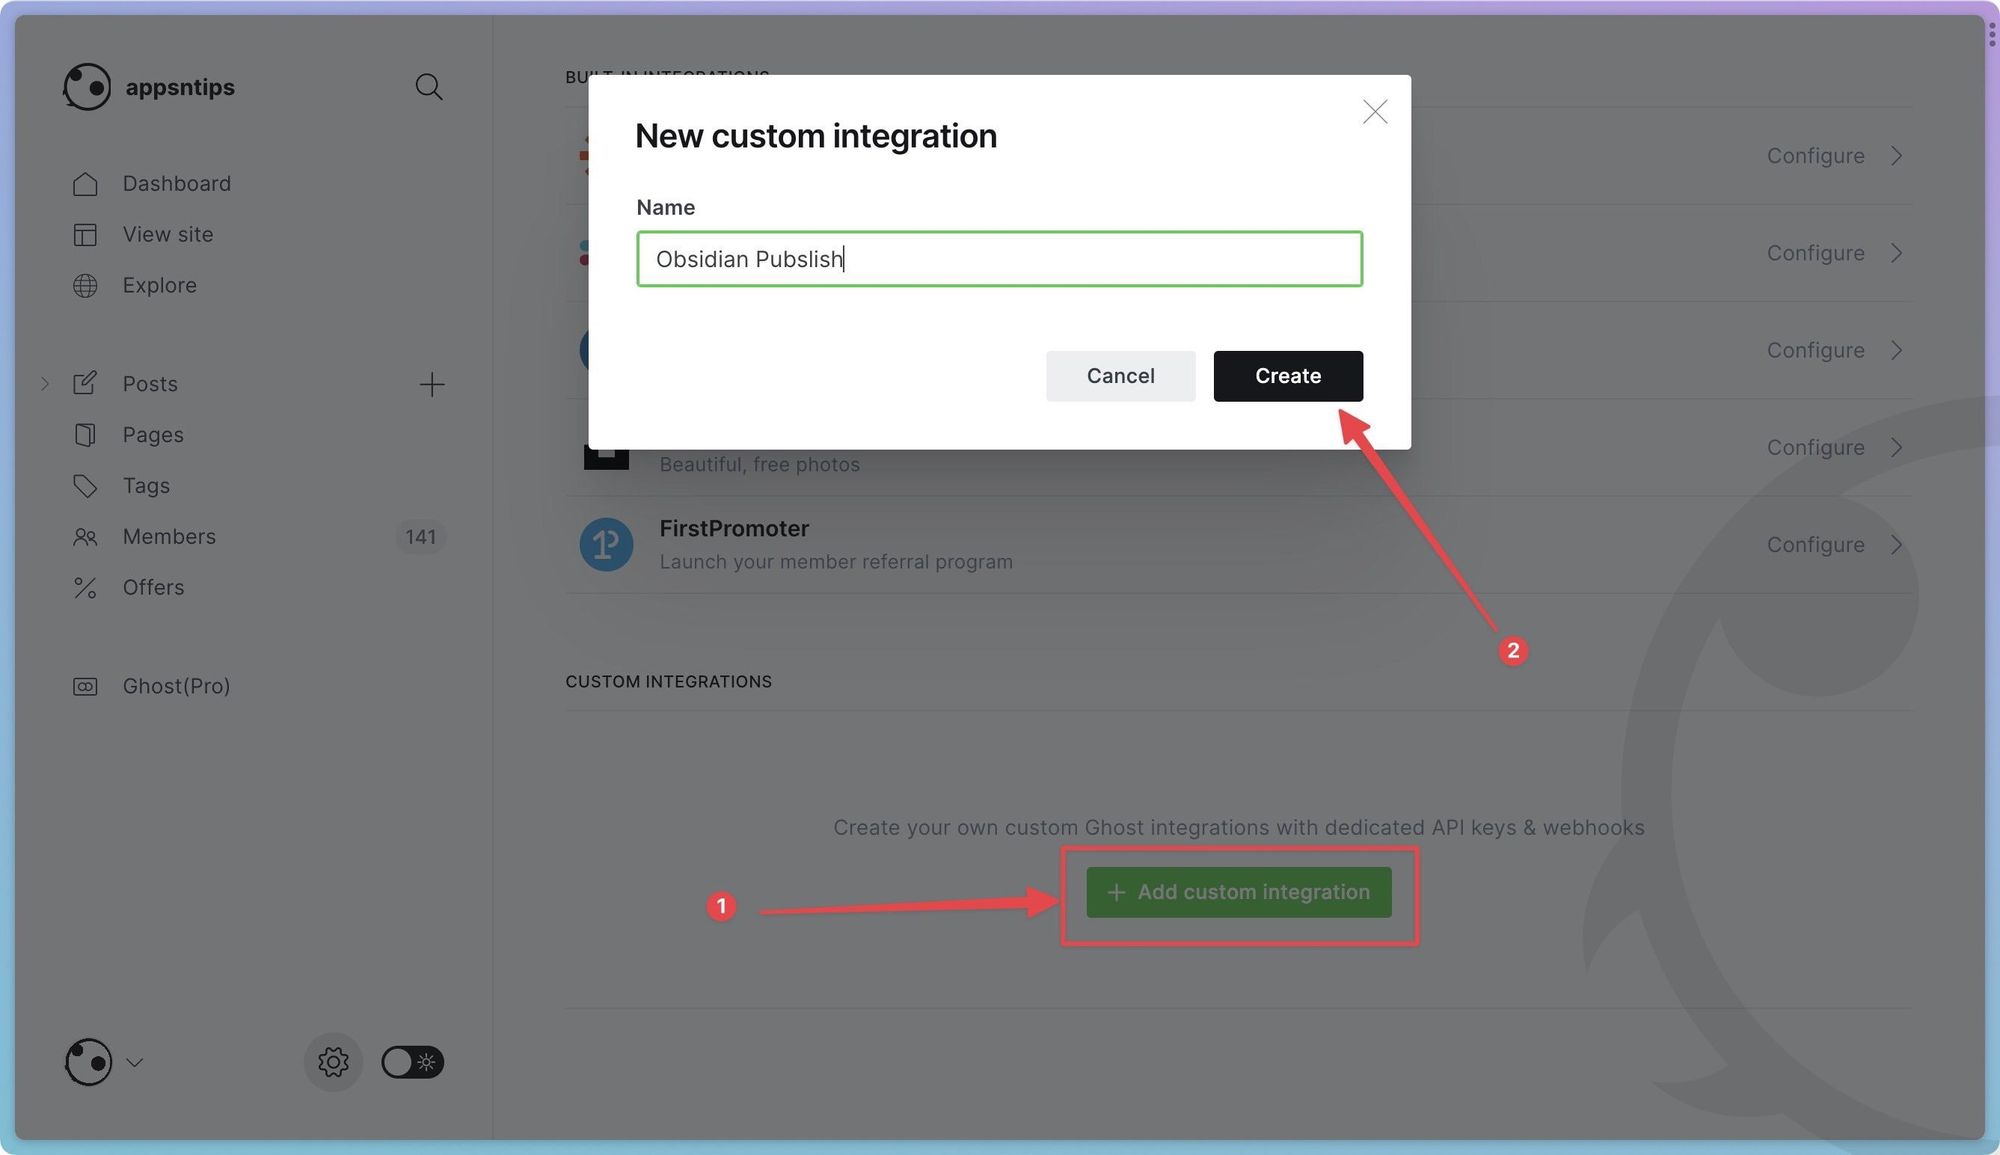
9. Click on Add custom integration and use an identifiable name. We will use the Obsidian Publish button and hit the Create button.
10. As you can see, we have the required API URL and Key. Copy and paste these into the Obsidian plugin.
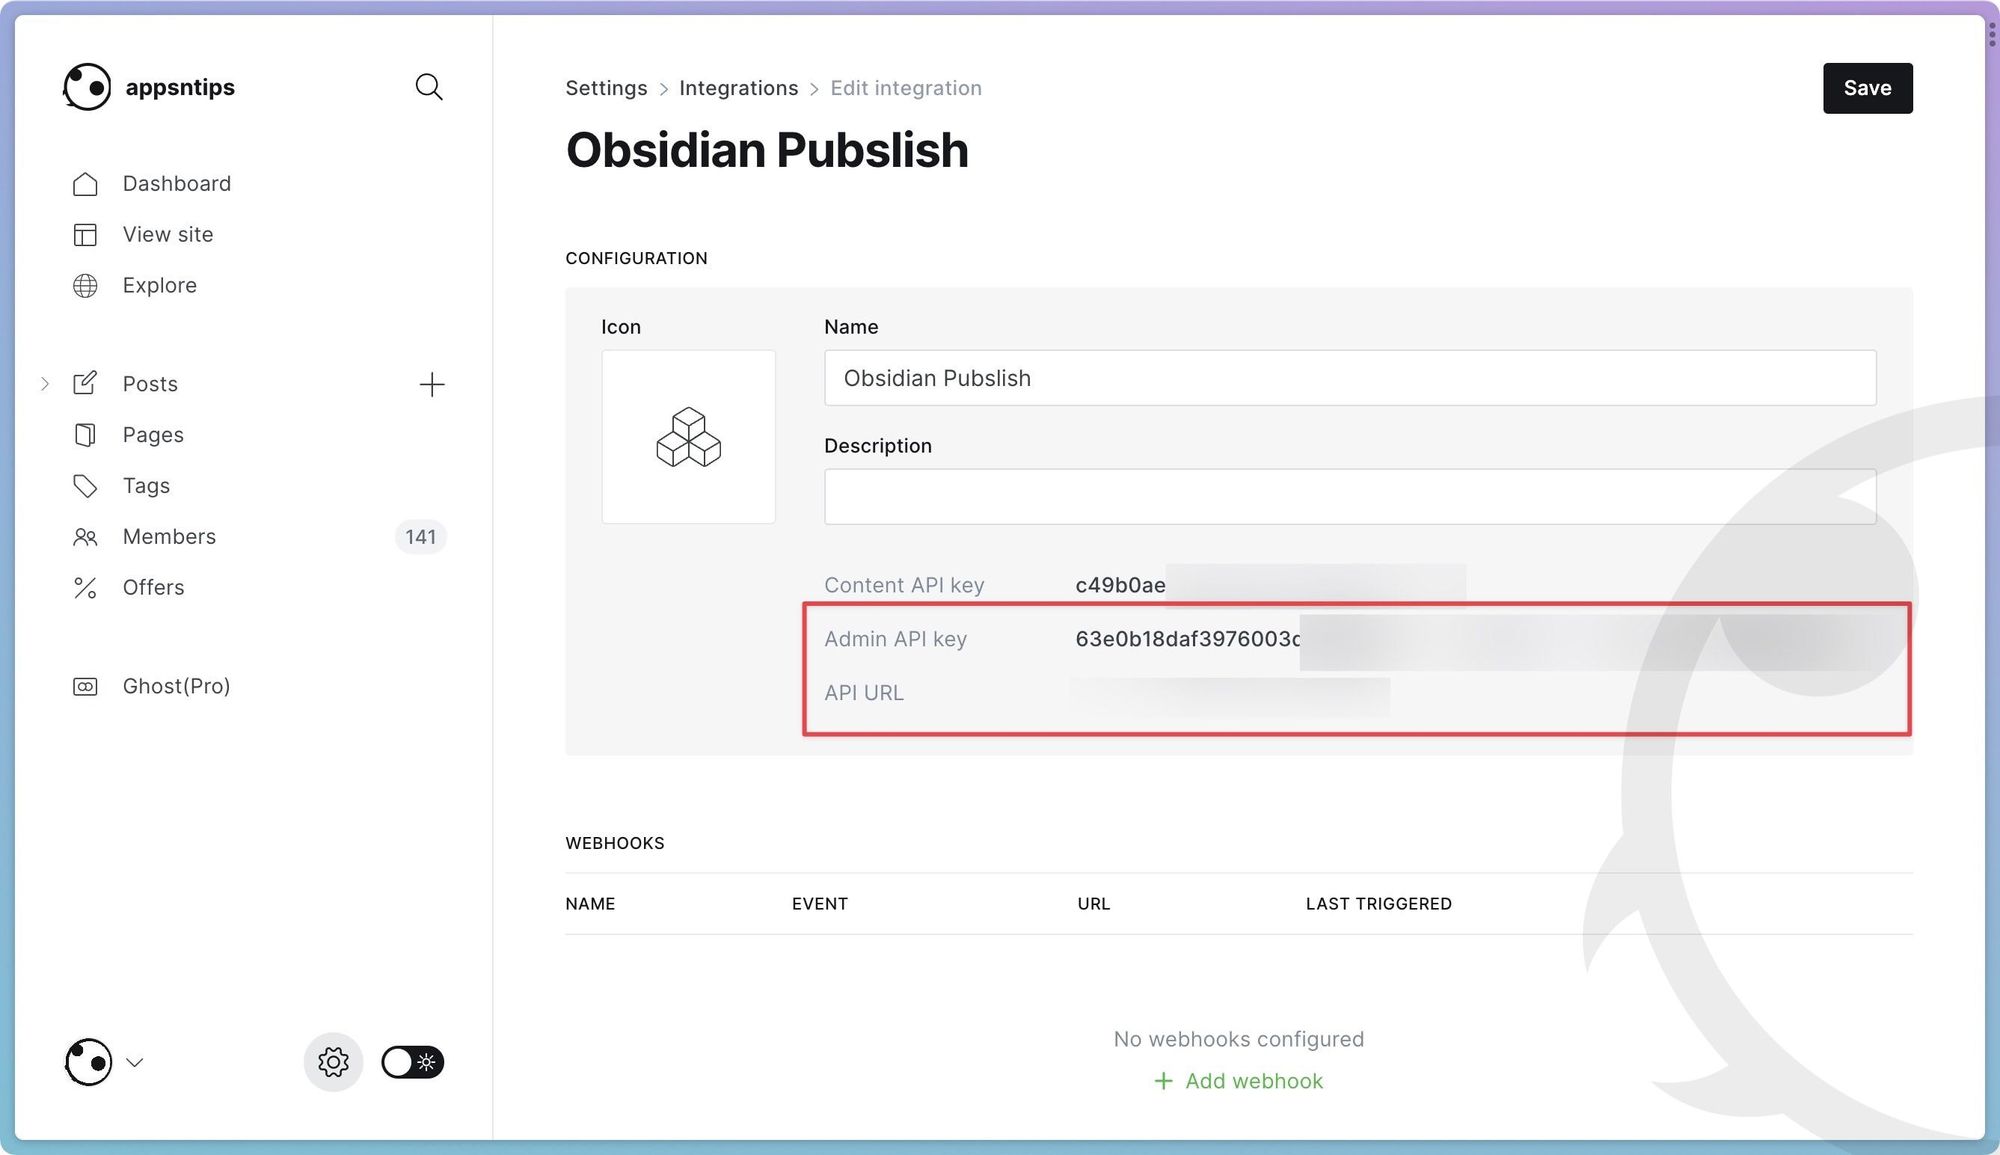

Publish Obsidian notes online using Ghost CMS
Now that we have set up a connection between the Obsidian app and the Ghost CMS, we can publish our article. But before you being, make sure to check out the plugin documentation to get the YAML front-matter data you need to add things like tags, excerpts, featured image, and more.
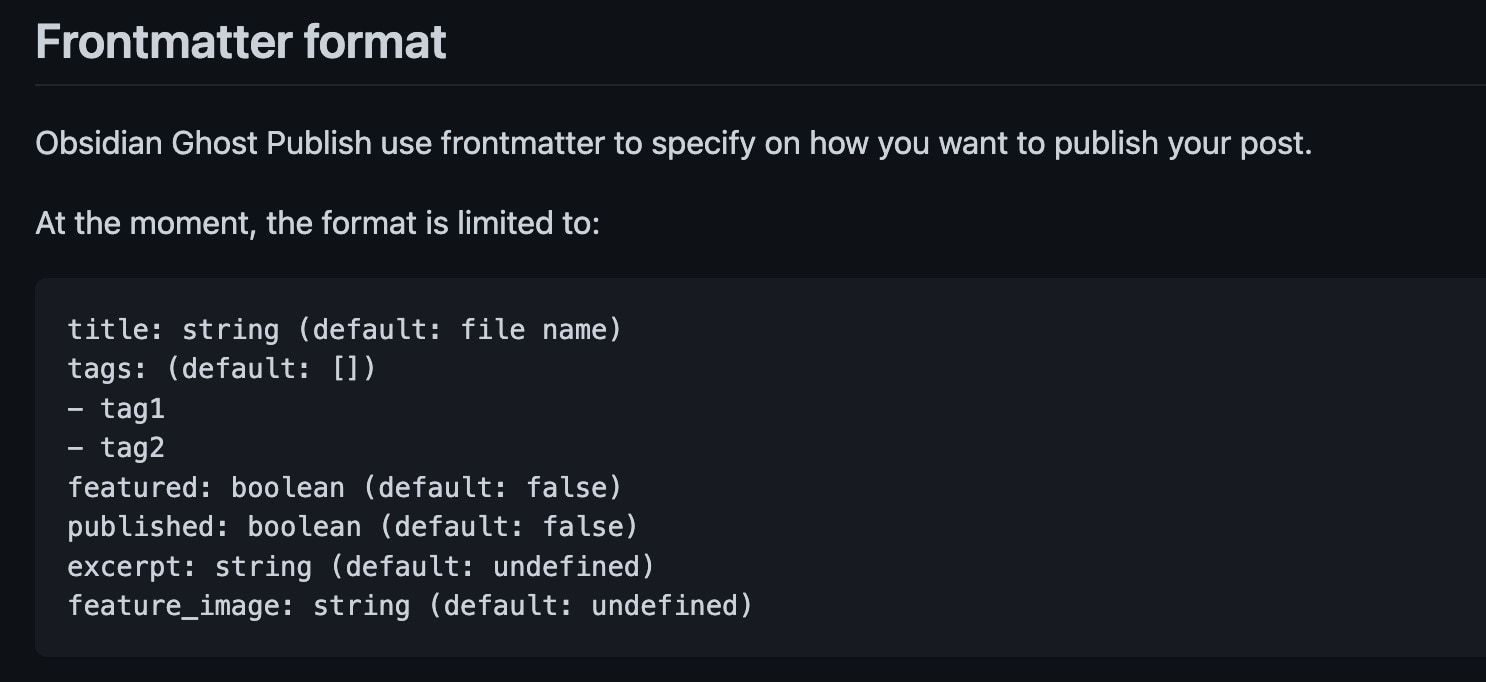
1. Open the Obsidian note you want to publish and enter the YAML data you have copied from the plugin documentation. Ensure to enclose the data inside three dashes on top and bottom, as shown in the screenshot below.
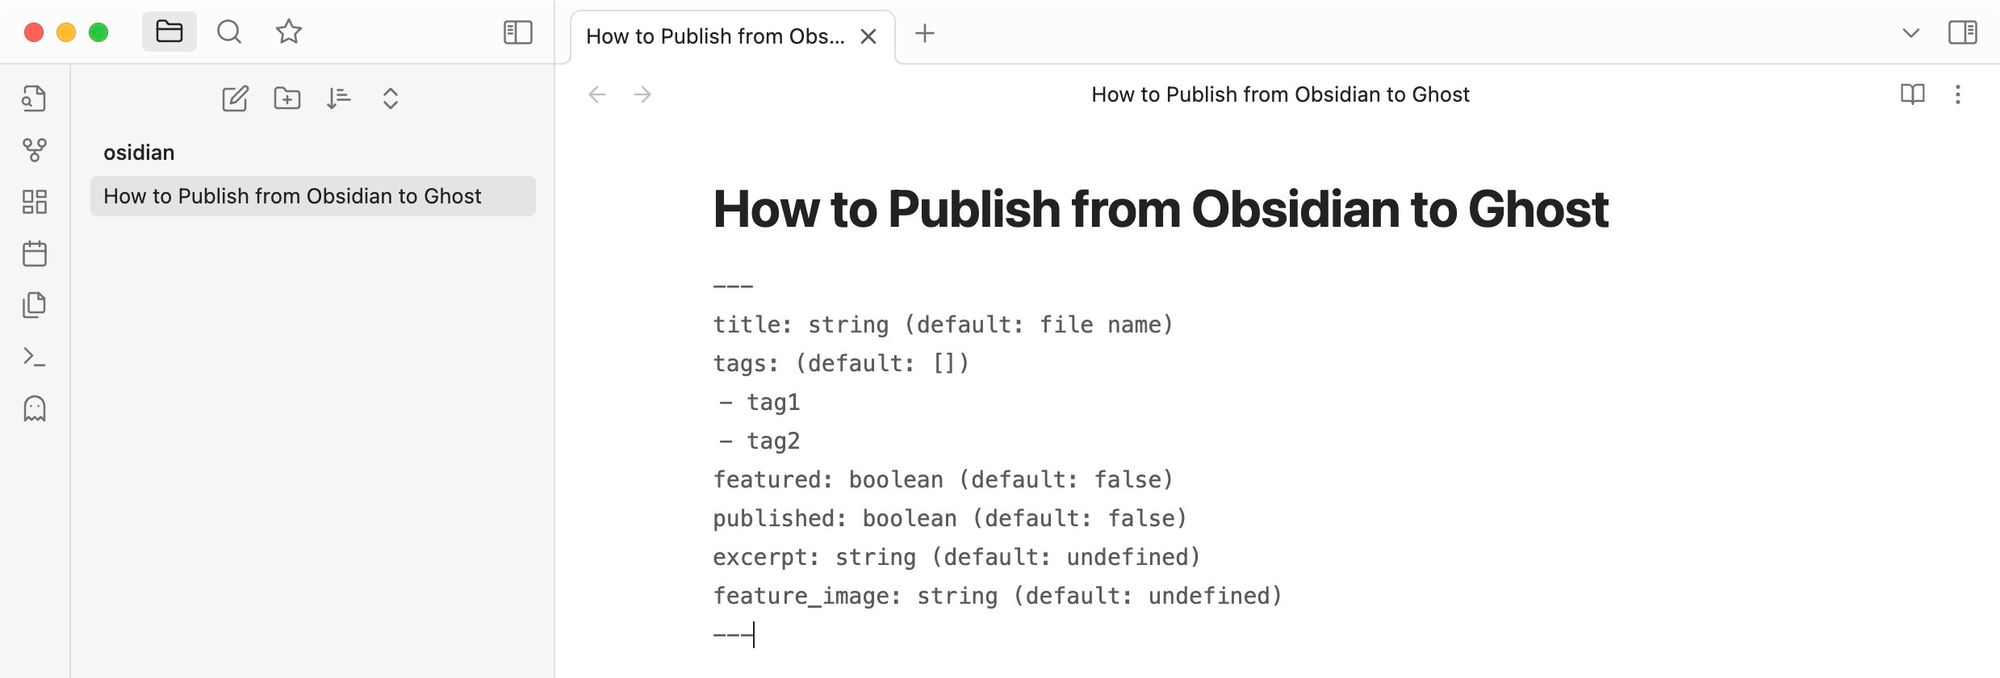
The front matter is self-explanatory, but we will explain this to make it easier to understand.
- Title: Whatever you write here will be the title of your post in Ghost.
- tags: You can add tags to your post by including them using the list as shown.
- featured: Write true if you want the post to be featured. The default is false.
- Published: Write true if you want to publish the post. We recommend keeping it as false to do a final check of the post in the Ghost backend to ensure everything is correct.
- Excerpt: Add the post excerpt or metadata here.
- Feature-image: Add your featured image here.
In our testing, all the features except the excerpt and feature image work. So you can add title and tags and set a post as featured. However, you cannot add an excerpt or a featured image.
2. After you edit the front matter as per your needs, write the article you want to publish.
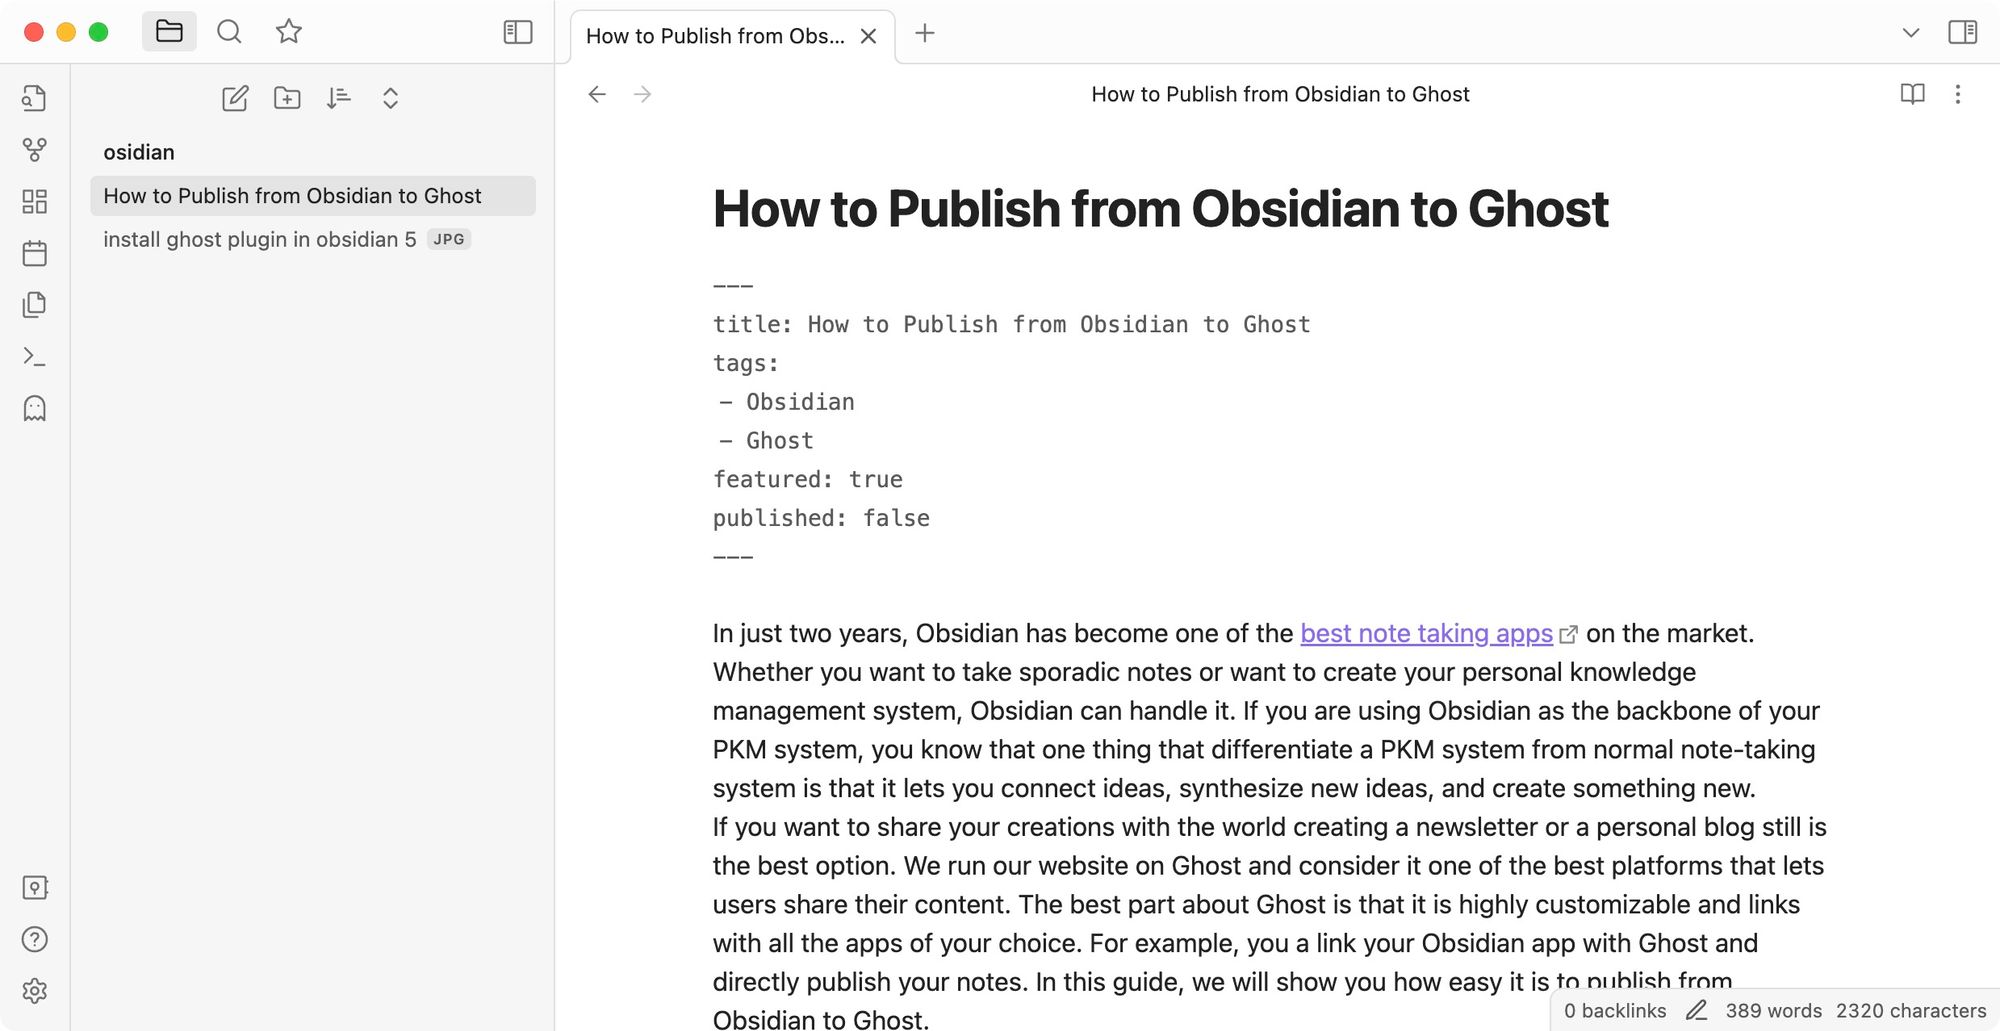
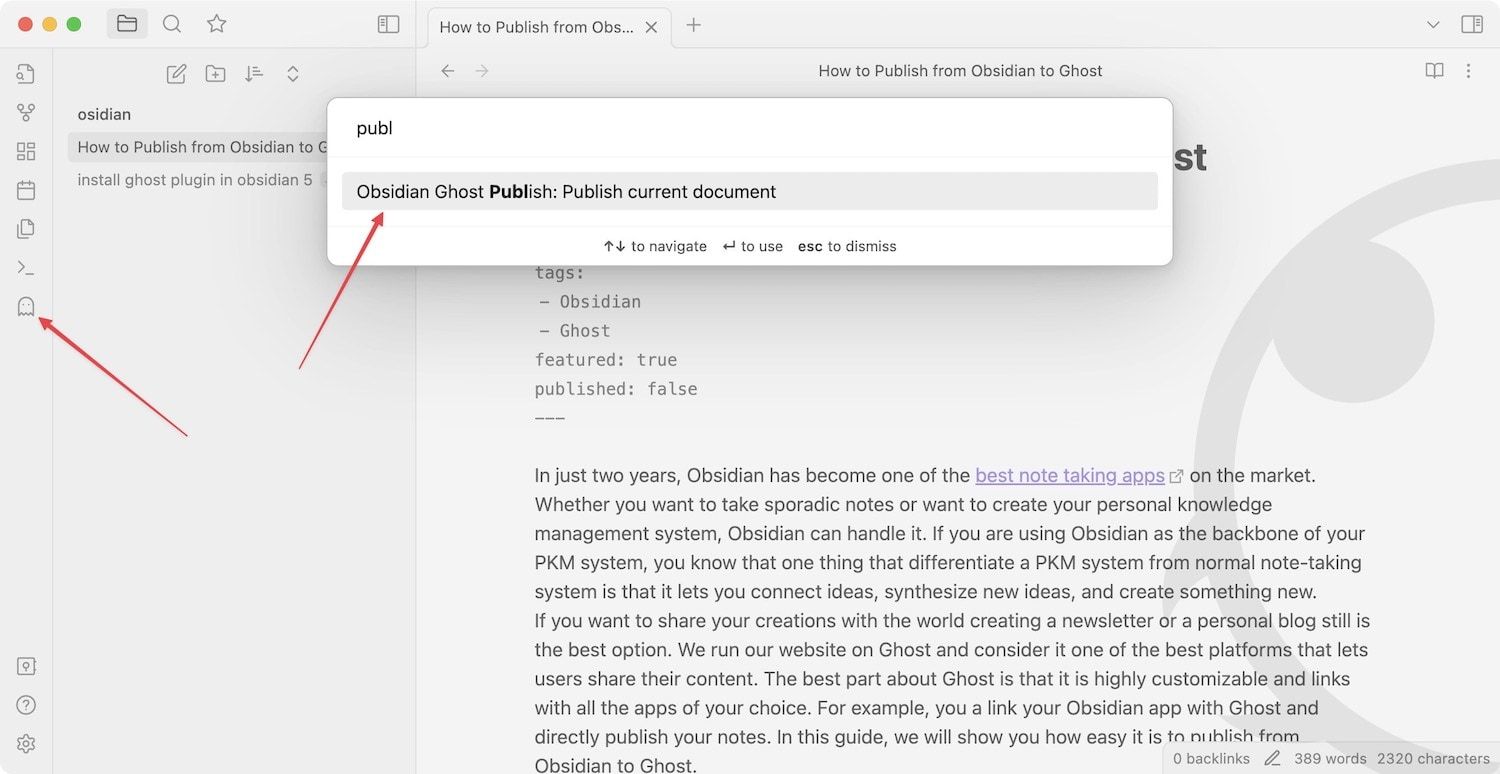
3. Click the Ghost icon to publish the note on Ghost. Alternatively, use the command pallet (CMD+P or Ctrl+P) and use the Obsidian Ghost Publish command
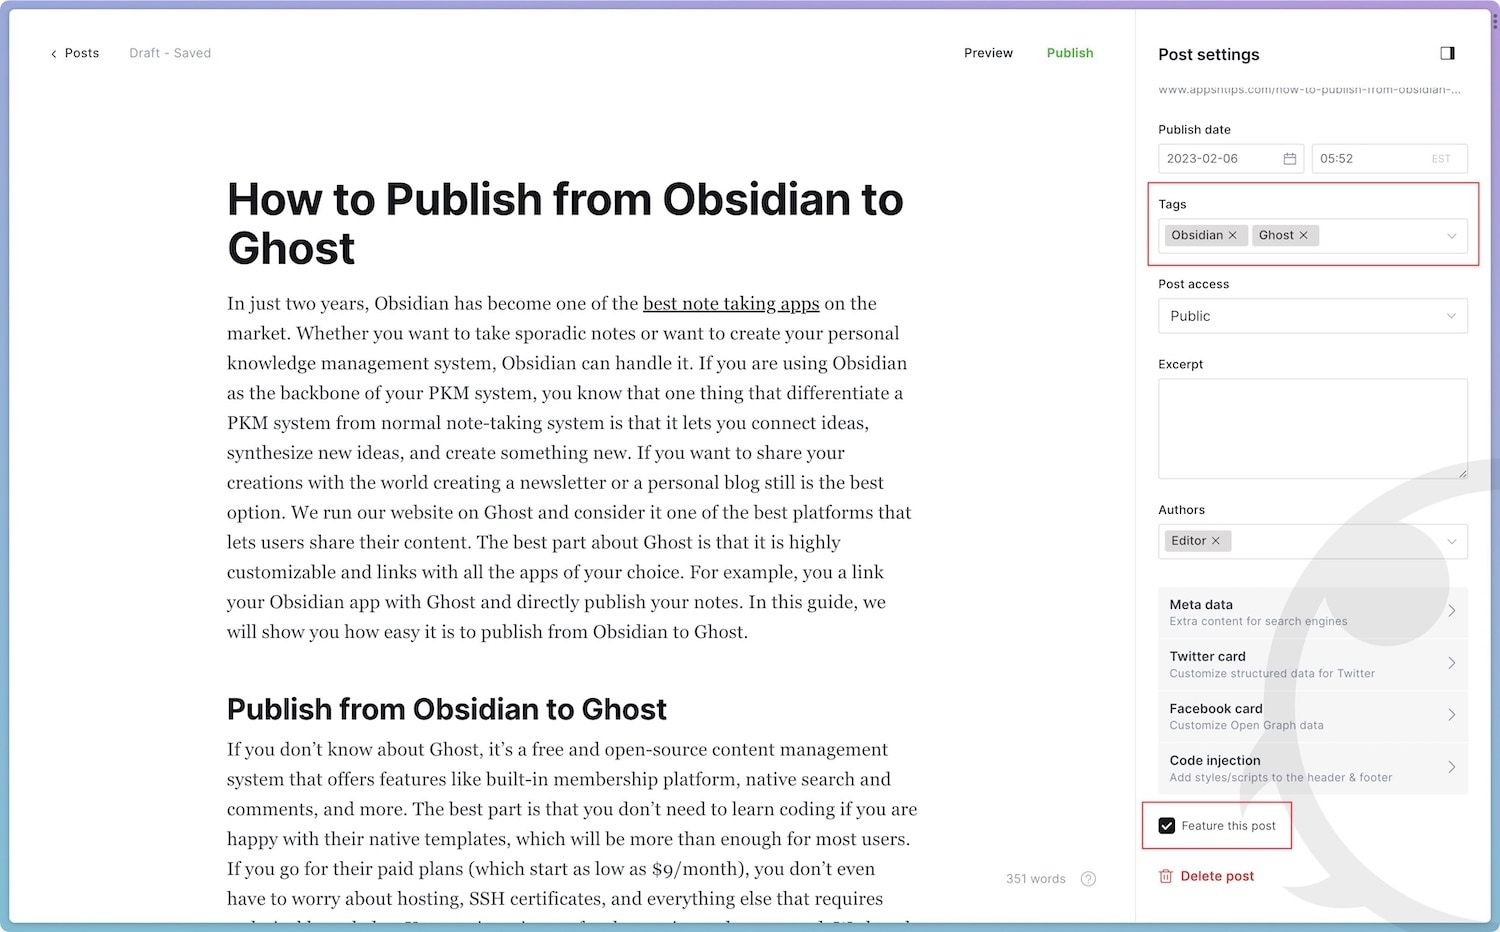
4 As you can see, the new article is added to my Ghost CMS. The article also has the correct tags and is featured as a set using the YAML data.
Drawbacks of using the Obsidian Ghost publish plugin
While the plugin is excellent for publishing Obsidian notes via Ghost, there are some noticeable drawbacks:
- We were unable to add a featured image.
- We were unable to add an excerpt.
- We were unable to add any images in the body of the article.
Use Ghost to publish your Obsidian notes
Despite the drawbacks, the Obsidian to Ghost plugin is handy as it lets you directly transfer your notes from Obsidian to Ghost. You can do further polishing and add images in the Ghost CMS before hitting the publish button. If you want a better publishing experience for markdown files, you should use Ulysses, which is one of the best writing apps for Mac. It lets you add images, featured image, tags, excerpt, and everything else you require in a post.


