How to Use Contact Lists to Organize Contacts on iPhone
Here is how you can organize contacts in iPhone using the new contact lists feature in iOS 16.

iOS 16 might not seem like a big update, but it has brought tons of quality of life improvement updates. From allowing users to schedule emails to hiding messages to using widgets on the Lock Screen, the new OS update brings features that iPhone owners will use and enjoy. One of these new features is the ability to create and use contact lists to organize contacts on iPhone. Here is how you can do the same.
Create and use contact lists to organize contacts on iPhone
iOS 16 allows you to create multiple lists and organize contacts. It works similarly to what you do in the Notes app or the Reminders app. So, you can create a list for family members, a list for friends, a list for work, and so on.
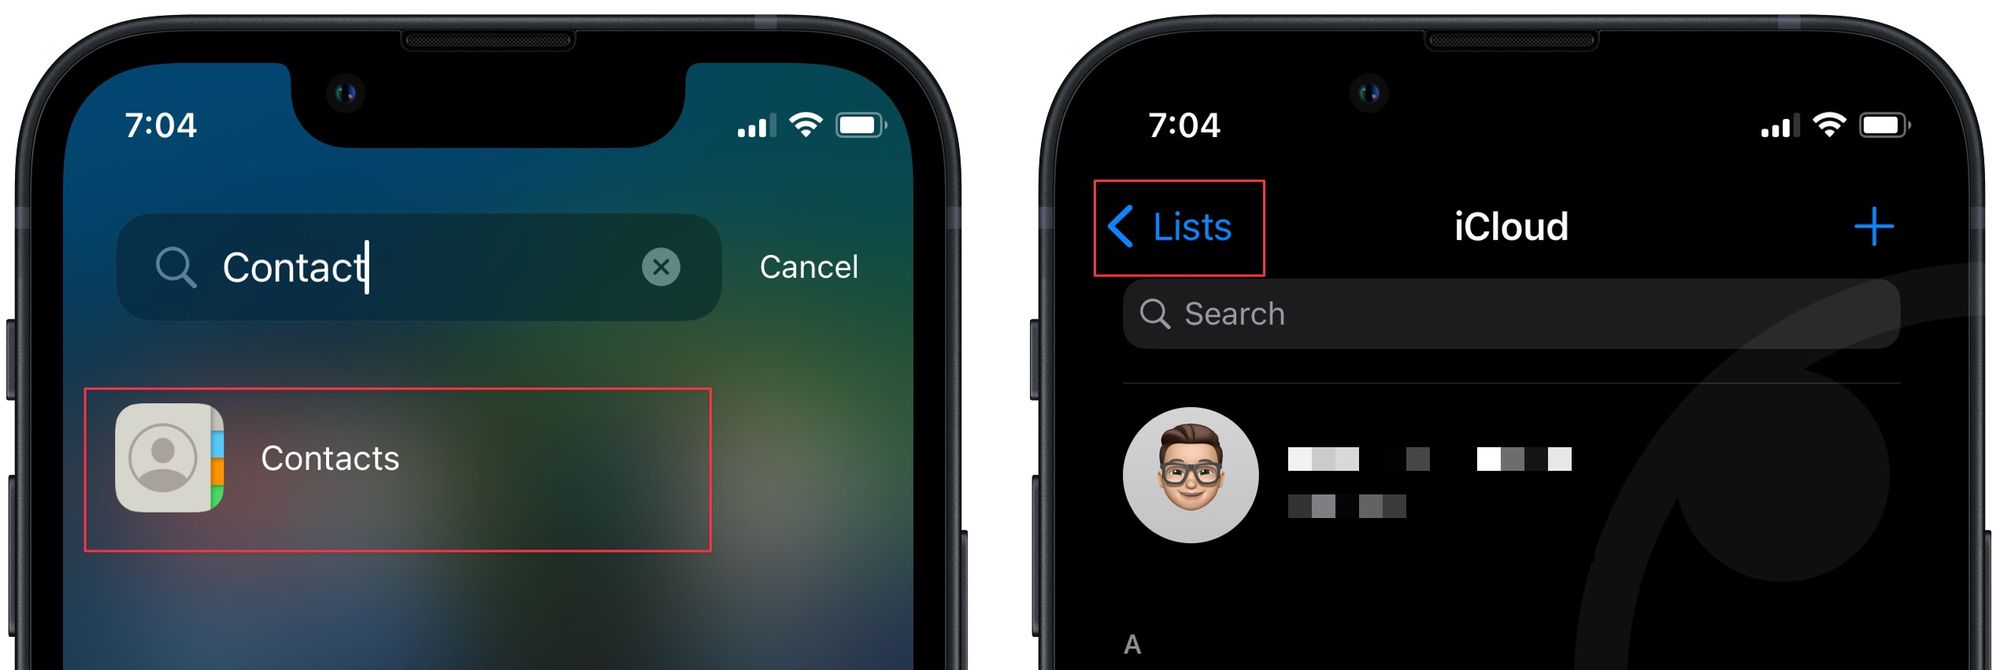
1. To create a contact list on iPhone, launch the contacts app and tap the Lists button in the top-left corner.
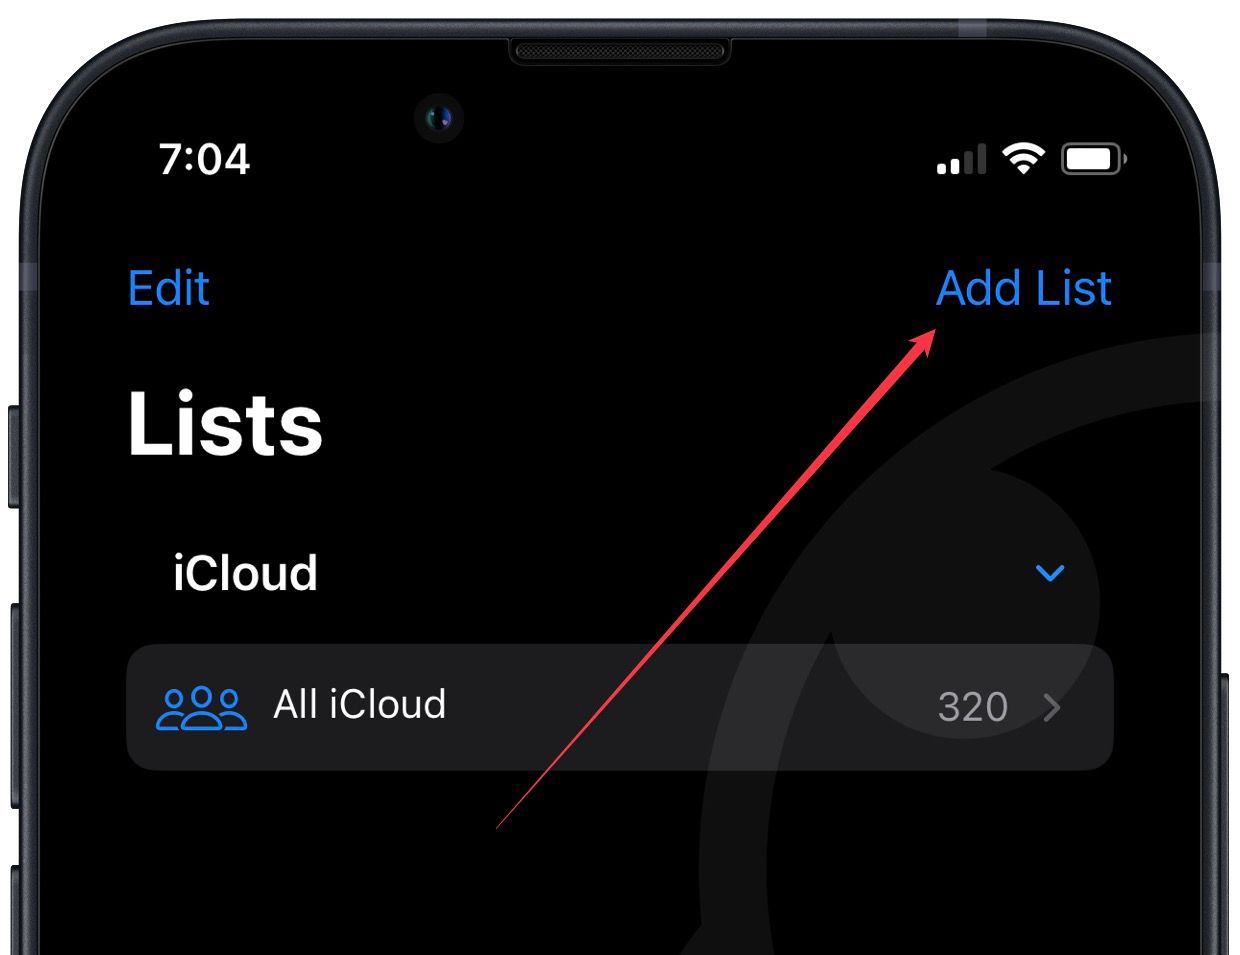
2. Now, tap the Add List button in the top-right corner. It will open a new empty list below the All iCloud list.
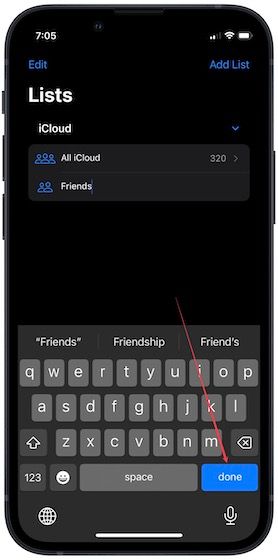
3. Enter the list name and tap on the Done button on the keyboard.
4. To add contacts to this list, tap on its name and then use the Plus (+) button.

5. Tap to select the contacts and use the Done button to save changes. As you can see, the Friends list is showing that it has 6 contacts.
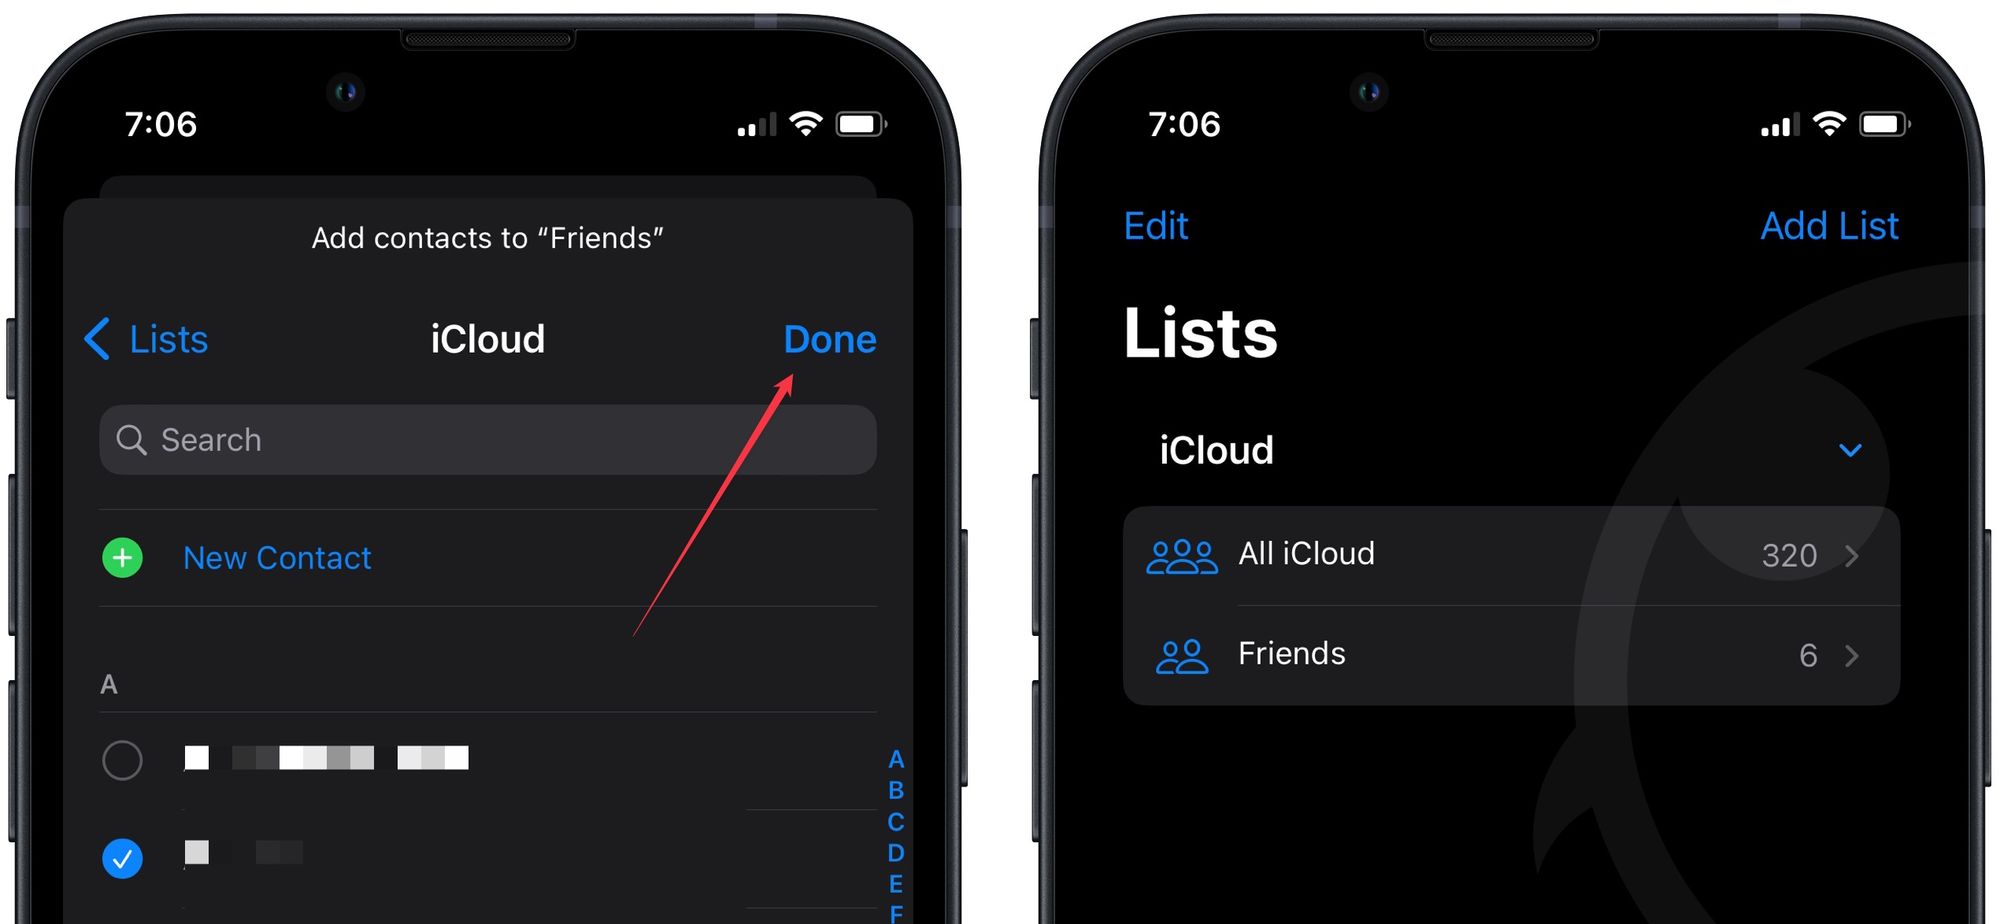
6. To delete a list, swipe from right to left on it's name and tap on the trash button.

You can repeat this process to create multiple lists and sort all your contacts.
Organize contacts on iPhone using the contact list feature
There are several benefits of creating a contact list on your iPhone. The first and obvious one is organization. The second benefit is that you can send emails to all members of your contact list with one tap. It saves you from manually adding each contact individually and ensures that you don’t forget anyone while sending the email.


