How to Schedule Email on iPhone Using Mail App
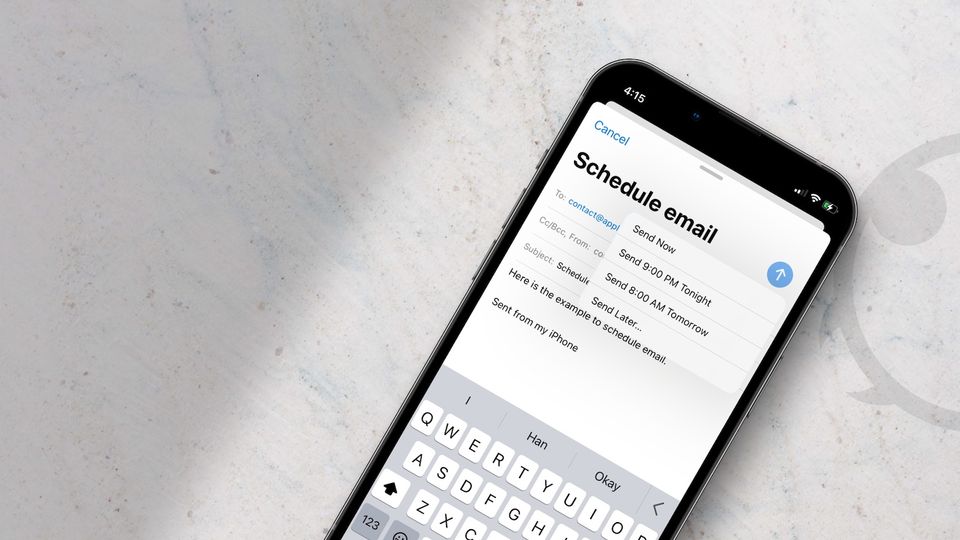
iOS 16 is introducing several new features to default apps including Reminders, Apple Notes, and Mail. One of the most awaited features of the default Mail app was the ability to schedule emails to send them later. With the iOS 16 update, users will finally be able to use this feature. We have already covered how to schedule emails on Mac using the Mail app. Now, we will show you how to do the same on your iPhone. Here is how you can schedule emails on your iPhone using the Mail app.
Schedule email on iPhone using the Mail app
Apple has made it easy to schedule emails on iPhone. You no longer need a third-party email client to use this feature as not it’s built into the Mail app on your iPhone.
1. To schedule an email, launch the Mail app on your iPhone and tap the compose button to start a new email.

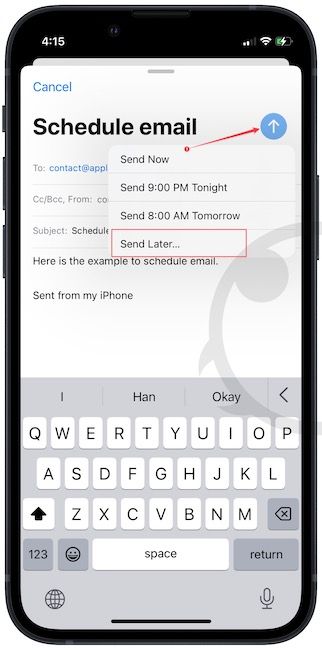
2. Fill in the relevant details and type your email. Now, long-press on the blue send button in the top-right corner. To set a custom schedule, tap the Send Later…button.
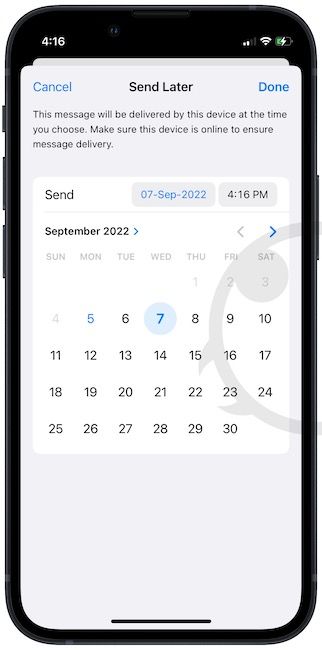
3. Here, tap on a date to select the date.
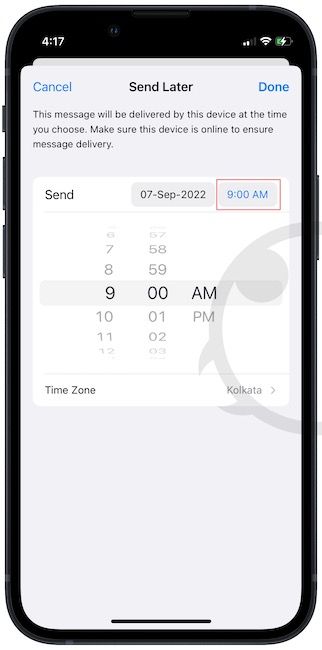
4. Now, select the time option and use the scroll wheel to set the time. Tap the Done button to save changes and send the email.
5. To see your scheduled emails, tap on the Mailboxes button in the top-left corner and open the Send Later folder.

6. Here, you can see all your scheduled emails and make changes if required.
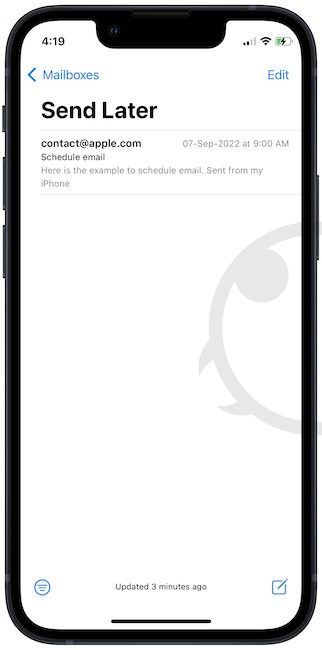
Note that the Send Later folder will not be visible if there are no scheduled emails.
Send emails later on iPhone using the Mail app
As you can see, Apple has made it easy to schedule emails on iPhone. Apart from this, iOS 16 is also bringing several other features like Lock Screen widgets, the ability to hide messages, password-protecting photos, and more. You can check out those articles by clicking on the respective links. If you have any questions, ask us in the comments below and we will answer them as soon as possible.



Comments ()