How to Create and Use Quick Entry Shortcut for Apple Reminders on Mac

I have been using the Apple Reminders app alongside Logseq - my note-taking app of choice - for managing all the projects and personal tasks. In my Apple Reminders Guide, I have explained why and how I use this app to create and organize tasks. Thanks to Reminders' deep integration with other apps and ease of task creation, I favor it over other task management apps like Things 3, despite the third-party apps bringing more features than the default Reminders app. One of the features that I missed the most about Things 3 was its quick entry shortcut on Mac, which let me add tasks using a quick keyboard shortcut. While Reminders doesn’t have this feature, you can use the Shortcuts app on Mac to create your own quick entry shortcut. Here’s how you can create and use a quick entry shortcut for Apple Reminders on Mac.
Create and use a quick entry shortcut for Apple Reminders on Mac
The Shortcut app is powerful, and my entire workflow revolves around this app. I have already covered my favorite Siri Shortcuts in a separate article and written an in-depth getting started guide that teaches you to create your first shortcut for launching apps, announcing when the battery is full and more. You can click on the links to check out those articles to learn more. For this article, we will be creating a quick shortcut that lets you create a reminder using a keyboard shortcut on Mac.
1. Hit the CMD+Space keyboard shortcut to call up Spotlight and launch Shortcuts.

2. Click on the (+) button in the top bar or use the CMD+N keyboard shortcut to start creating a new shortcut.

3. Click on the search field in the top-right section, and search for reminders.
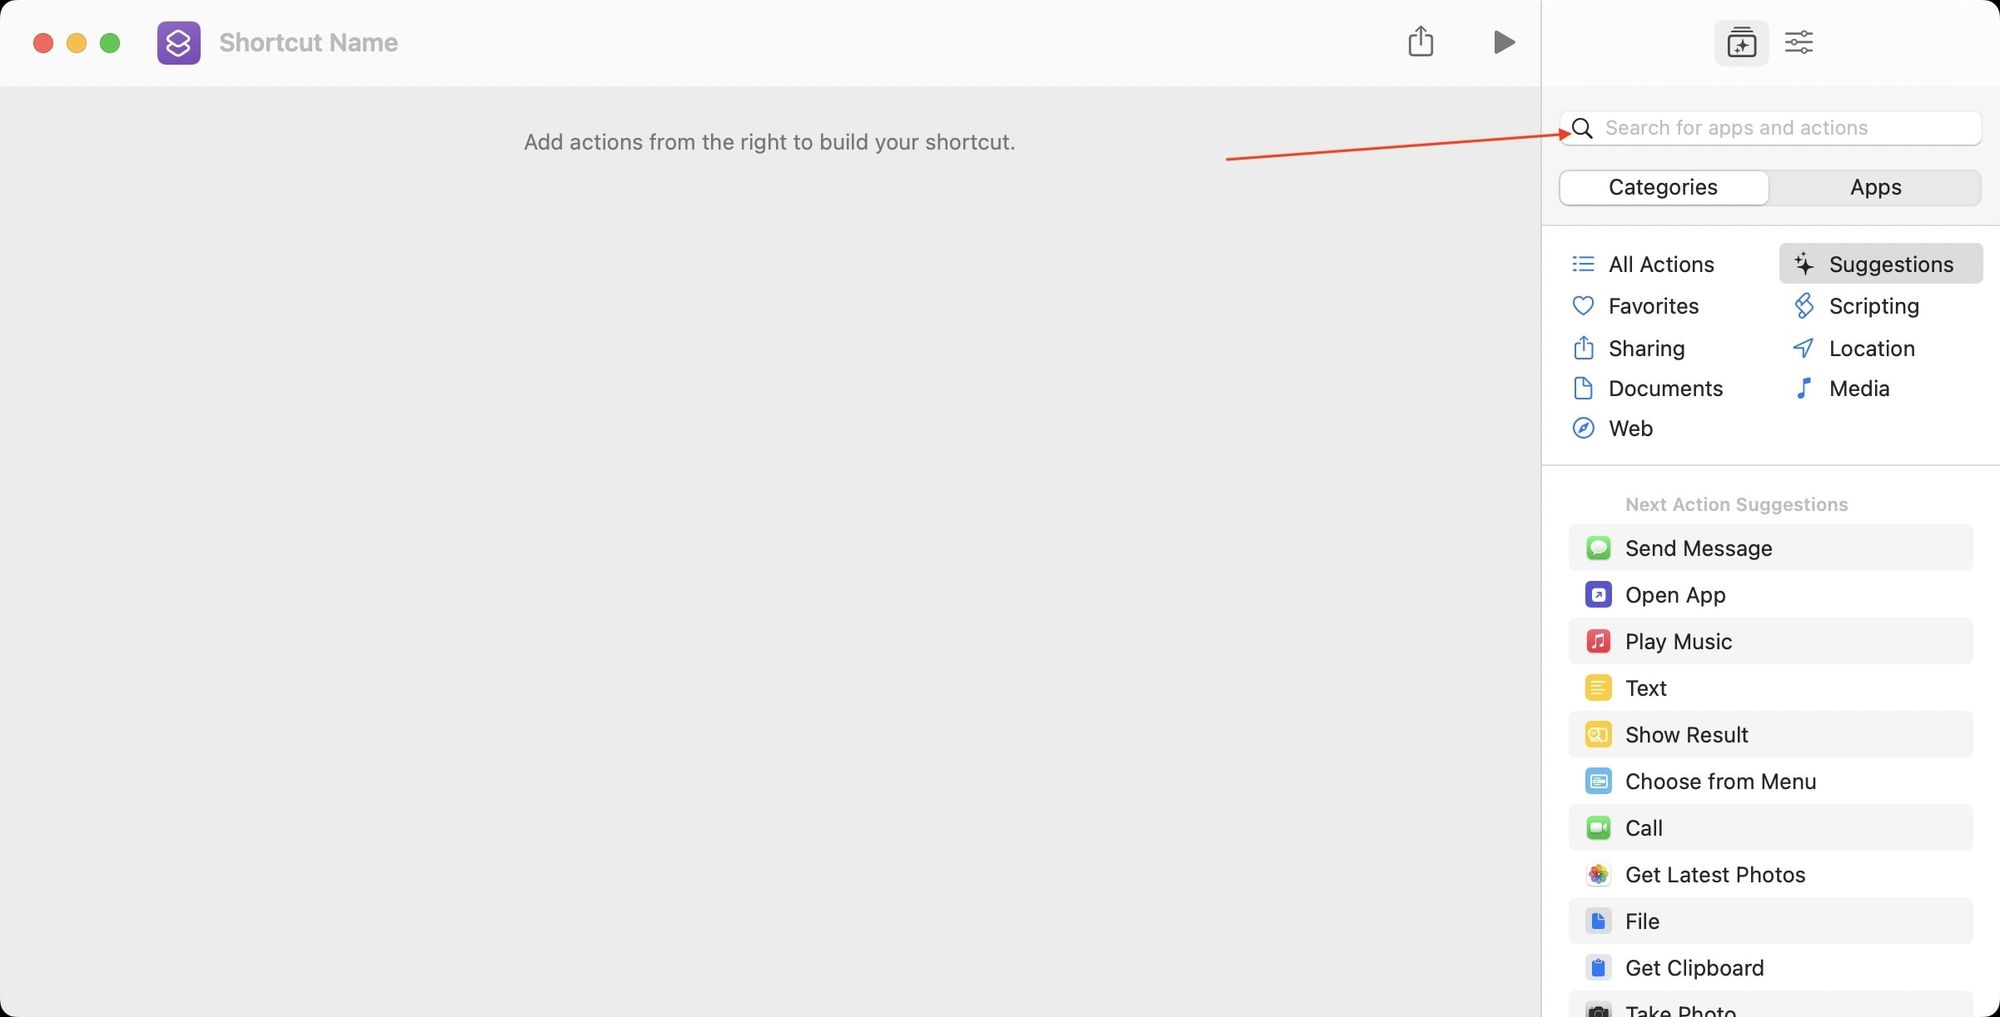
4. Double-click on the Add Reminder action to add the action to the shortcut.
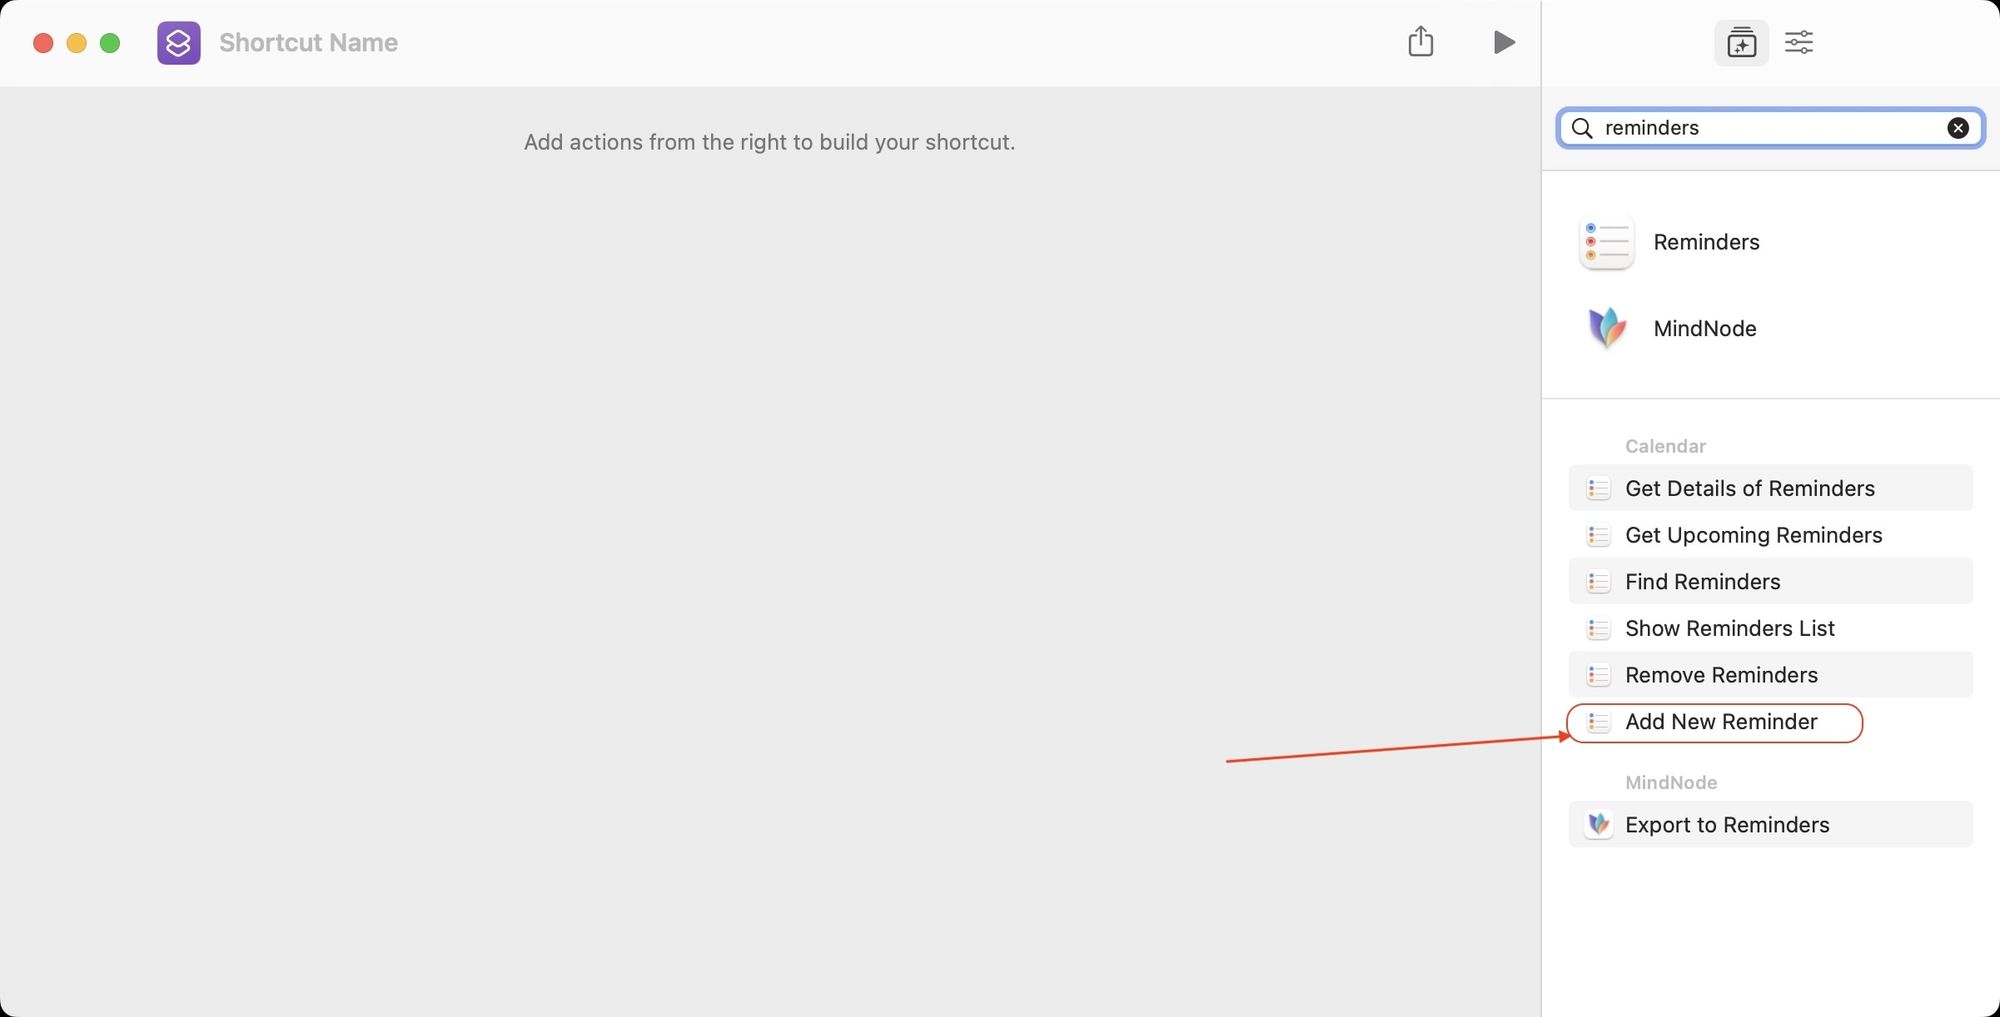
5. Click on the Show More button to reveal all the options.
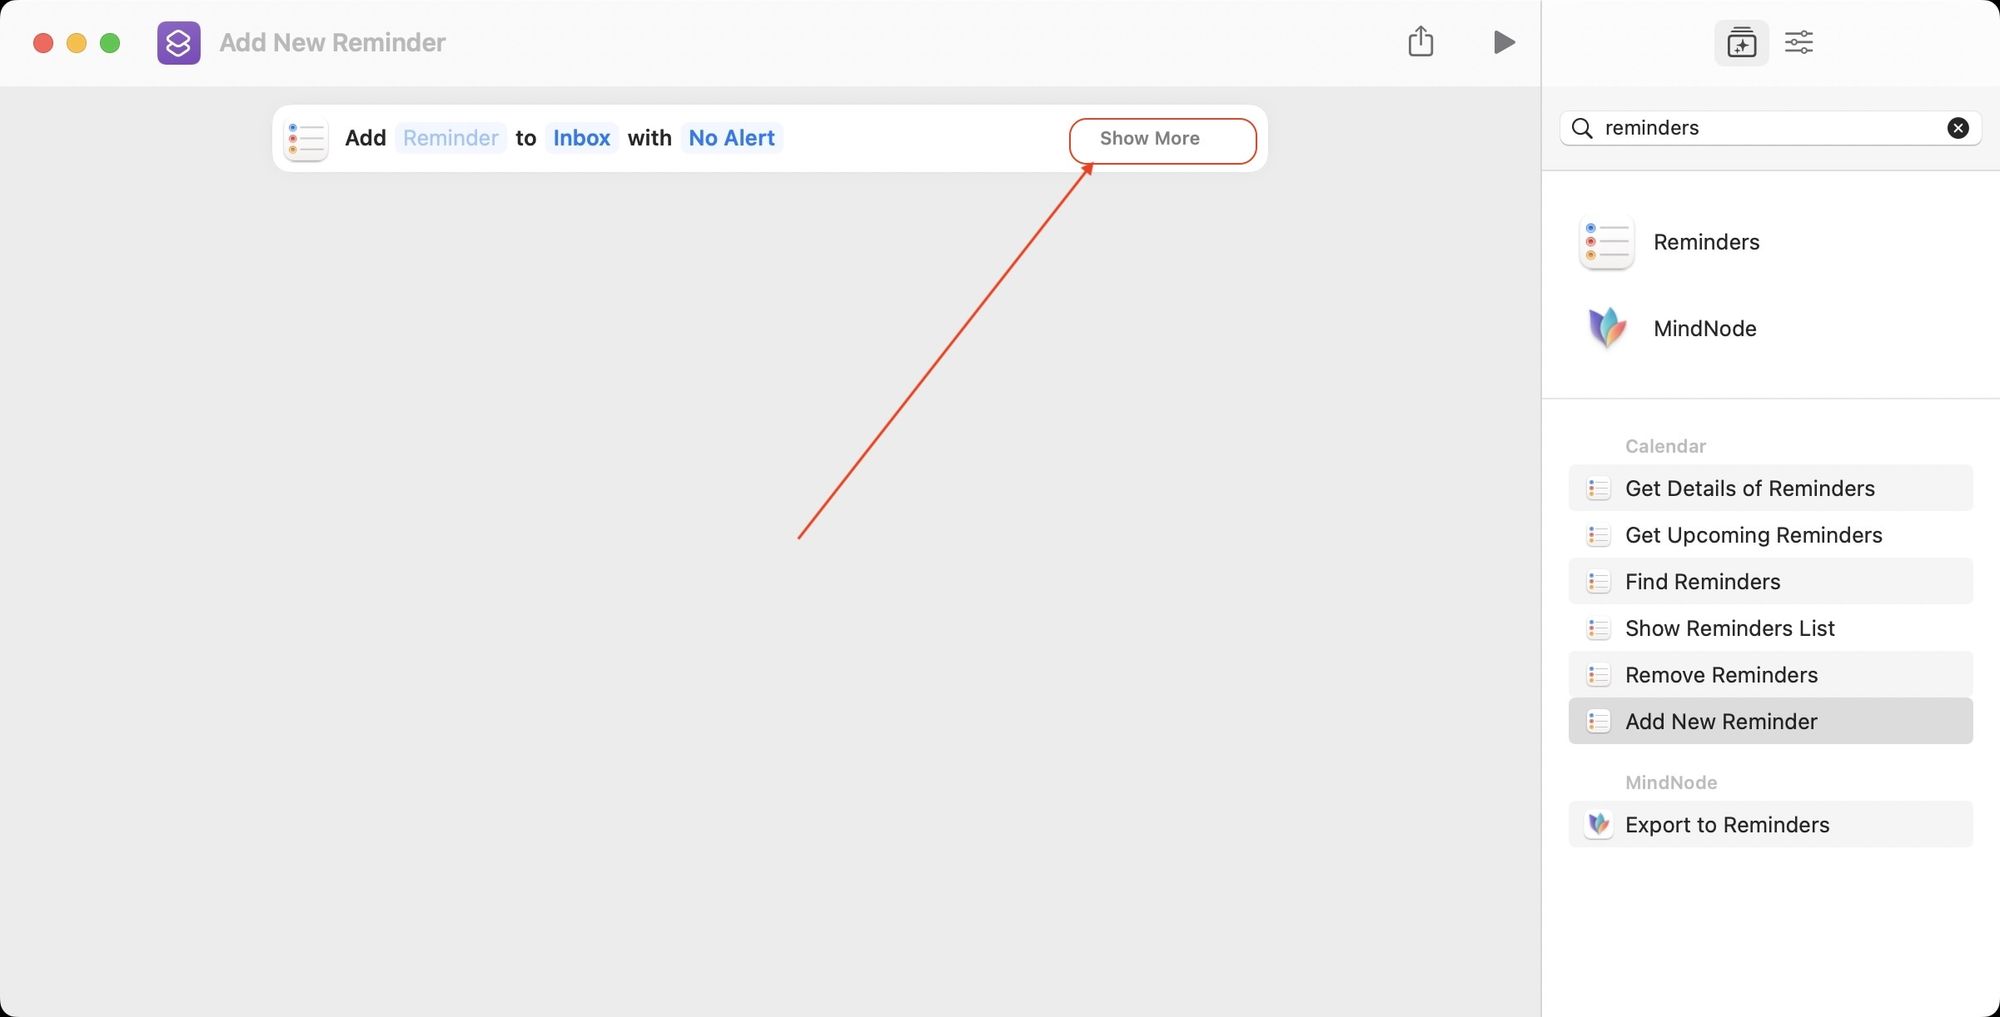
6. Click inside the input field next to Add. Start typing ask, and select the Ask Each Time option.
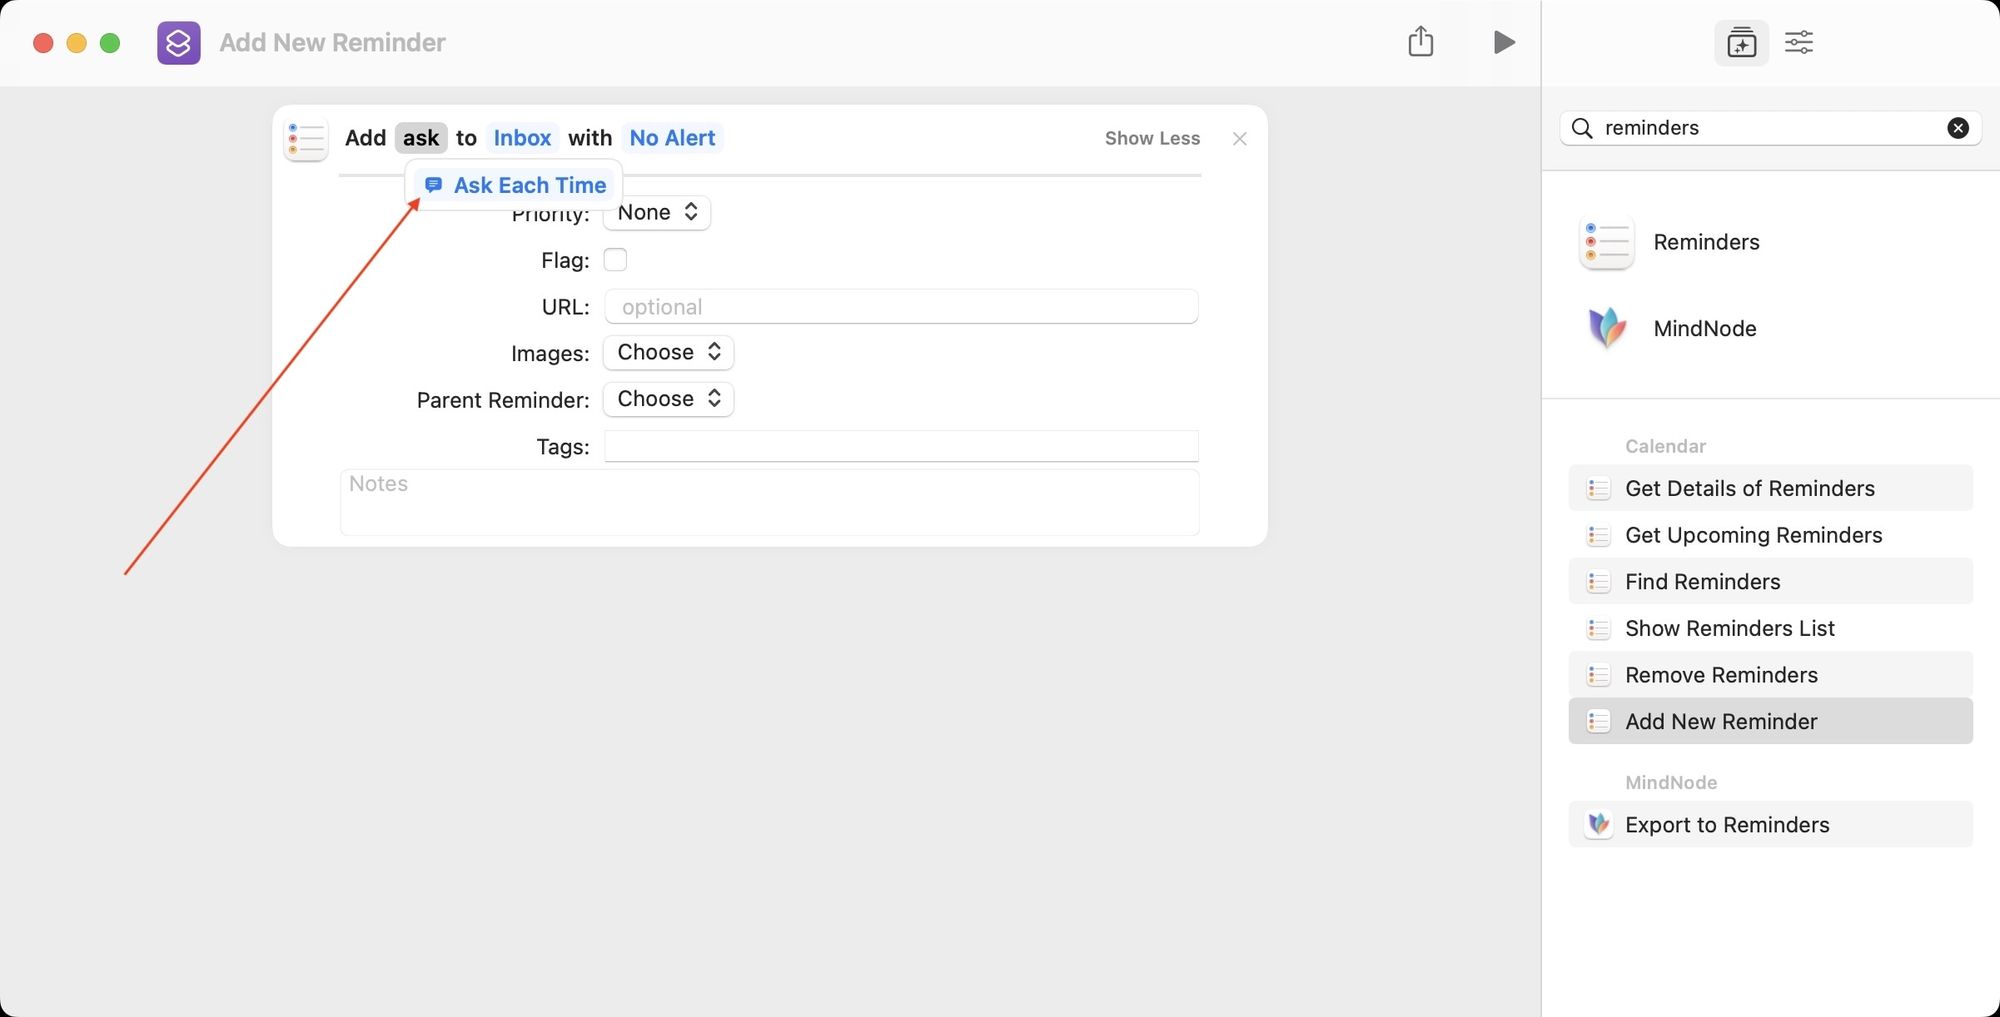
7. Similarly, do this for every field that you want to have the option when creating a new reminder. For example, if you want to be able to add an alert while adding the task, click on the No Alert option and select Ask Every Time.
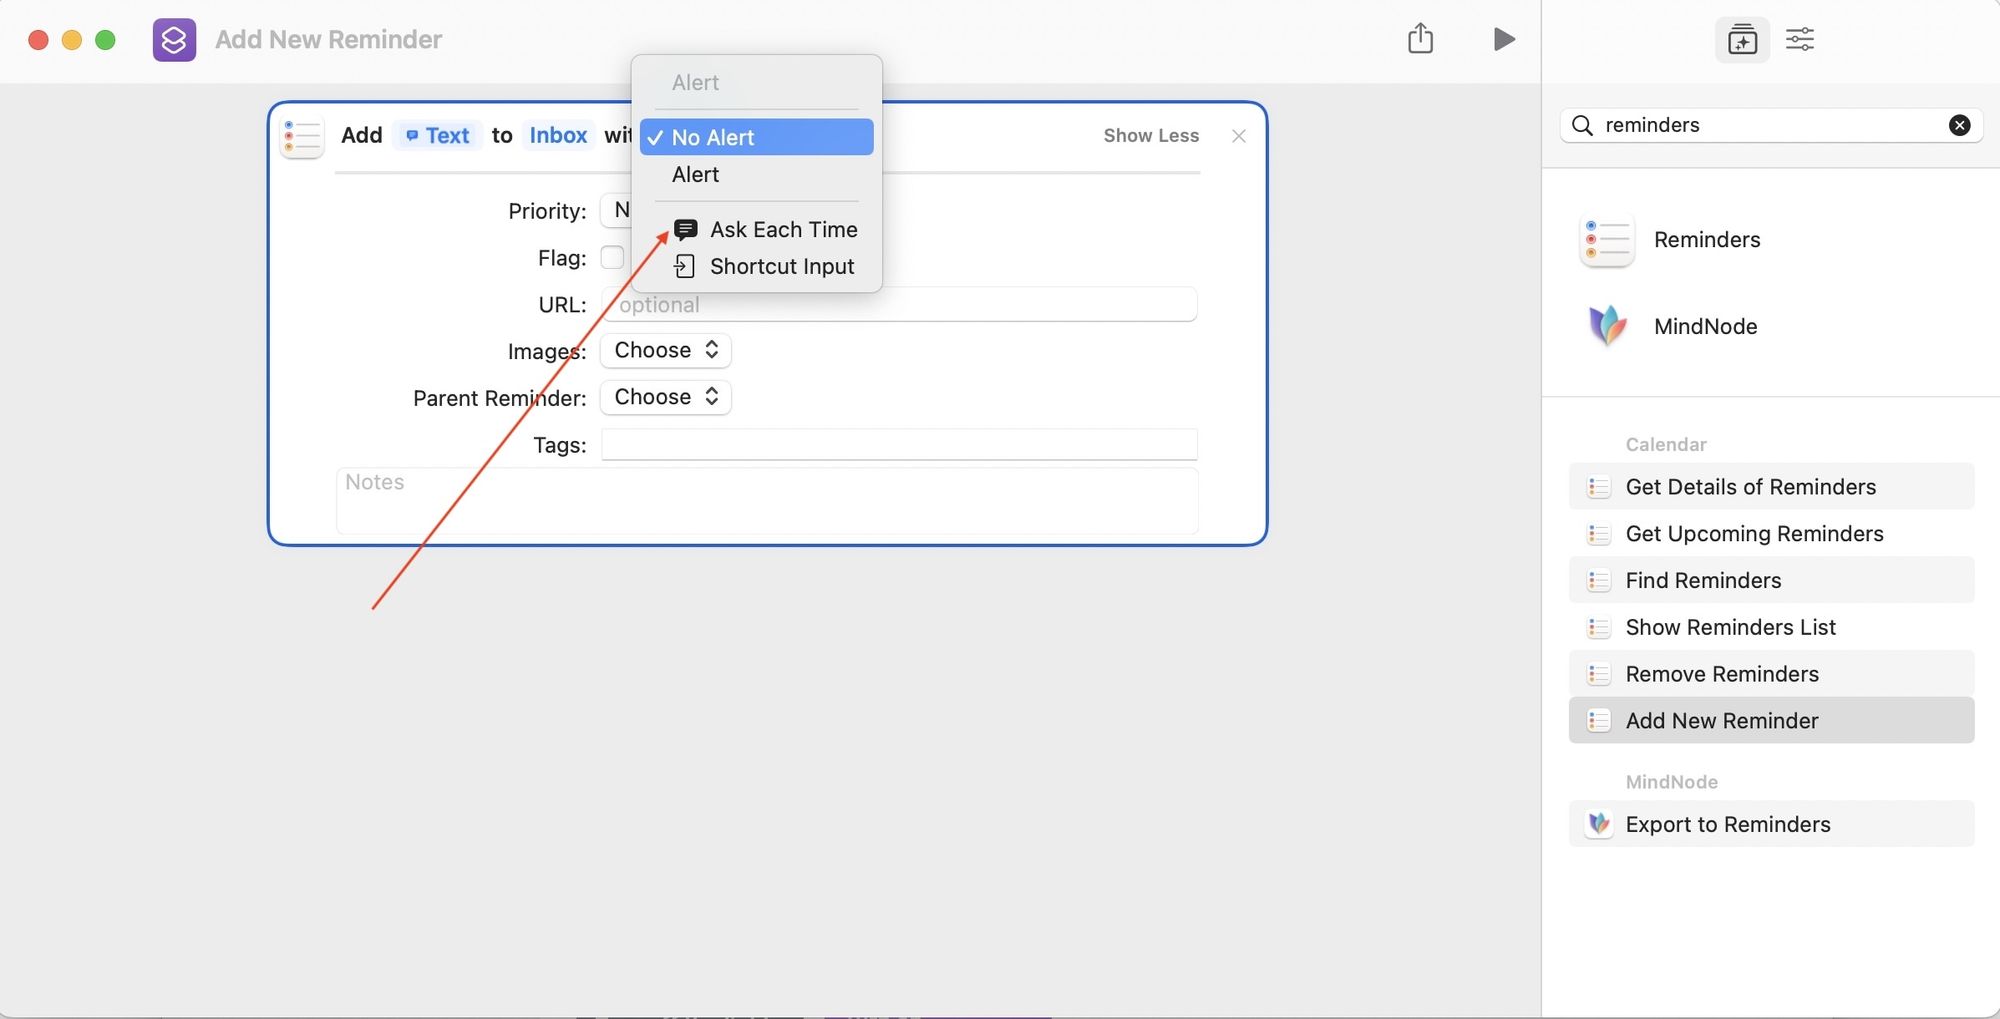
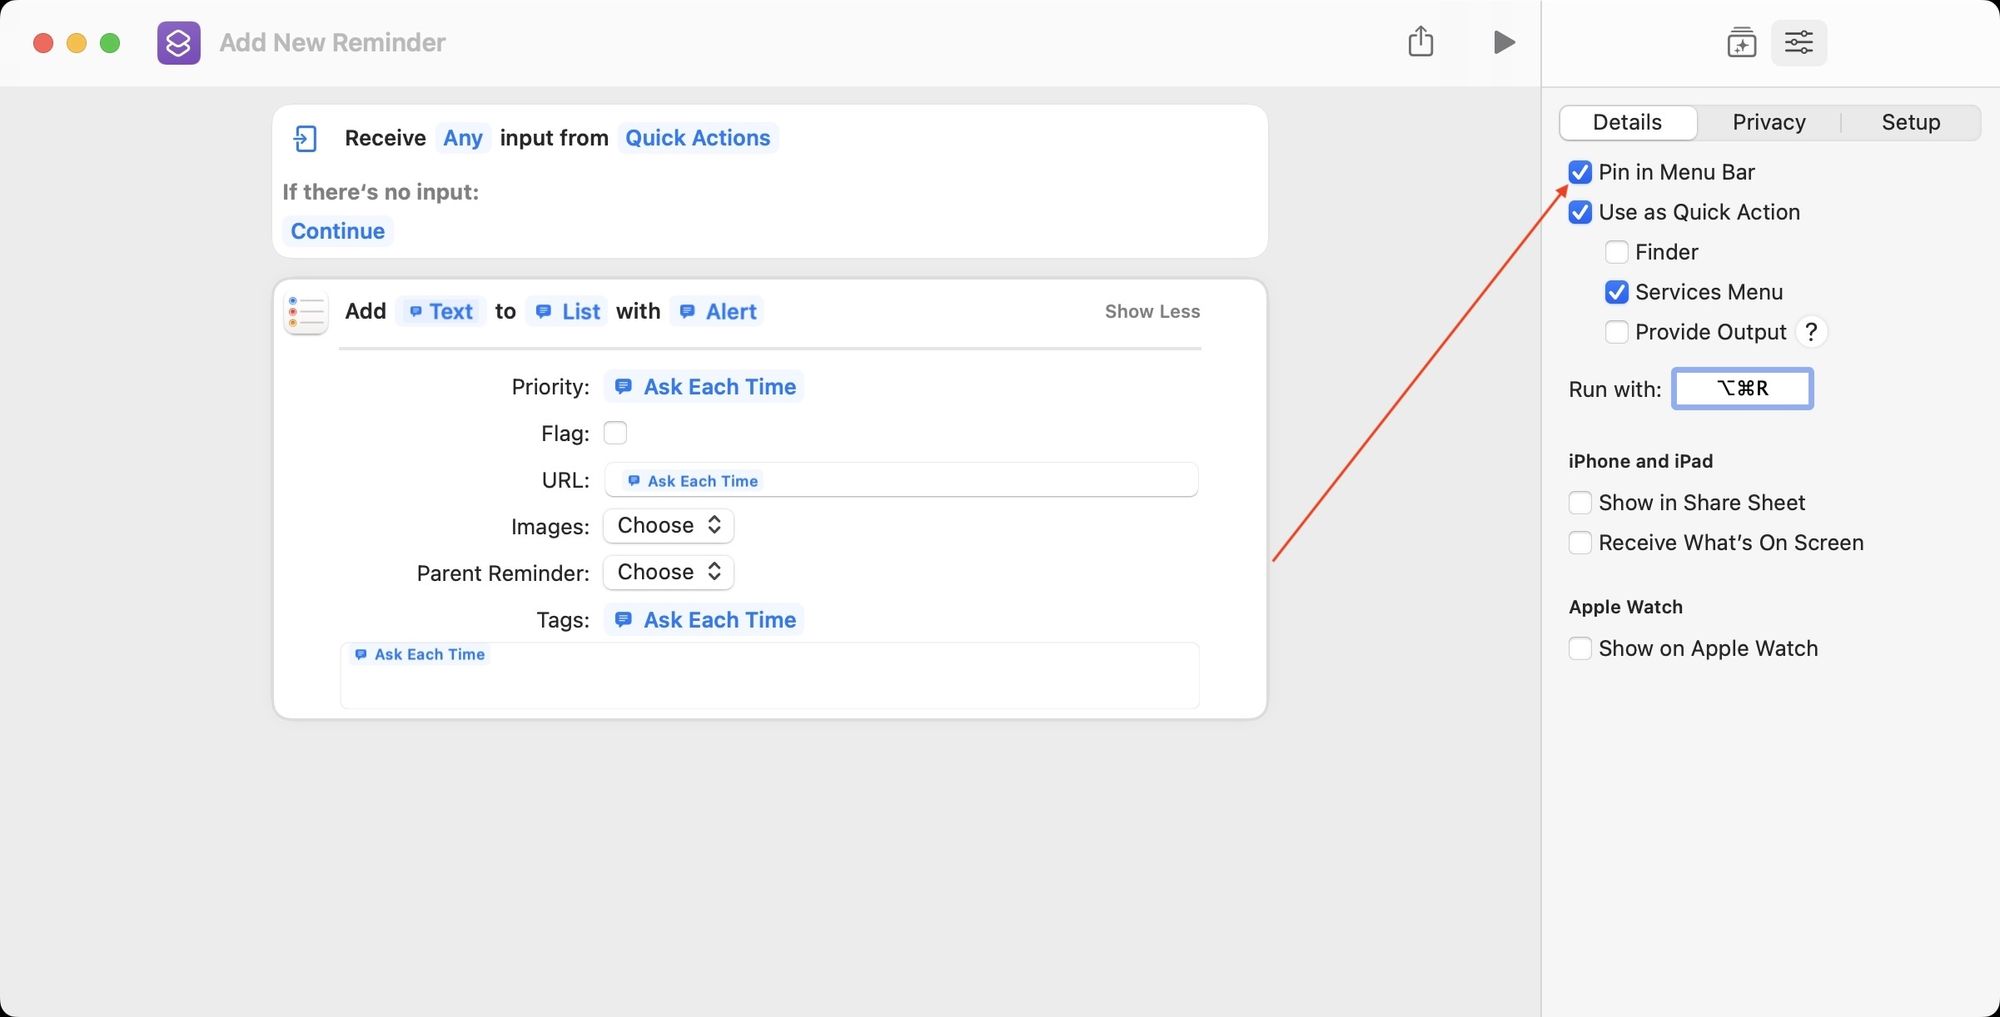
You can do the same for most options, including Priority, URL, Tags, and Notes. I don’t enable these options as I want to quickly add tasks to my default-list Inbox and then process them at the end of the day. However, if you want to receive these options when creating a reminder, you can enable all these options with Ask Every Time options. This is how the Shortcut will look if you do that.
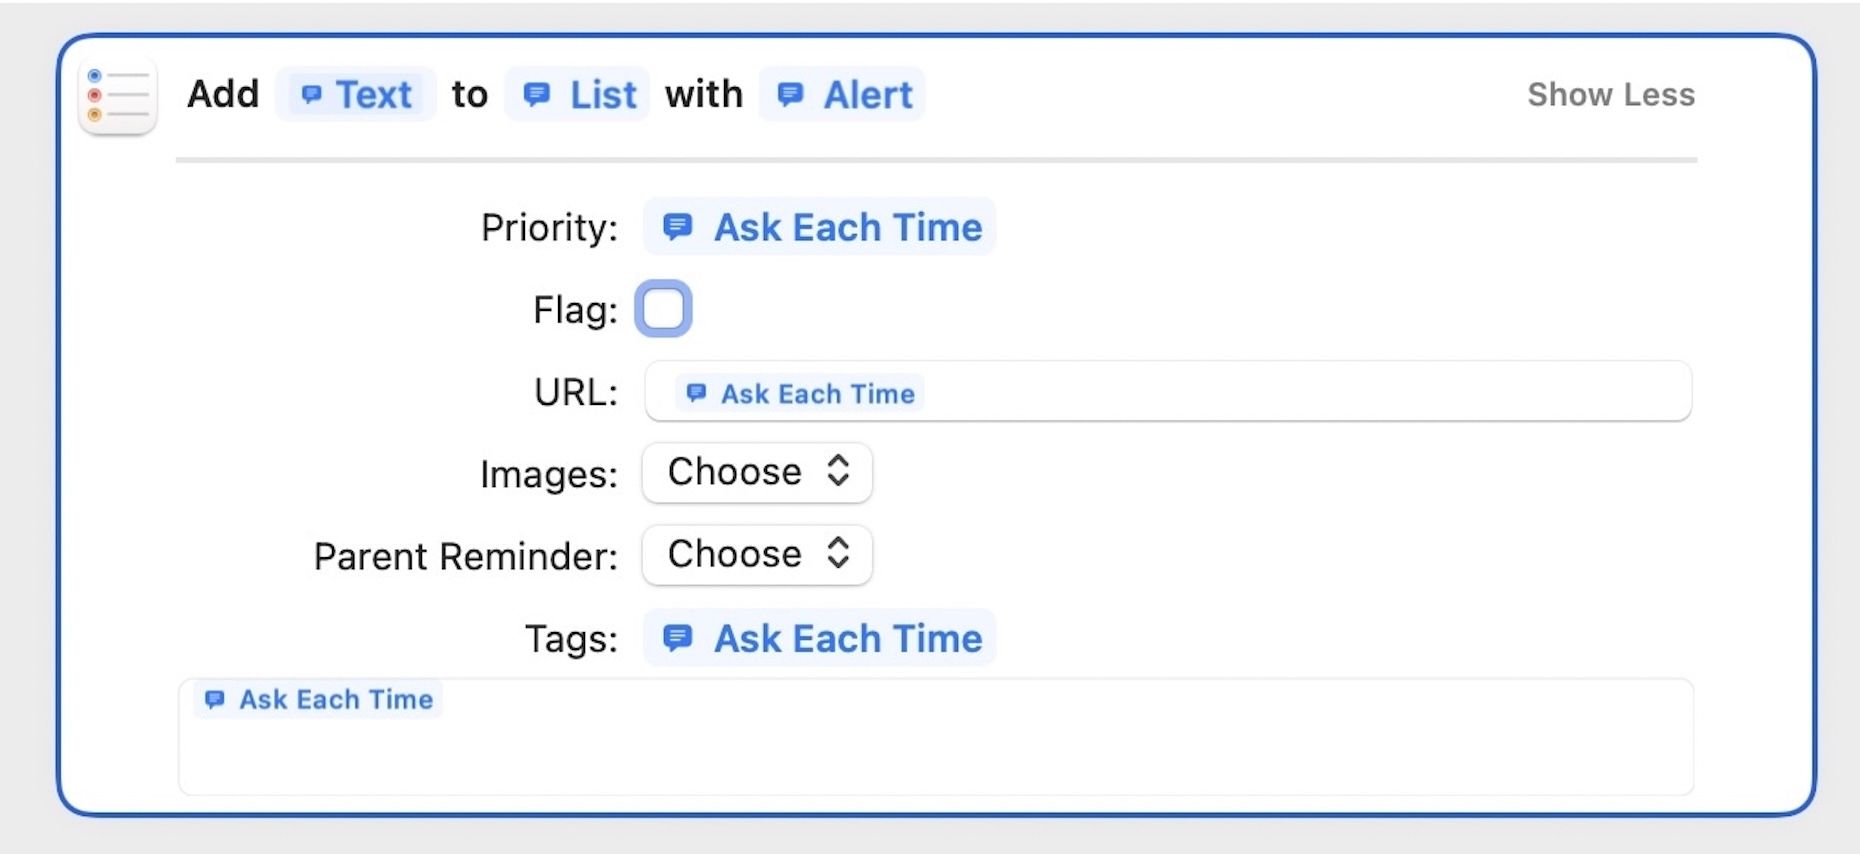
Note that if you do this, if you add a task, it will take you a while to fill in all the details, so you have a choice to make here. If you want to add a full-fledged task with notes, due dates, priority, and all the other details, enable these options. If you want to be able to quickly add reminders and can process them later, you should only enable the necessary options.
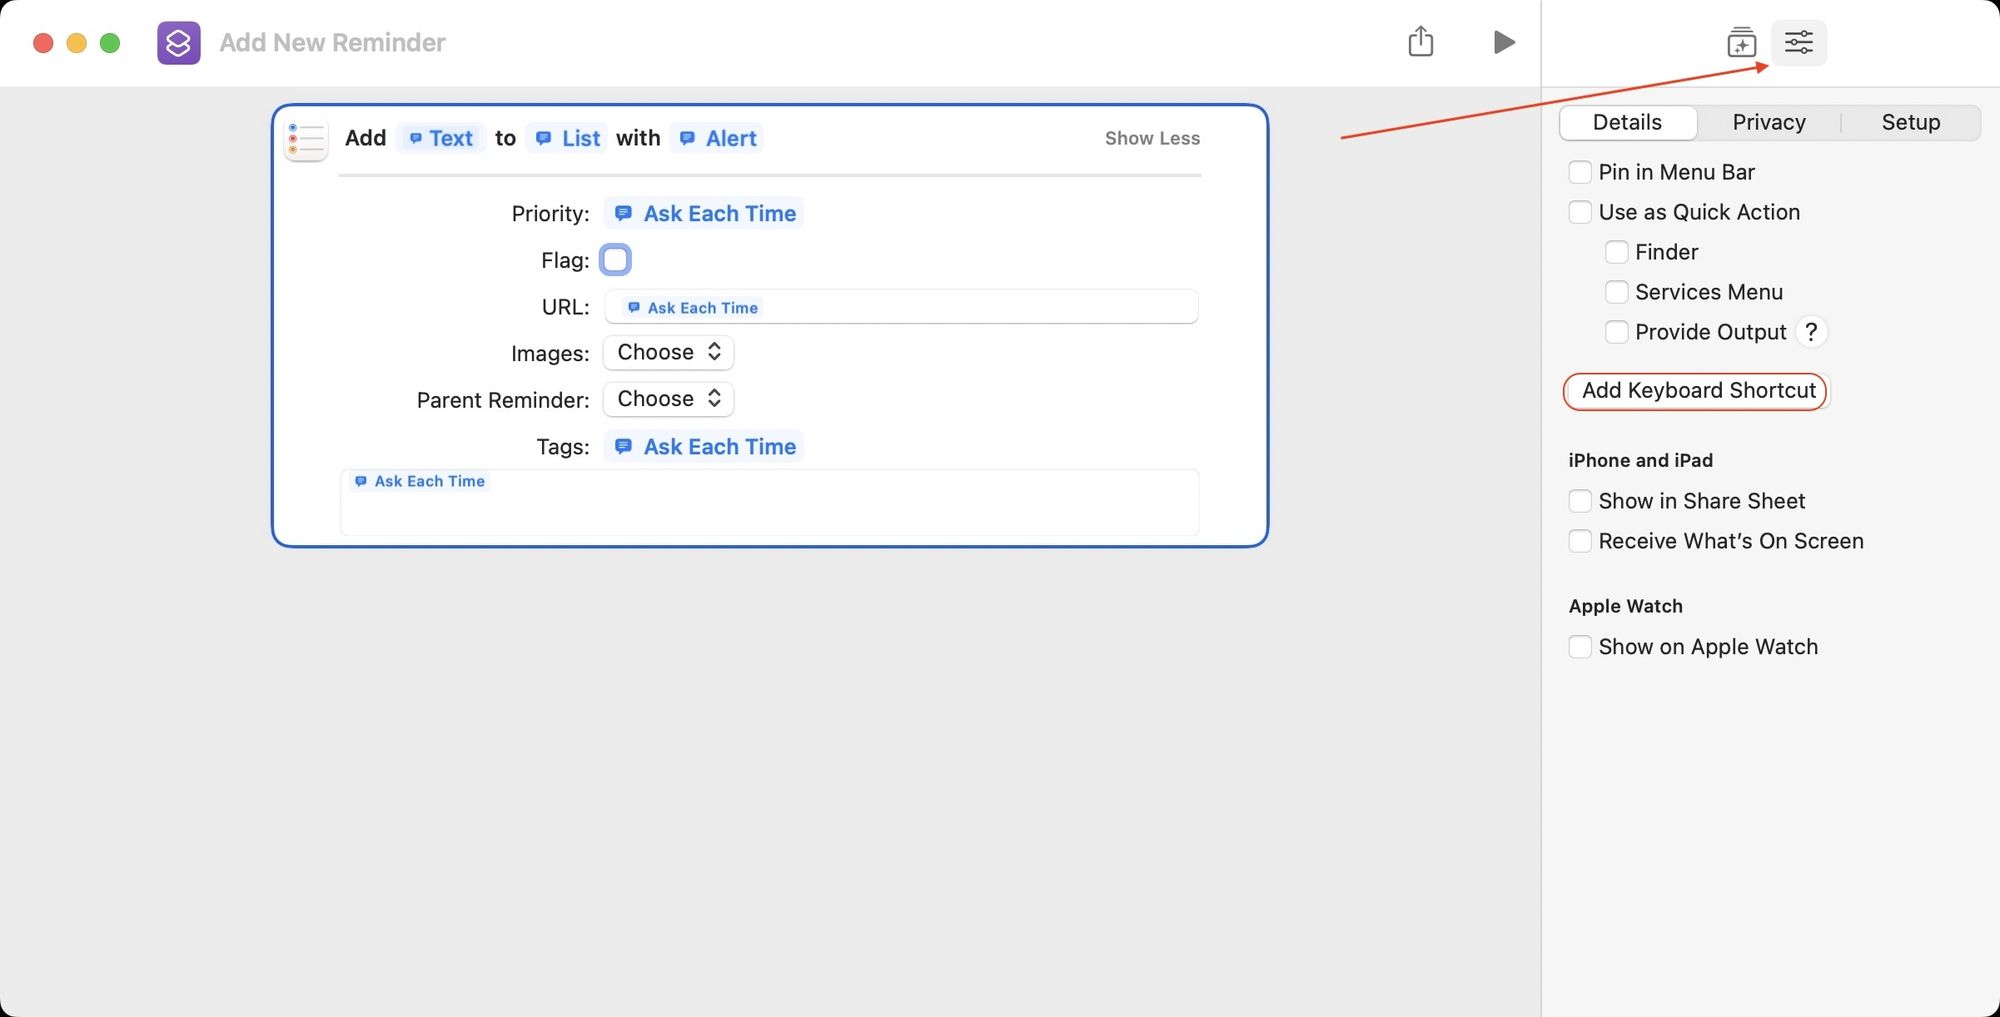
8. Now, to assign a keyboard shortcut, click on the settings icon. Now, click on the Add Keyboard Shortcut button.
9. Now, type the keyboard shortcut that you want to use. I use the ⌥⌘R (Option+Command+R) keyboard shortcut for mine.
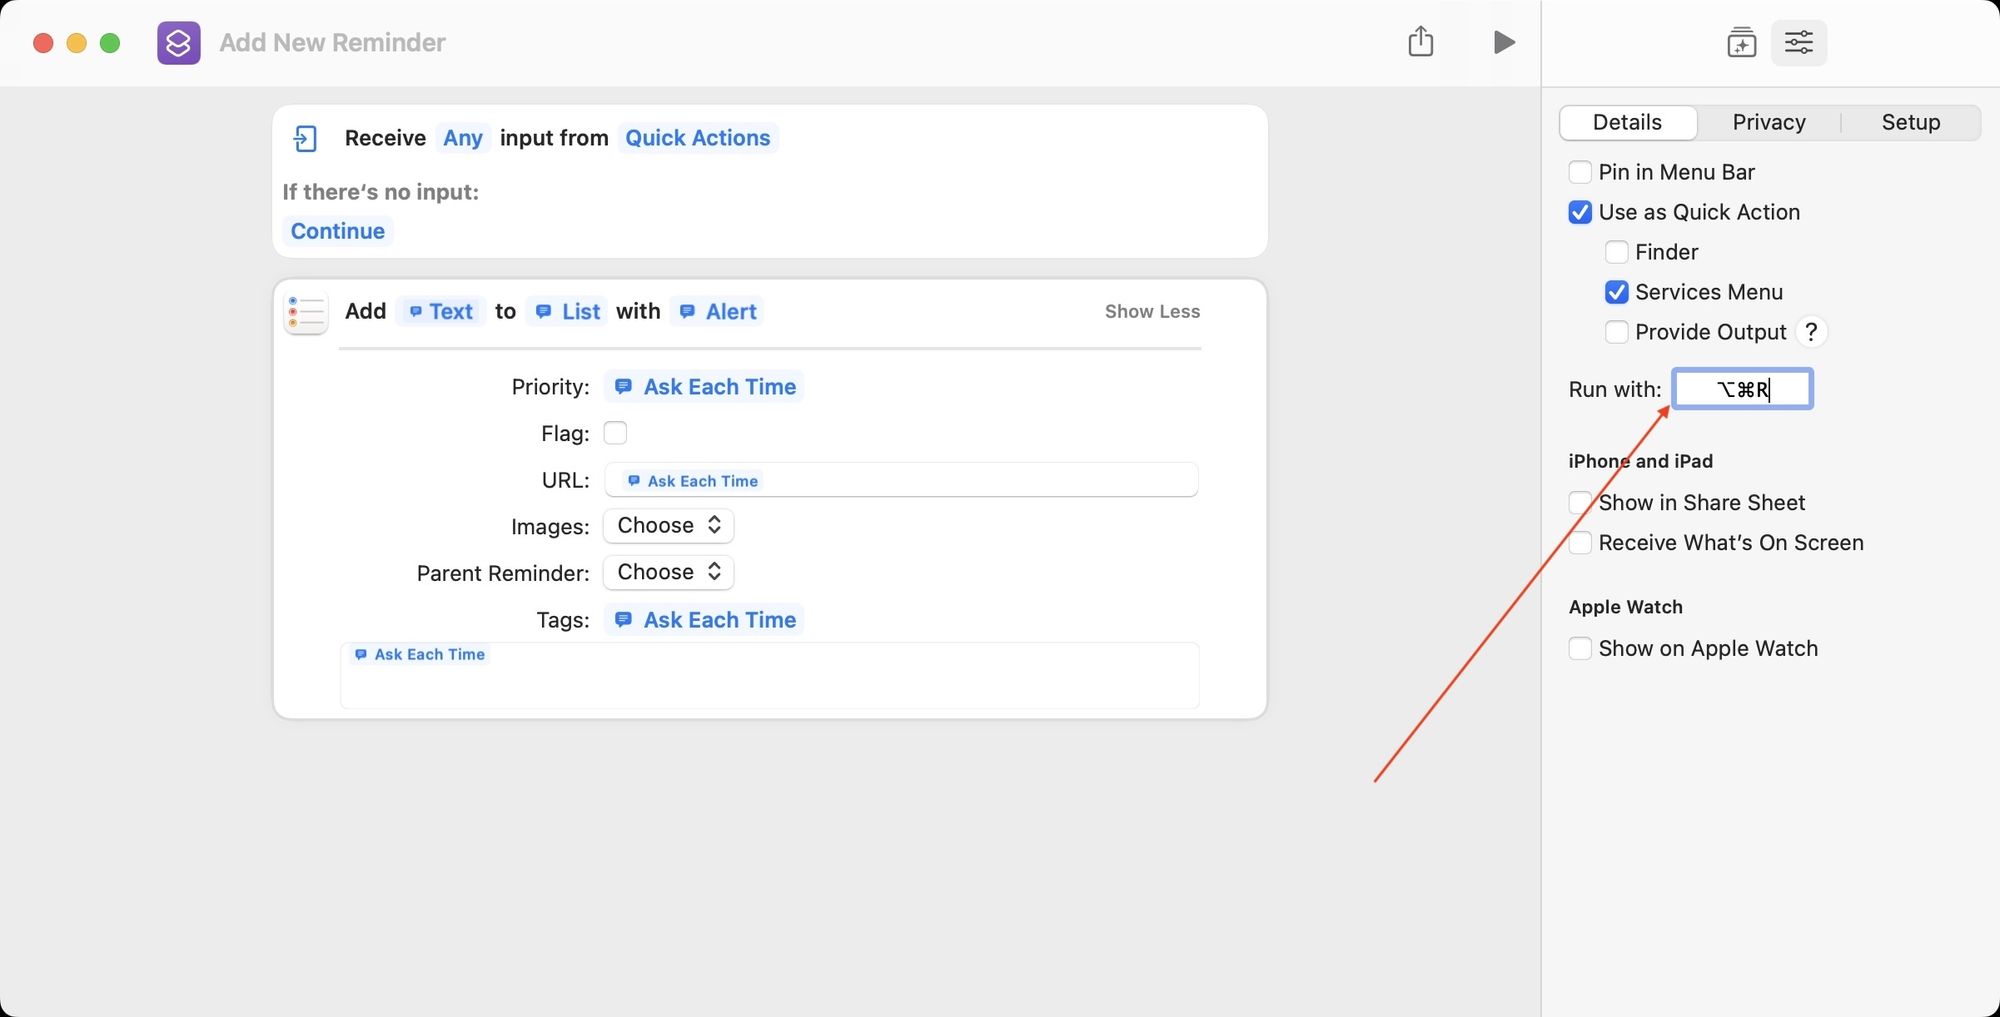
10. You should also enable the Pin in Menu Bar option. It ensures that the keyboard shortcut works without fail.
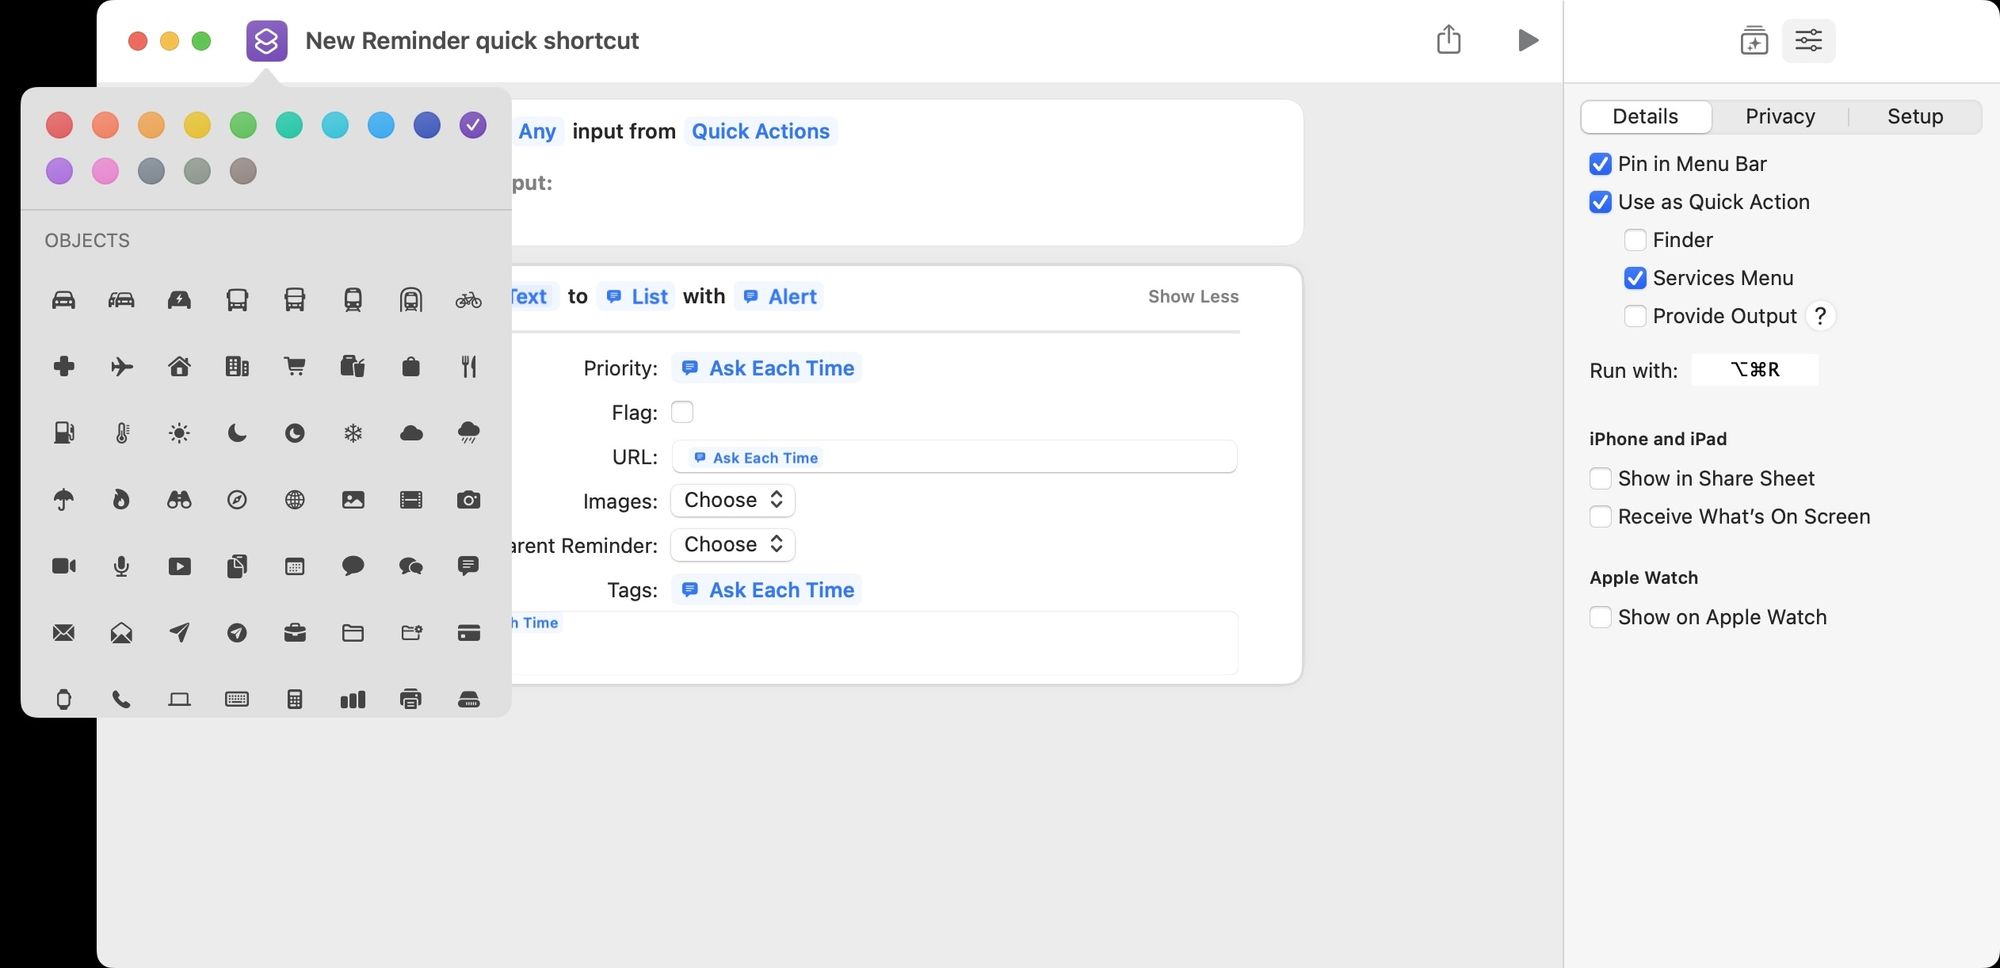
11. Finally, click on the name field on the top to add a name and the icon to assign it a distinct icon. Click on the red button to close the window.
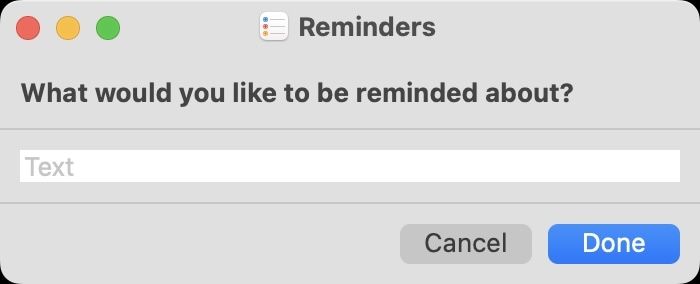
12. Now, when you want to add a reminder, hit your keyboard shortcut, and it will open a quick add window, as shown below.
Add reminders with a quick keyboard shortcut on Mac: final thoughts
So, that is how you create a quick entry shortcut for Apple Reminders on Mac. I find this much easier to create reminders using this shortcut. So, use this shortcut and let us know whether you find it useful or not. Also, if you have any questions or face difficulties while making the shortcut yourself, reach us on Twitter with your questions.

Comments ()