How to Generate Temporary Email IDs on iPhone and Mac
Here is how you can generate temporary email IDs on iPhone and Mac.

Every other website on the web wants you to sign up and create an account with them for some reason or the other. While it’s okay to create an account on websites that you will use regularly, giving your personal email to every website and app will result in tons of spam emails. Then there’s the issue of websites that don’t let you unsubscribe from their newsletter, no matter how many times you ask them. That’s where temporary or throwaway email IDs can help you out. Here is how you can generate temporary email IDs on iPhone and Mac.
Generate temporary email IDs on iPhone and Mac
While there are several online services that allow you to create a temporary email ID, these services are not really useful, as you lose access to your temp email as soon as you close the tab. We will not be using those services for this guide. Instead we will use the Hide My Email feature that Apple introduced with iOS 15 and macOS Big Sur. Here are some of the benefits of using this solution:
- You don’t lose access to your temporary email ID unless you delete them.
- The emails you receive on your temp emails are automatically forwarded to your main Apple ID. It means you don’t have to keep track of the temp emails you create.
- You can easily manage and delete your temp emails.
Now that you know about the benefits, let us see how you can create throwaway emails using the Hide My Email feature on your Mac and iPhone.
Generate temporary email ID on iPhone
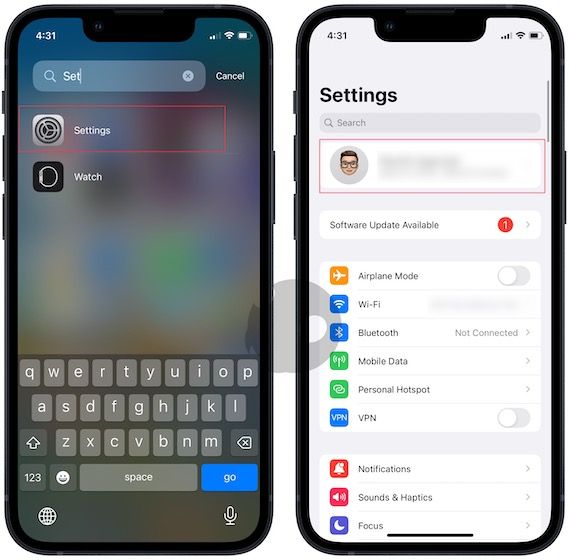
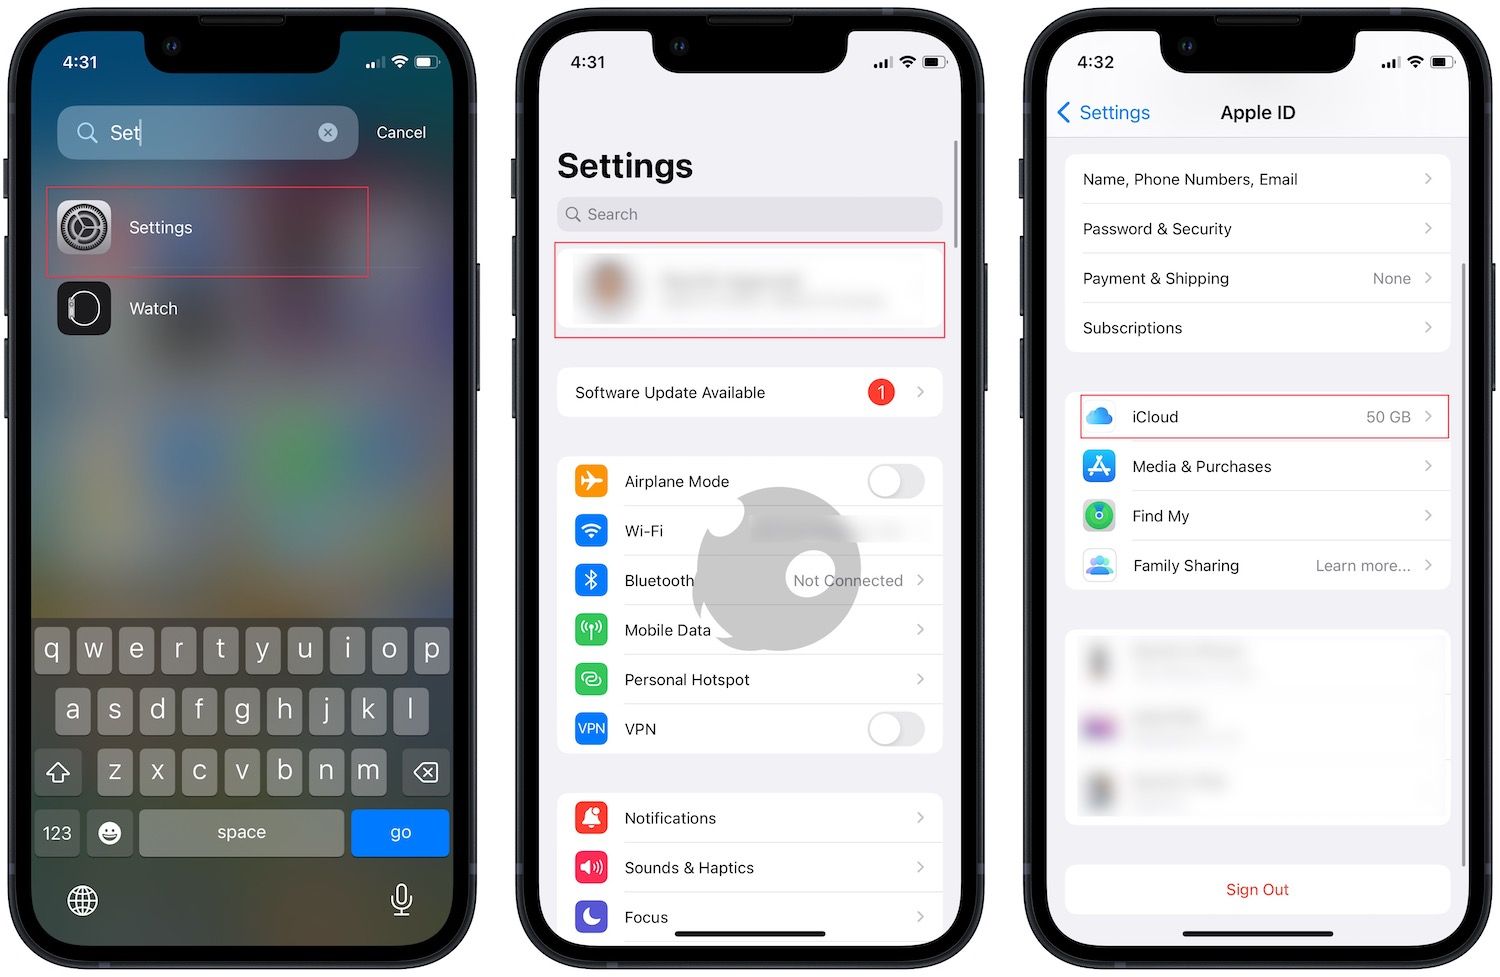
1. Launch the Settings app on your iPhone and tap on your name.
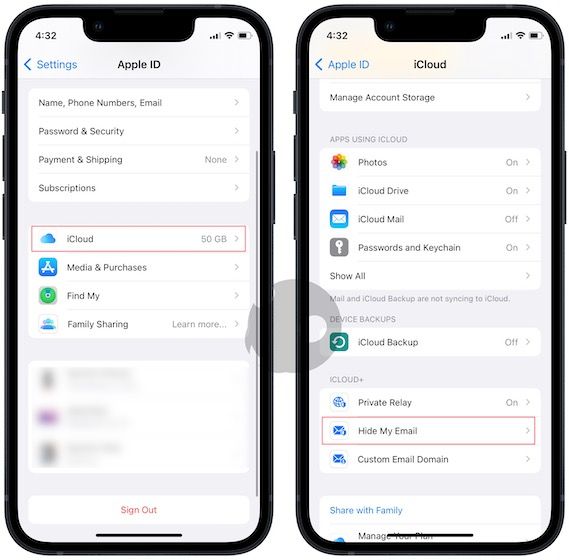
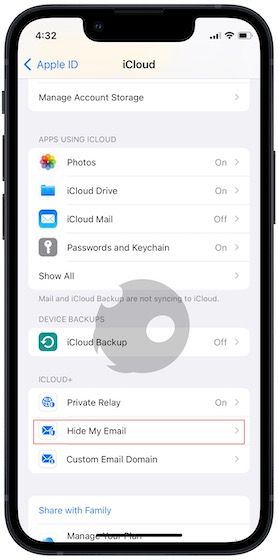
2. Open iCloud and tap on the Hide My Email option.
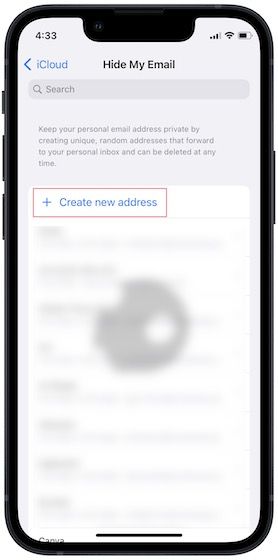
3. Choose the Create new address option.
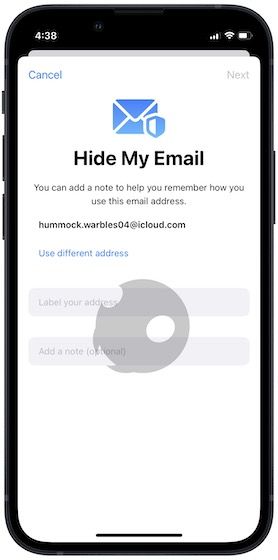
4. Now, you can add a label and a note to ensure that you remember where you are using this email address.
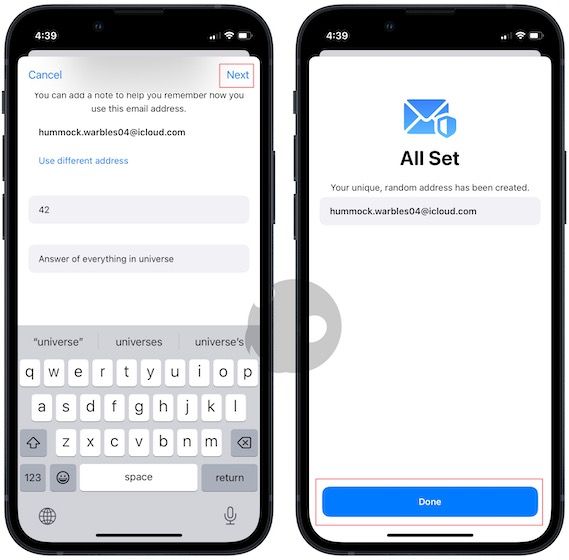
5. Tap on Next and then on Done to save changes.
Delete temporary Email ID on iPhone
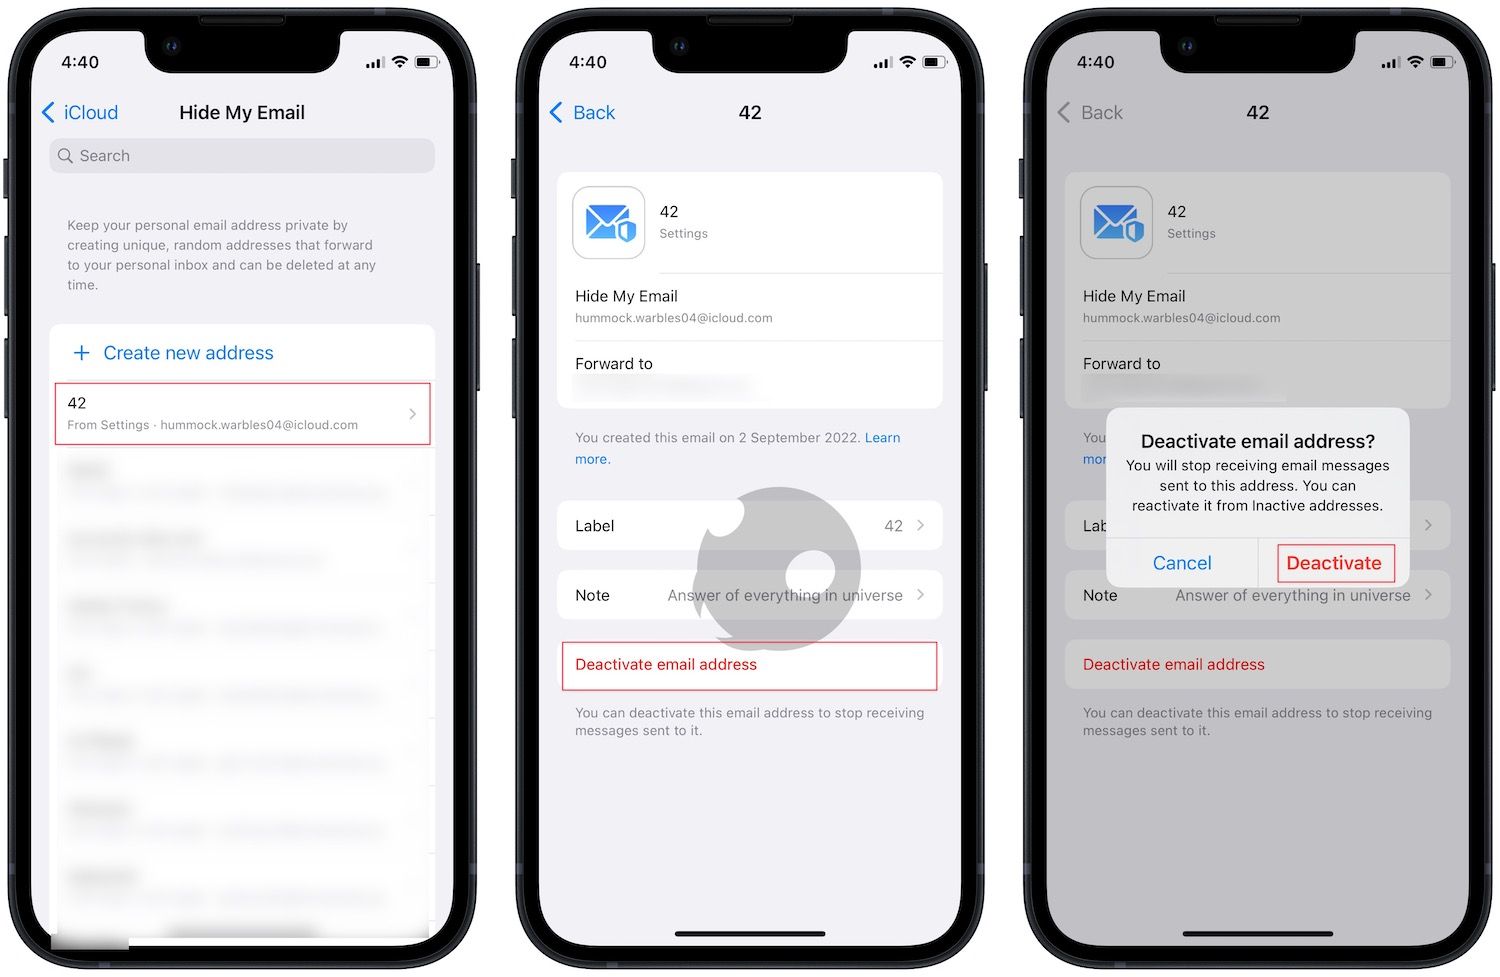
1. To delete a temp email go to Settings → Profile → iCloud.
2. Tap on Hide My Email, and you will see a list of all your temp email IDs.
3. Tap on the email ID you want to delete. Choose the Deactivate email address option and tap on Deactivate to delete the email.
Generate temporary email ID on Mac
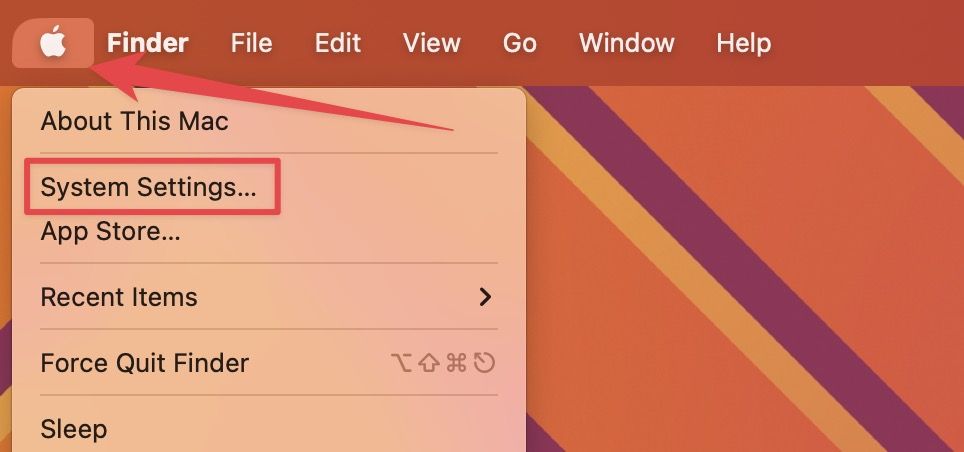
1. Use the Apple Menu to launch the System Settings app (System Preferences in Big Sur).
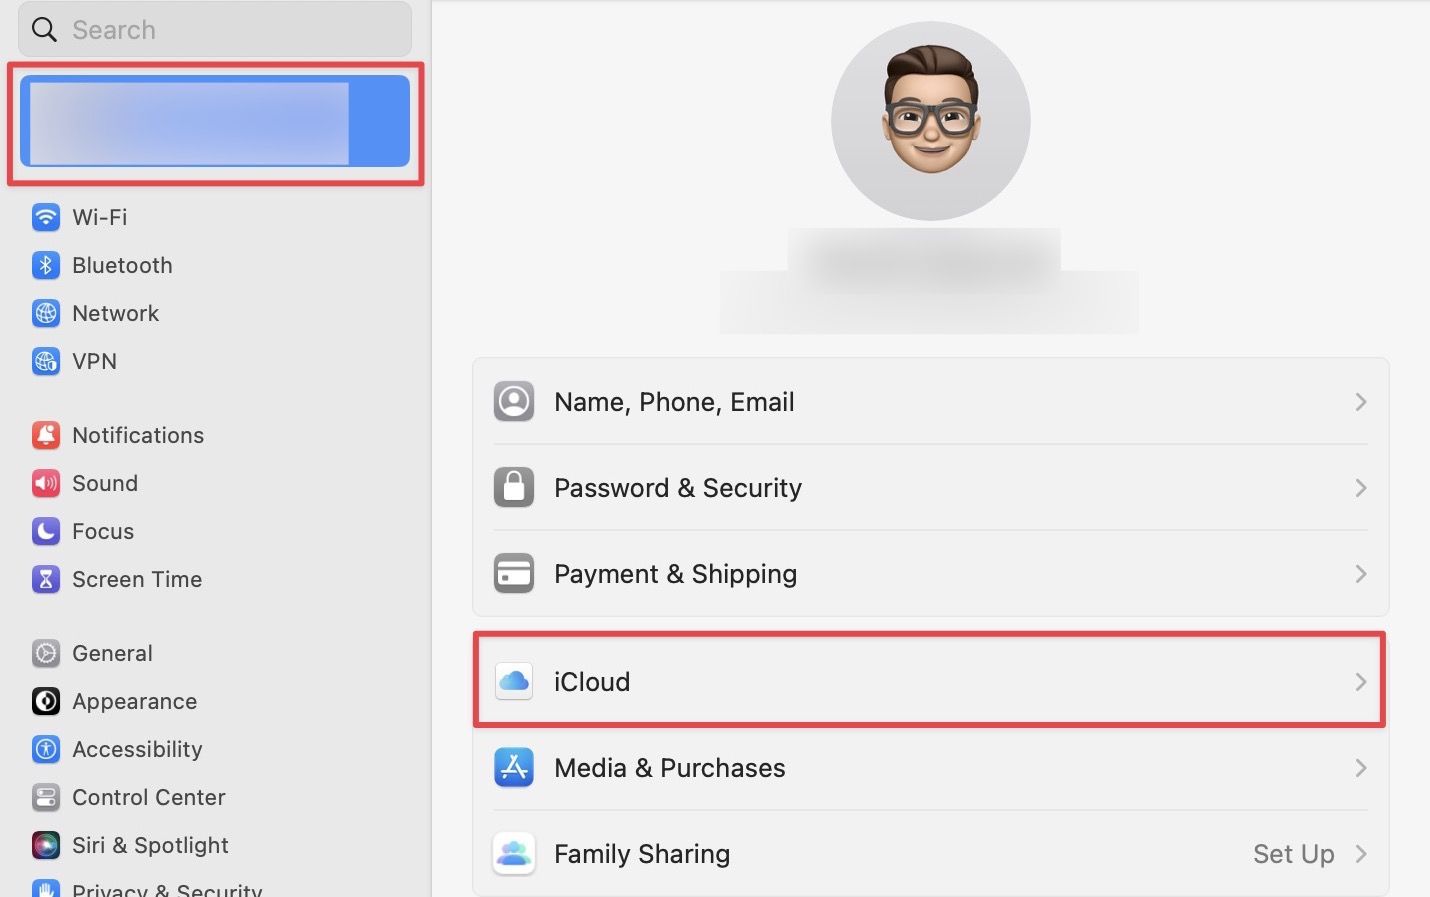
2. Click on your name and then choose the iCloud option.
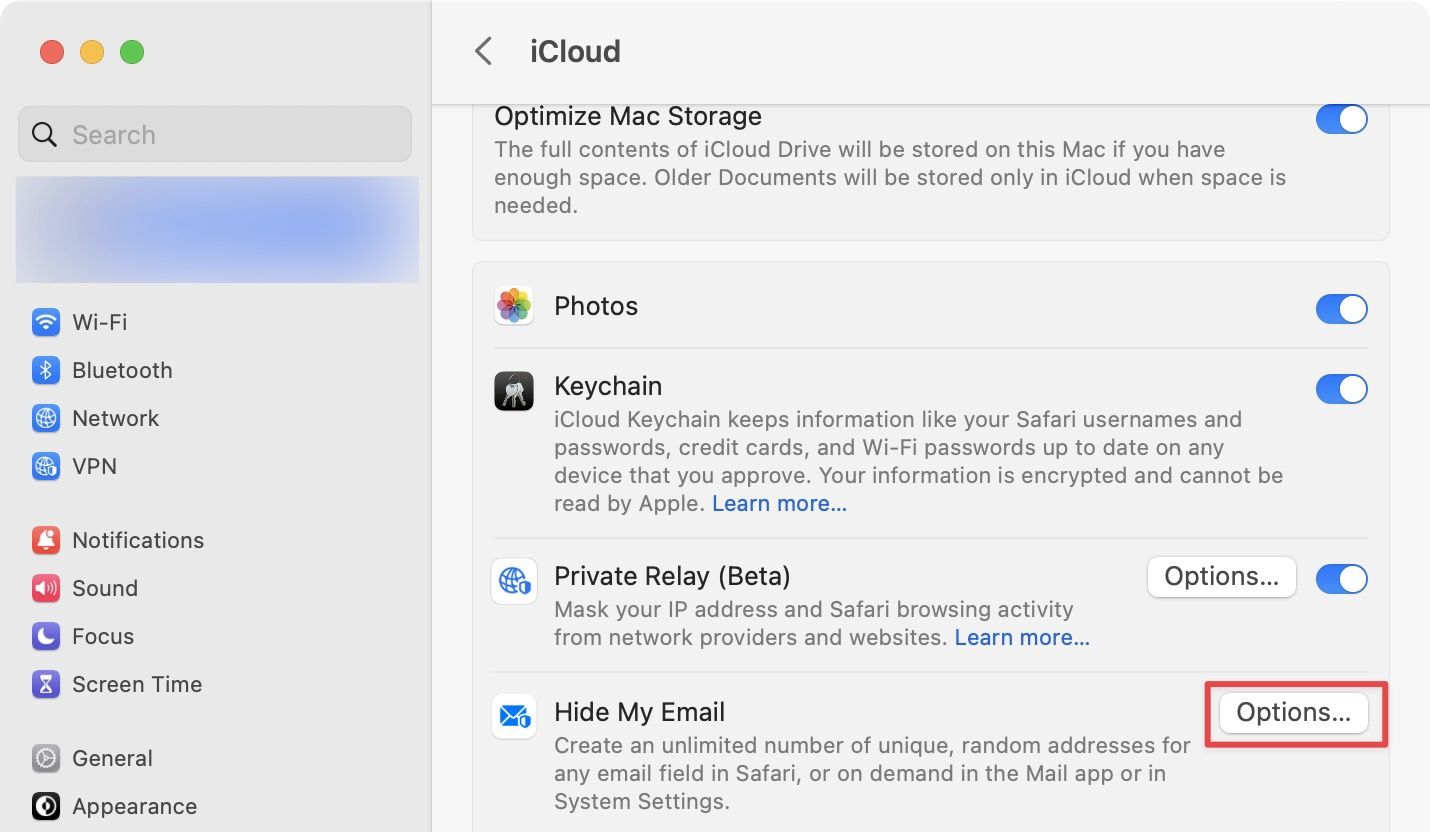
3. Click on the Options button next to the Hide My Email option.
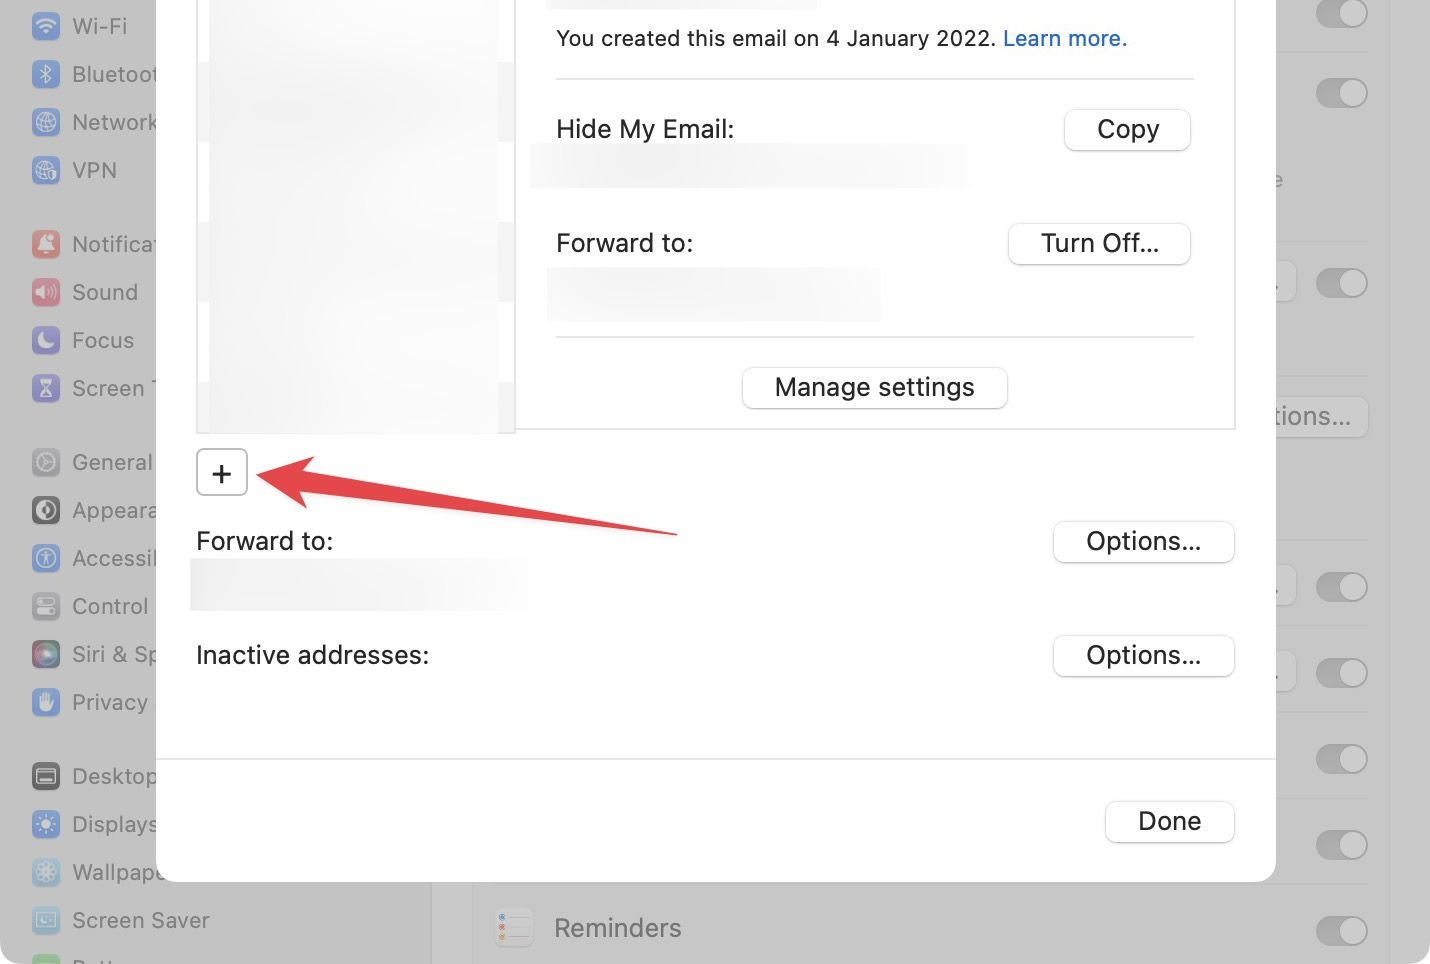
4. Tap on the plus (+) button.
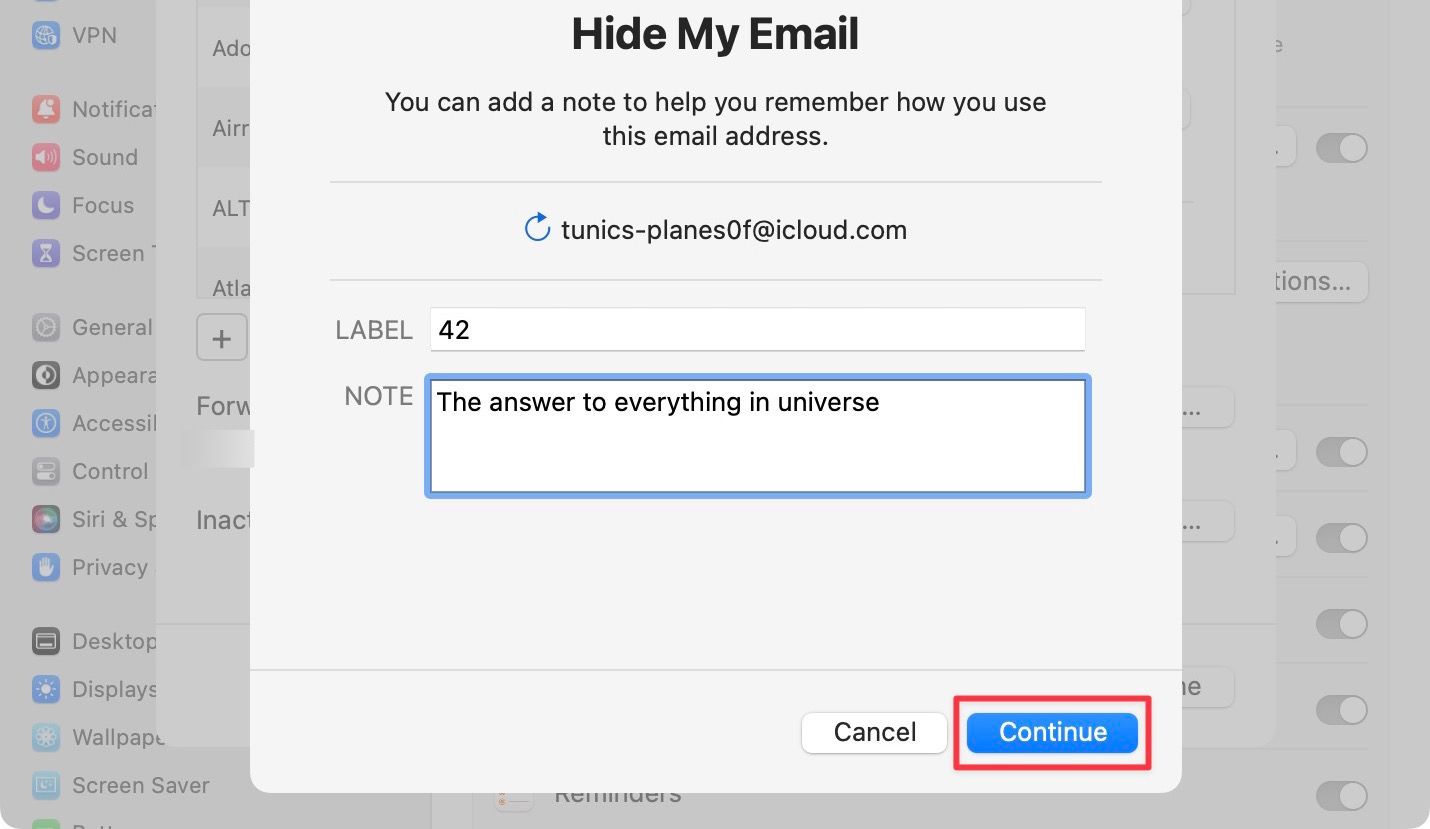
5. Enter the label and the note for the email and tap on Continue.
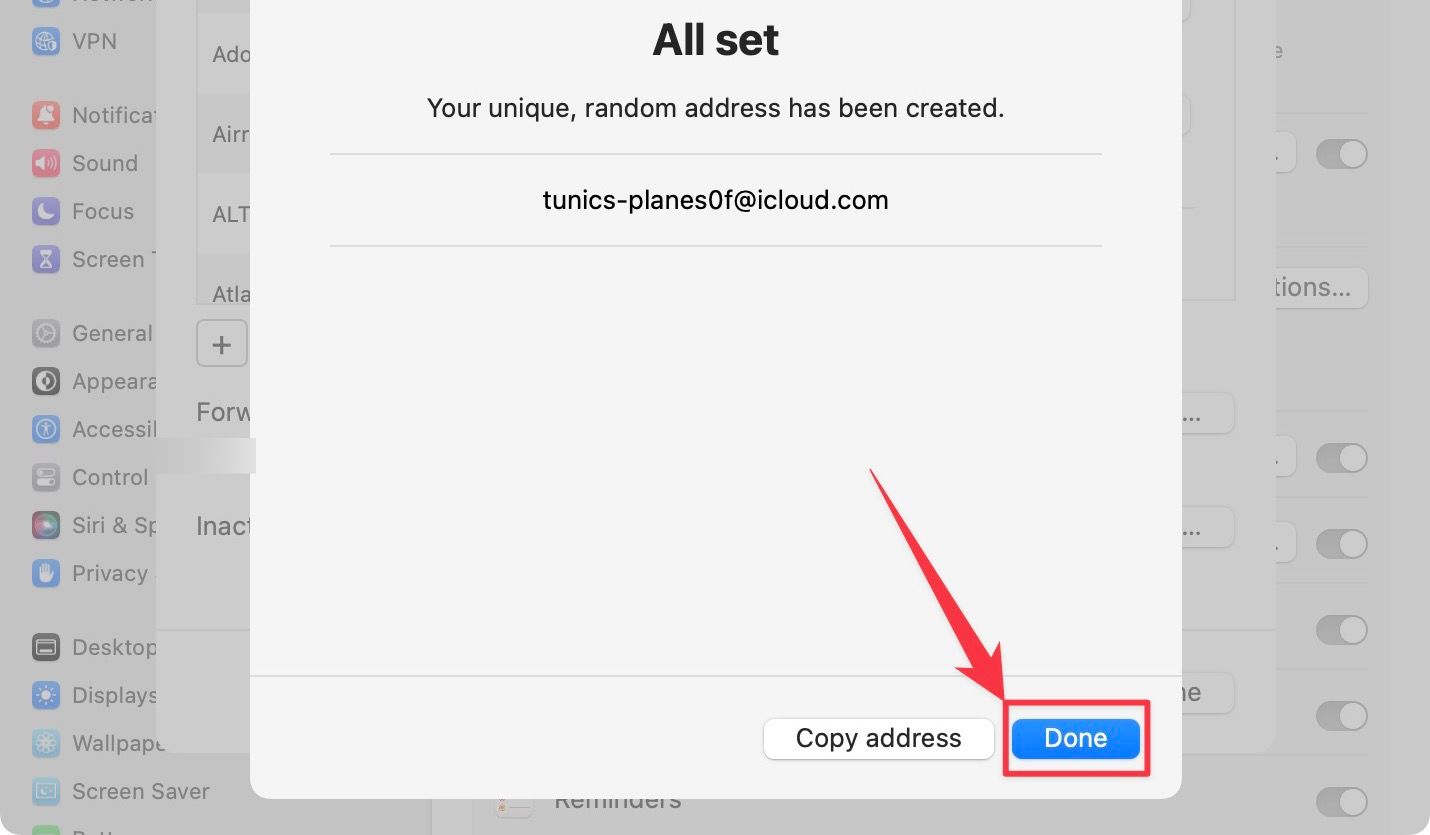
6. Click on the Done button to save changes.
Delete temporary email ID on Mac
1. To delete a temporary email ID on Mac, go to System Settings → Profile → iCloud and click on the Options button next to Hide My Email.

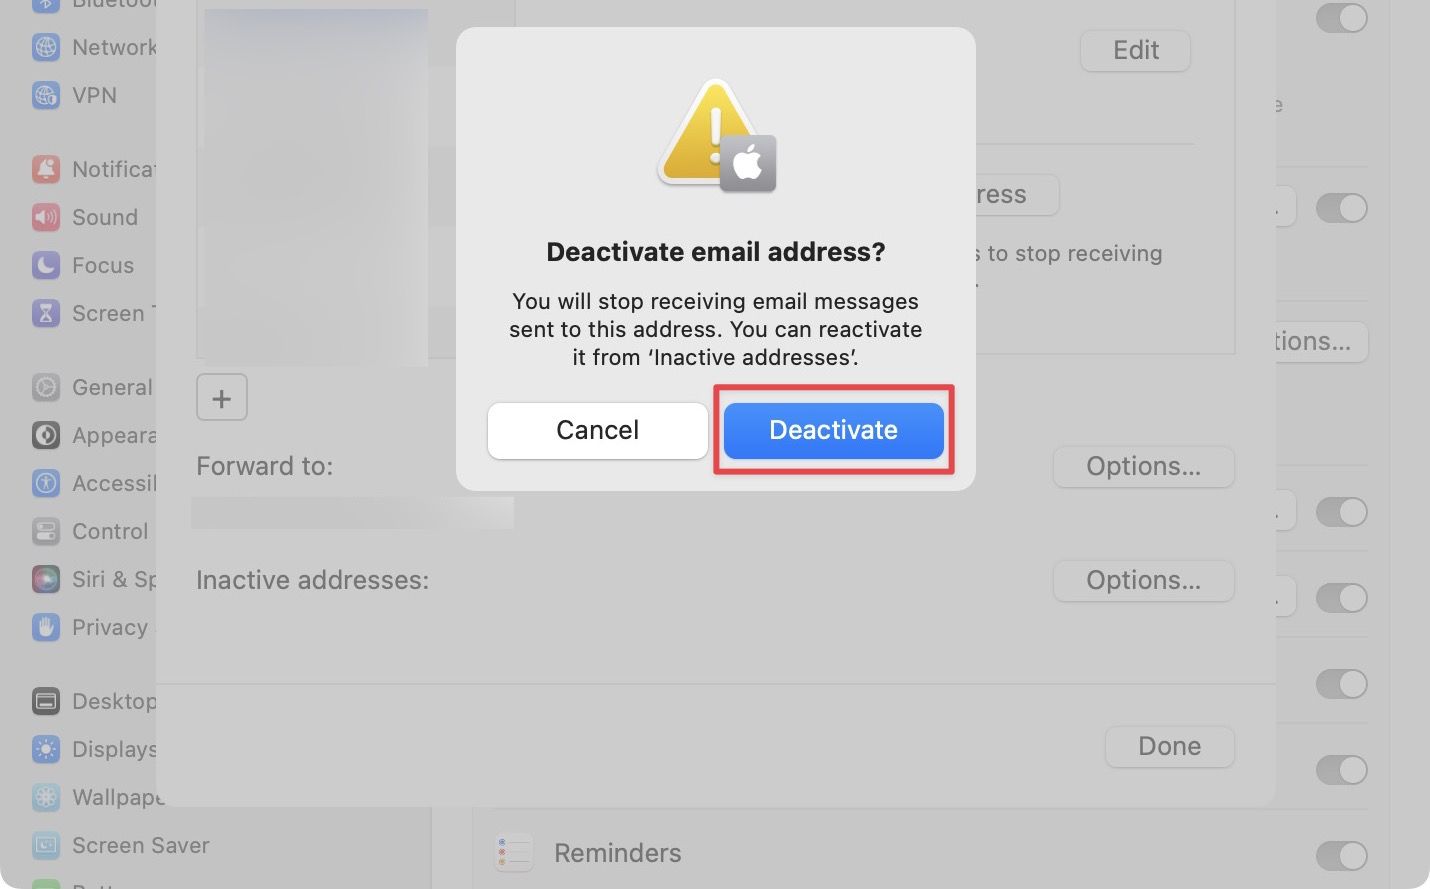
2. Select the email ID you want to delete, and scroll down and click on the Deactivate email address option.
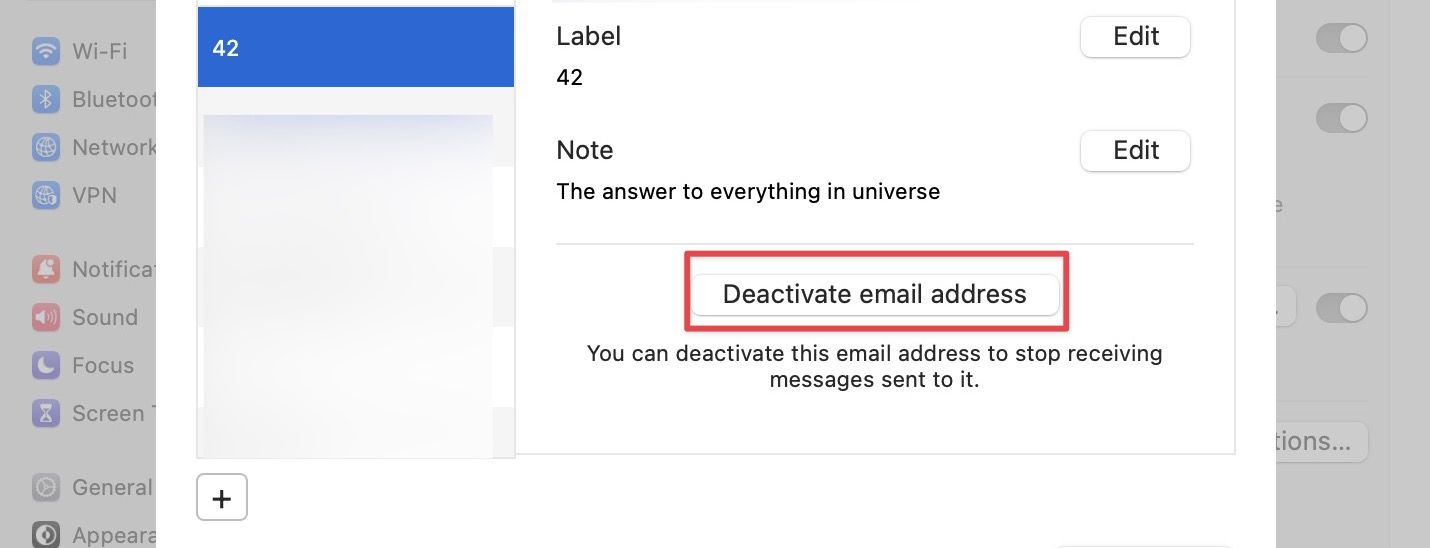
3. Click on Deactivate to confirm.
Create and delete throwaway email IDs on Mac and iPhone
As you can see, it is easy to create temp emails on your Apple devices. You can use these emails to sign up on any website you want. If an app or service is too annoying and doesn’t let you unsubscribe, you can delete these temp emails to stop receiving emails from them. Do let us know what you think about this feature in the comments below.


