How to Disable Wallpaper Tinting in Windows on Mac
If you don't like the wallpaper tinting feature on your Mac, here is how you can disable wallpaper tinting in windows on Mac in macOS Ventura and other macOS versions.

macOS comes with a built-in wallpaper tinting feature that chooses colors from your current wallpaper and adds a subtle effect that helps windows blend more harmoniously with their surrounding content. While some users find this feature helpful, others find it distracting. The new macOS Ventura update has changed how users can disable wallpaper tinting in windows on Mac. In this guide, we will show you how to enable or disable wallpaper tinting in windows on Mac.
Disable wallpaper tinting in Windows on Mac
The macOS Ventura update has replaced the System Preferences app with a new System Settings app. While this change is not a problem in itself, what might annoy users is the fact that it has also reorganized several settings. For example, the way you change your Mac’s login password in macOS Ventura, set the default browser in macOS Ventura, and several other settings have changed. We have published several guides covering these changes.
Here also, we are going to show you how you can disable wallpaper tinting in Windows on Mac in macOS Ventura and previous operating systems.
Disable wallpaper tinting in windows in macOS Ventura
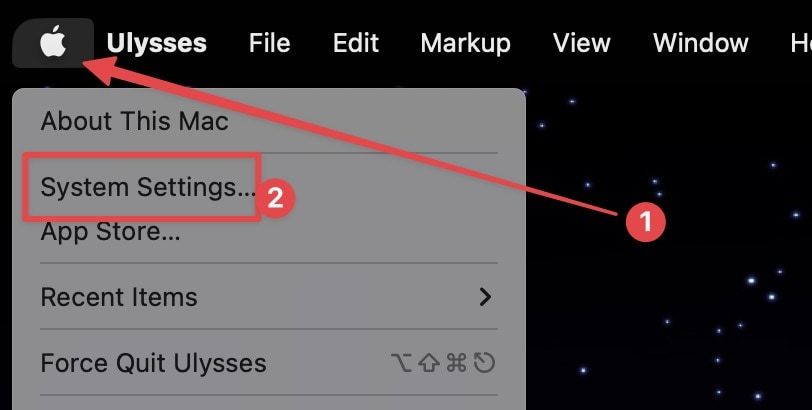
1. Use the Apple Menu to open the System Settings app on your Mac.
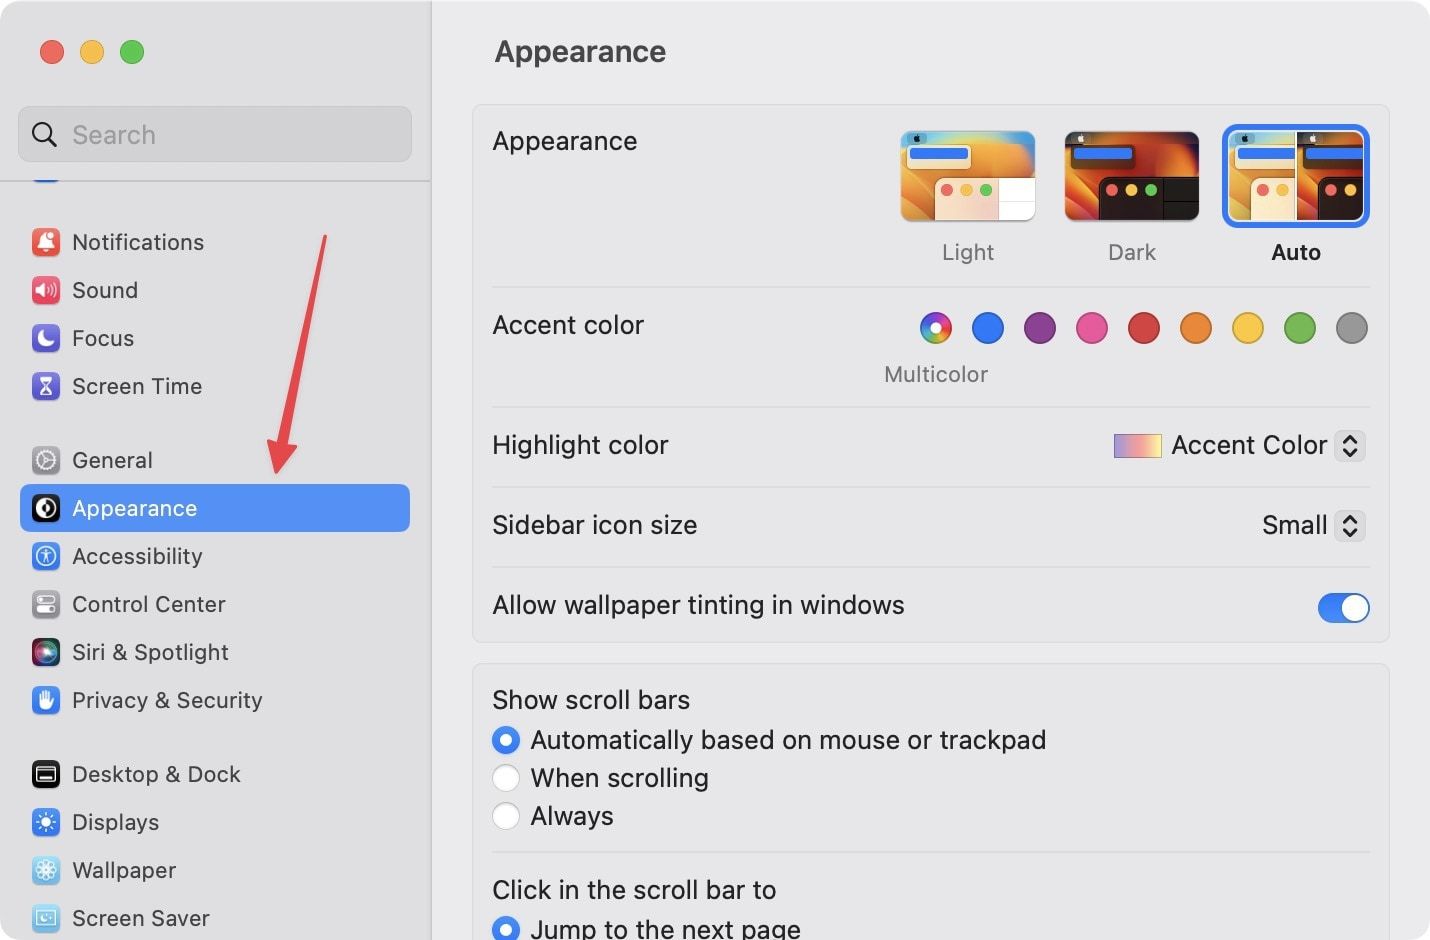
2. Locate the Appearance settings and click on it.
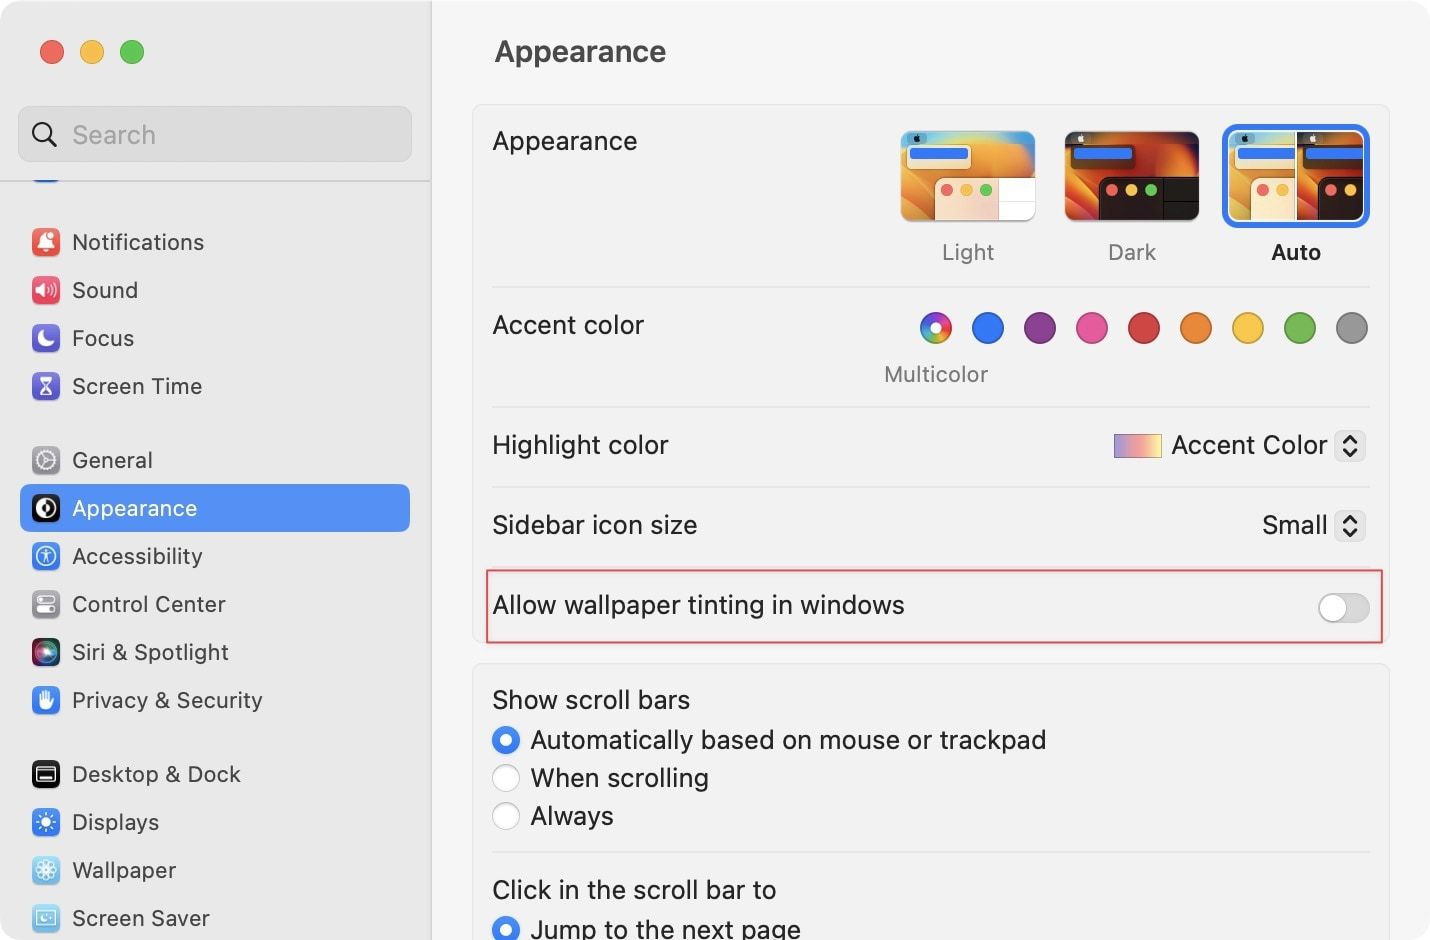
3. Now, disable the toggle next to Allow wallpaper tinting in windows.
Disable wallpaper tinting in windows in macOS Big Sur and below
1. Use the Apple Menu to open the System Preferences app.

2. Click to open the General settings.
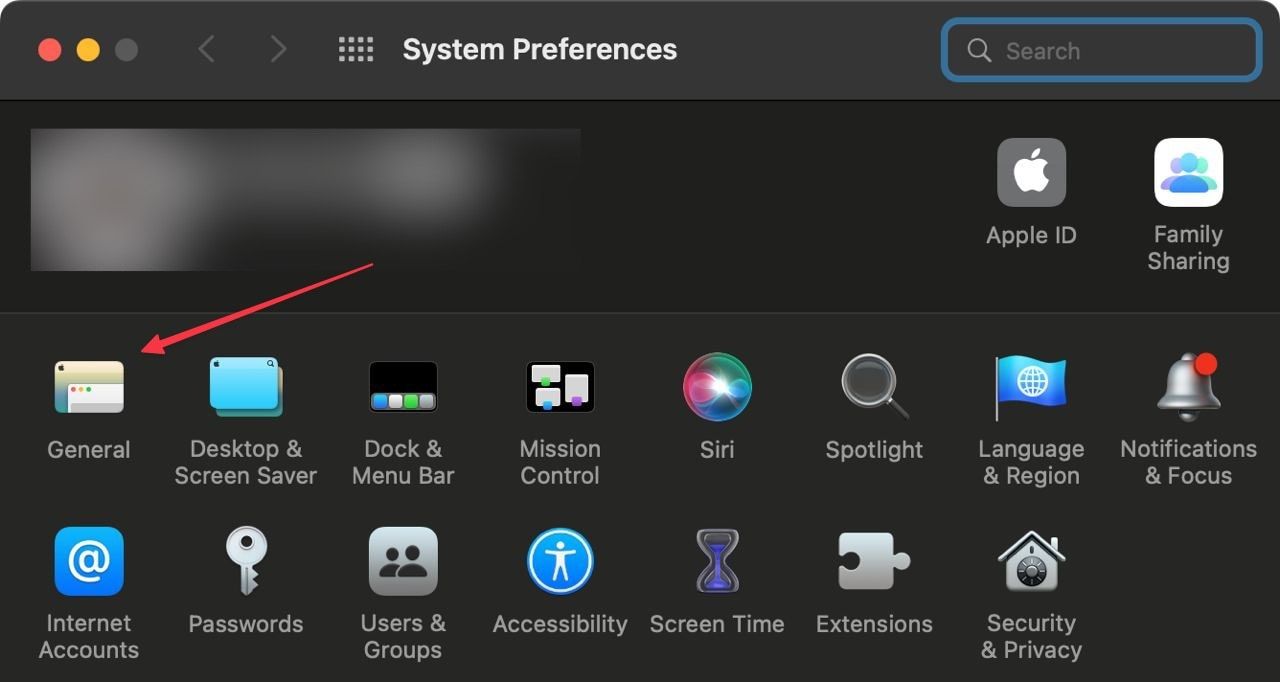
3. Disable the toggle next to Allow wallpaper tinting in windows.
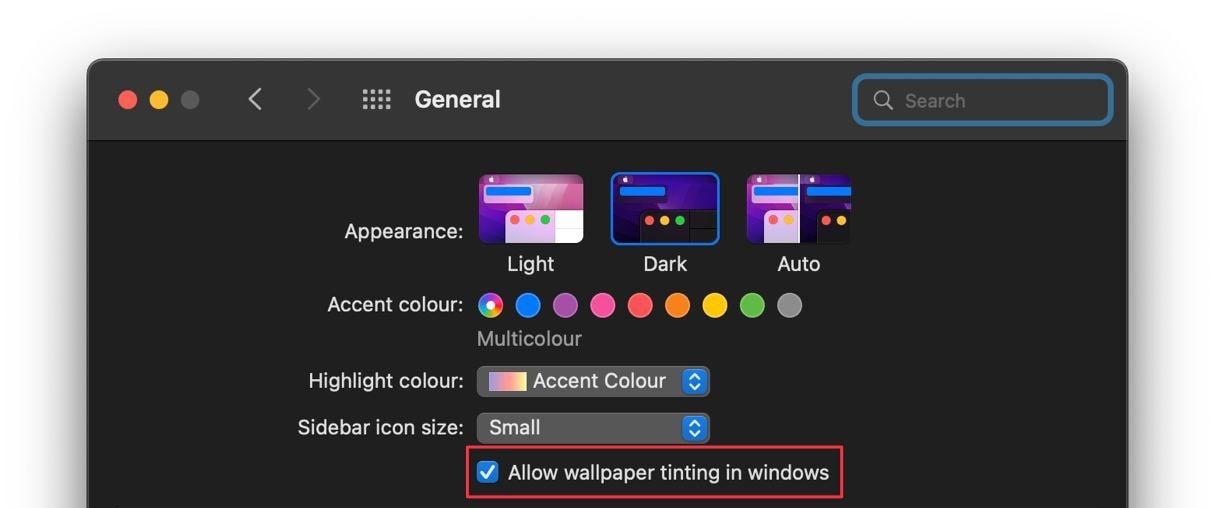
Disable desktop wallpaper tinting on Mac
As you can see, once you know where to look, it’s pretty easy to turn off wallpaper tinting in windows on Mac. Apart from messing with system-level settings, macOS Ventura also brings several fun features, including email scheduling, Stage Manager, and more. You can click on the links to check our coverage of these new features.


