How to Create Contact Poster on iPhone

Every new iOS update adds some customization features to the iPhone, allowing users to personalize their iPhones. With the latest iOS 17 update, the biggest customization is coming to the Phone app. Now, users can create Contact Posters that other iPhone users will see when they call. We love this feature as it lets us express ourselves even before someone picks up our calls. Here is how to create your Contact Poster on your iPhone.
But first,
- Enable Screen Distance feature in iOS 17 to protect your eyes.
- Learn how to convert photos to stickers on iPhone to personalize your chats.
Things to keep in mind about iPhone Contact Posters
Before we get to our guide, there are a few confusions that we want to clear.
- You don’t have to create a Contact Poster for all your contacts. The idea is that everyone will create their own Contact Poster.
- You will create your own Contact Poster and share it with your contacts. As more and more iPhone users start using Contact Posters, your contact list will automatically show their Contact Posters.
- That said, you can create Contact Posters for your contacts. We recommend doing it only if someone has not added a Contact Poster (a friend who uses Android) or you don’t like someone’s Contact Poster (maybe they made it too obscene).
- A Contact Poster is different from a contact photo. The contact photo is what you see in the circle above the name of the contact.
- You can create multiple Contact Posters and switch between them as you switch between different lock screens.
With these points out of the way, let’s see how you can create your Contact Poster on your iPhone.
How to create and customize your Contact Posters
We have shown how you can create and customize your Contact Posters on your iPhone. You can use the same steps to create and customize Contact Posters for any of your contacts as well.
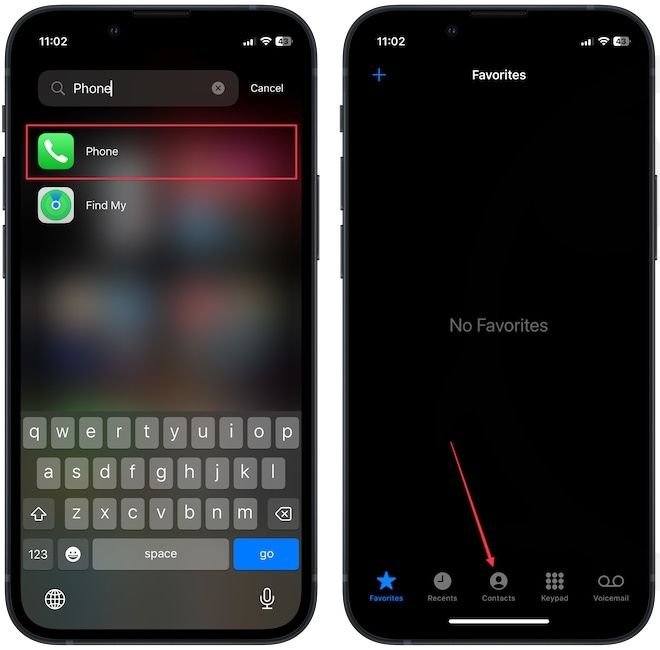
1. Launch the Phone app and choose Contacts.
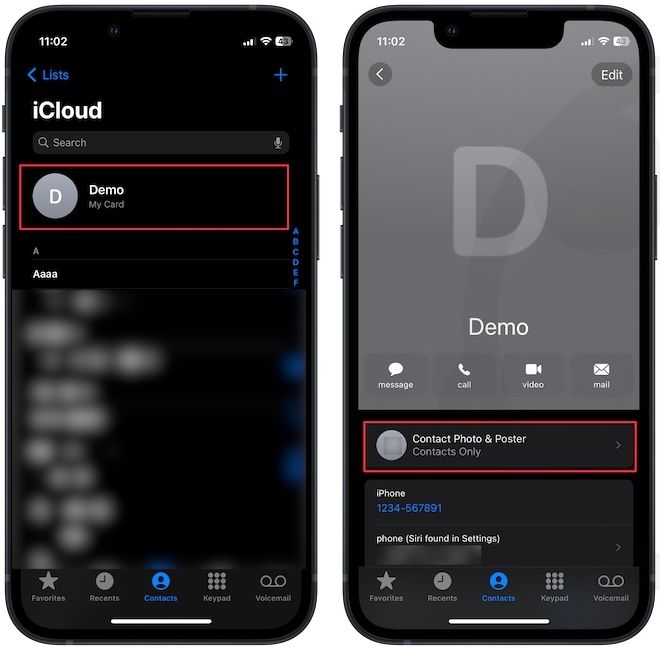
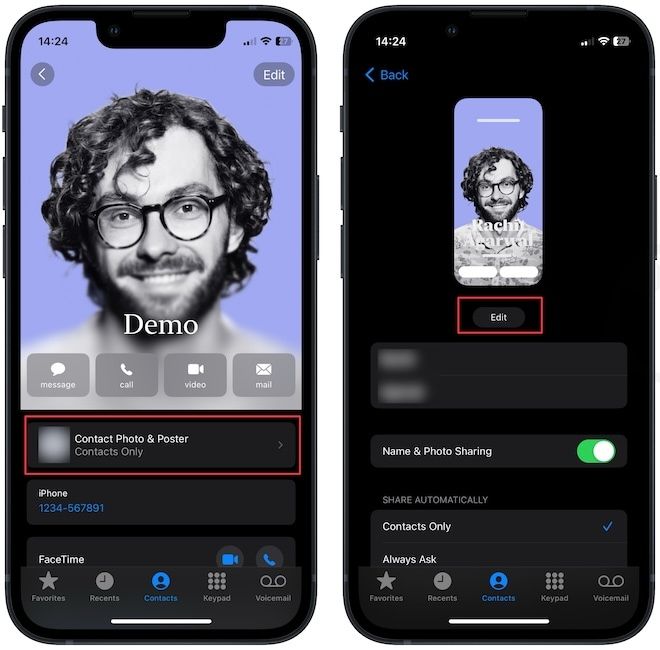
2. Tap on your contact name at the top and choose the Contact Photo & Poster option.
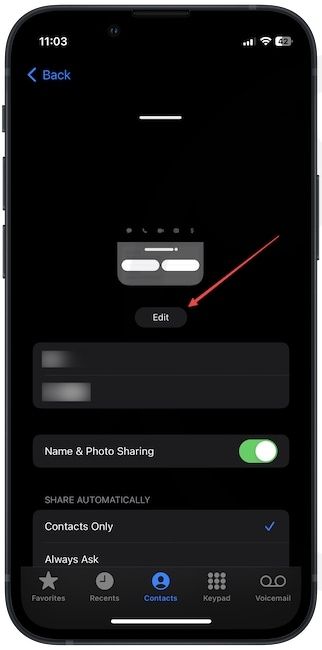
3. Now tap the Edit button.
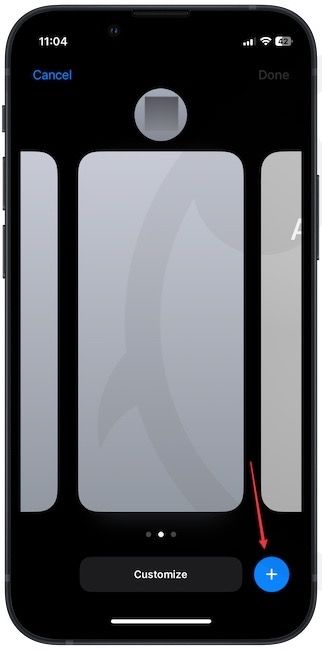
4. Tap the plus (+) button to start creating a new Contact Poster.
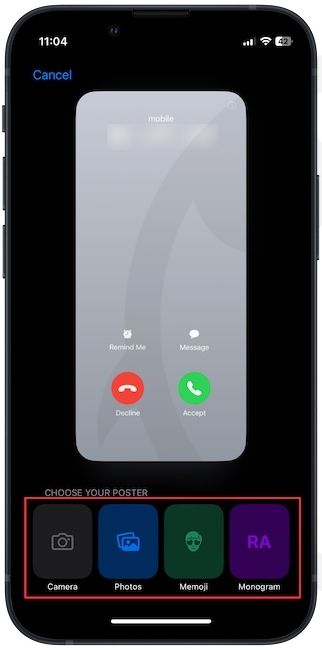
5. Here, you can use the Camera button to capture a photo, the Photos button to use a captured photo, the Memoji button to add a memoji, and the Monogram button to show your name. We will choose the Photos option to add a photo.
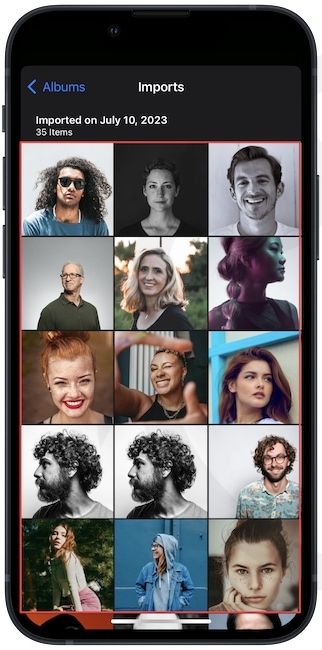
6. Pick the photo you want to show as a Contact Poster.
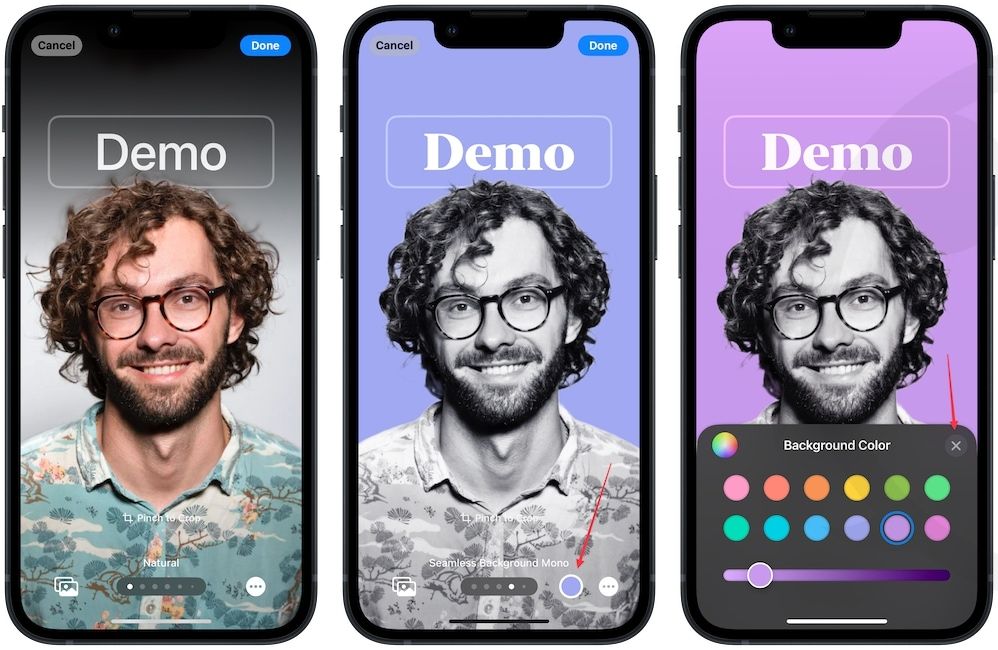
7. Now, you can swipe between the pages to apply different filters. In the color filter, you can tap the color icon to choose a different background color.
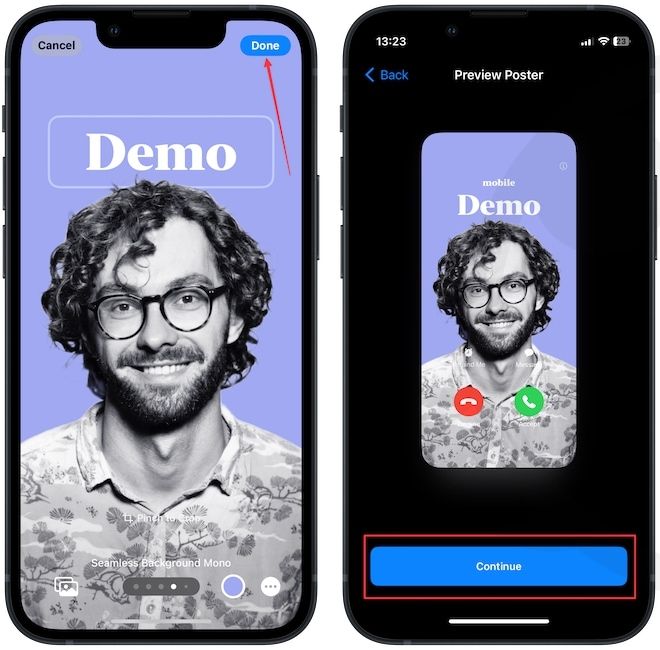
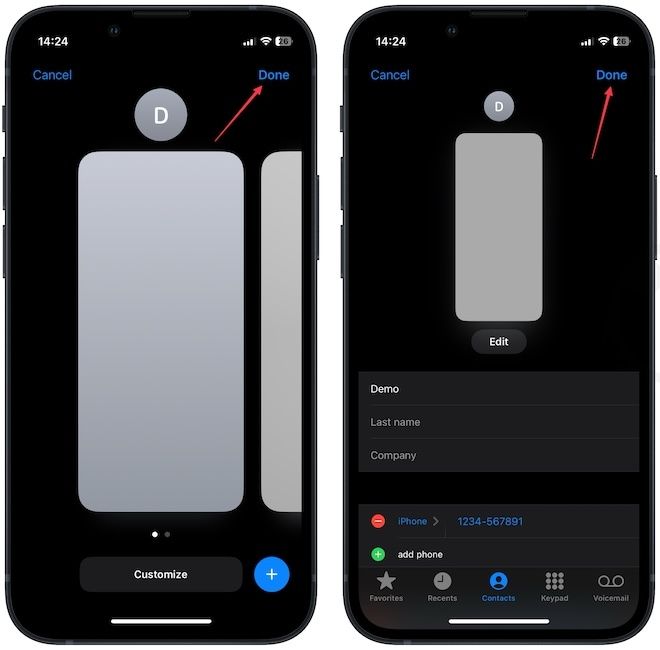
8. Tap the Done button to save changes and then tap on Continue.
9. Now, use the Crop button to adjust your profile photo.
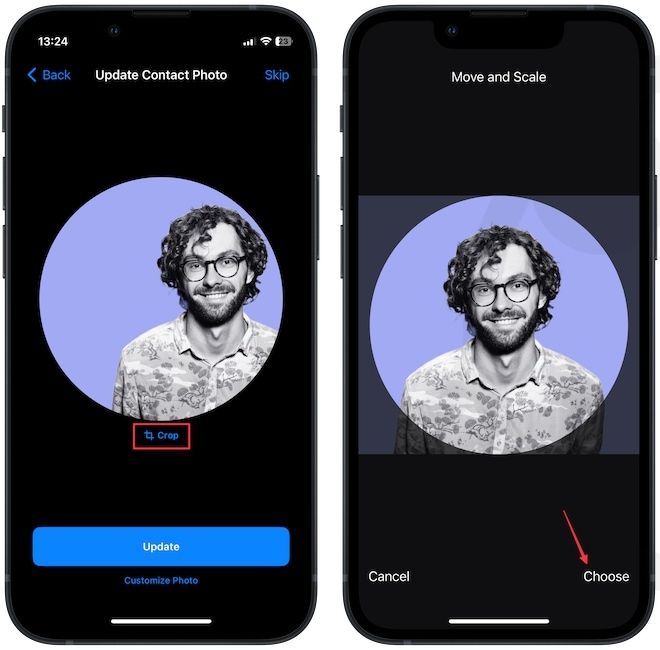
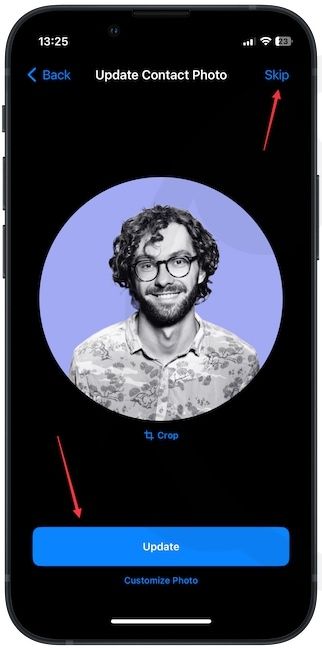
10. Tap the Update button to update the profile photo. If you want to keep your original profile photo, tap the Skip button in the top-right corner.
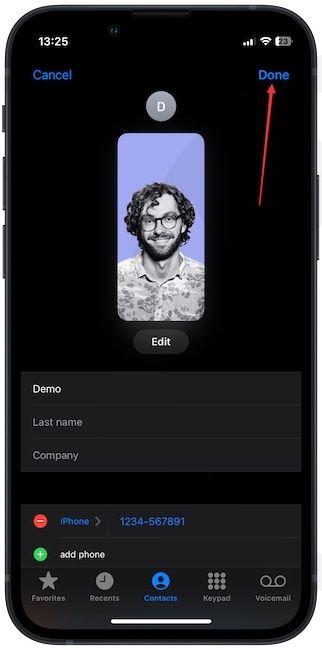
11. Finally, tap the Done button to save changes.
12. Here’s how our Contact Poster looks.
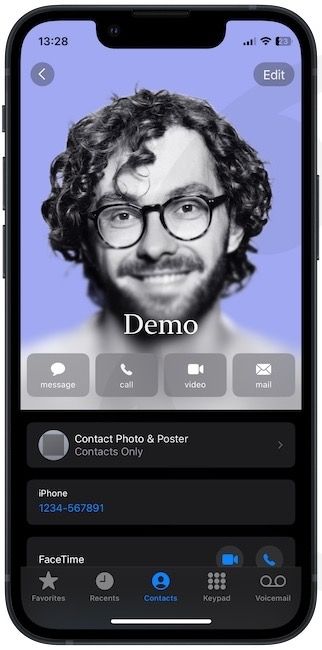
As mentioned, you can use the same steps to customize the Contact Poster for any contact in your contact list.
How to delete a Contact Poster
If you have created too many contact posters and you want to delete some of them, here's how you do it.
1. Go to Phone → Contacts and tap on your name.
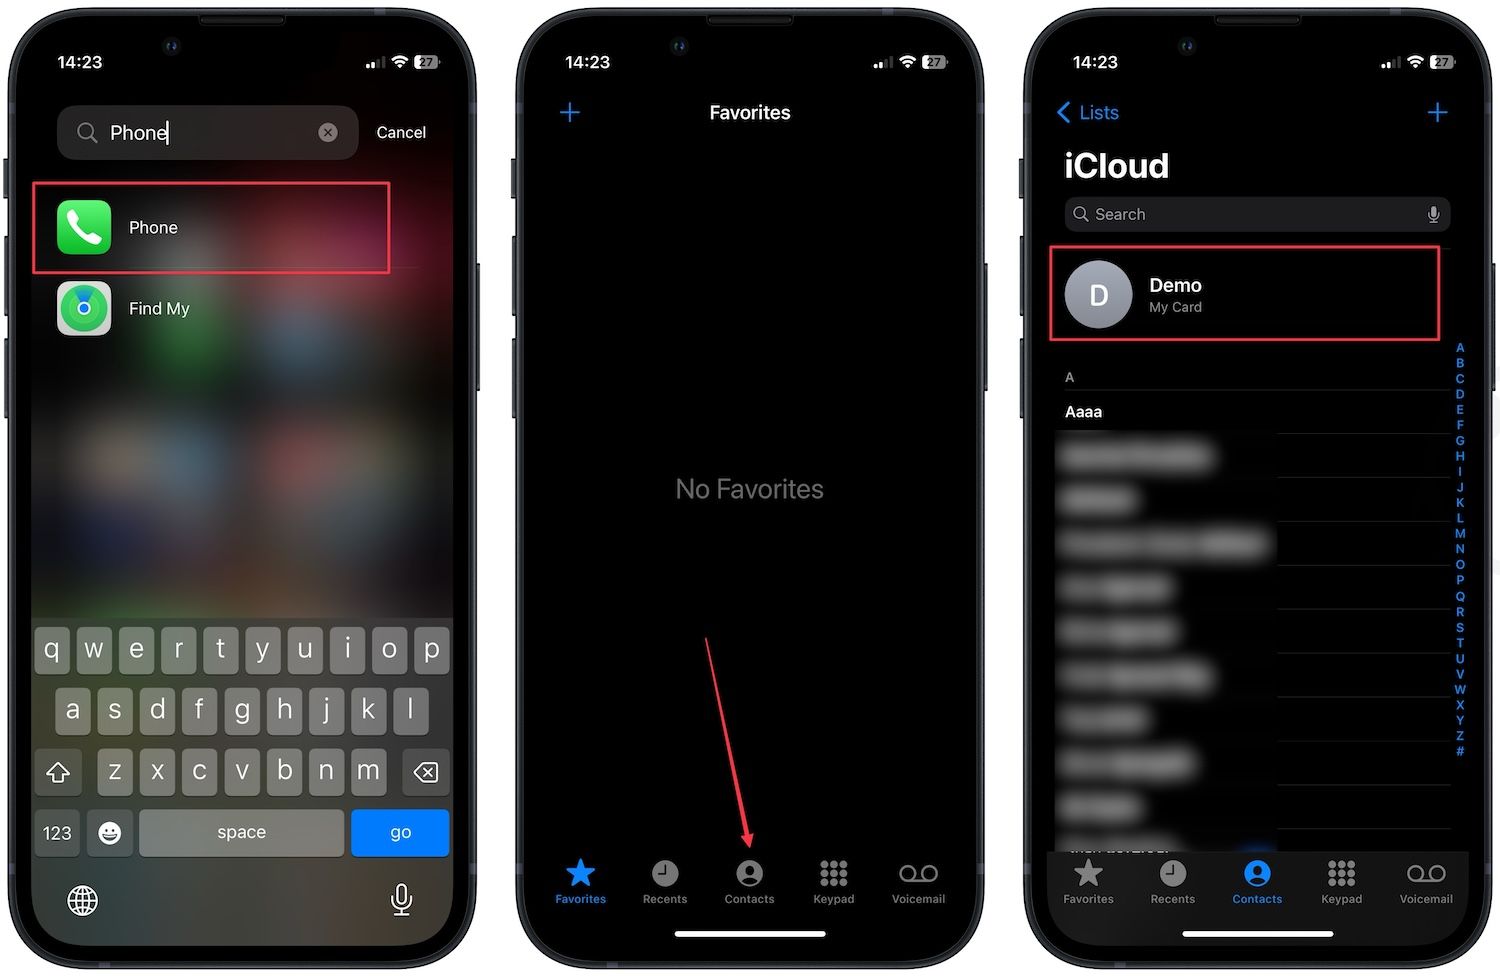
2. Choose the Contact Photo & Poster option and tap the Edit button.
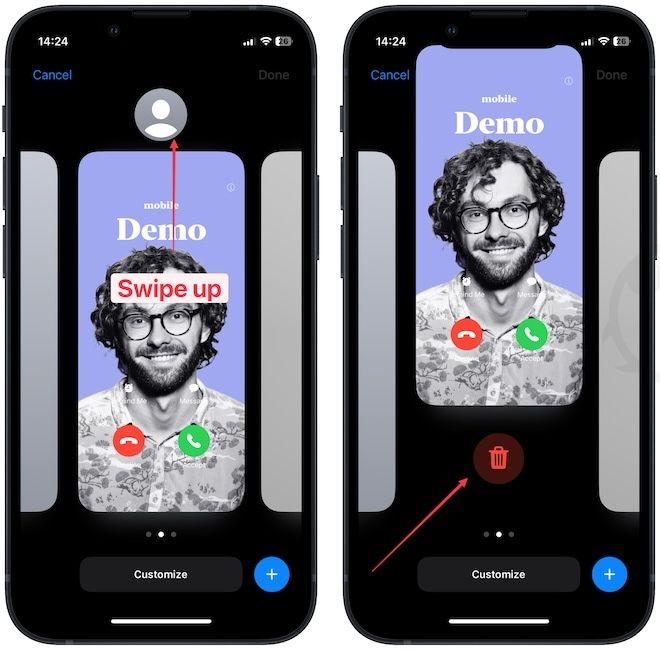
3. Swipe up the Contact Poster you wan to delete and tap the Trash icon.
4. Tap on Delete to confirm deletion.
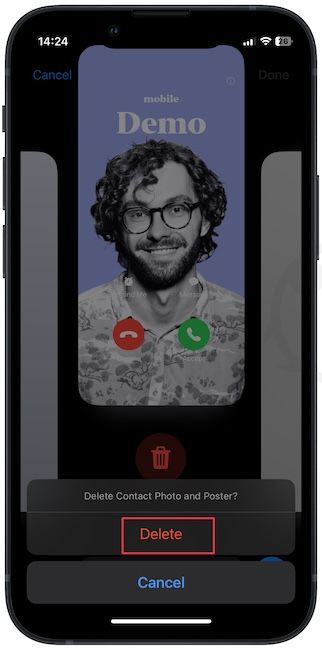
5. Tap on Done and Done to save changes.
Customize your Contact Poster to personalize your call screen
So that is how you can create and customize your Contact Poster. You can repeat the same steps to create multiple Contact Posters and switch between them. If you liked this guide, check out how to organize your contacts in the contact list on your iPhone.


Comments ()