How to Create and Use Templates in Logseq
Here is how to create and use templates in Logseq. Learn about different types of templates and their benefits.

Logseq is an excellent note-taking application that I use all the time. Whether I want to do my interstitial journaling, take notes on podcasts and books, create meeting notes, or wonder away writing my thoughts, Logseq’s free-flowing structure gives me a place to do all that and more. One of the best features of Logseq is the built-in Templates feature that allows me to add structure to my unstructured thoughts. There are several benefits of using Templates, and in this article, I will tell you all about them. Here is how you can create and use templates in Logseq.
Create and use templates in Logseq
Sometimes I find it surprising that a note-taking app that focuses so much on capturing unstructured thoughts gives you access to excellent tools that let you take uniform notes. Templates are one of those tools. The feature is built into the app and you don't need to use third-party Logseq plugins.
Using templates, you can create a structure for specific types of notes. For example, you can create a template for meeting notes and use it to start taking meeting notes. It will ensure that all your meeting notes will be uniform and easy to parse.
Let’s see how you can create and use templates in Logseq.
Table of content
How to create templates in Logseq
In Logseq, you can create templates anywhere in your graph. However, for easy organization, I recommend that you create a page where you save all your templates. For example, I have created a Templates page, where I create and store all my templates. Note that the page name doesn’t matter and you can name it anything you want.
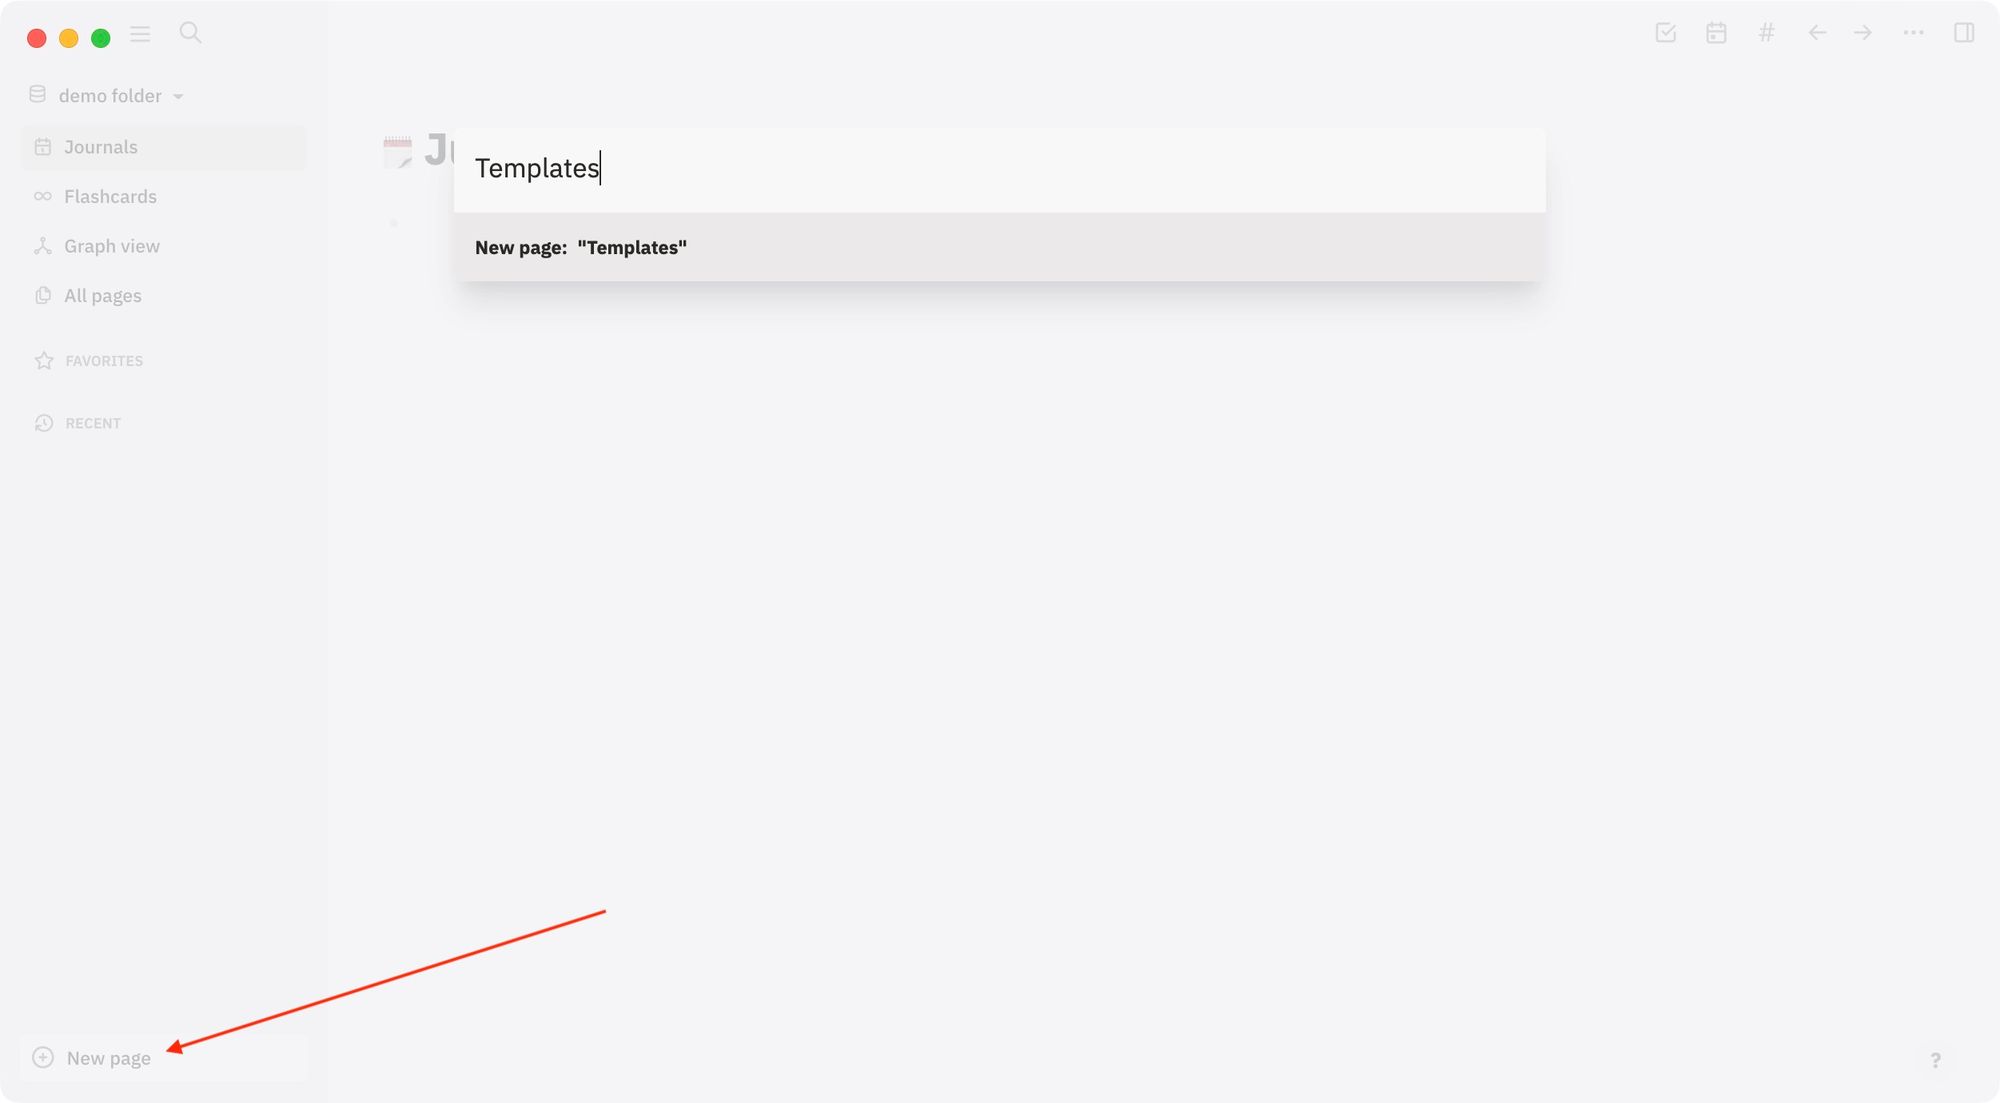
To create a new page, click on the New page button in the bottom left corner, enter the title of the page and hit enter. Now we have a place to store our templates. Before we begin creating our templates, let us first understand the parts of a template.
In Logseq, templates consist of two parts.
- Template title
– Template body
Here’s an example of how a template for taking notes on book might look. In the screenshot below, Book Notes is the template title and all the indented items are part of template's body.
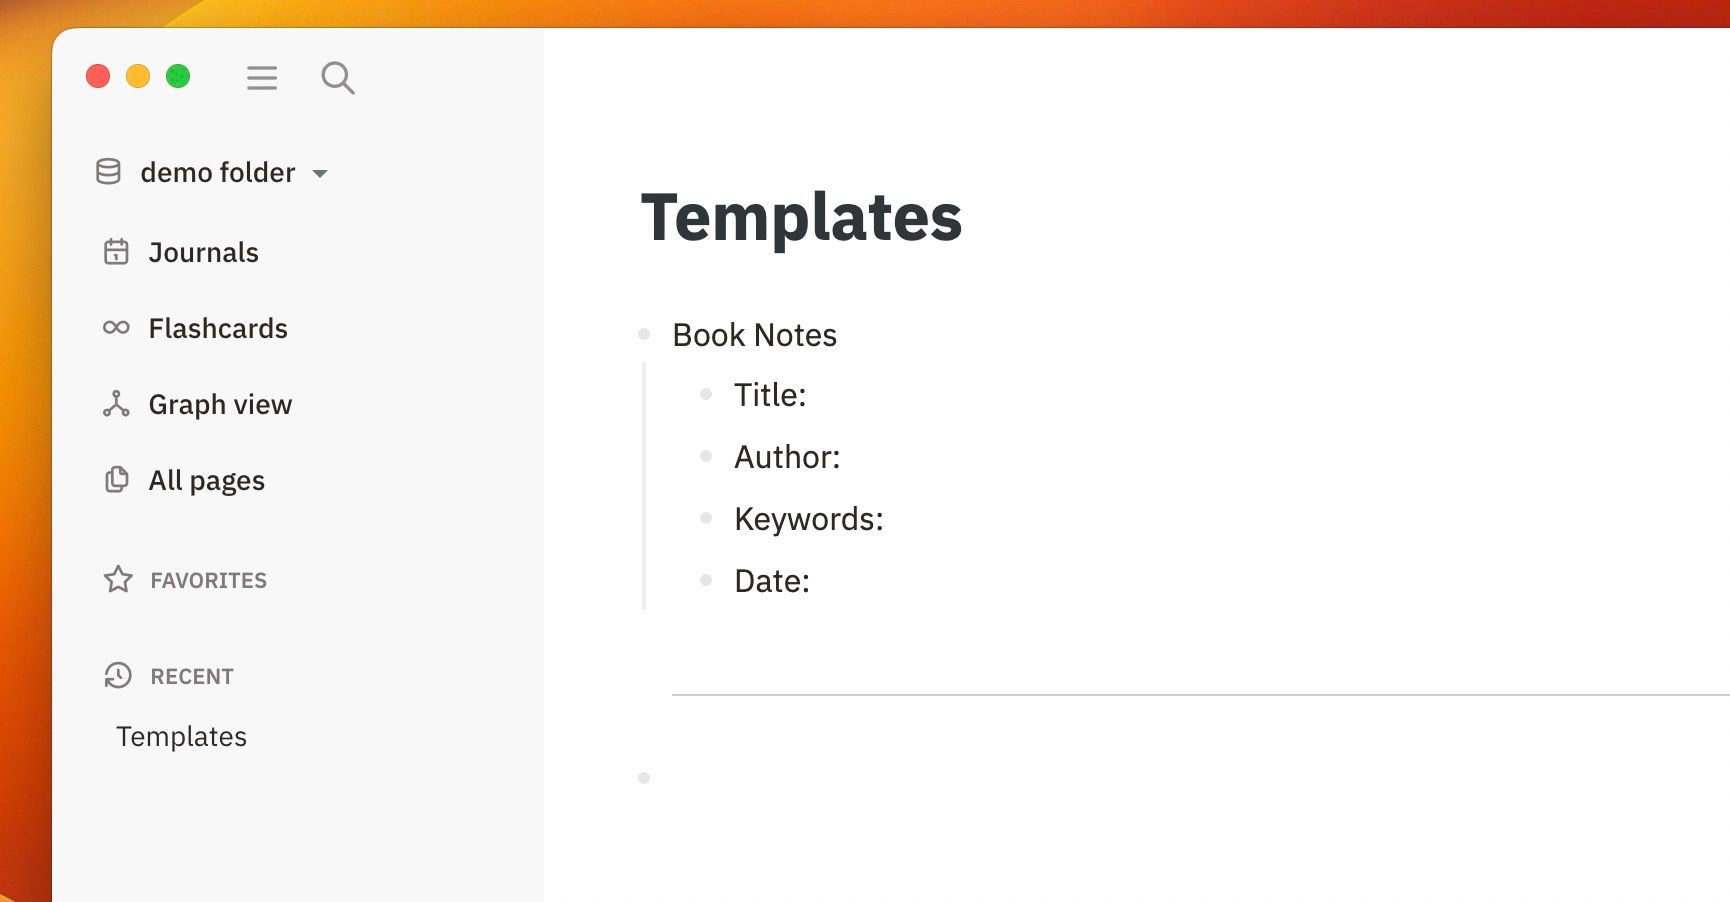
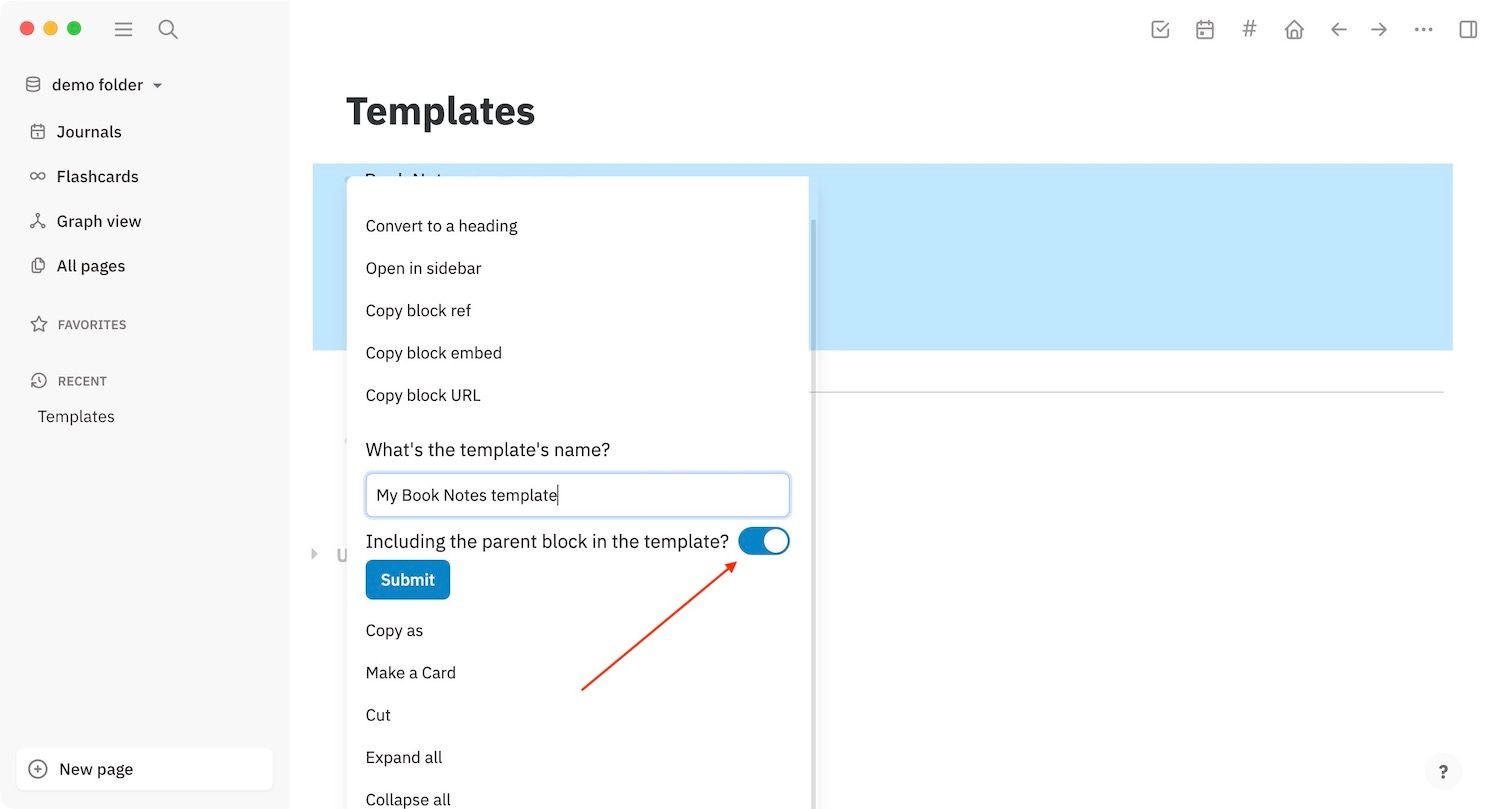
But this is not yet a template, it’s just a bunch of bullet points under a parent block. To convert this to a template, right-click on the parent bullet point (Template title’s bullet point) and choose the Make template option.

Now, enter the name of the template and select whether you want the template title to be a part of the template or not. If you don’t want the title, disable the toggle next to including the parent block in Template option.
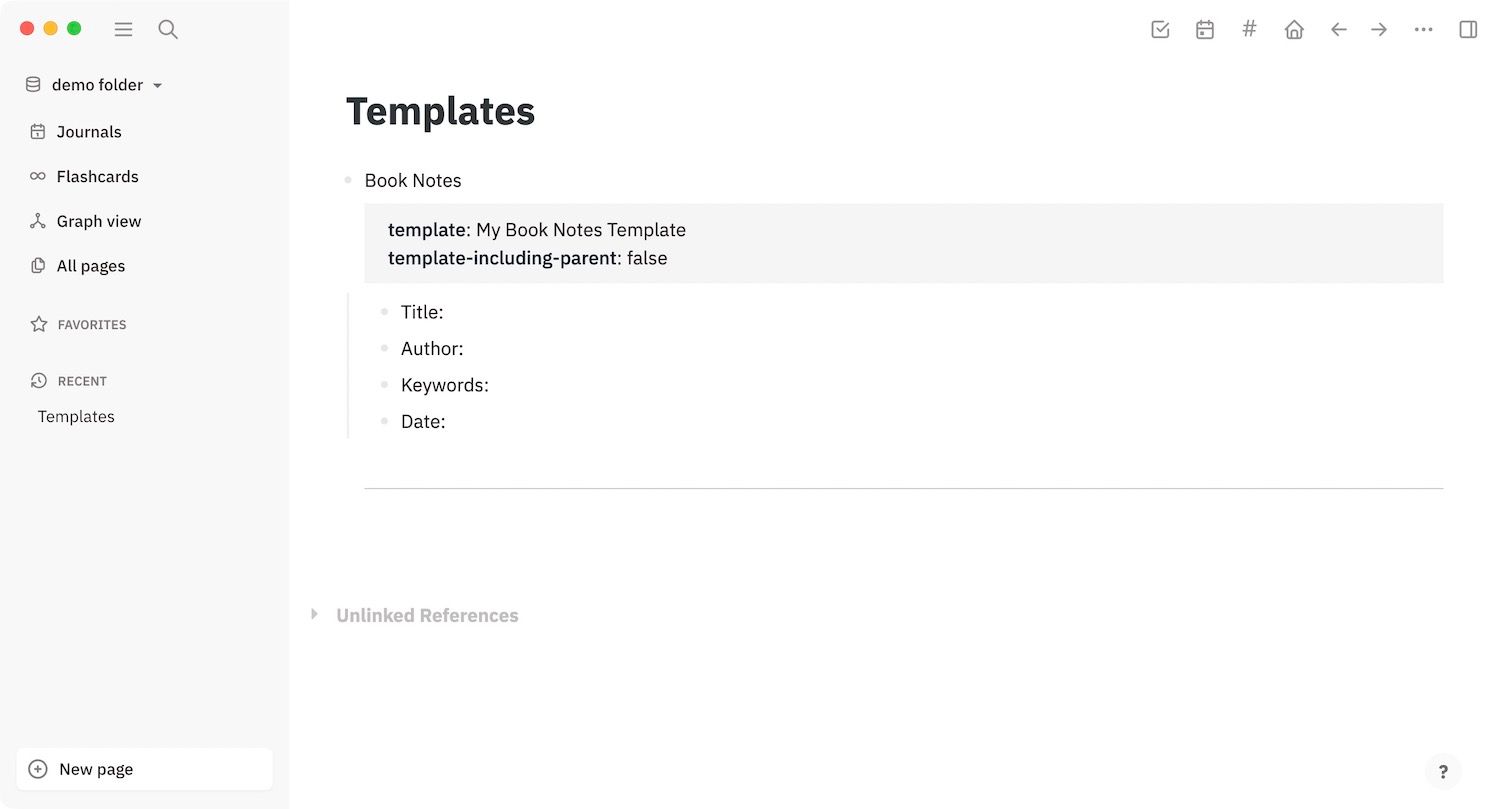
You will see that Logseq has converted the block into a template. Now, you can insert this template anywhere you want.
The above example showcases a basic template that doesn’t use any other features of Logseq. The real magic of templates starts when you combine templates with other features of Logseq. For example, below is the example of a meeting notes template. In this template, I am using formatting, tags, dynamic date insertion, and more.
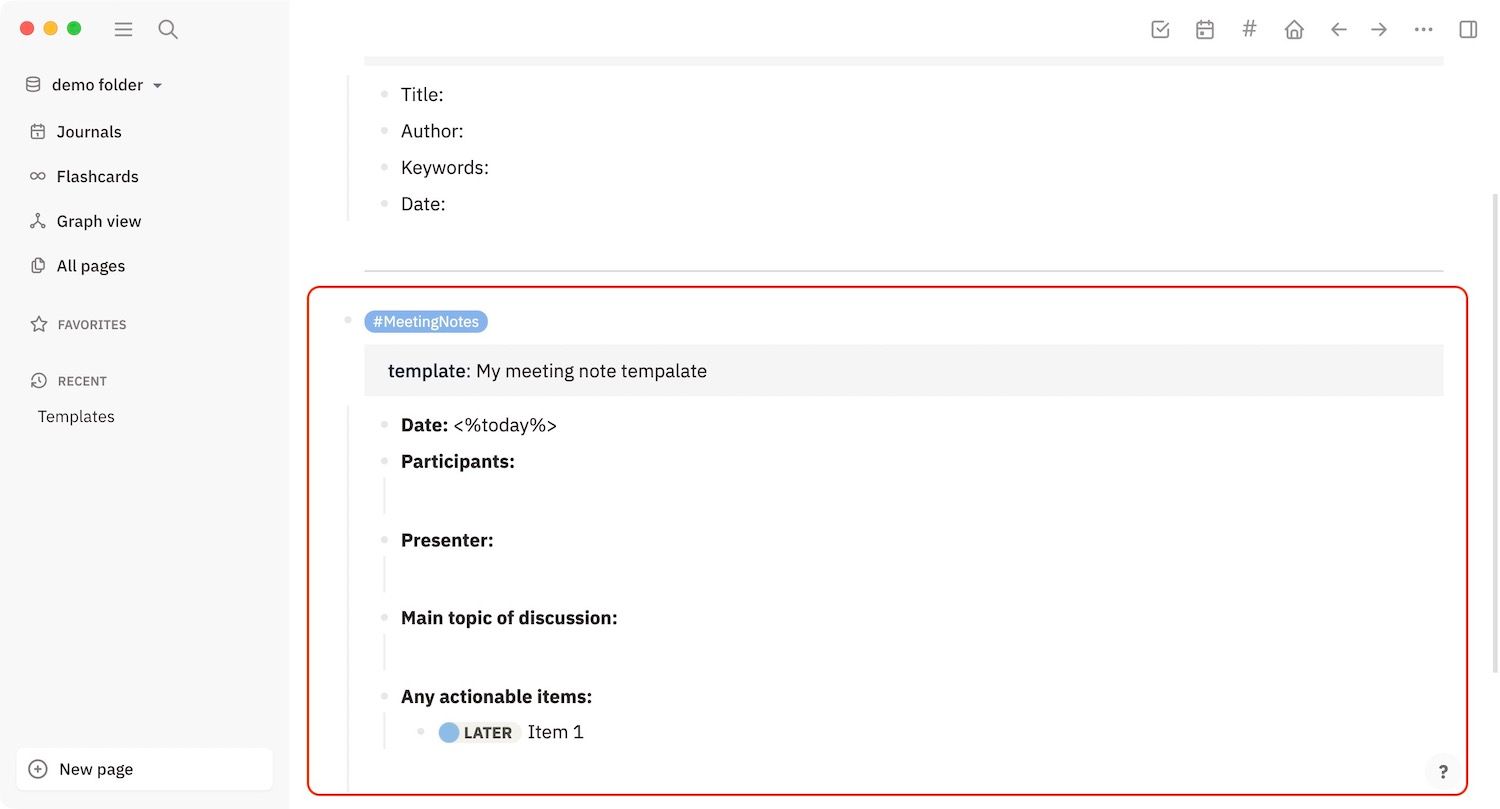
Real magic of templates starts when you combine templates with other features of Logseq
How to use templates in Logseq
Let’s see how these templates will look when you insert them. To insert a template, use the ‘/‘ command and select the Template option. Now, click on the template that you want to enter.
As you can see, in an instant, I have a structured place to start taking my notes. That helps me in two ways. First, it gives me a starting point in an instant, so I don’t have to worry about what to write. Second, it allows me to add structure to my meetings notes, which will make them easier to review and contrast with other notes in the future.
How to Edit templates in Logseq
Editing templates is easy. You can edit the content of the template, change its name, and change whether you want the parent block to be a part of the template or not. Whenever you save a template, Logseq adds properties to the template that you can edit.
To change the name, click on the template property and change the name.
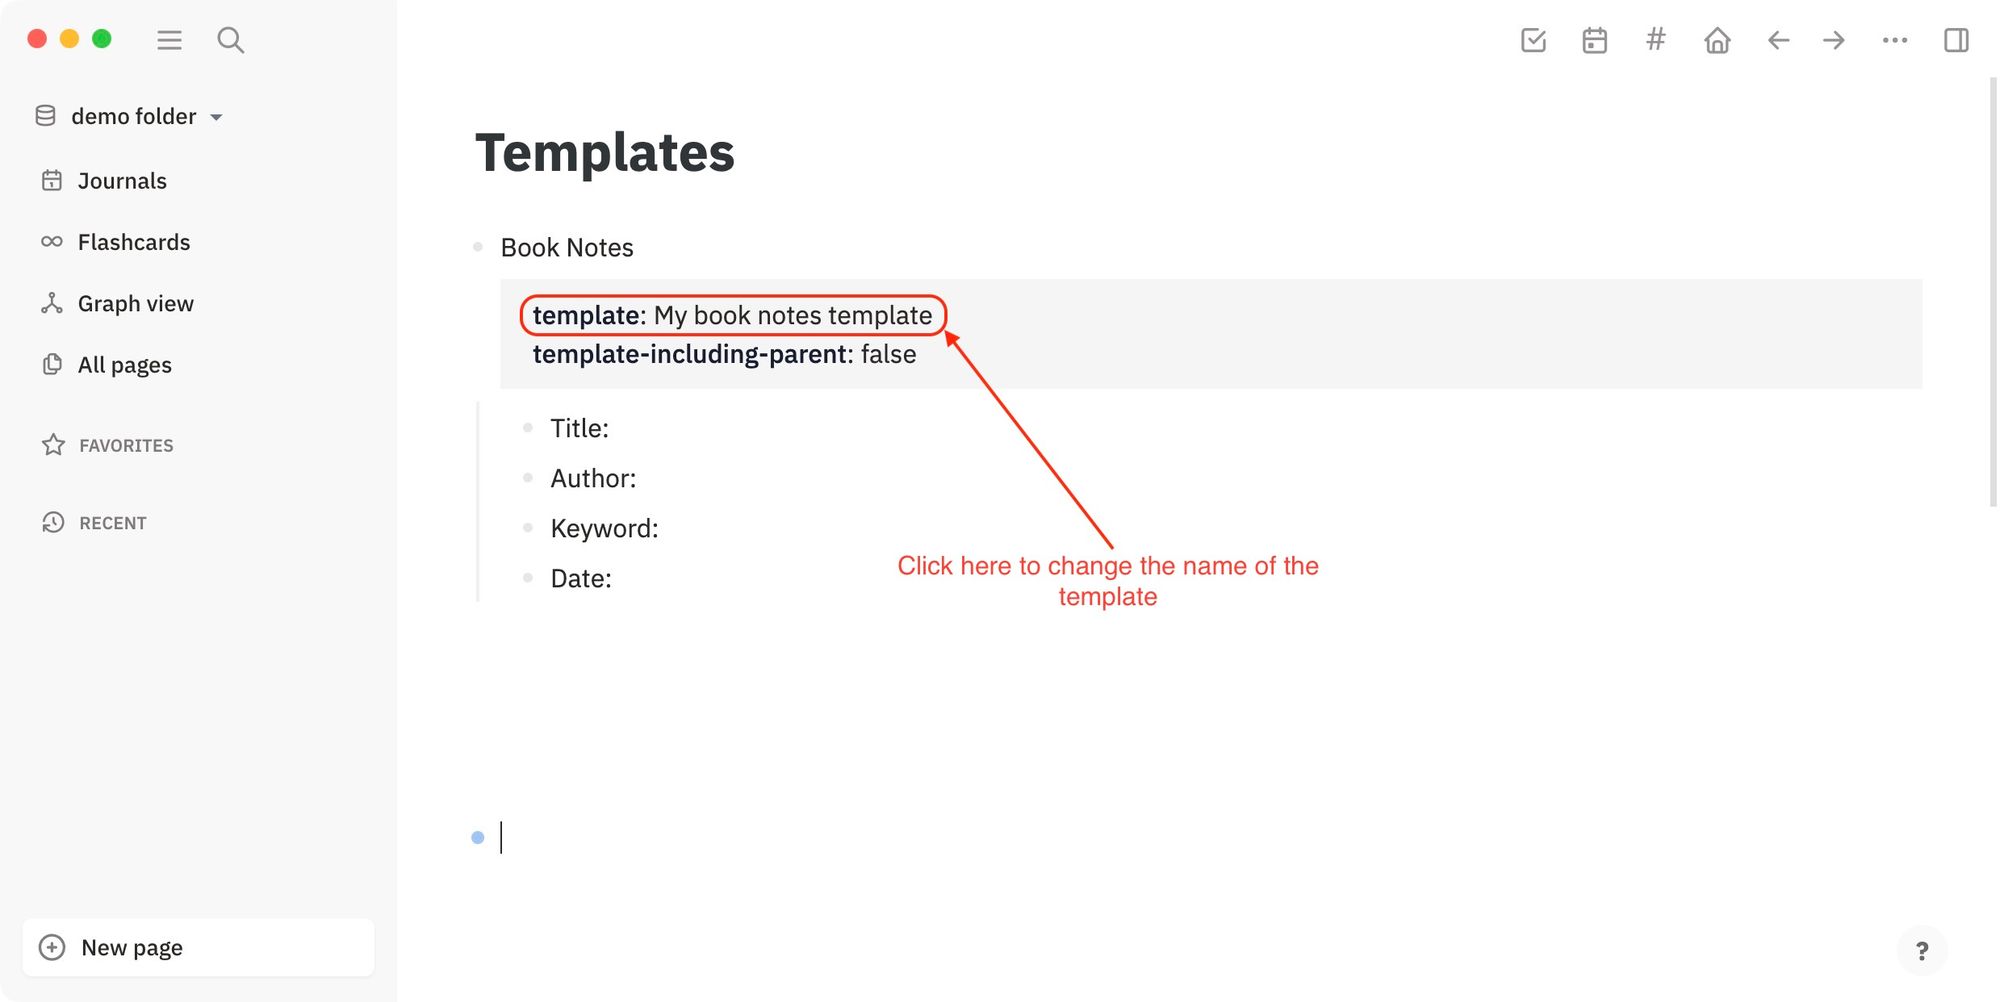
If you disabled the inclusion of the parent block when creating a template and later want the parent block to be included, change the template-including-parent: property to true.
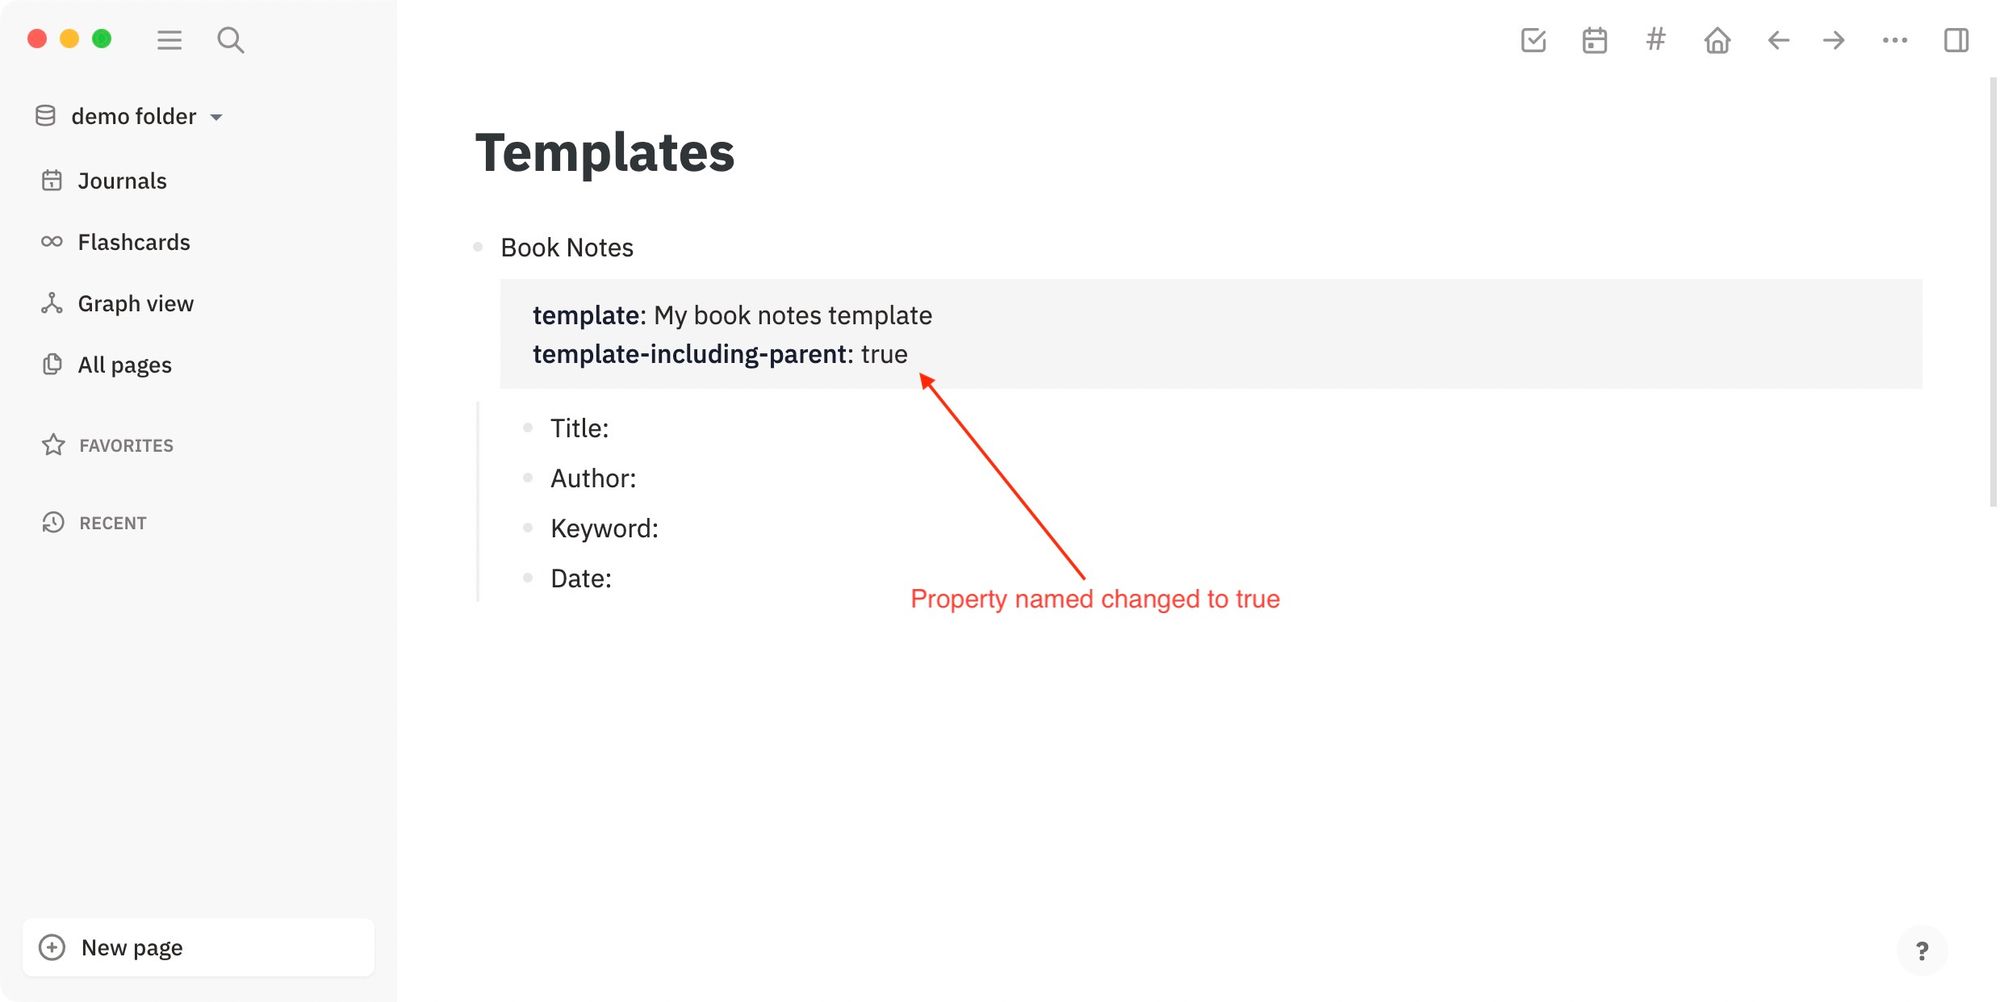
On the other hand, if you don’t want the parent block to be included, add the property below the template name:
template-including-parent:: false
Supercharge your templates with properties
You have seen how templates work in Logseq. You can create simple templates that only contain text, or create complex templates with links, tags, and dynamic dates, among many other things.
One thing you can do to supercharge your templates is use properties. As we saw above, Logseq already adds a template name as a property. Similarly, you can also use properties to supercharge your template workflow. The benefit of using properties is that properties can be queried, allowing you to filter and organize data. For example, I use templates with properties to track books I read. Here’s how my book tracker page looks.
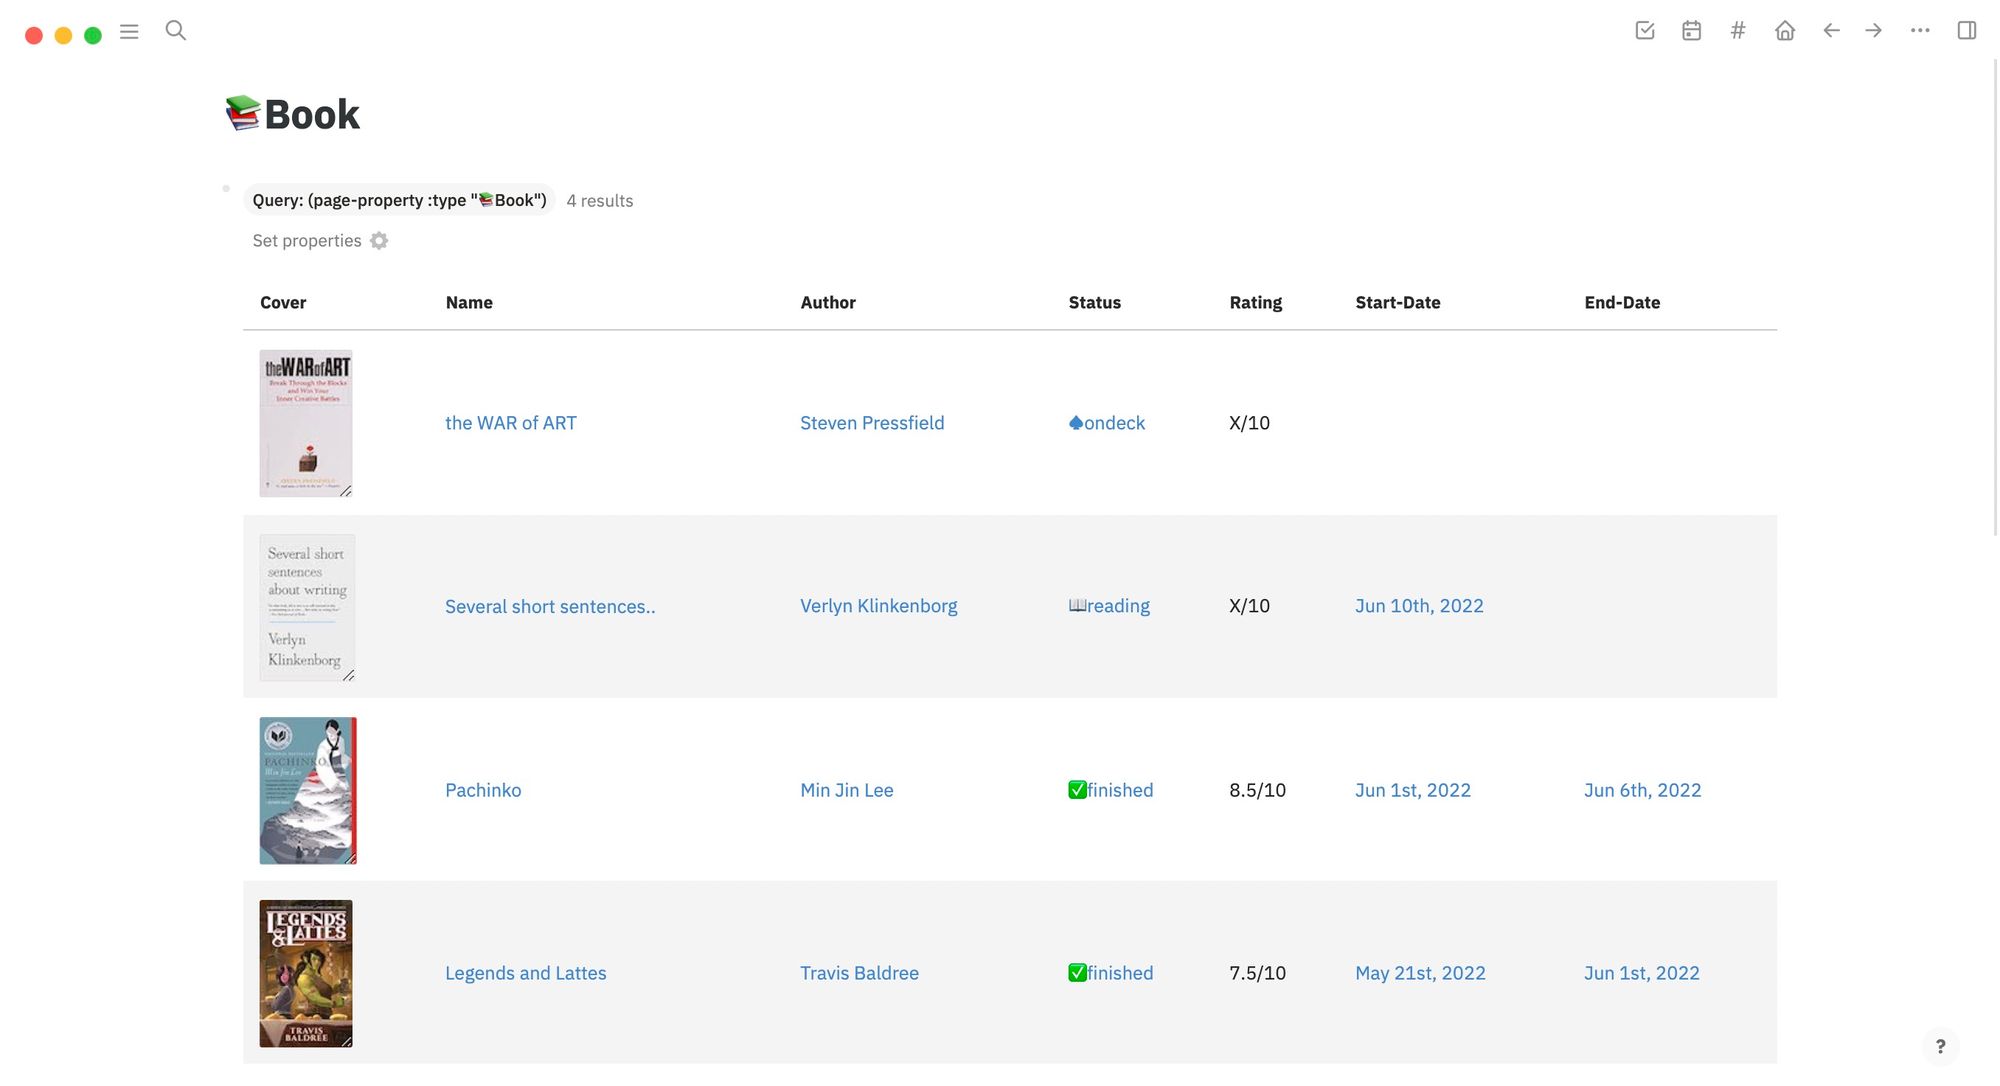
I will publish another article on how I created this book tracker. For now, understand that properties can supercharge your templates.
How to use properties in Logseq templates
Like everything else in Logseq, creating and using properties is simple once you get the hang of it. To create a property in Logseq, we use :: (double-colons). Let’s understand properties by creating a simple movie rating template. Suppose, you want to keep track of all the movies you watch. Let’s brainstorm what we can include in our template:
- Name
- Director
- Release Year
- Watched-on
- Rating
- Tags
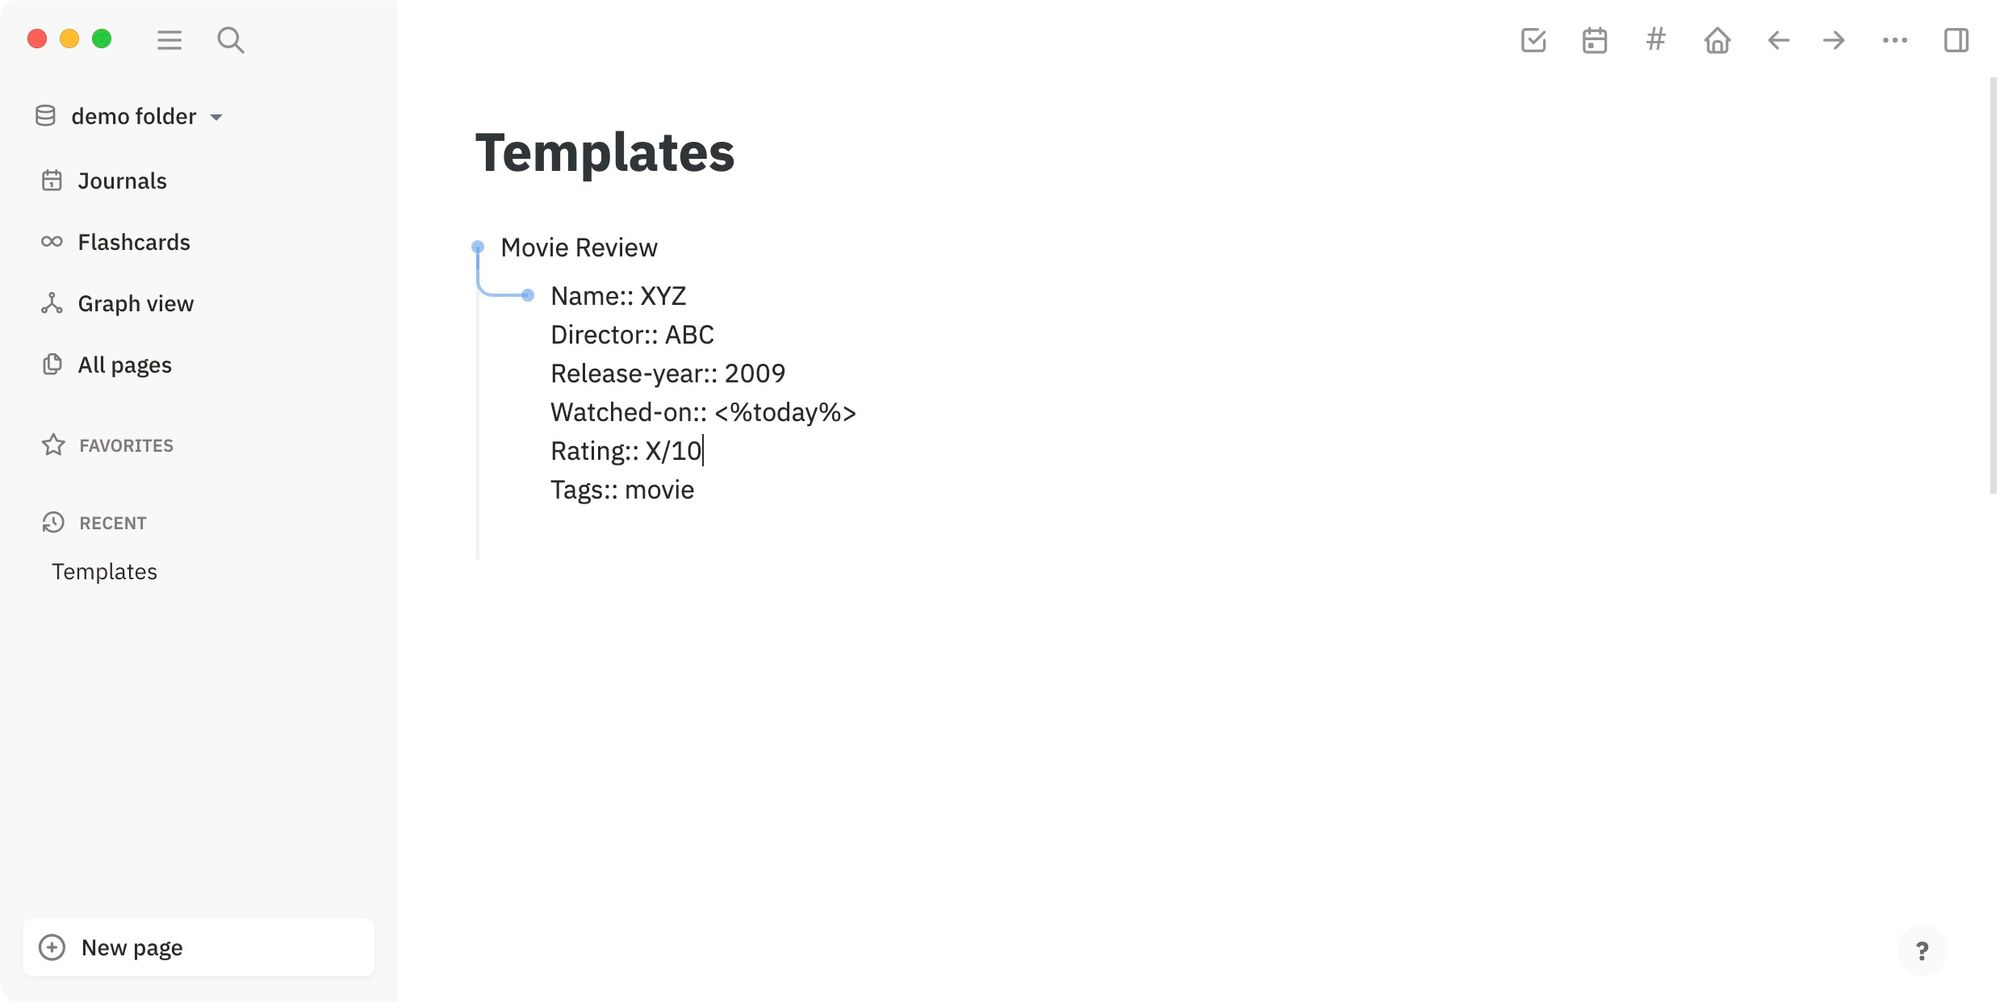
I think these details are enough for our basic template. Let’s use these items to create our template, but this time use :: after the name to convert it to property. Also, ensure that you are not using space between words as properties can’t have space.
Another thing to keep in mind is that Logseq already has some property types you can use. For example, the Tags is a special property that automatically tags the items you add after it. Here’s how the template looks while in editing mode.
Tags is a special property that automatically tags the items you add after it
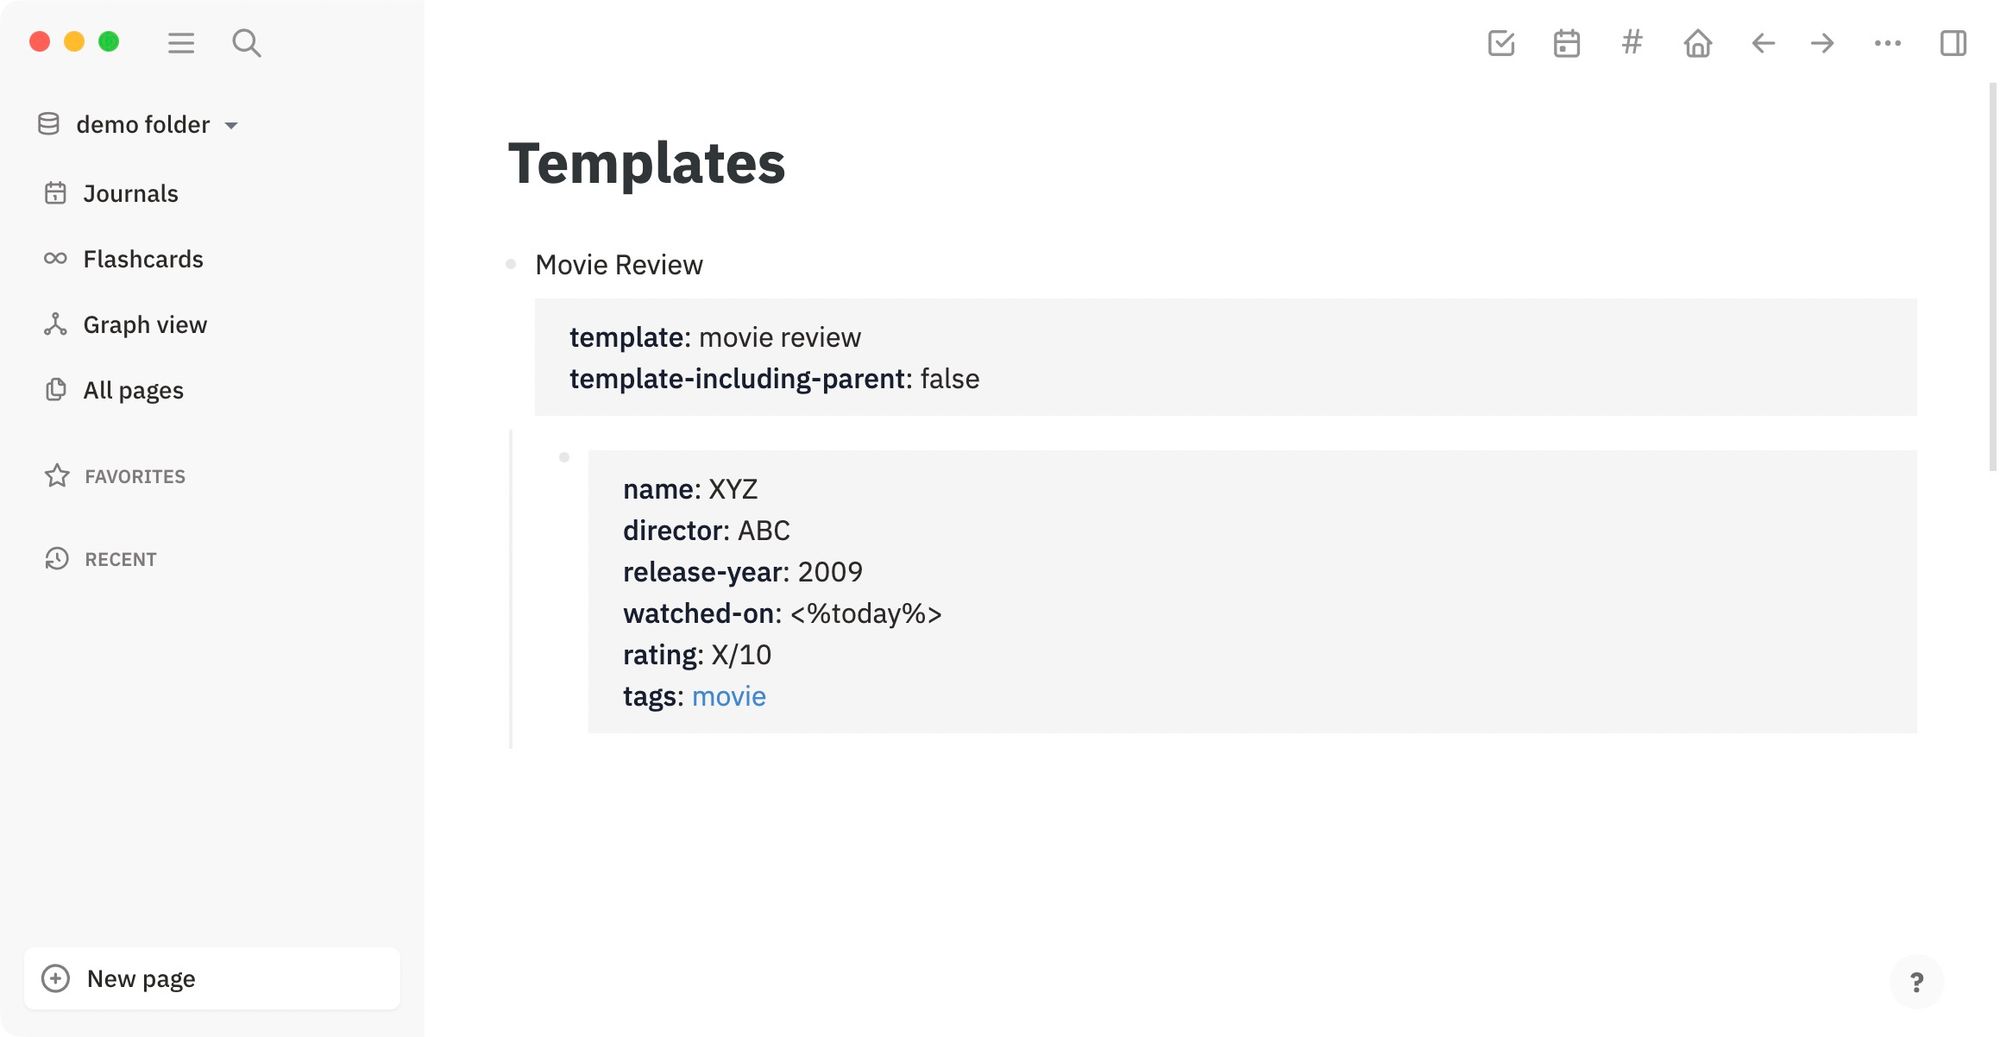
Once you click out to exit the editing mode, you will see that all the item names are in a small case and bold. That denotes that we have turned our items into properties. Also, see how the Tags property has automatically tagged the word movie.
Now, let’s create a movie review page. Suppose we just watched Margin Call today and want to review it. Here’s what the entire process will look like.
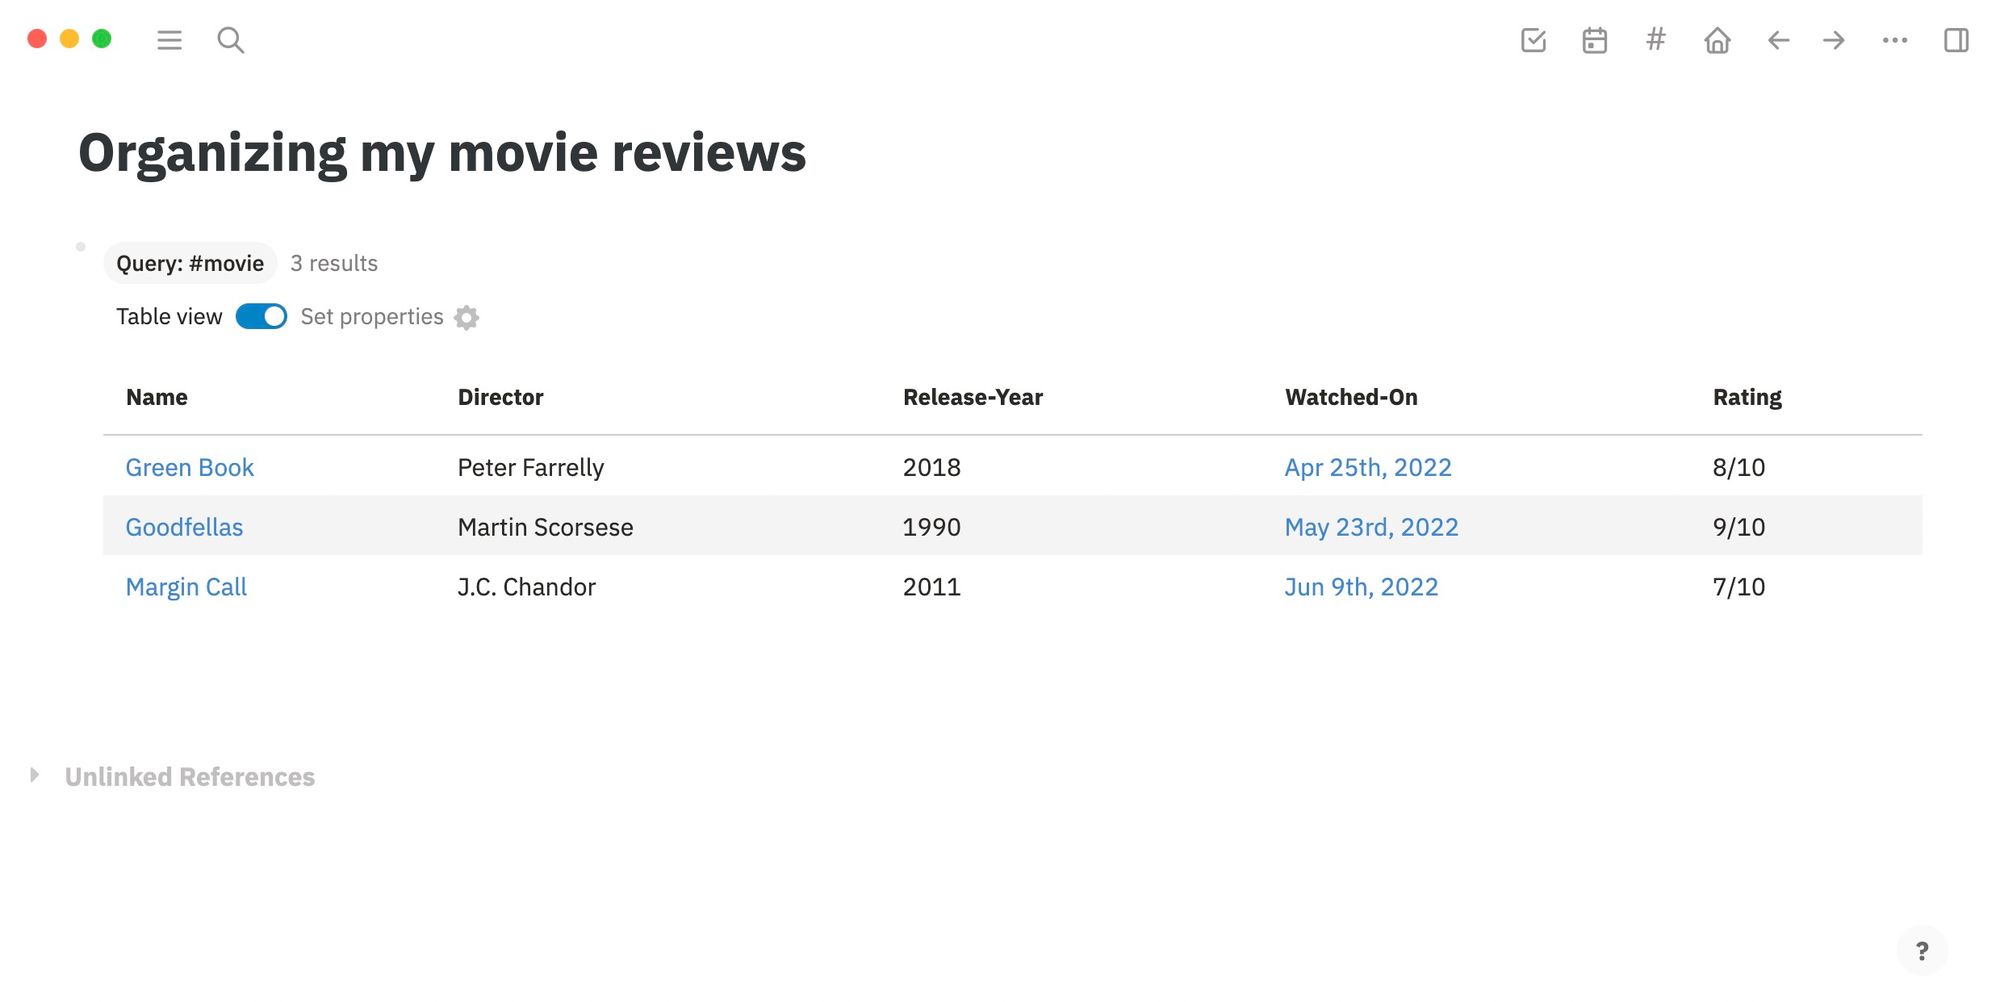
It takes only a few seconds to create a page and add the metadata. You can then add your rating, and you also have the entire page to record any thoughts you have on the movie. As I mentioned before, properties are useful because you can query them to organize your data. For example, let’s create a query for organizing our movie reviews in one place.
We will use the Tag property to query our data and then use the table function to organize the data. I will go into more detail on this in a future article where I explain how I track books I read inside Logseq. For now, here’s how the process will look.
Since I had only added one review, you can only see one movie on the list. But as you add more reviews with the same template, your results will show up in the query. Here is how the page looks after adding a few more reviews.
Using templates in Logseq: final thoughts
Template is a powerful tool in Logseq that allows you to add structure to your notes, gives you a starting point, saves time, and helps you organize data, among many other things. Once you start using templates, you won’t be able to use Logseq without it.
For more information, check out the official Logseq documentation on templates. Like always, if you liked this article, don’t forget to share and if you have any questions, reach us on Twitter, and we will help you out.
