How to Convert Screenshots to JPG or PNG Format on Mac
Here is how you can convert screenshots to JPG or PNG format on Mac and change the default screenshot format.

macOS comes with a fairly advanced built-in screenshot tool that you can access using the CMD+Shift+3/4/5, keyboard shortcuts. Using the built-in screenshot tool on Mac, you can capture screenshots of an area, an app’s window, and a full screen with ease. By default, macOS saves the screenshot you capture in PNG format. While the PNG file format is excellent for capturing high-fidelity screenshots, it also results in large file sizes, which take up more space on your Mac. So if you want to save space on your Mac and want the screenshots to be easy to share, here is how you can connect screenshots to JPG or PNG formats on Mac.
Convert screenshots to JPG or PNG formats on Mac
We have explained three methods that you can use to convert screenshots to JPG or PNG formats. The first method is to use the Preview app on your Mac. You should use this if you also want to make additional edits to the screenshot.
If you don't need to edit your screenshots and only want to convert their format, you can easily do so using our second method, which uses the Quick Actions feature.
Finally, the third method uses Terminal to change the default format of the screenshots you take on the Mac. Use this method if you take tons of screenshots, so you don't have to convert them every time you capture them.
- Convert screenshots to JPG or PNG formats using Preview
- Convert screenshot format using the Quick Actions menu
- Change default screenshot format on Mac
Convert screenshots to JPG or PNG formats using Preview
Preview is a powerful app that lets you edit PDFs, photos, screenshots, and more. You can use it to even sign documents and redact PDFs. Here is how you can use the Preview app to change your screenshot format.
1. Double-click on a screenshot to open it in the Preview app.
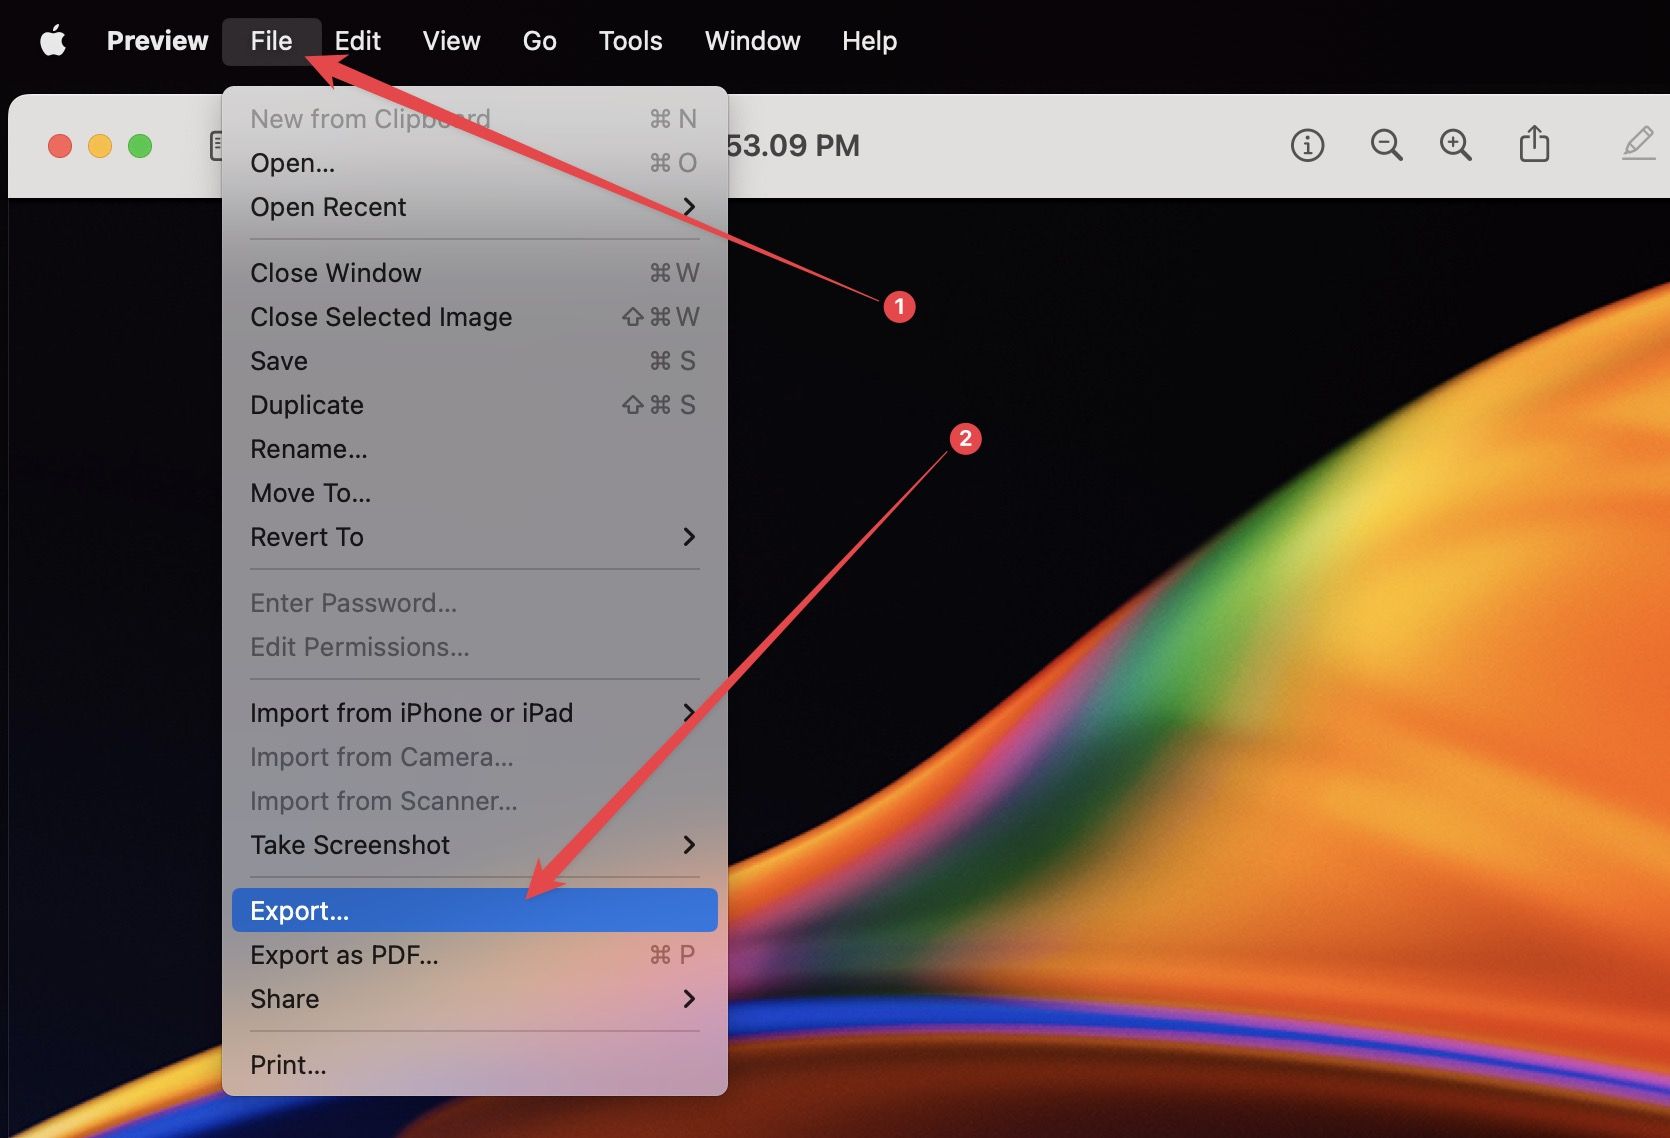
2. Select the File menu and choose the Export… option.
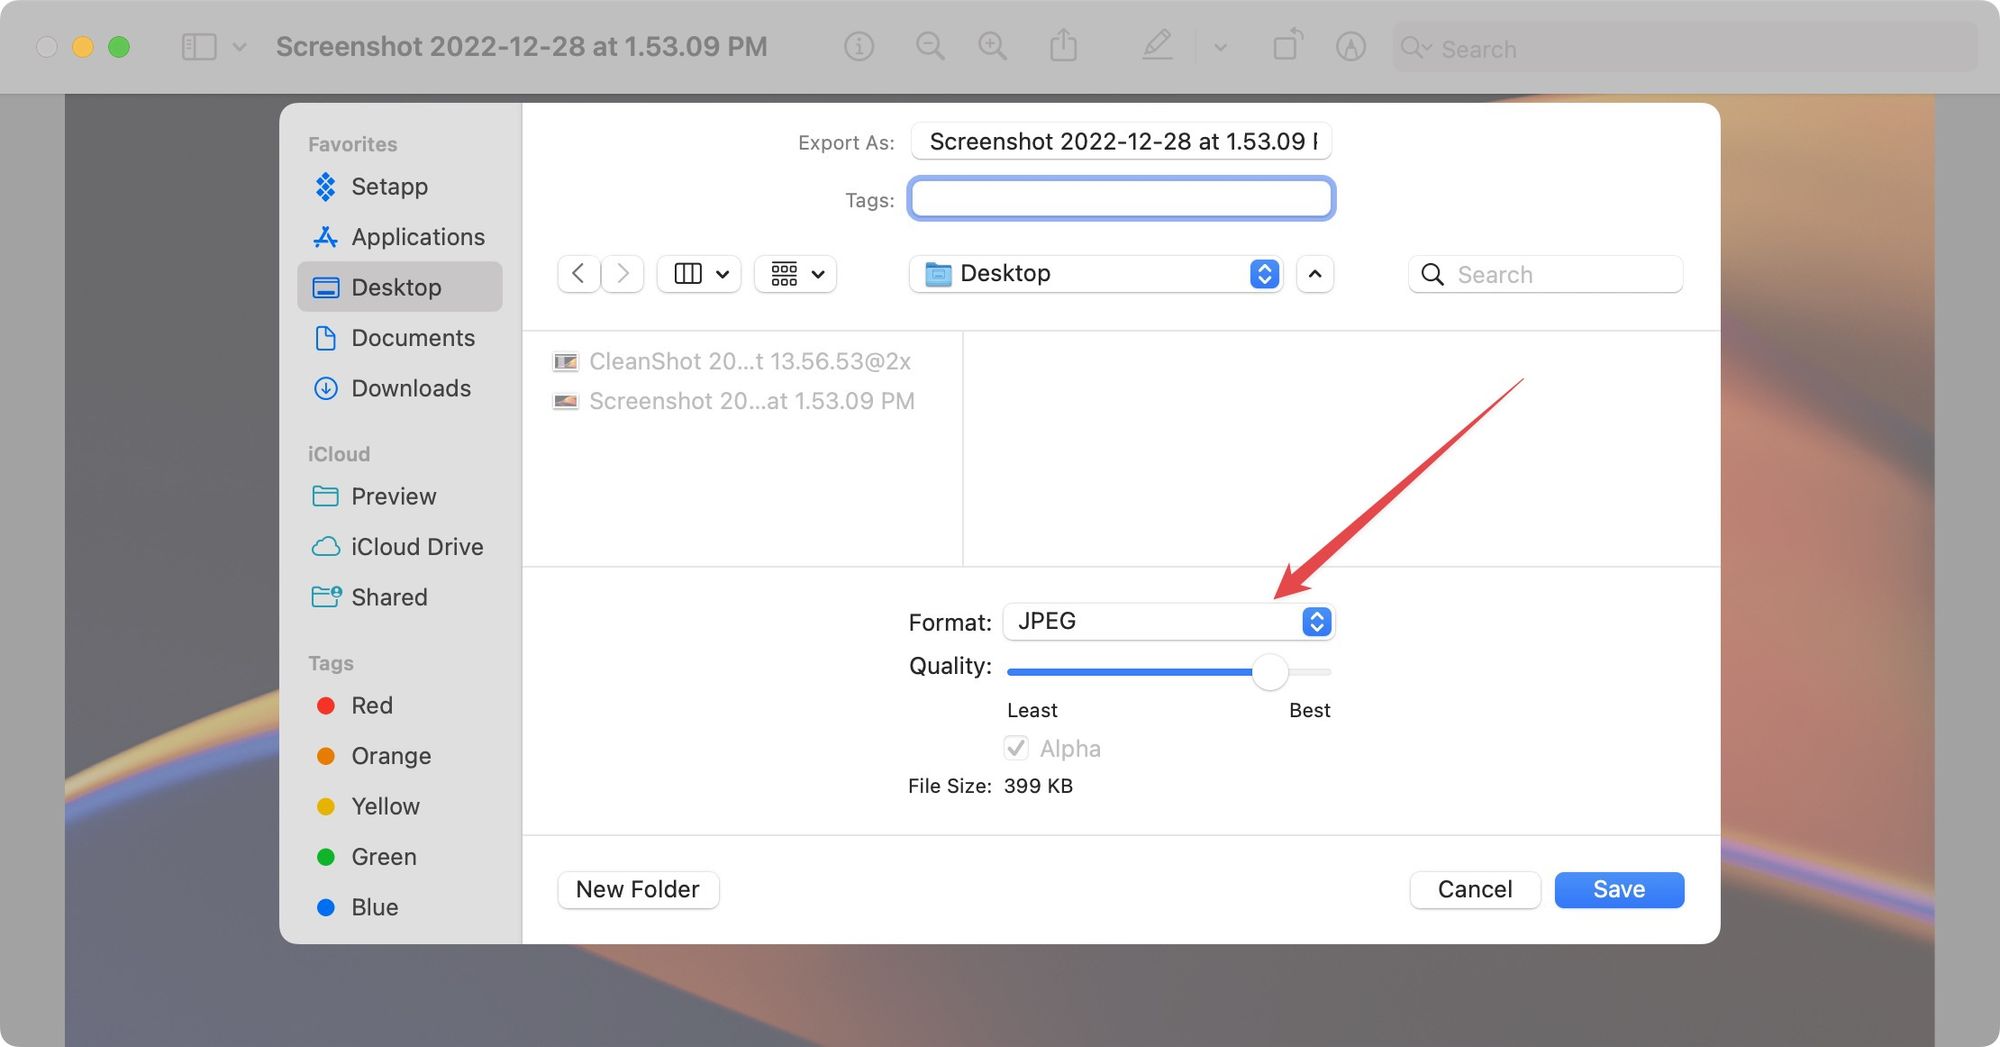
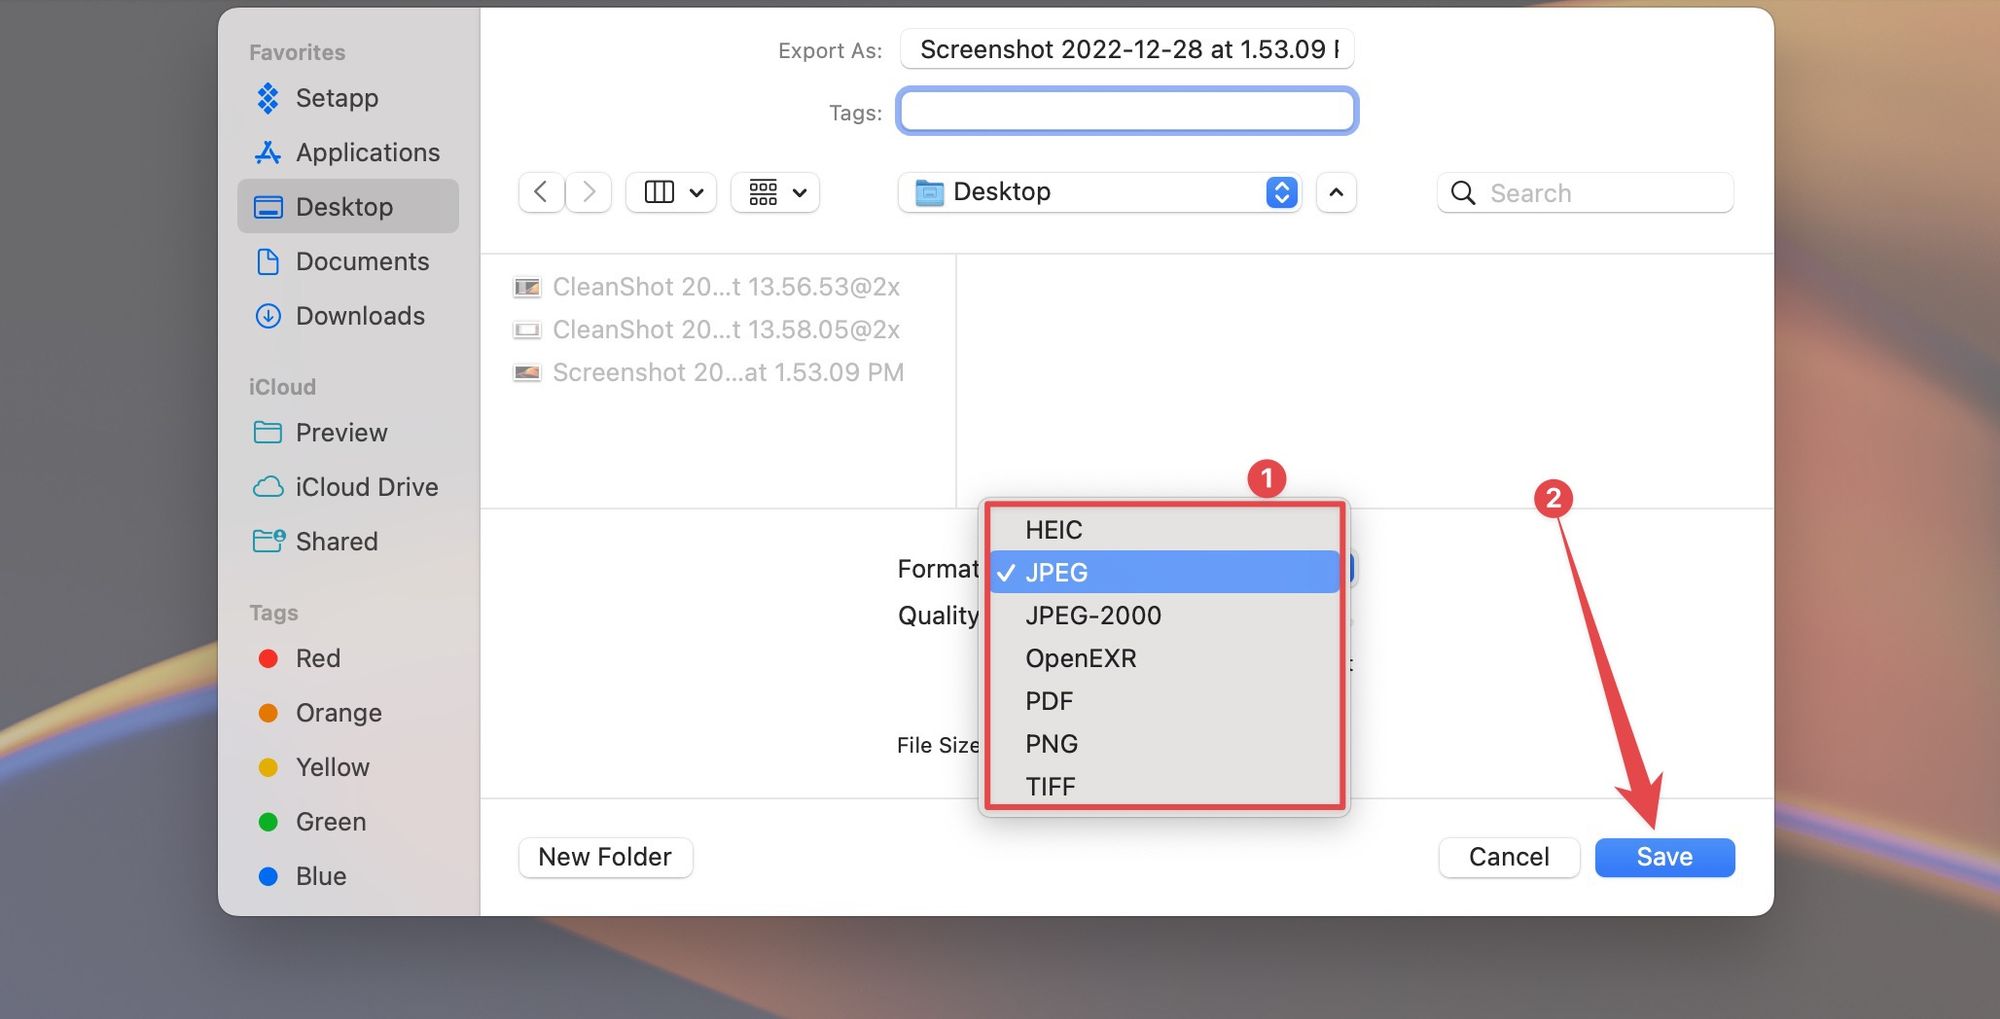
3. Click on the drop-down menu next to the Format option and choose your desired format. As you can see, you have JPG, PNG, HEIC, and other file format options.
The drawback of this method is that you can not select and export multiple files at once. If you want to batch-edit photos, you can use the second method described below.
Convert screenshot format using the Quick Actions menu
Not many people know that but macOS has a Quick Actions menu feature that lets you easily convert image formats with just a few clicks.
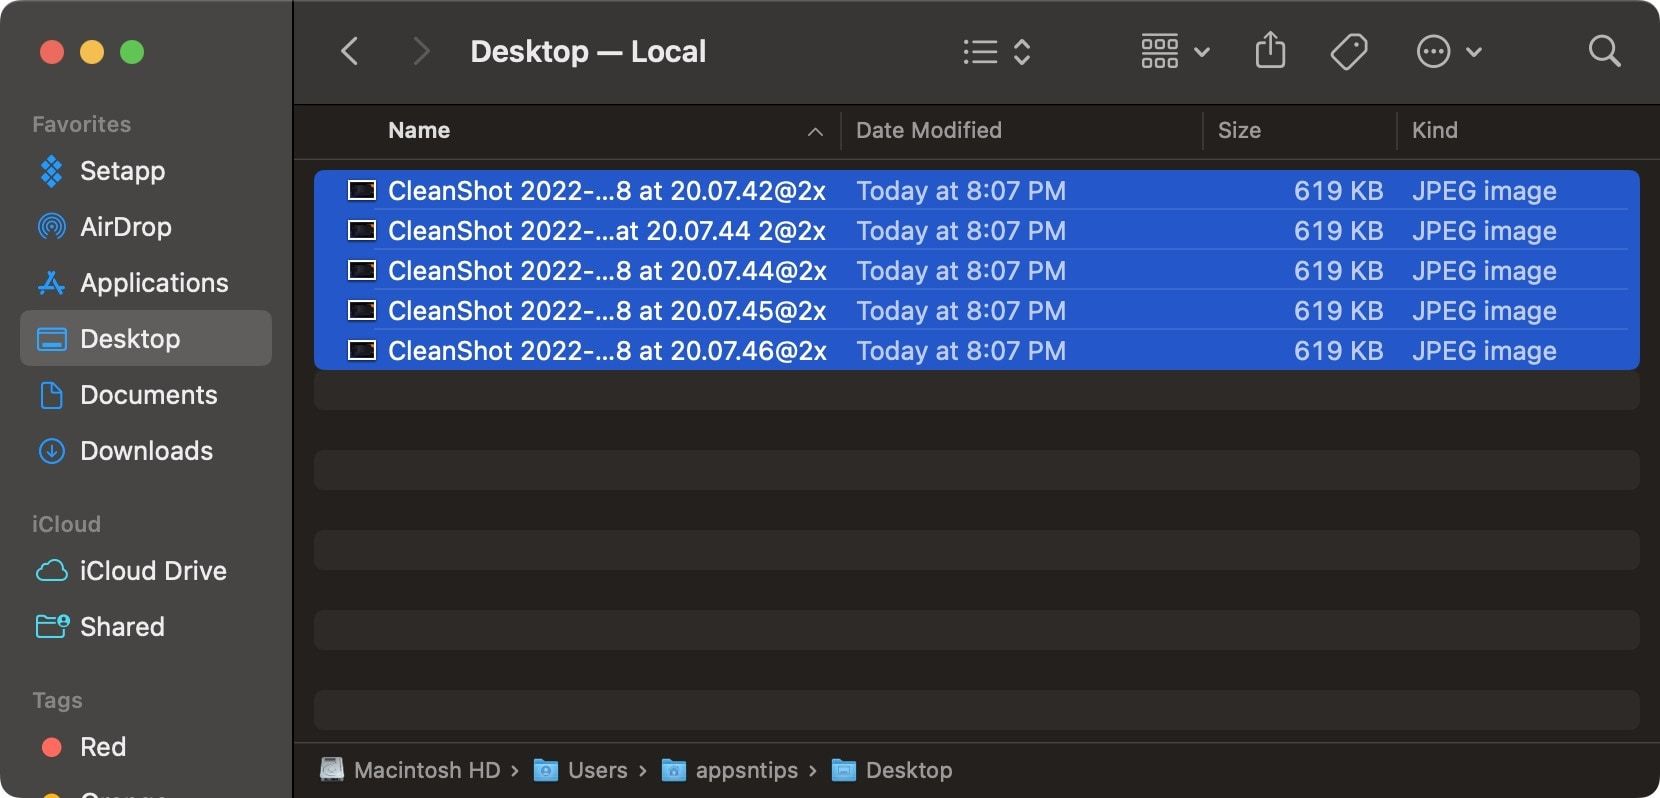
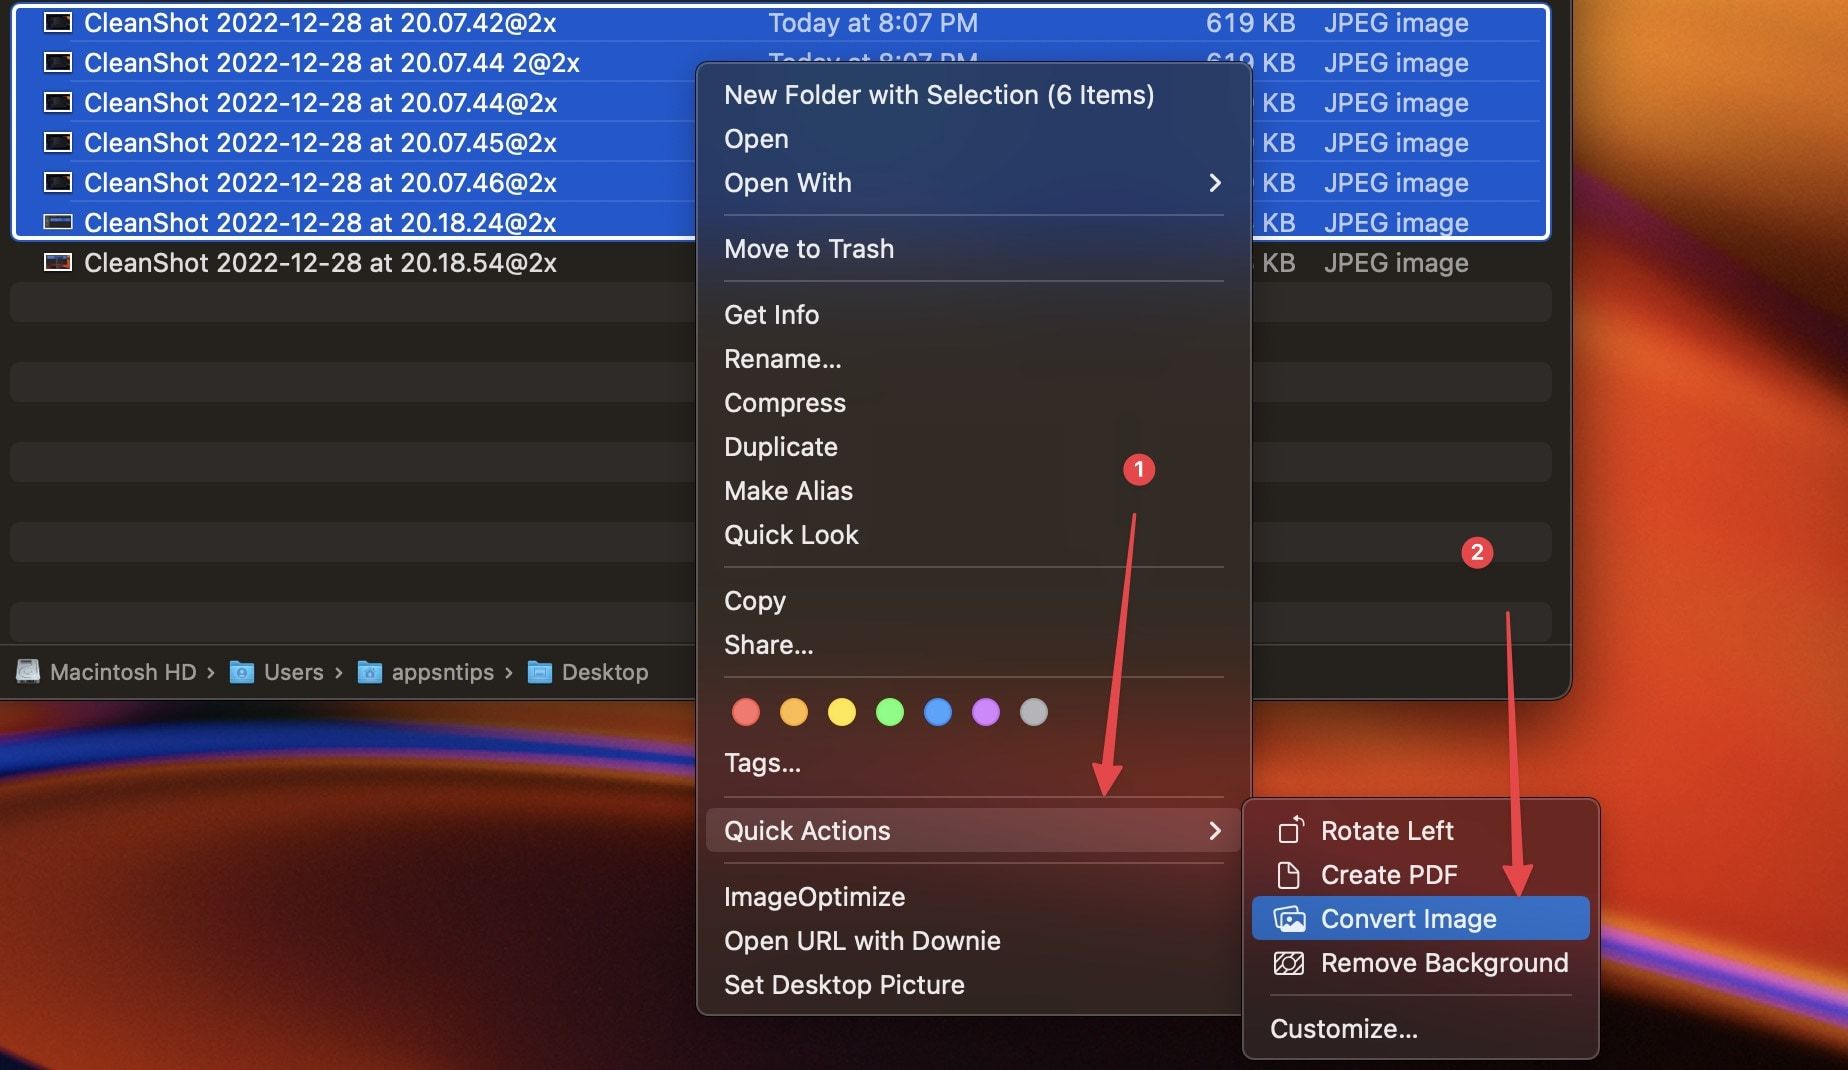
1. Select all the screenshots you want to convert and right-click (Ctrl+click) to bring the secondary click menu.
2. Hover over Quick Actions and select the Convert Image option.
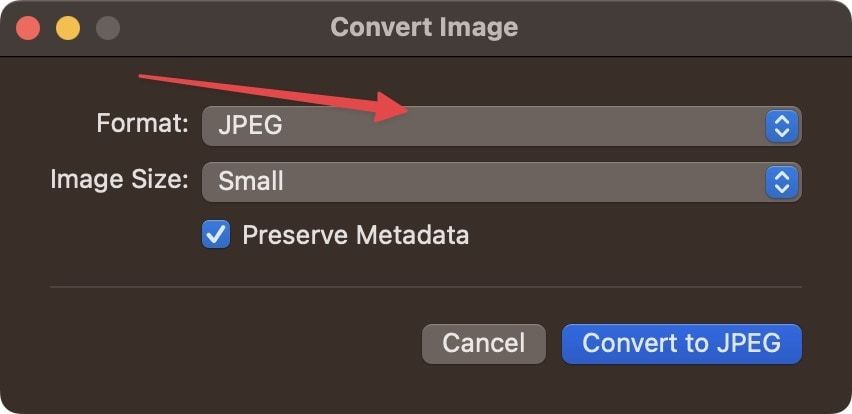
3. Use the drop-down menu next to Format to select your desired format.
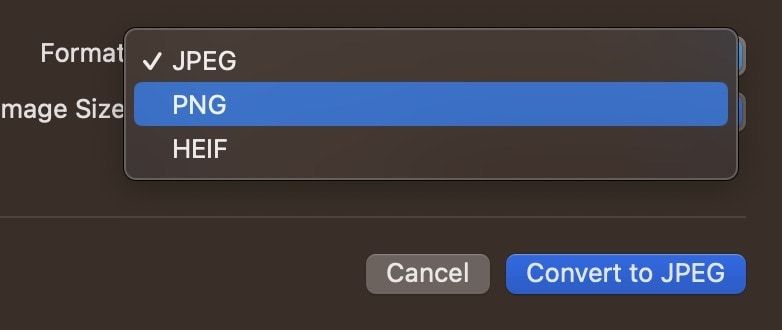
4. Similarly, select the desired size by using the drop-down menu next to Image Size. Click on Convert to XYZ to save changes.
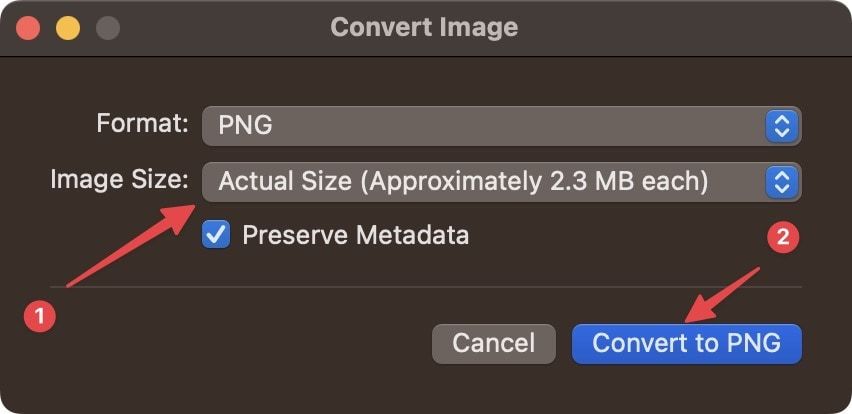
That’s how you can easily batch convert the format of your screenshots from JPG to PNG or vice versa.
Change default screenshot format on Mac
If you take a lot of screenshots and want your default screenshot to be different from PNG, you can use the Terminal app to do so. You can use this method to change the default screenshot format to JPG, PNG, HEIC, PDF, GIF, and TIFF.
1. Use Spotlight (CMD+Space) on your Mac to launch the Terminal app. Alternatively, you can go to Finder → Applications → Utilities → Terminal.

2. Paste the following command in the Terminal Window and hit enter to change the default screenshot format to JPG. Now your screenshots will be in JPG format.
defaults write com.apple.screencapture type jpg;killall SystemUIServer

3. To change the format to something else, replace “jpg” in the command with the format you want. For example, let’s say we want the screenshot default format to be PNG again. I will use the following Terminal command to do it.
defaults write com.apple.screencapture type png;killall SystemUIServer
Change default screenshot format on Mac
As you can see, you can easily change the default screenshot format on Mac. If you liked this guide, check out our best Mac tips and tricks article to learn 30+ tips and tricks that will help you improve your Mac experience and make you more productive.
