
How to Install Mac Apps on External Disk
Unlock more storage on your Mac! Learn how to install Mac apps directly on an external disk with macOS Sequoia 15.1."

The MacBook Pro is a fantastic machine, but let's face it, Apple's storage upgrades come with a hefty price tag. If you're looking to expand your storage without breaking the bank, an external SSD is the way to go.
With the macOS Sequoia 15.1 update, using external storage is about to get even better. This new update introduces a feature that lets you install Mac apps directly onto an external disk. In this video, I'll walk you through how to set it up.
Install Mac apps on an external disk
As I mentioned, this feature is part of the macOS Sequoia 15.1 update. I'm running the developer beta, so I already have access to it. If you don’t see this feature on your Mac, make sure to update to macOS Sequoia 15.1 when it’s released.
1. First, connect an external drive to your Mac that you will use to install apps.
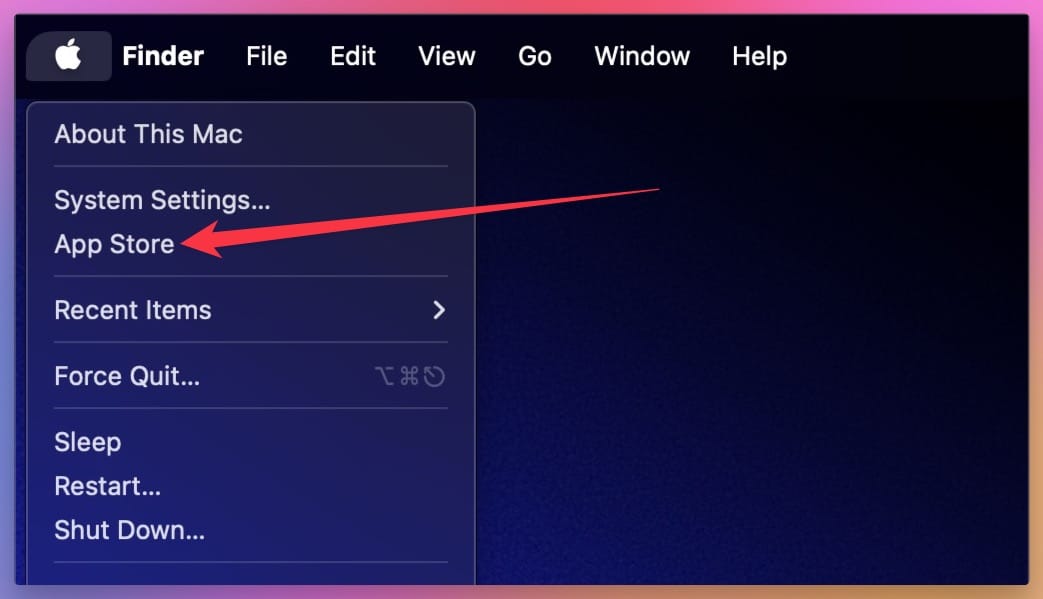
2. Now, use the Apple Menu in the top-left corner to launch the Mac App Store. Alternatively, hit the Command+Space keyboard shortcut to invoke Spotlight and use it to launch the App Store.
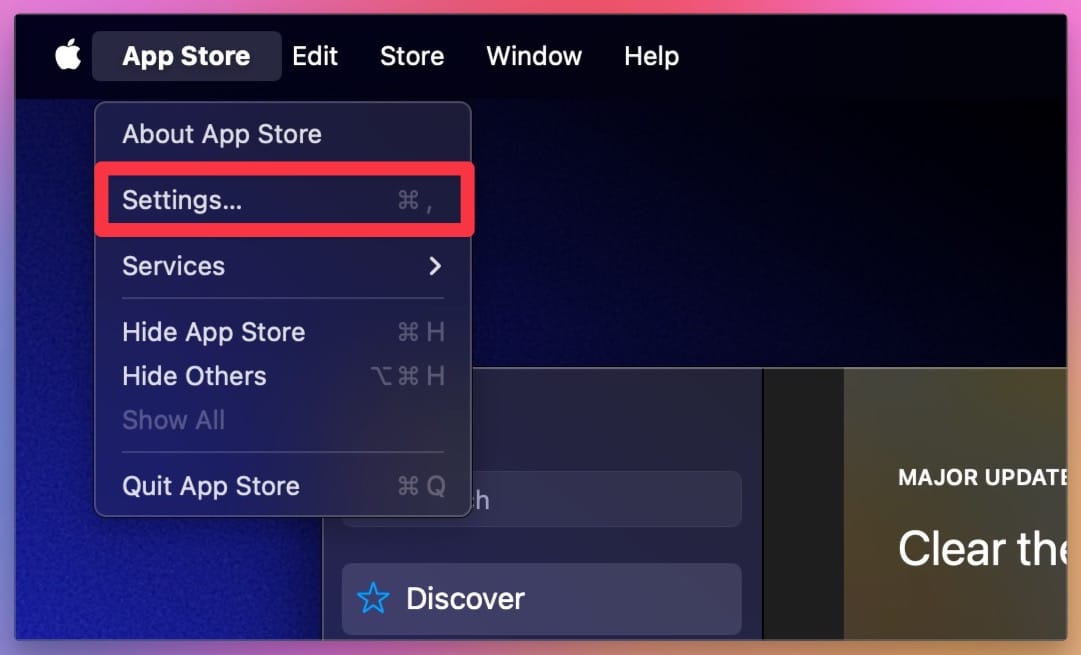
3. Click the App Store menu bar item and open settings. Alternatively, hit the keyboard shortcut, ⌘, to open the Settings page.
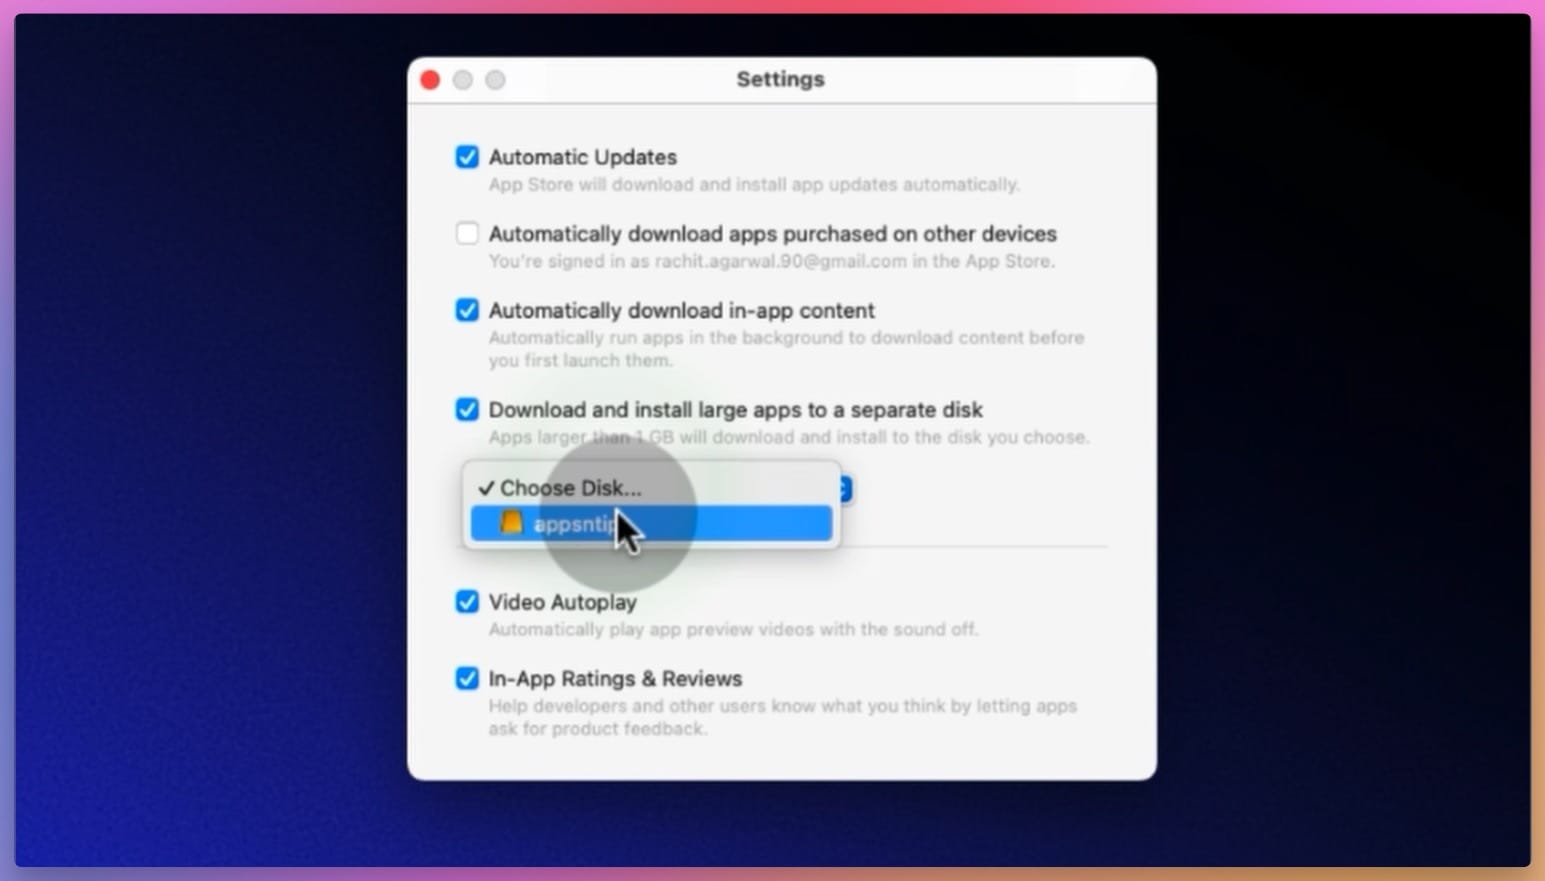
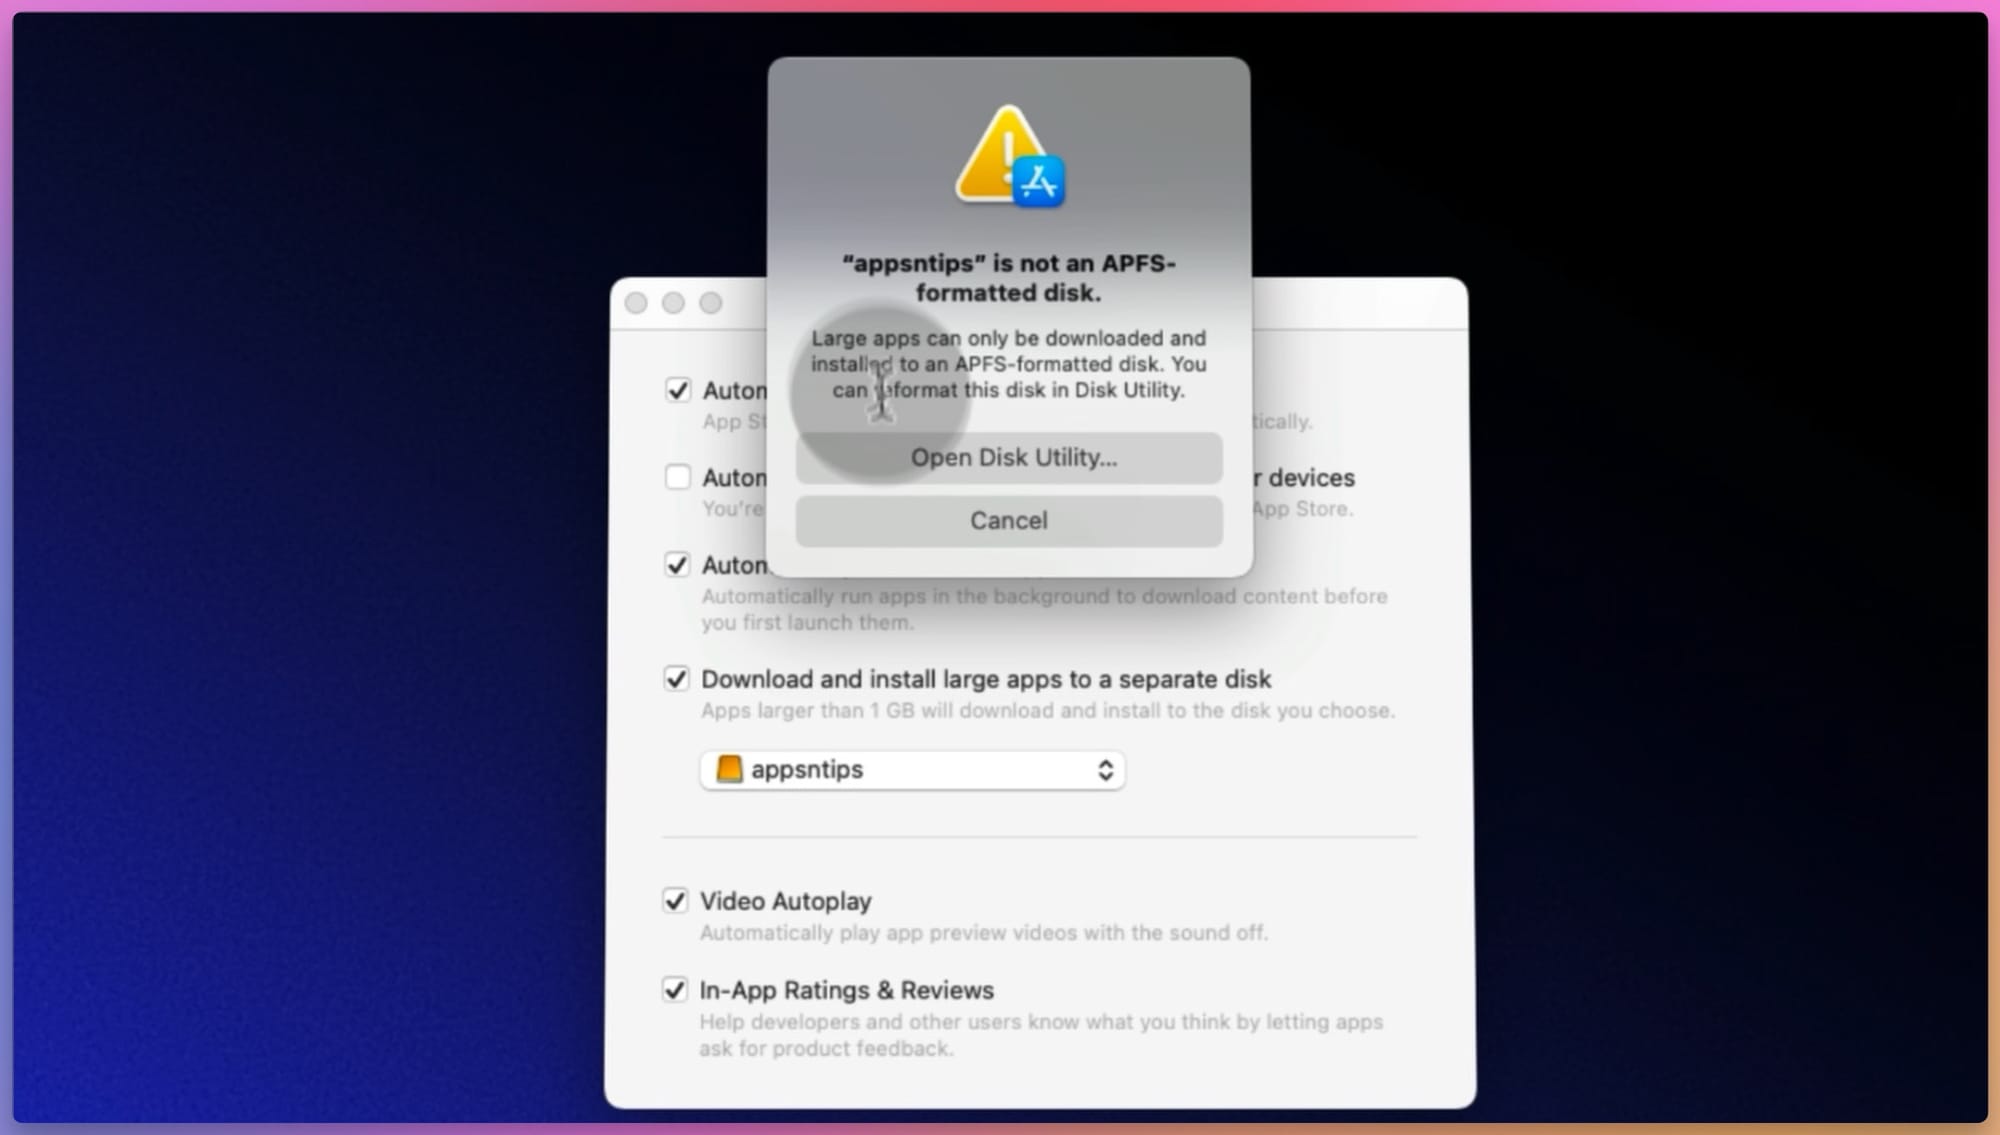
4. Click on the checkbox next to the “Download and install large apps to a separate disk” option to turn it own,
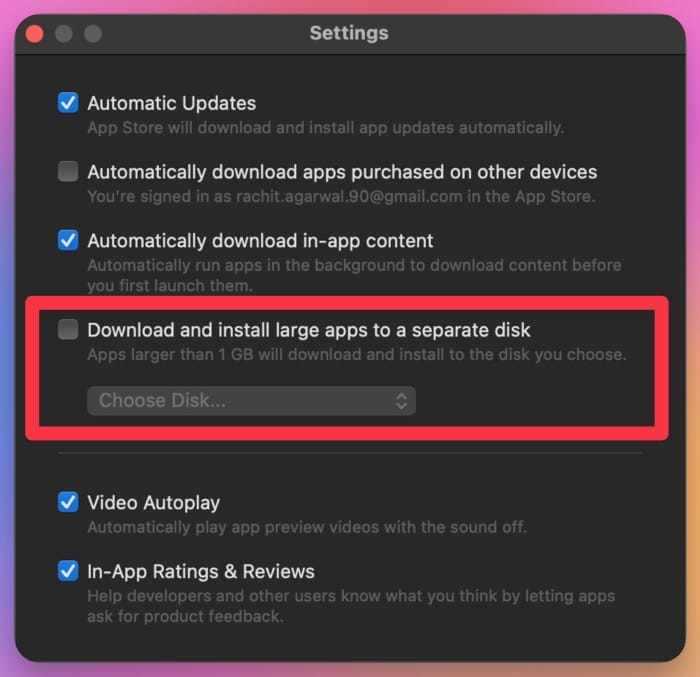
5. Click the Choose Disk dropdown menu and select the external drive you connected.
You will notice that when I chose my external disk, I got an error dialog. That’s because your external disk needs to be formatted in APFS format to work. It won’t work if the disk is formatted with ExFAT or other macOS-supported formats.
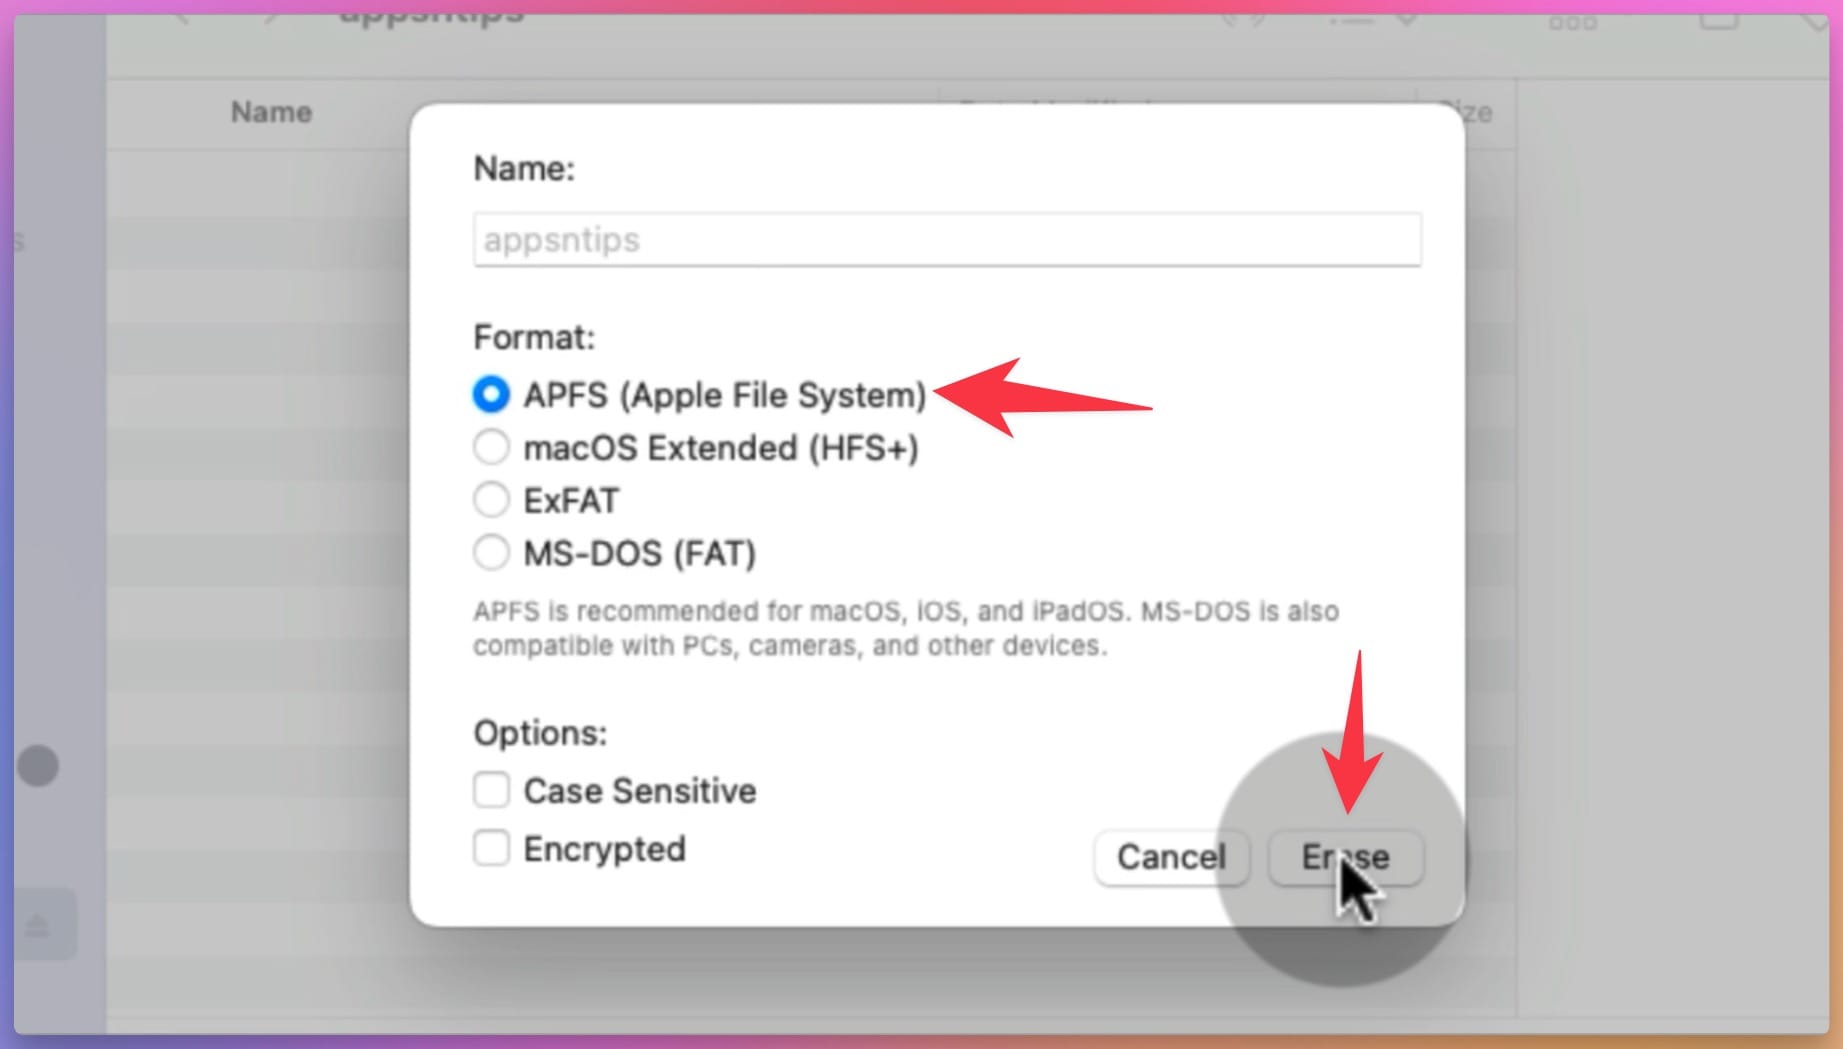
You can resolve this issue by formatting your disk in APFS format. To do this, first, create a backup of any files on the disk, as they will get erased during the formatting process. Now, right-click the disk icon and choose the Erase Disk option.

If you don’t see the disk on your desktop, open Finder and you should see it in the Finder sidebar under Locations.

Choose the APFS option and click the Erase button. You have now formatted your disk in APFS format and can use it to install apps.
Keep in mind that a disk formatted in APFS won’t work with Windows machines. If you need to use your external drive with both Mac and Windows, it’s a good idea to keep two separate drives: one for Mac only in (APFS) format and one for both in ExFAT).
If you have any questions regarding this guide, ask them in the comments below and we will get back to it as soon as possible.


