
How to Resize Photos on iPhone
One frustrating thing about the iPhone Photos app is that it doesn’t let you Resize photos. That means you have to install third-party photo editing apps that either cost money or are brimming with ads.
What if I told you that you can resize photos on your iPhone in seconds without using any third-party apps? If that intrigues you, let’s see how to resize photos on iPhone.
Resize Photos on iPhone with Shortcuts App
To resize images on iPhone, I will use the Shortcuts app. As always, I will provide a link to download it but I recommend checking the steps, as it will help you understand how this works and make changes to the shortcut as per your needs.
Create the photo resize shortcut
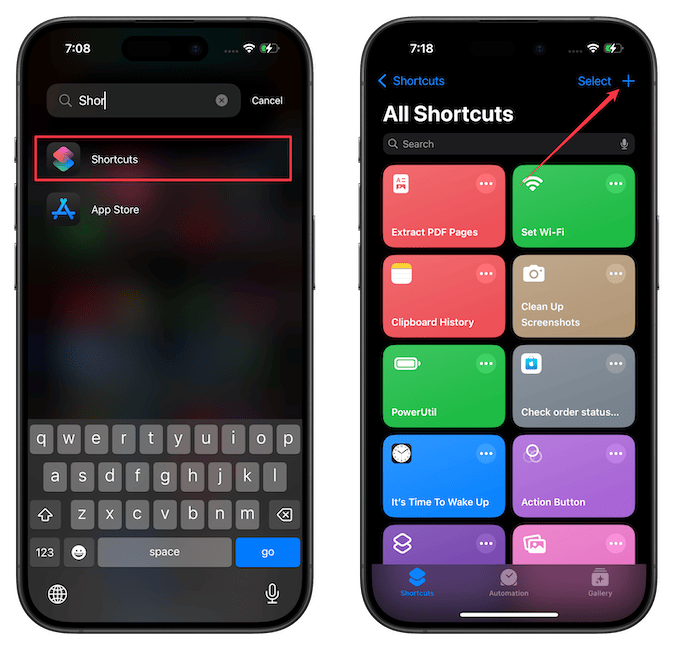
1. Launch the Shortcuts app on your iPhone and tap the plus (+) button in the top-right corner.
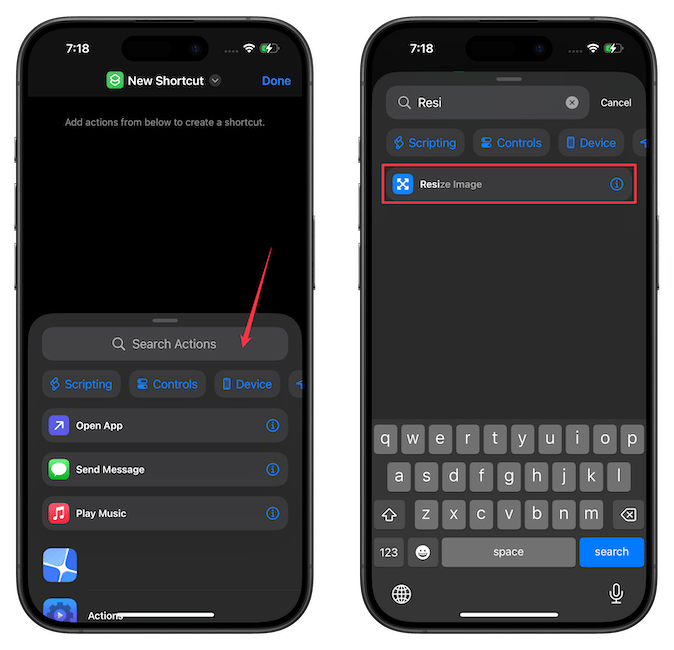
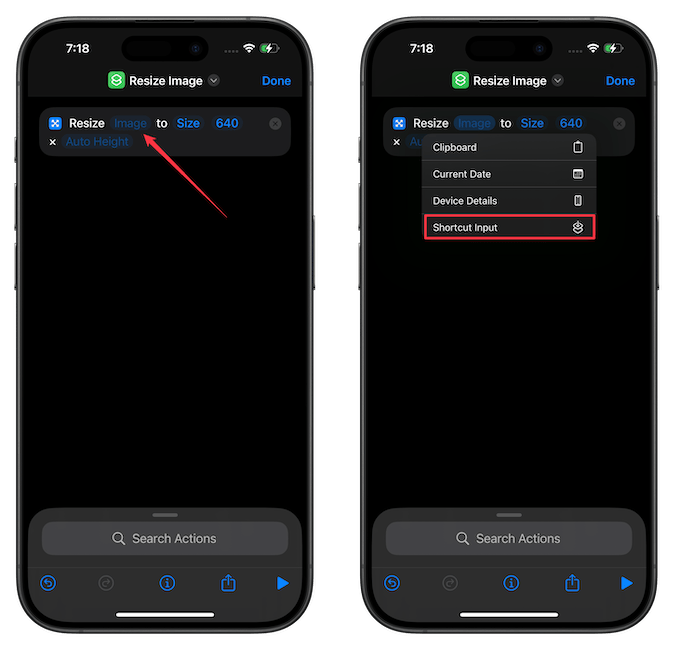
2. Tap the Search Actions field and search for Resize Image action. Tap to add it to the shortcut.
3. Tap the empty Image field and choose the Shortcut Input item.
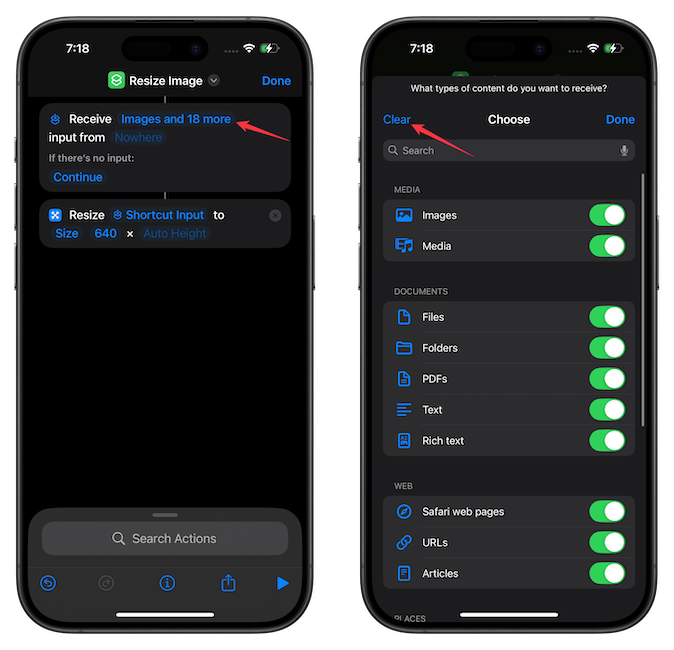
4. It will add a Receive action that will help the shortcut take image input. Tap the Image and 18 more input option and tap the Clear button in the top-left corner.
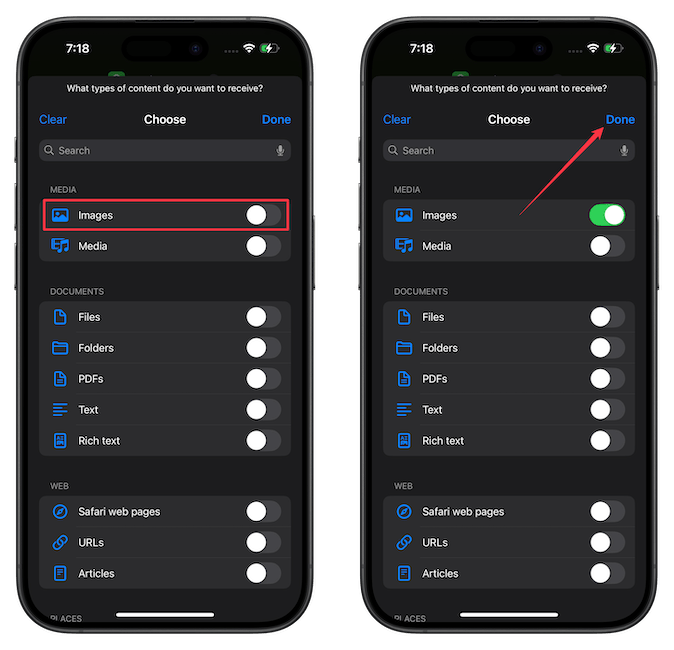
5. Now turn on the toggle for Images. Tap the Done button to save changes.
6. Now tap on Nowhere and turn on the toggle for the Show in Share Sheet option. Tap the Done button to save changes.
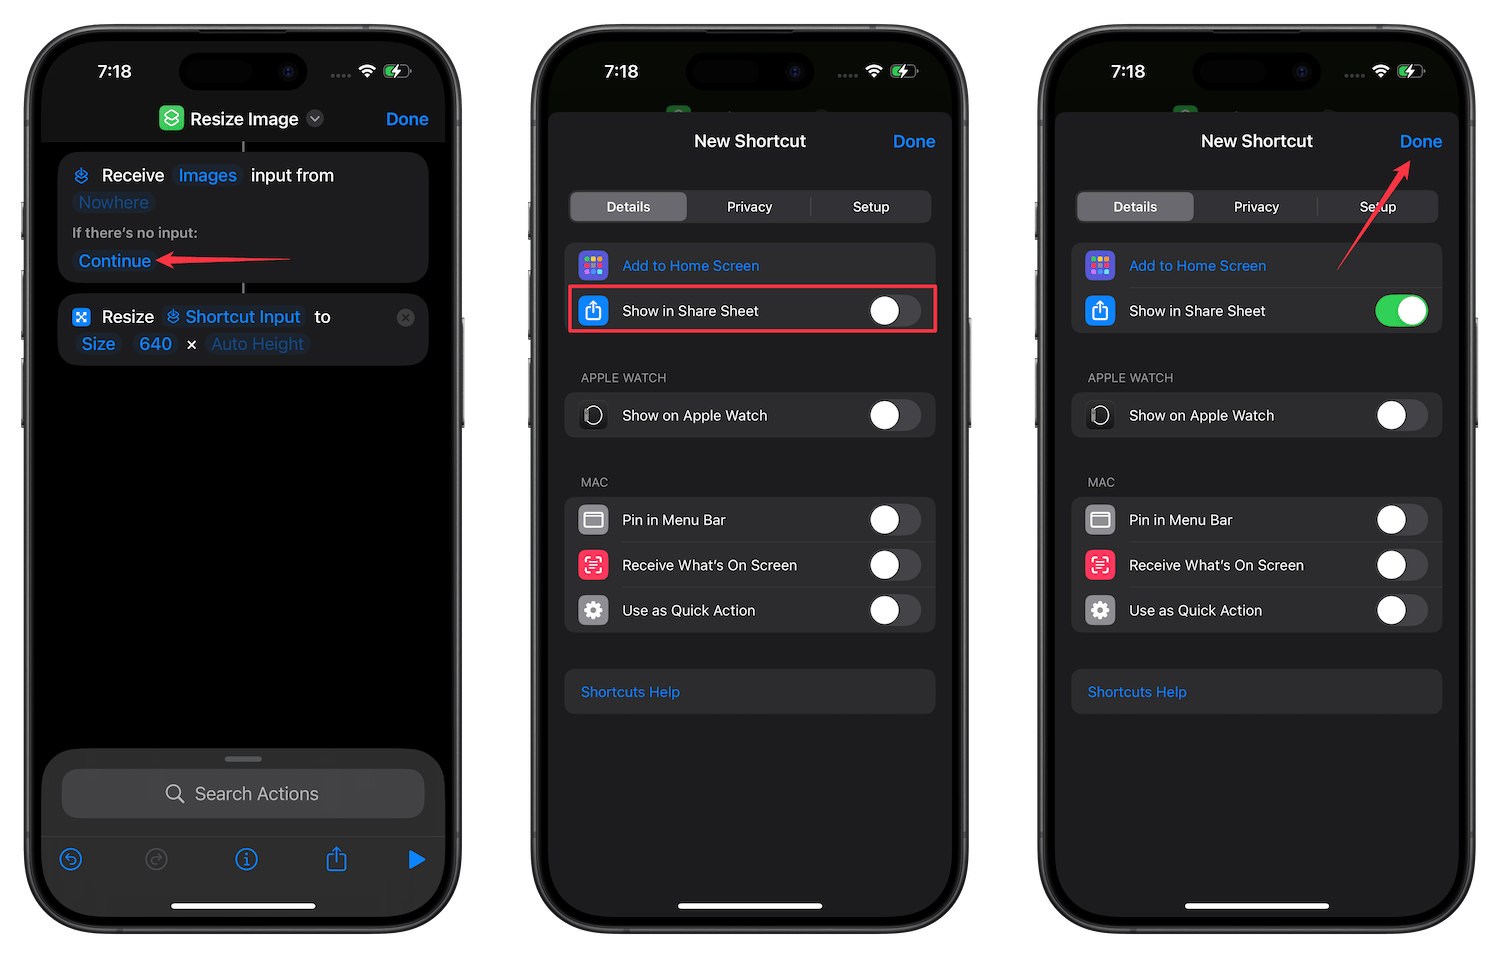
We have now created an image input pipeline that will allow us to feed images to this shortcut via the iOS Share Sheet. We turned off all the other options, as we don’t want the shortcut to clog the Share Sheet when you share, say a link or video.
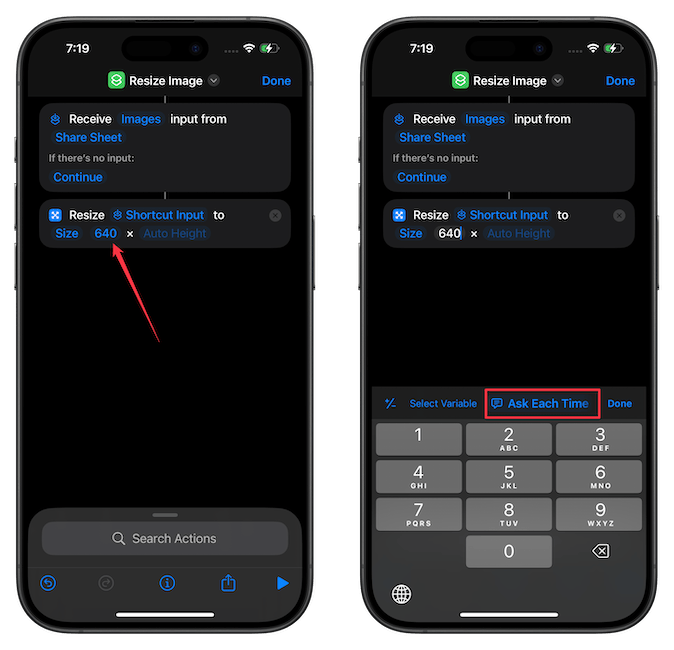
Now let’s set the resize parameters. The shortcut lets you input the width of the photo and changes the height accordingly.
7. Tap on 640 and change it to your required size. If you are unsure, choose the Ask Each Time variable. It will ask for your desired photo width every time you run the shortcut.
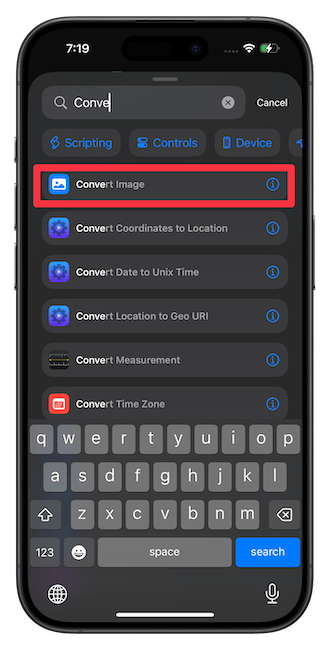
Now, before I add the action to save the image, I like to add a Convert Image action to convert the image to JPEG format. But this is an additional step that you can skip.
8. Search for the Convert Image action and add it to your shortcut.
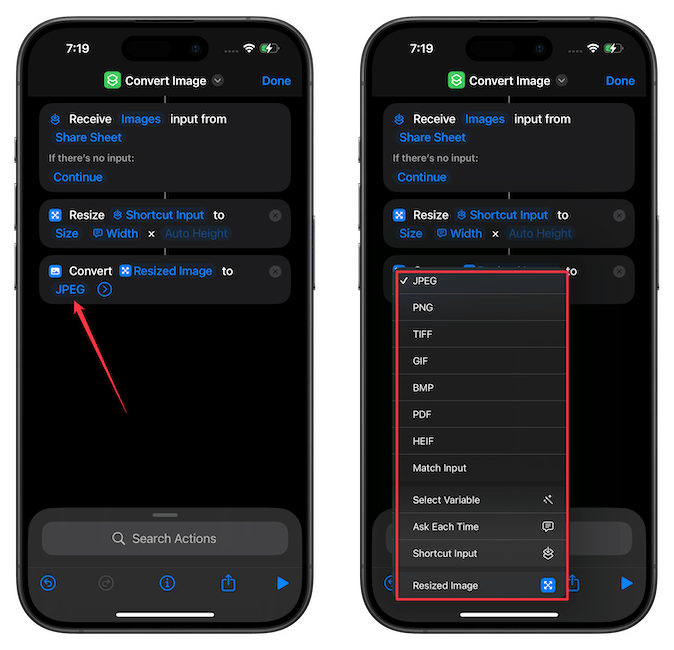
9. You can tap the JPEG field to change it to any image format you want. I will keep it to JPEG.
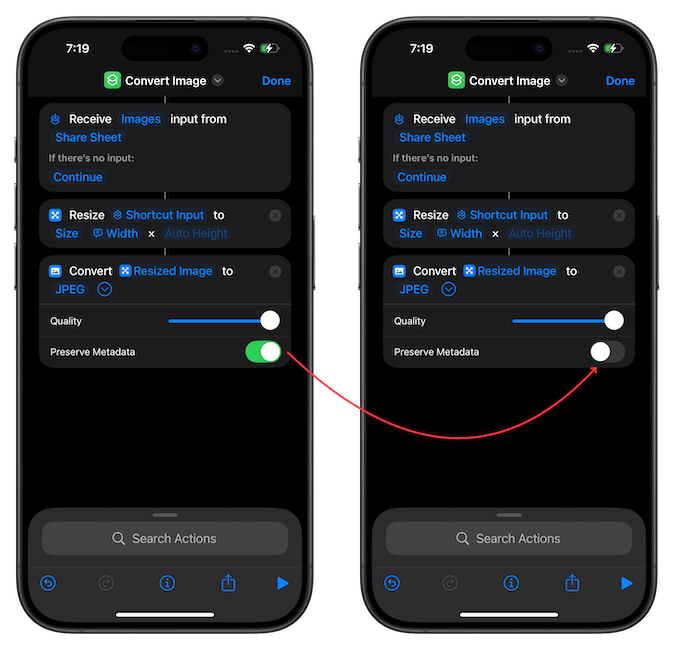
10. Tap the arrow next to JPEG and set the Quality parameter to full.
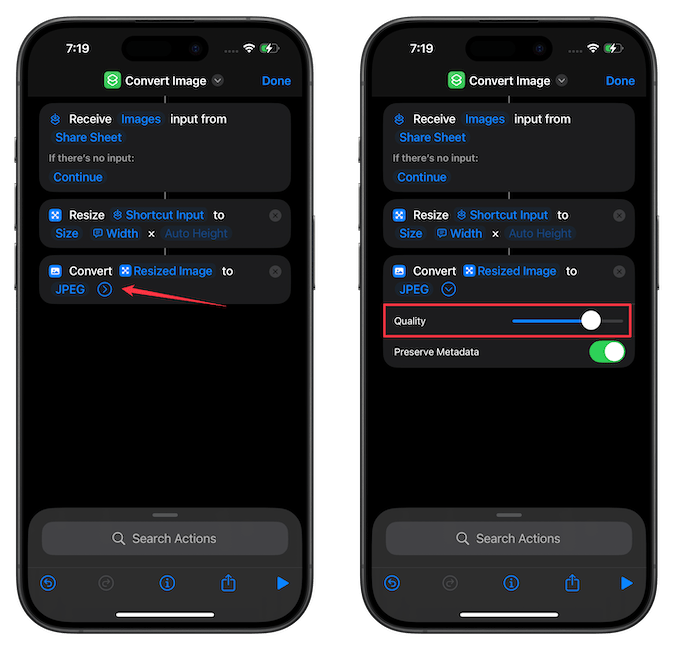
You can turn off the toggle for Preserve Metadata if you want to remove image metadata to make photo sharing more secure.
Now it’s time to save the photos. You can save the resized and converted images to your Photos app, Files app, or both. I will show you how to add both actions but you can pick and choose what you want.
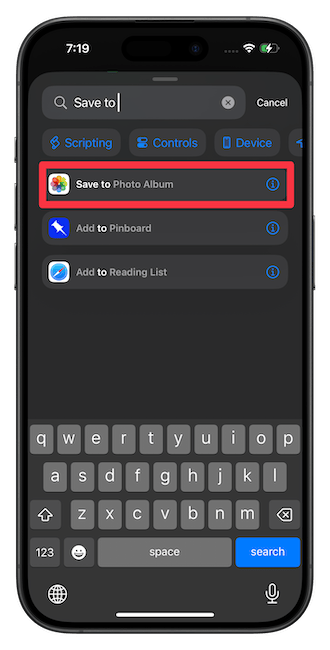
11. Use the Search Actions field to search for Save to Photo Album action and add it to the shortcut.
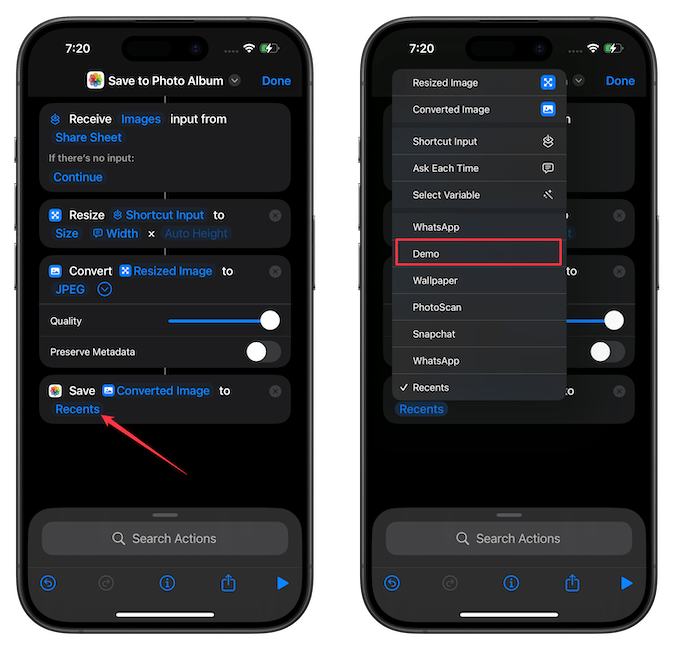
12. By default, the shortcut saves the processed photos to the Recents folder. I will change it to the Demo folder.
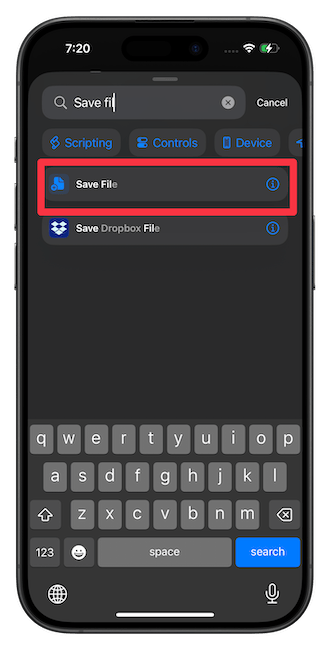
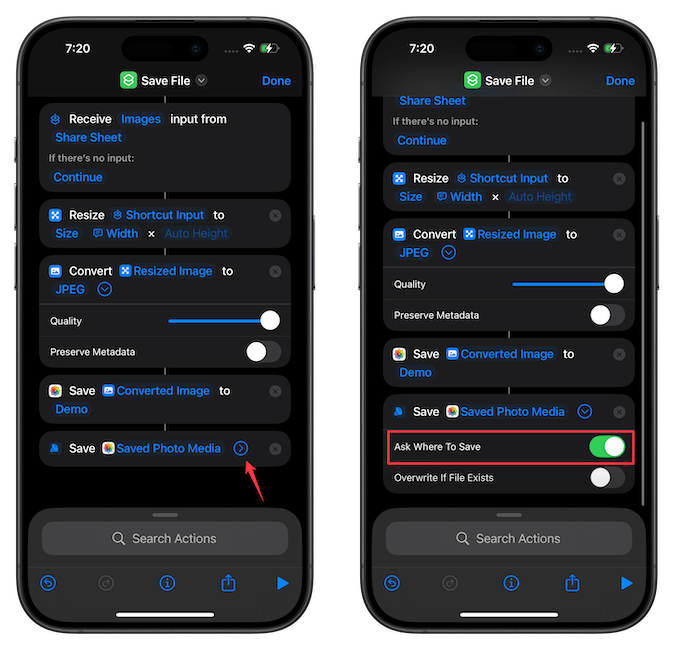
13. Similarly, let’s add Save File action to save the image in the Files app.
By default, it will ask you where you want to save the photo every time, which is cumbersome. I recommend setting it to a specific folder.
14. Tap the arrow and turn off the Ask Where to Save toggle.
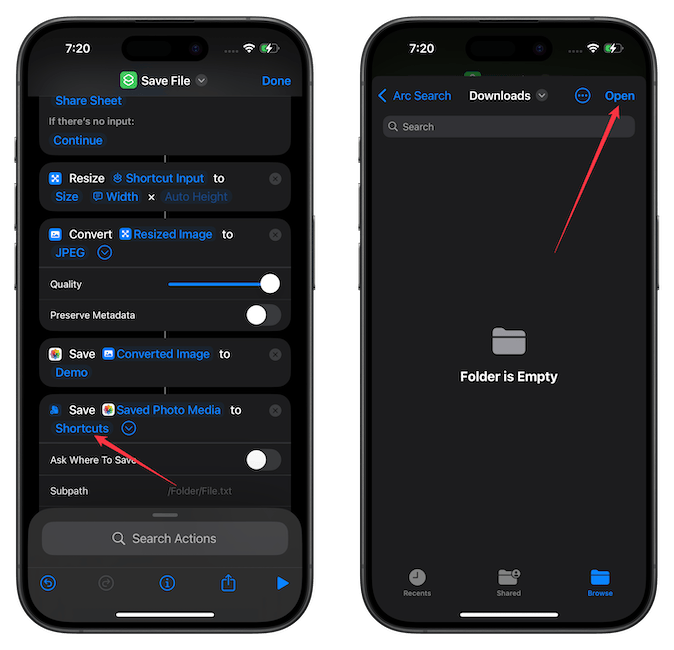
15. Tap Shortcuts and navigate to your desired folder location. Tap the Open button to save it.
Again, you can choose to save the resized images to either a photo album or a folder inside your Files app. You don’t need both.
I am showing you how to create both so you can choose what you want. With that said, we are almost done. We only need to give the shortcut a proper name and save it.
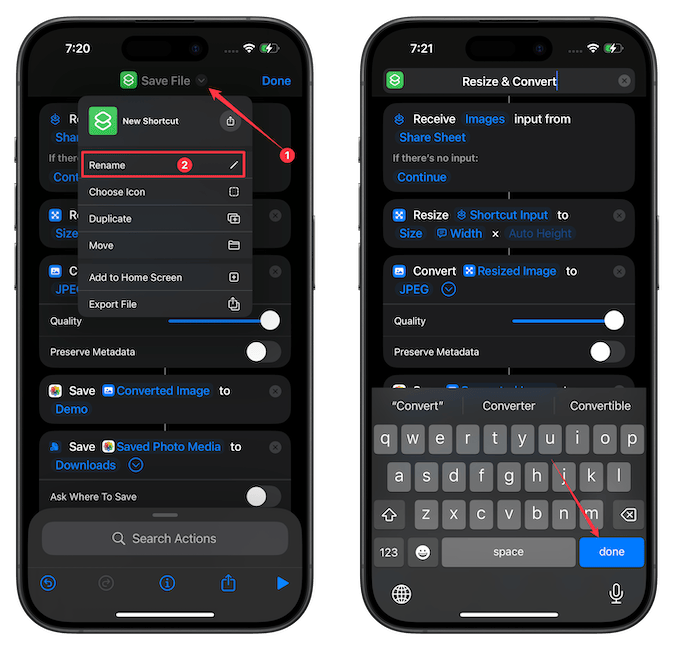
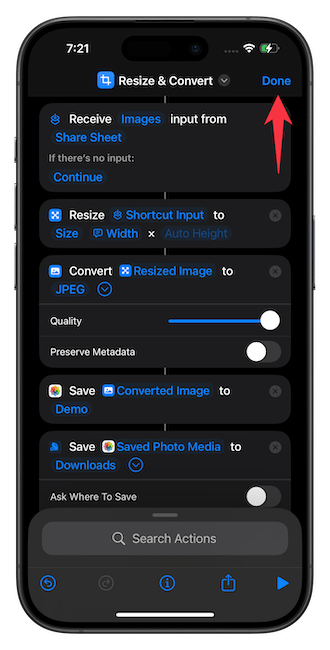
16. Tap the downward arrow button next to its name and use the Rename option to rename the shortcut. I will rename it to Resize & Convert. Tap the Done button to save changes.
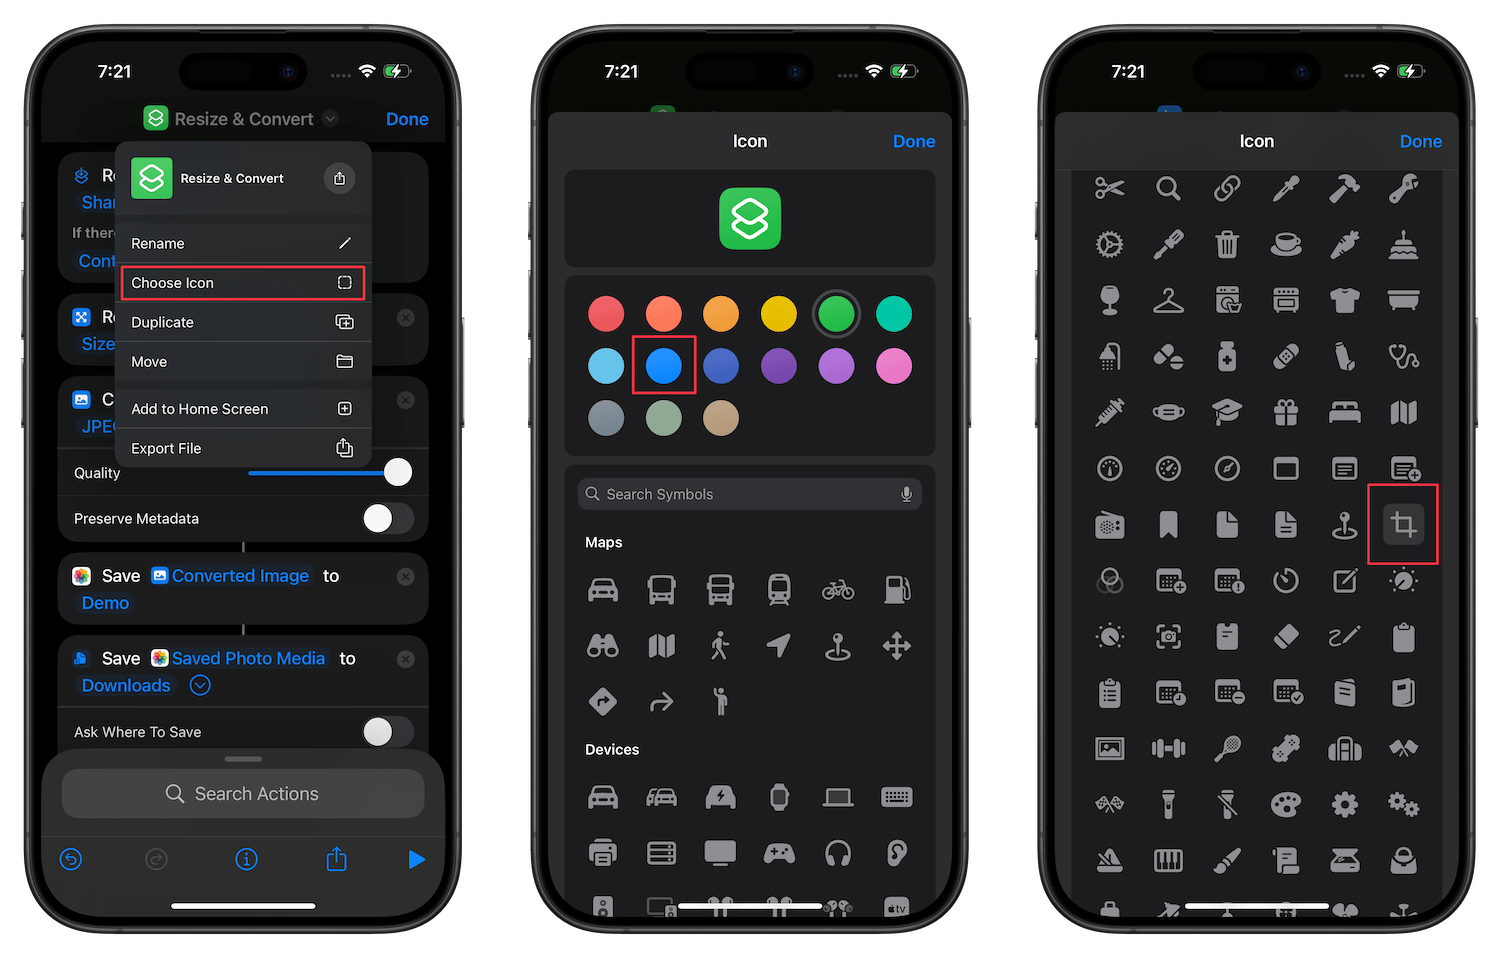
17. You can also use the Choose Icon button to give it a unique icon and change its color. Let’s make it blue and give it a crop icon that feels the most appropriate.
18. Finally, tap the Done button to save changes.
Resize images on iPhone
We have done the hard work and are ready to reap the benefits.
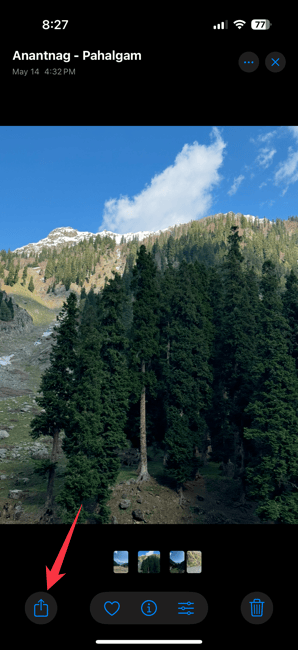
1. Open a photo you want to resize and hit the Share button to open the iOS Share Sheet.
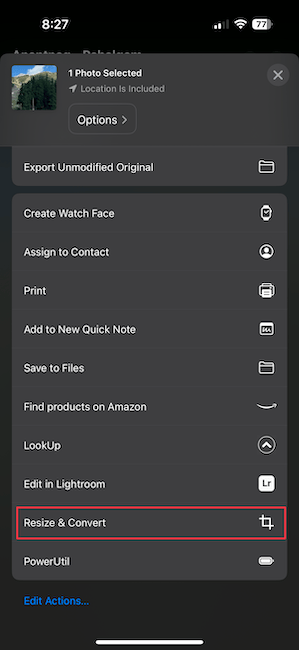
2. Scroll to the bottom and hit the Resize & Convert shortcut.
3. Enter the desired width in pixels. Let’s enter 1000 pixels. Tap the Done button.
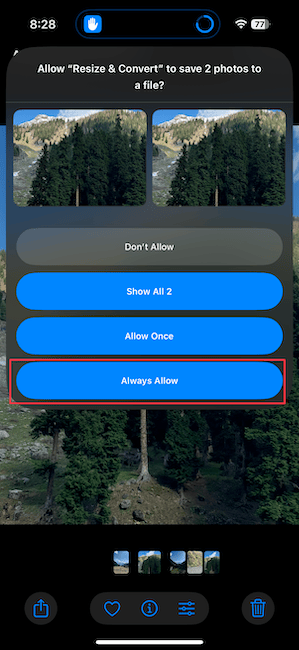
4. The shortcut will ask the permission to save the file when you run it for the first time. Tap the Always Allow button.
That’s it. Let’s see if our shortcut has worked or not.
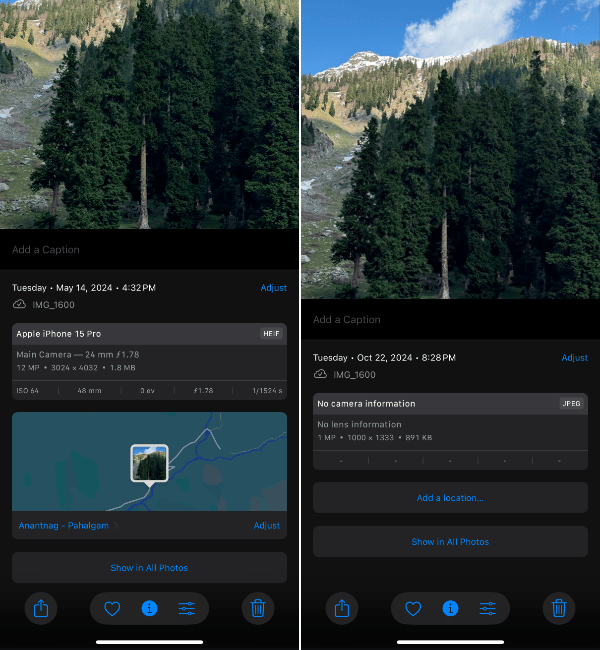
The original image is in HEIF format, has a resolution of 3024×4032 pixels, and all the metadata including location, camera lens, iPhone model, and more. Let’s open the details in the converted image. You can see that the shortcut has resized the image, converted it to JPEG, and removed all the image metadata.
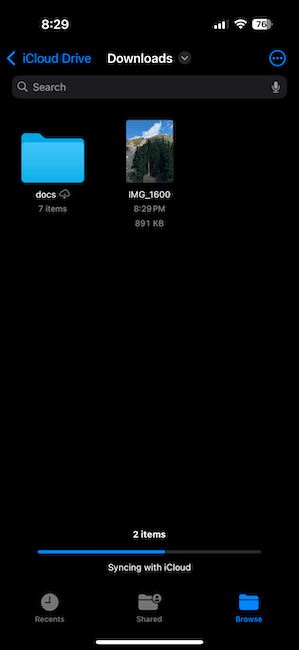
As a final check, I will open the Files app and see whether it has saved the image in the Downloads folder. And here it is. That means everything is working perfectly.
One cool feature of this shortcut is that you can feed multiple images to resize and convert them. Let’s open the Photos app, select all four photos in the Demo folder, and run them through the shortcut.
I will again set the desired width to 1000 and run it. You will notice that the shortcut is again asking permission to run. It’s because you have selected more than one image.
It won’t do that again no matter how many photos you choose. The shortcut has resized all the photos, converted them to JPEG, and saved them to the desired location in seconds.
It’s the easiest way to resize photos on iPhone for free without using a third-party app. If you enjoyed this guide, share it with others and drop your thoughts in the comments below.

Comments ()