How to Fix Private Relay Not Working on Wi-Fi Issue
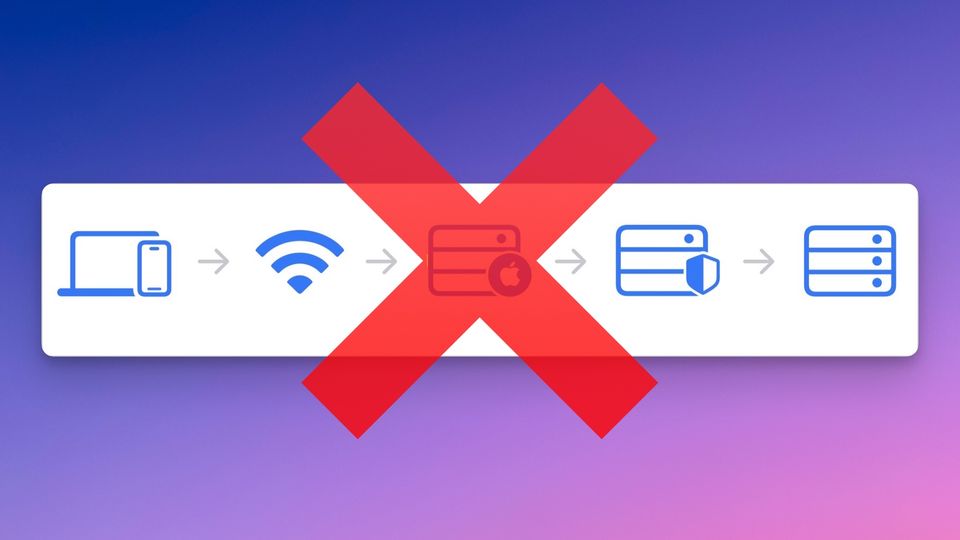
Last night, when browsing the web, my iPhone threw the error that Private Relay was not available for my home Wi-Fi. It happened out of the blue, and I was not sure what was happening. Thankfully, Apple provided a reason as to why this was happening, and I was able to solve the issue quite easily. If you are also seeing Private Relay not available for your Wi-Fi error, here’s how to solve it.
What is Private Relay?
Private Relay is a network security feature provided by Apple to its iCloud subscribers. It is an iCloud security feature that protect your internet browsing history by bouncing your data through two separate internet relays and encrypting your DNS records.
We recommend keeping this feature turned out to protect your online browsing habits from being tagged by your internet service provider or any third-party trackers. That’s why, if the feature starts throwing an error, instead of turning it off, use the steps below to solve the issue.
Fix Private Relay not available for Wi-Fi issue on iPhone
Here are the steps you can take to solve the Private Relay not working issue on your iPhone.
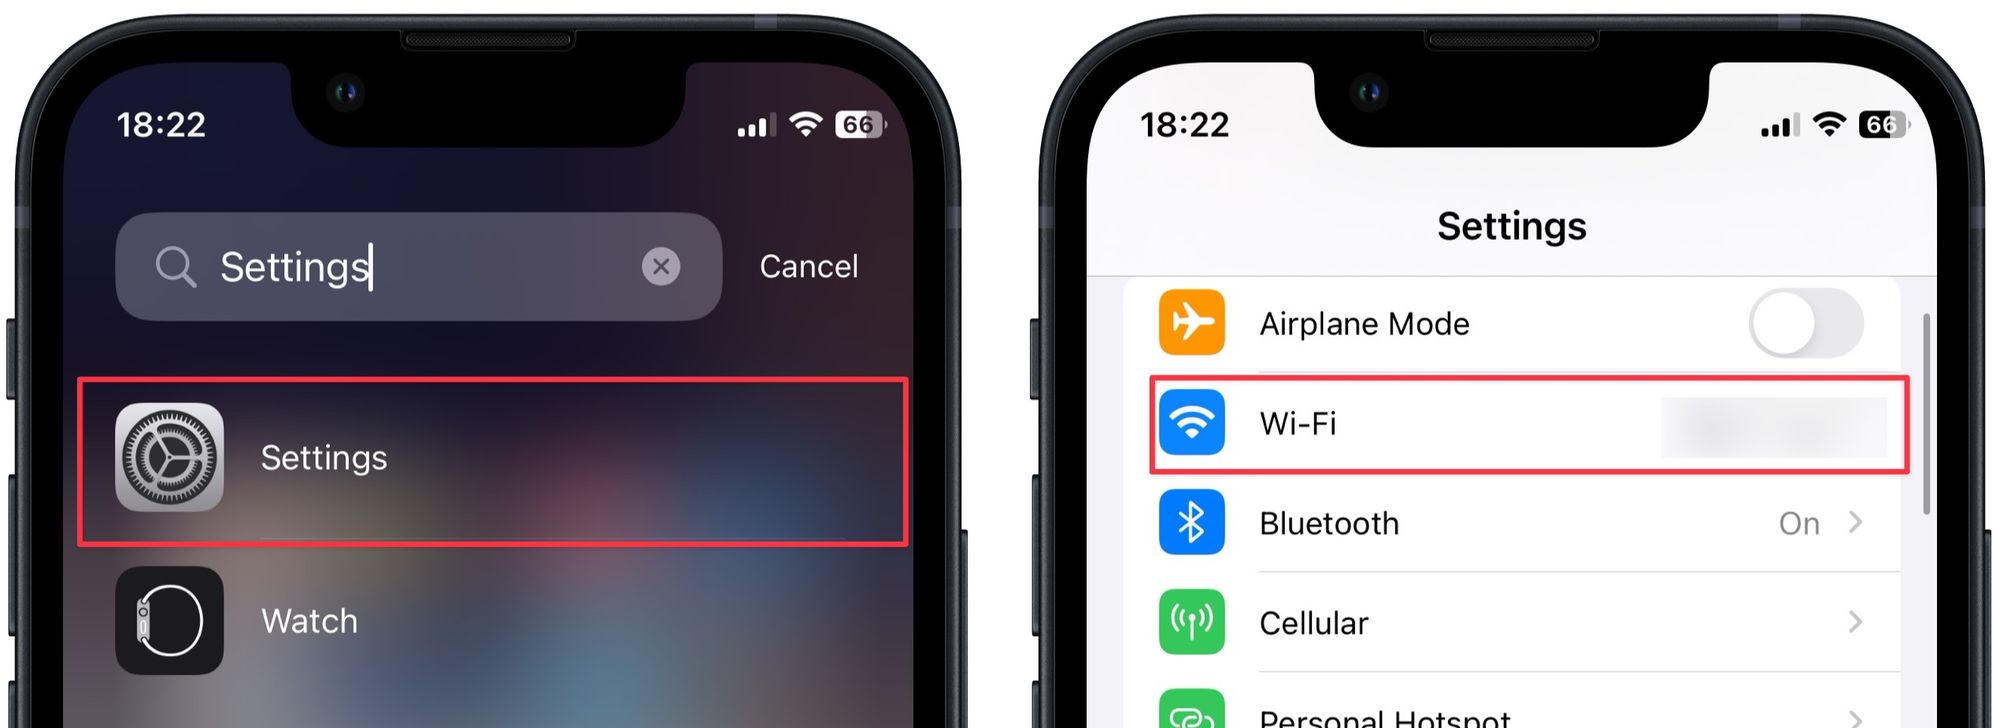
1. Launch the Settings app and tap to open the Wi-Fi settings.
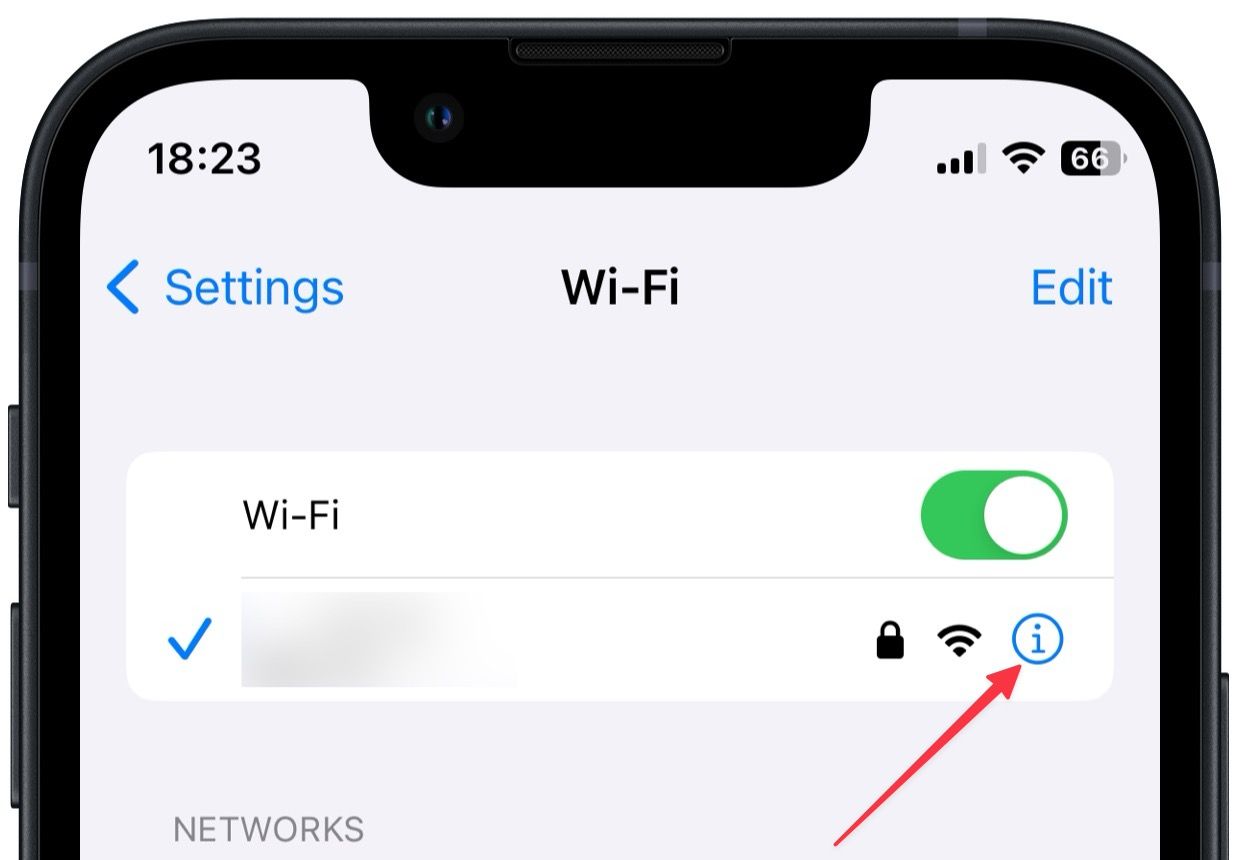
2. Now, tap the (i) icon next to the Wi-Fi network’s name.
3. Now, scroll down and enable the toggle next to Private IP Address. Tap the Continue button to save the change.
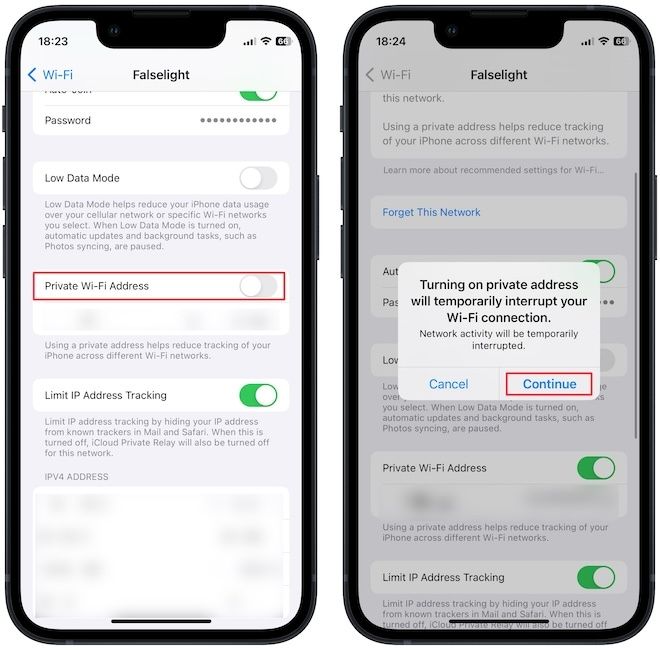
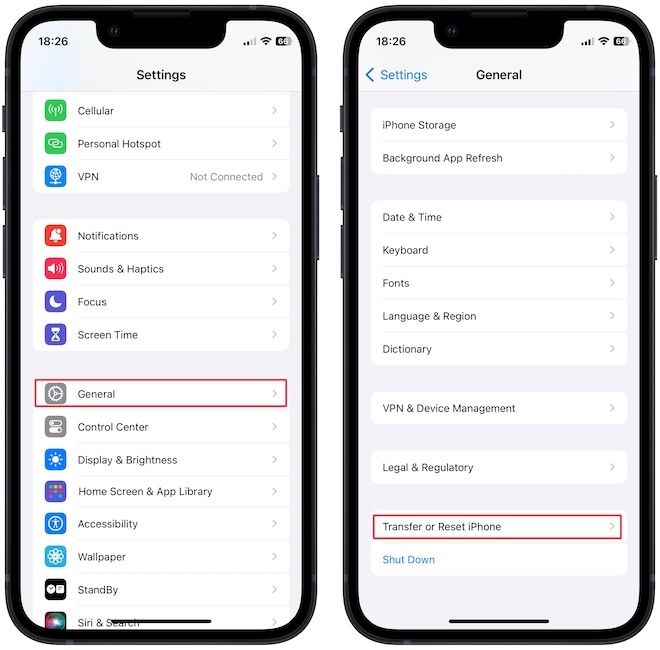
This should solve the issue. However, if this doesn’t work, you reset the network settings to start over and solve any network-related issues your iPhone is facing. To reset network settings:
4. In the Settings app, tap to open the General settings. Now, scroll down to the bottom and tap on Transfer or Reset iPhone.
5. Tap on Reset and select the Reset Network Settings option.
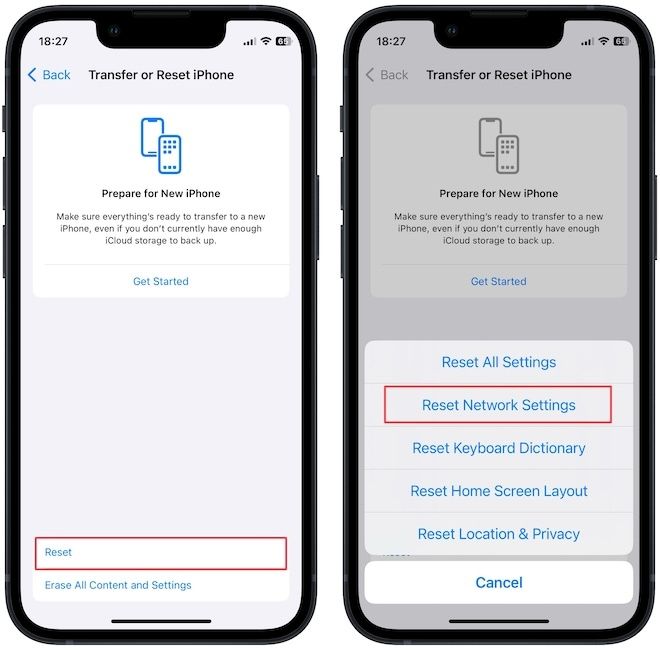
This will reset your network settings and forget all the connected Wi-Fi. You will have to reconnect to your Wi-Fi network. After you reconnect, Private Relay should work fine.
Solve Private Relay not working issue on Mac
If you are experiencing the same issue on your Mac, here’s how to solve it.
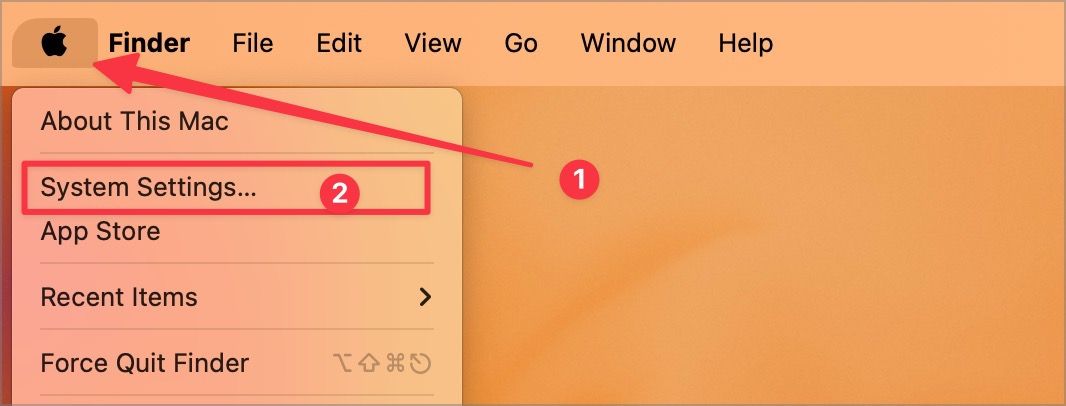
1. Click on the Menu and choose the System Settings option.
2. Select the Wi-Fi option in the left sidebar and click the Details button next to the Wi-Fi network’s name.

3. Now, enable the toggle for Limit IP address tracking.
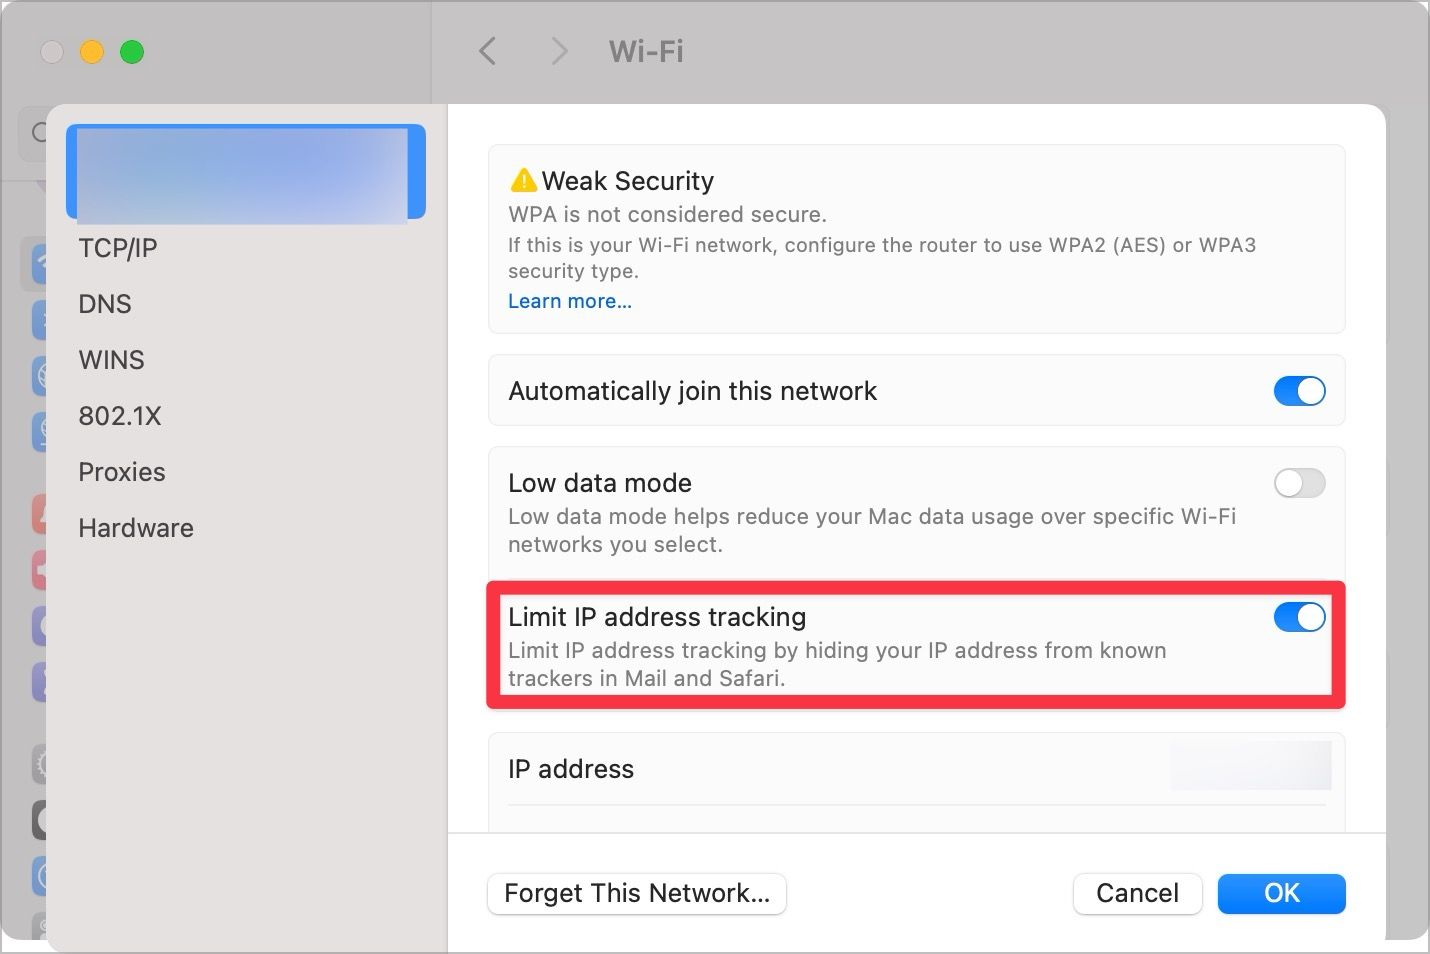
4. If that doesn’t solve the issue, use the Forget this network… button to forget the network. Now, reconnect to the network, and Private Relay will start working.

Fix Private Relay not working issue on iPhone and Mac
We hope you found this guide useful. If you liked it, you might want to read our guide on the best MagSafe accessories for iPhone to find the best accessories to enhance your iPhone’s capabilities.


Comments ()