Apple Notes Tips: Use Automatic Sorting of Checked Items
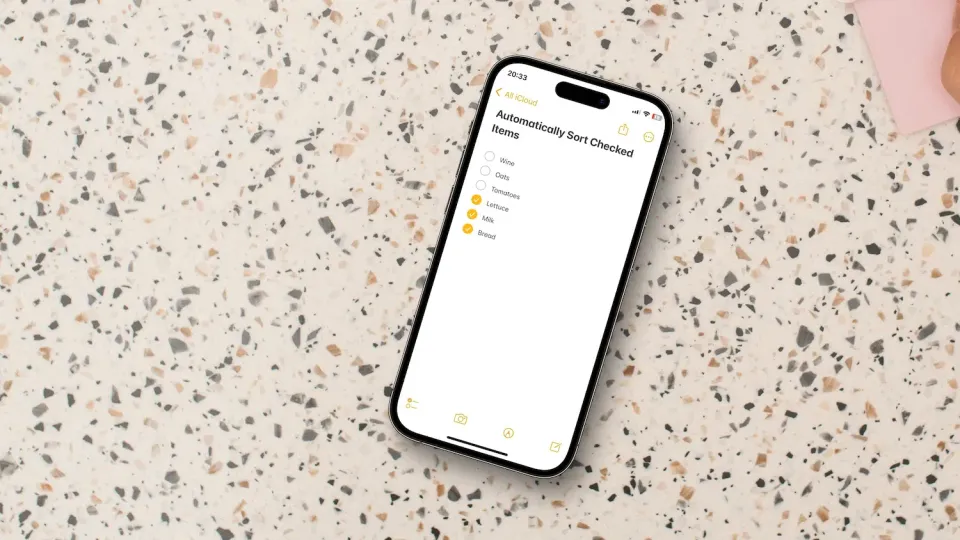
Apple Notes is one of the best note-taking apps for Apple users. I use the app to take handwritten notes, store important documents, save links and PDFs, jot down quick thoughts, and create checklists. One of my favorite things about checklists in Apple Notes is that you can enable the automatic sorting of checked items.
When you enable this feature, all checked items automatically move to the bottom of the list. It helps me keep track of things that are pending at a glance. If you have not used this feature before, I highly recommend it. Here’s how you can enable automatic sorting of checked items in Apple Notes.
Enable Automatic Sorting of Checked Items in Apple Notes
Apple Notes is great at syncing your notes across devices. However, the custom settings you apply don’t get the same sync functionality, meaning you will have to enable this feature on your Mac and iPhone separately.
Use automatic sorted checklist in Apple Notes on iPhone
1. Launch the Settings app on your iPhone and open Notes setting.
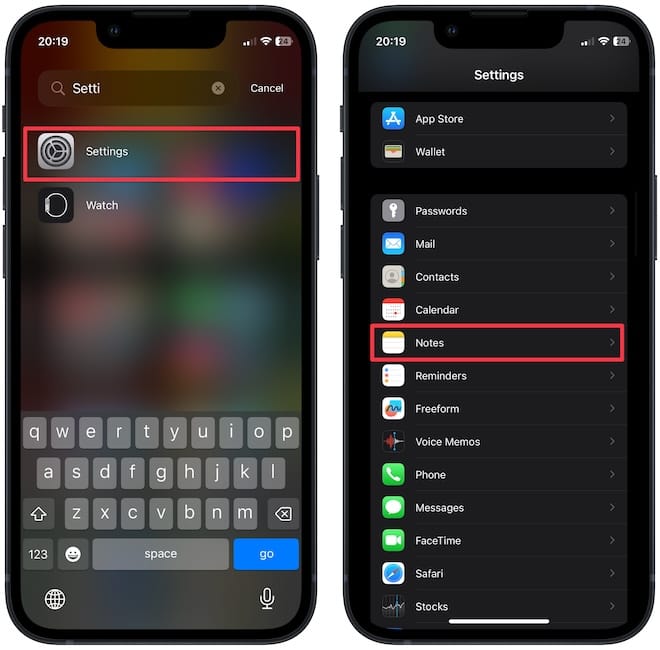
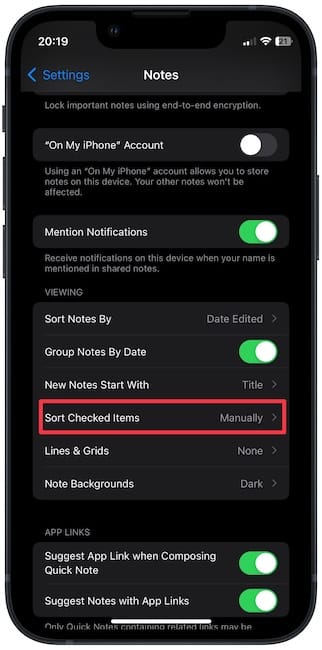
2. Scroll down to the Viewing section and tap on the Sort Checked Items option.
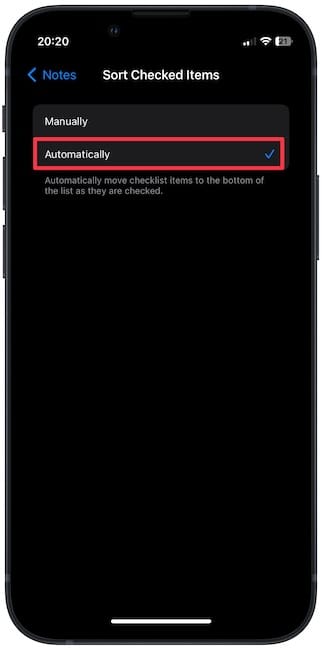
3. Tap to choose the Automatically option to auto-sort checked items in notes.
Use the automatic sorted checklist in Apple Notes on Mac
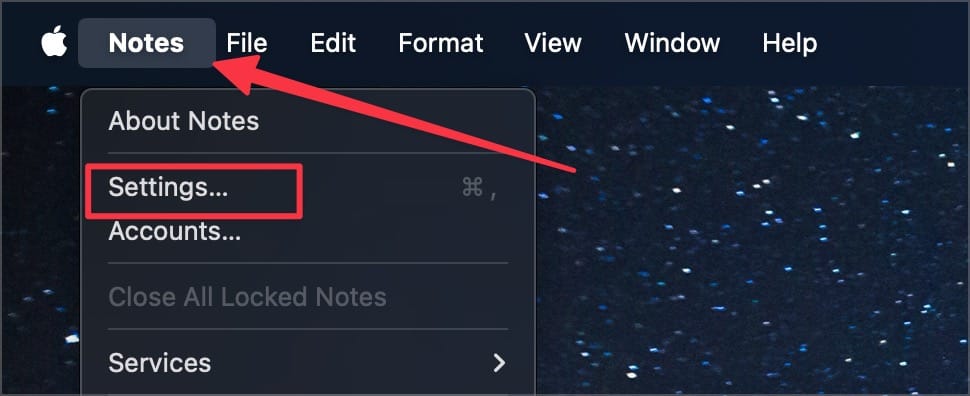
1. Launch the Notes app on your Mac and use the Notes menu item to open Settings. Alternatively, use the keyboard shortcut ⌘,.
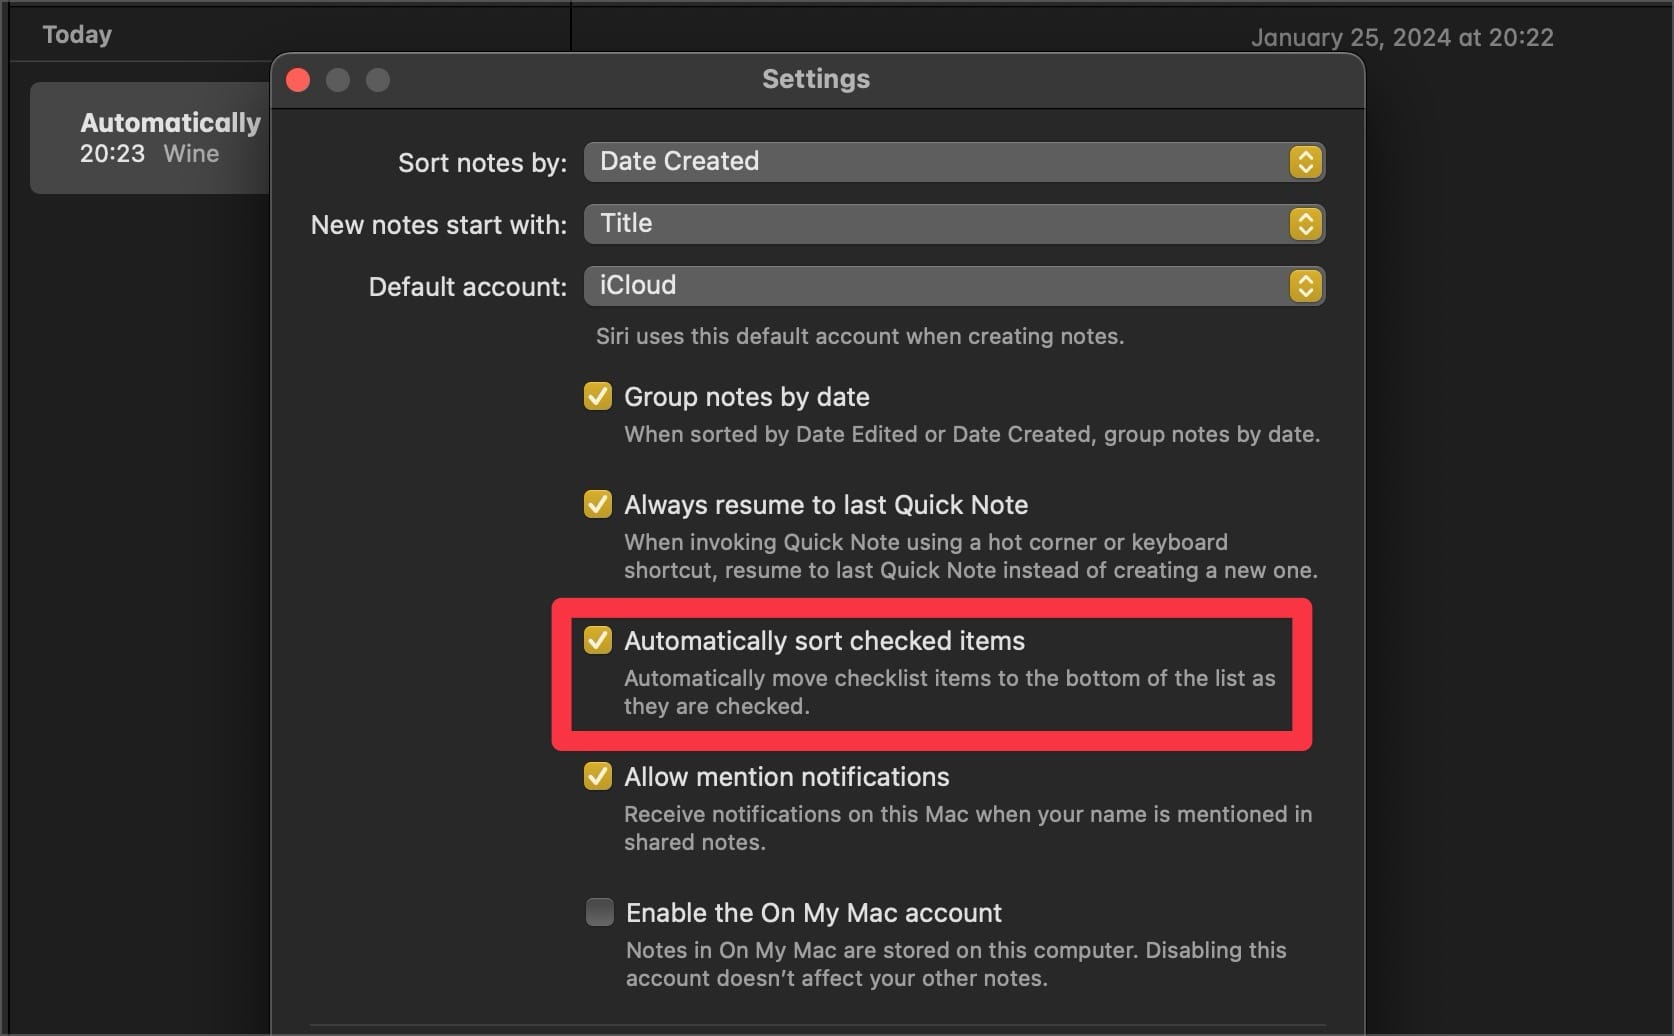
2. Enable the checkbox next to Automatically sort checked items.
Create a packing and shopping list in Apple Notes
While Reminders has released a new Grocery List feature that automatically sorts your shopping items into different sections, I still prefer to use Apple Notes to create my packing and shopping lists.
The Notes app has received much love with the latest iOS 17 updates and received several new features, including note-linking, PDF support, and more. You can click the link to read the guide or click on the video to watch it.


Comments ()