How to Convert HEIC to JPG on Mac

By default, your iPhone captures photos in HEIC format. HEIC stands for High-Efficiency Image Container and is the file format that Apple adopted with iOS 9. The benefit of using HEIC format is that it delivers better images with smaller file sizes.
That said, HEIC is still not as universally adopted as PNG or JPEG formats. So many services, including most government websites and universities, don’t accept this format. Thankfully, there are two methods you can use on your Mac to convert HEIC to JPG format for free.
Covert HEIC images to JPG format on Mac
As we mentioned in the introduction, there are two methods you can use to convert HEIC to JPG on Mac. The first method involves the Preview app, while the second uses the Quick Action shortcut in the right-click menu.
Convert HEIC file to JPG using Preview on Mac
1. Double-click on the HEIC image to open it in the Preview app.
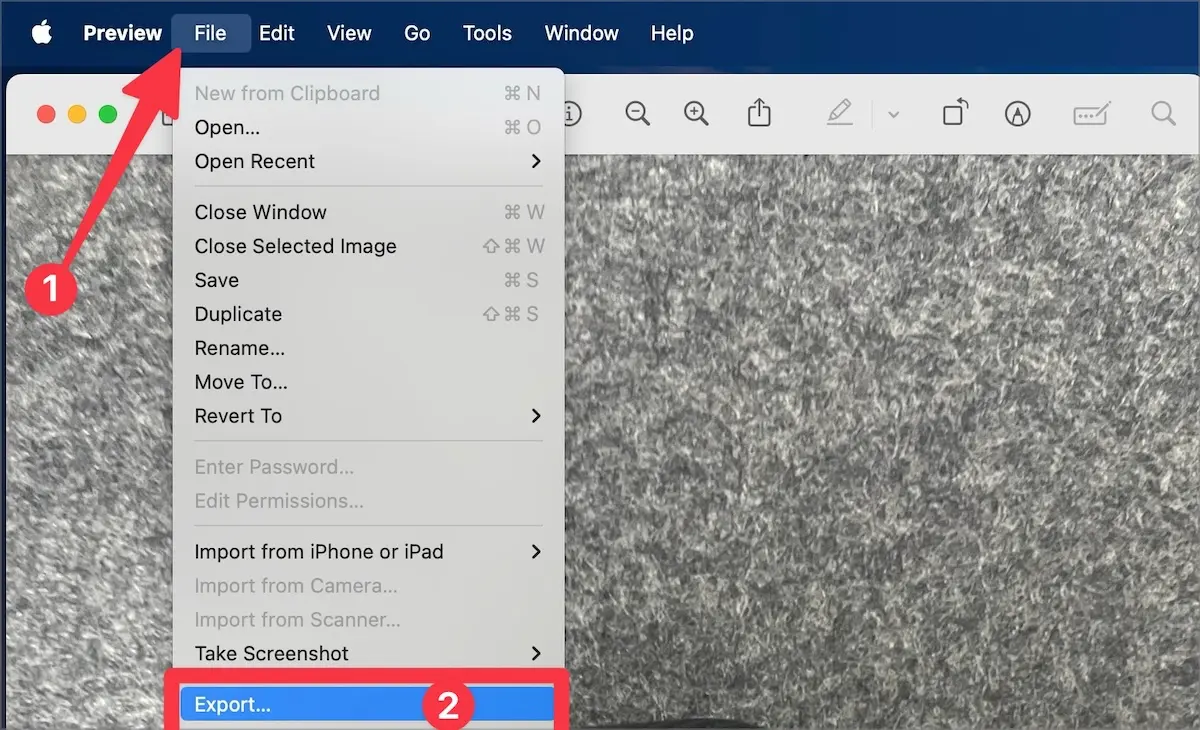
2. Now go to the File menu and click the Export… option.
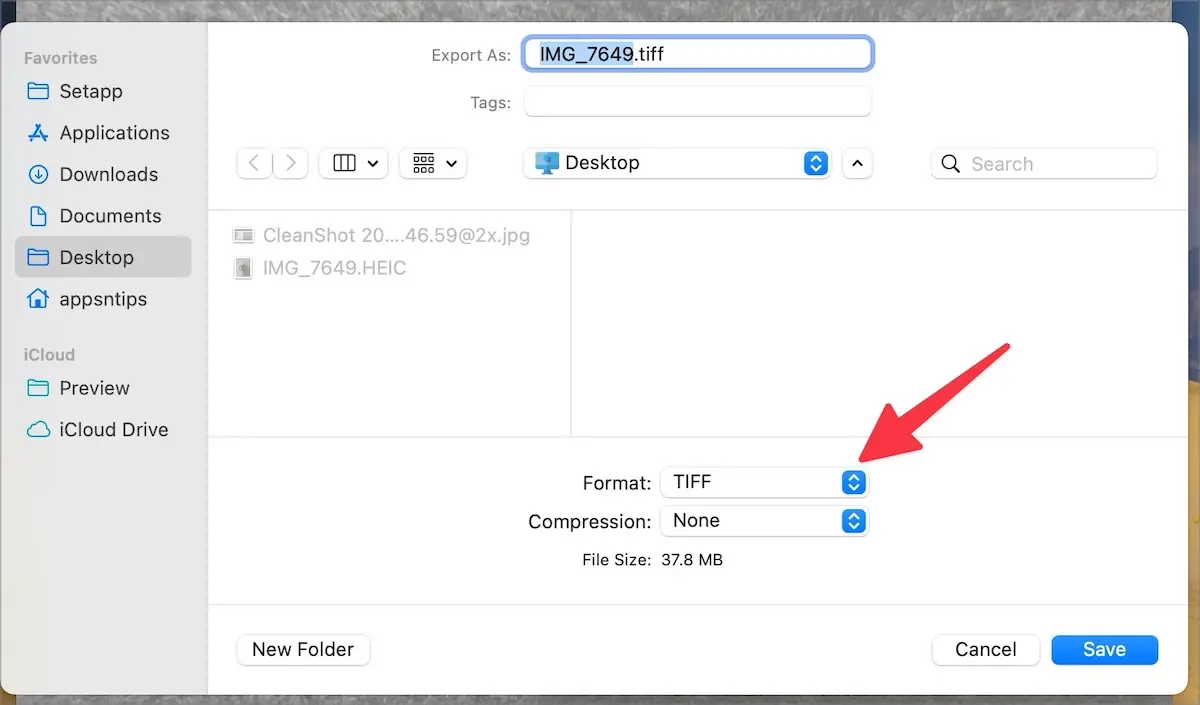
3. Click on the dropdown menu next to the Format option.
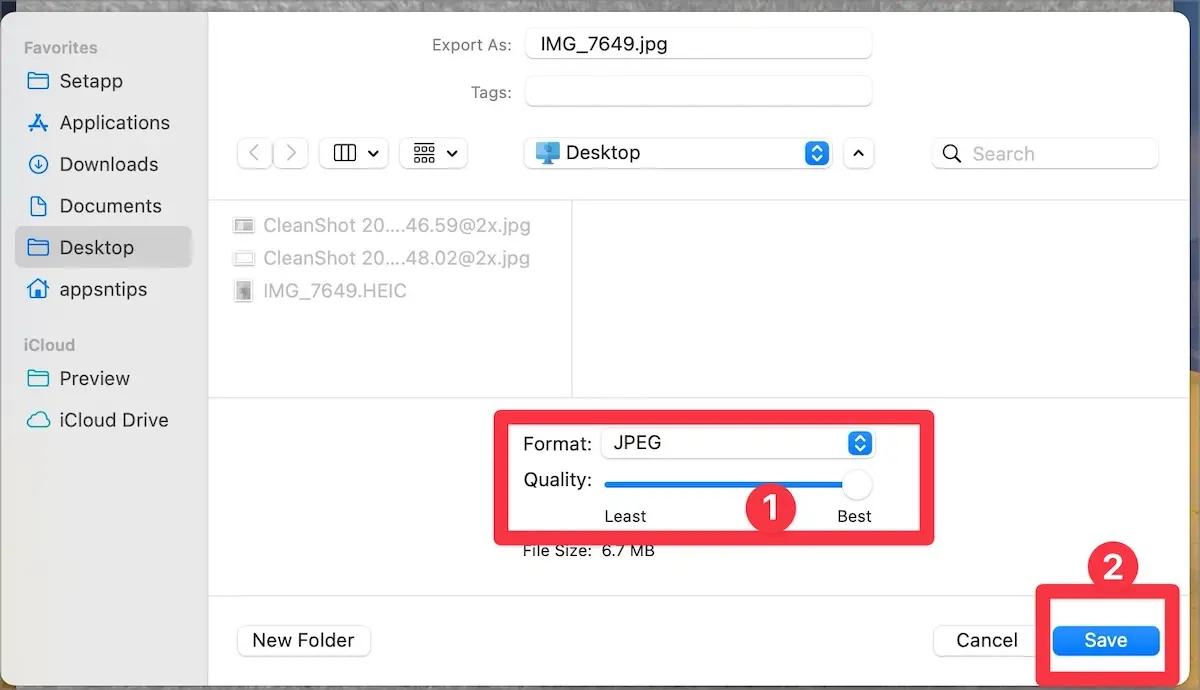
4. Select the JPG option and use the slider to adjust the quality of the image. Finally, click the Save button to save changes.
Convert HEIC to JPG on Mac with Quick Actions Menu
While the Preview app works great, the Quick Actions menu gives you an even quicker way to convert images from HEIC to JPG format on Mac.
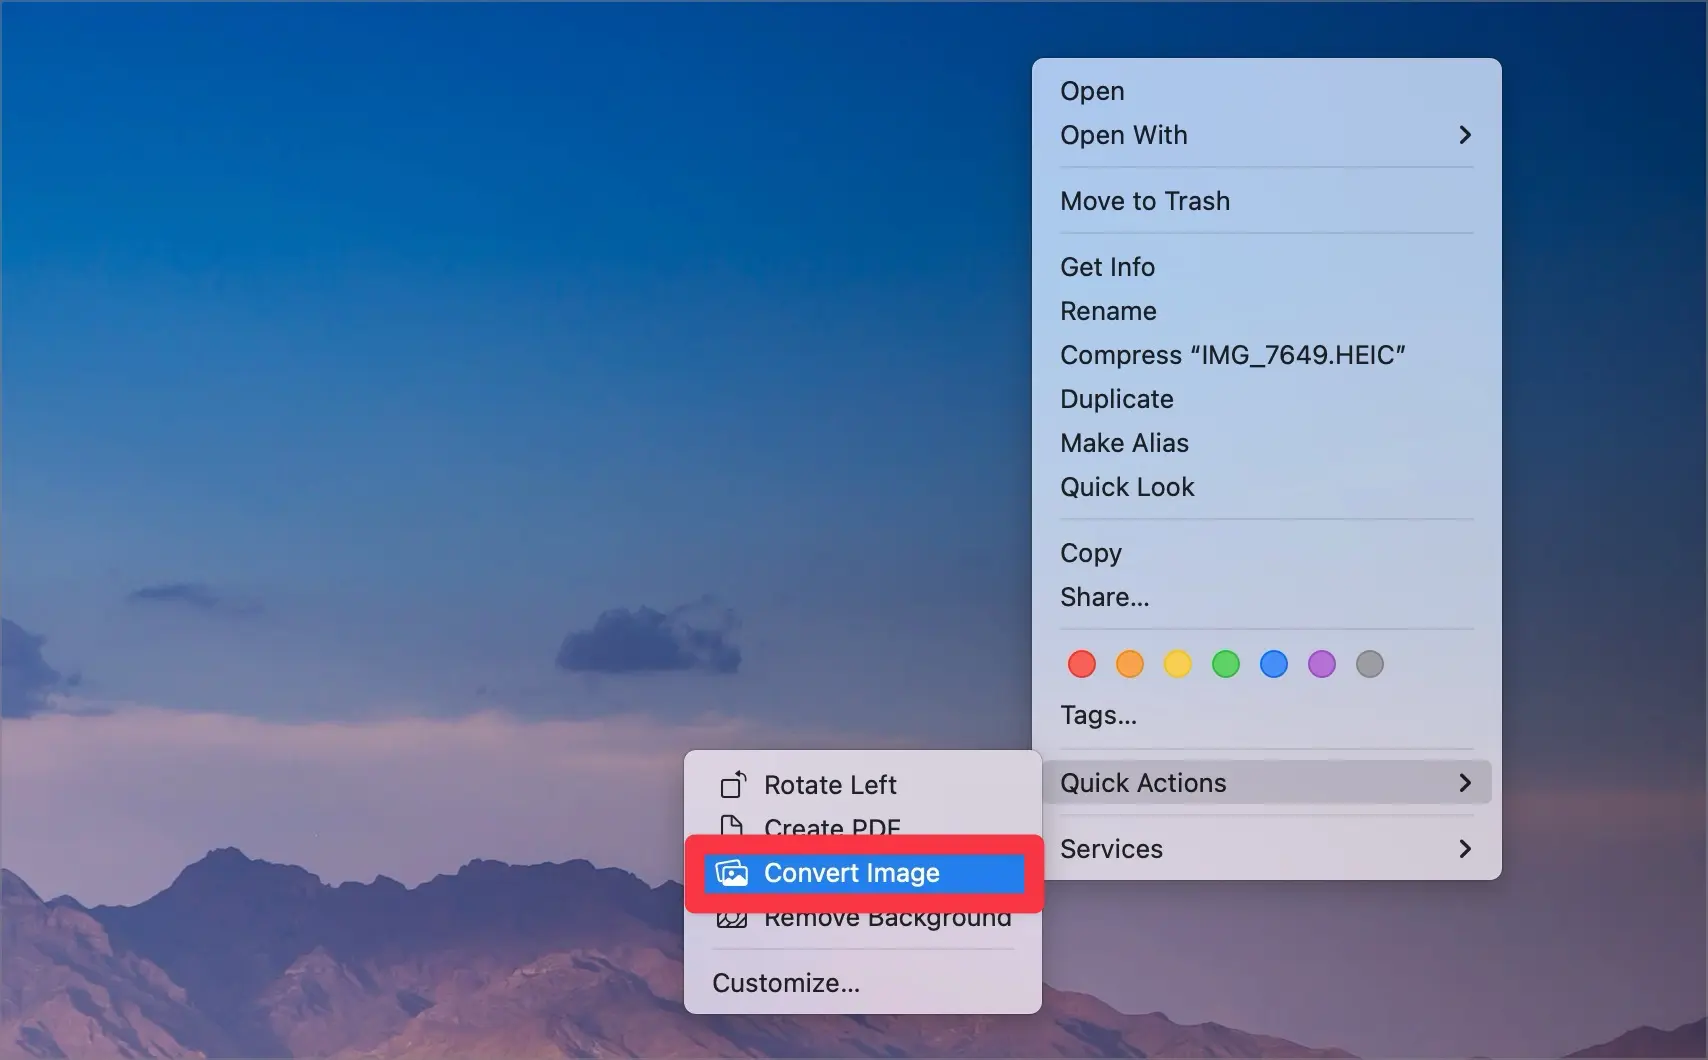
1. Right-click or Control+click (⌃click) on the image and hover your mouse cursor over the Quick Actions menu.
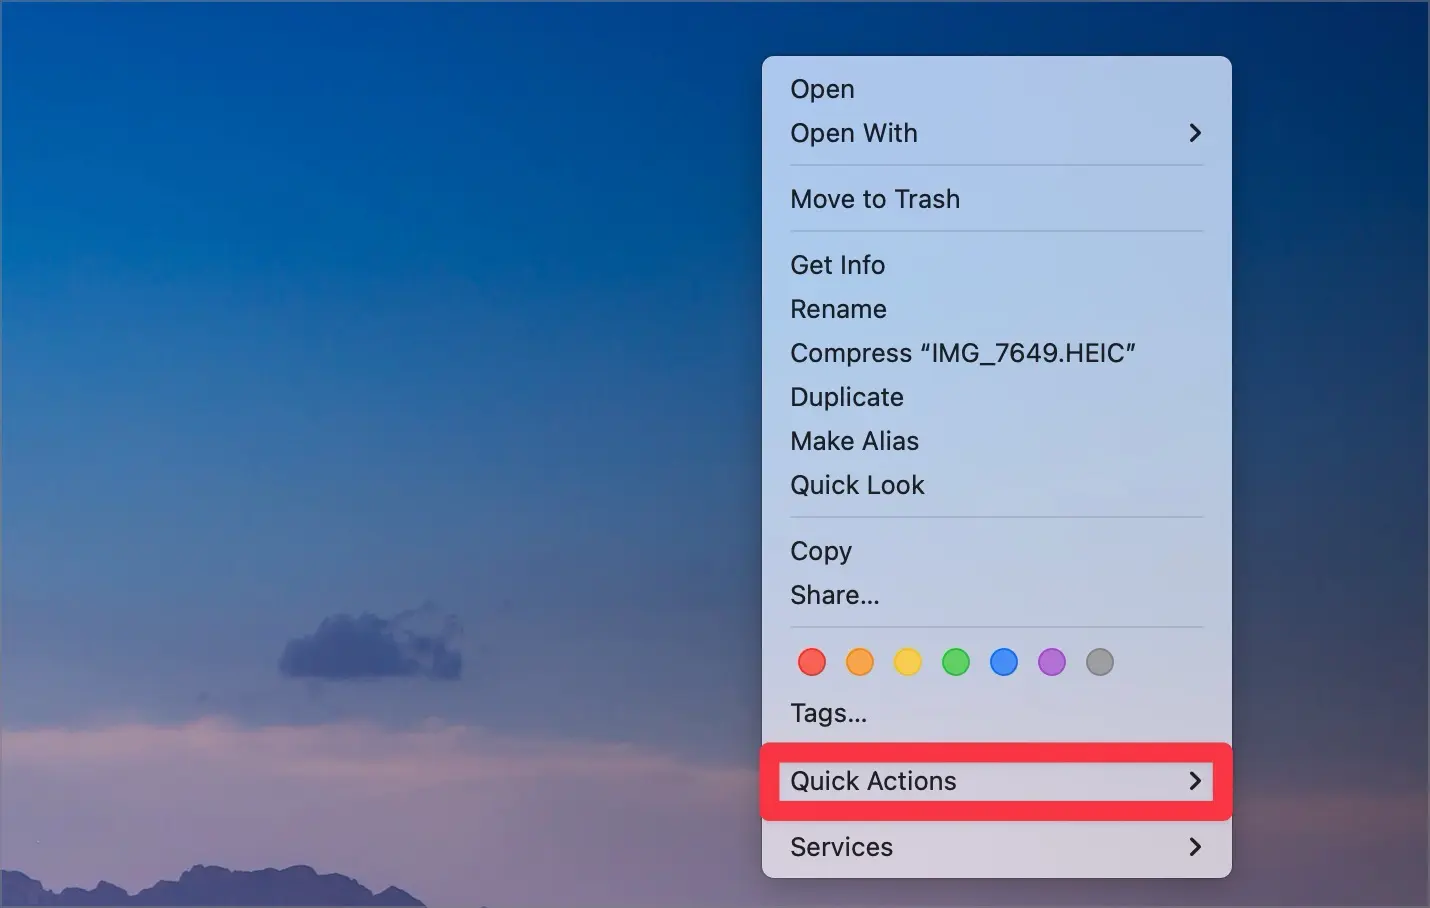
2. Now click on the Convert Image option.
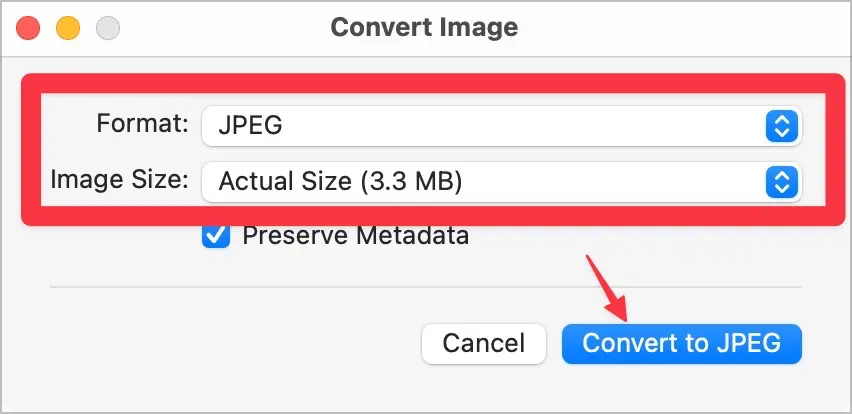
3. Finally, use the Format and Image Size options to your requirements and click the Convert to JPG button to convert the file.
Do you capture a lot of photos on your iPhone? Check out our favorite MagSafe iPhone battery packs so you will never run out of battery on the next shooting session.
Don’t want to deal with the HEIC format?
If you don’t want to deal with the HEIC format, disable it by going to Settings → Camera → Formats and choosing the Most Compatible option. Doing this will ensure that your iPhone will capture images in JPG format.


Comments ()