How to Change Console Skins in Delta Emulator
Here's how to change the console skins in Delta emulator to give them a unique look. Change skins for NES, Game Boy Advance, Nintendo DS, and more.
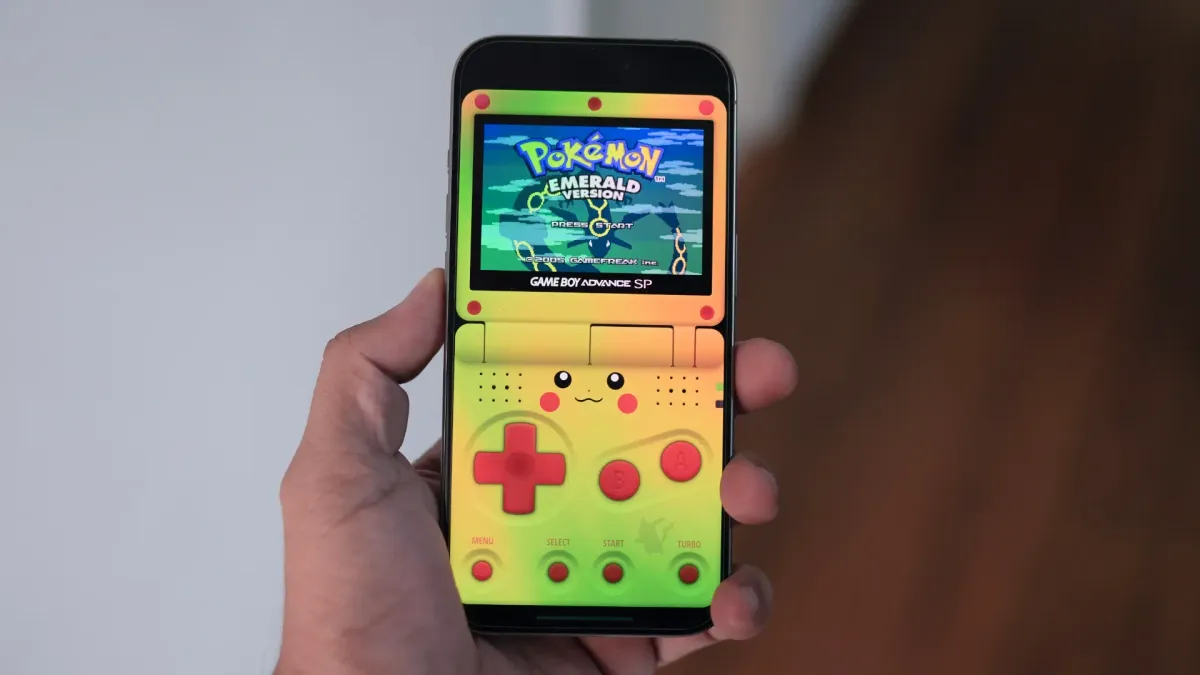
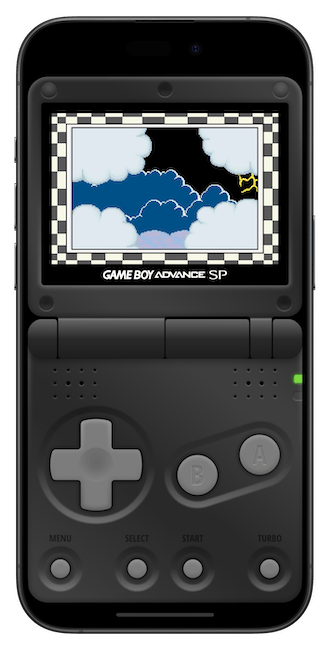
If you look at the featured image of this article, you will notice that the Game Boy Advance emulation on my iPhone looks different than the default looks of the Delta emulator. It’s because the Delta emulator allows users to customize the console skins. Here’s how you can change skins in the Delta emulator.
Change skins in the Delta emulator
Delta emulator supports several consoles, including NES, SNES, Game Boy Color, Game Advance, Nintendo DS, and more. You can change the default skin of any of these consoles. We will change the skin of Game Boy Advance for this guide, but the steps will be the same for any console emulation in the Delta app.
1. Launch Safari on your iPhone and visit the Skins4Delta website. Scroll down and tap on the console name for which you want to download the skins.
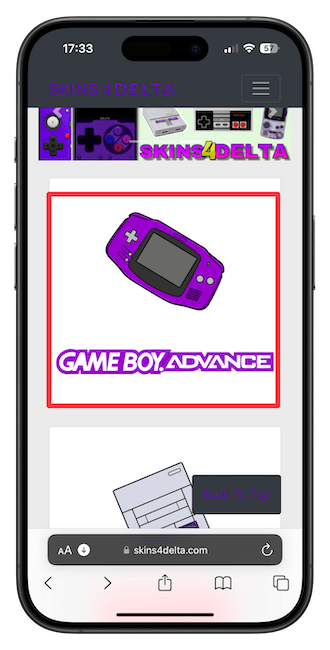
2. You will find that two types of skins available for all consoles: Vertical and Horizontal. Since I mostly play games in portrait mode, I will choose one of the vertical skins.
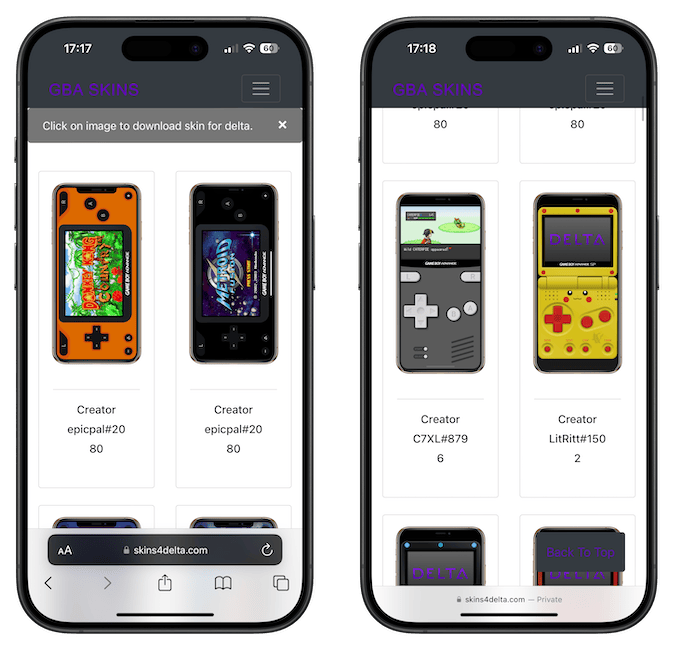
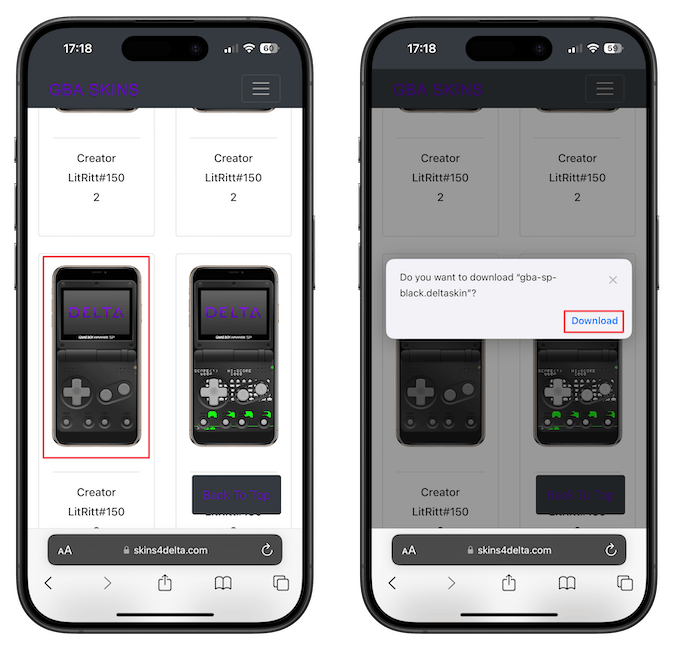
3. Tap the skin you want to download and confirm using the Download button.
4. Now, launch the Delta app and tap the Settings icon in the top-left corner. Tap the name of the controller for which you want to customize the skin.
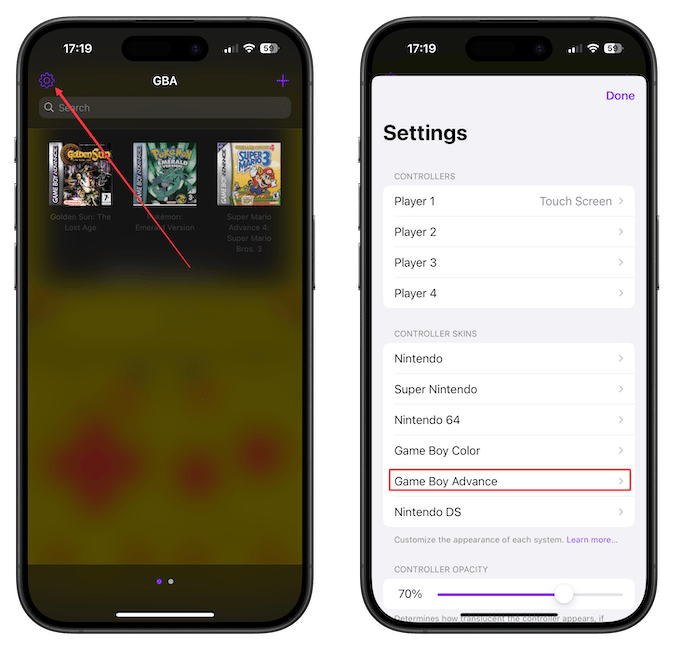
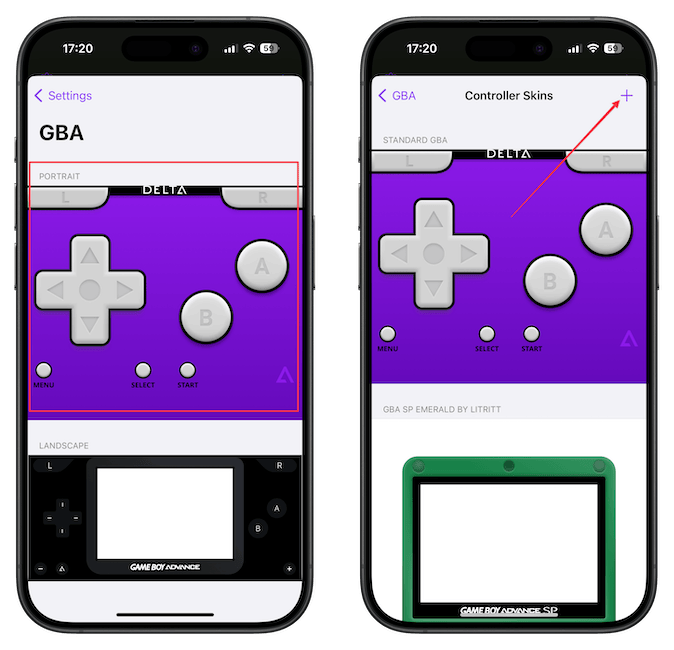
5. Tap the skin you want to change (vertical or horizontal) and use the plus (+) button in the top-right corner.
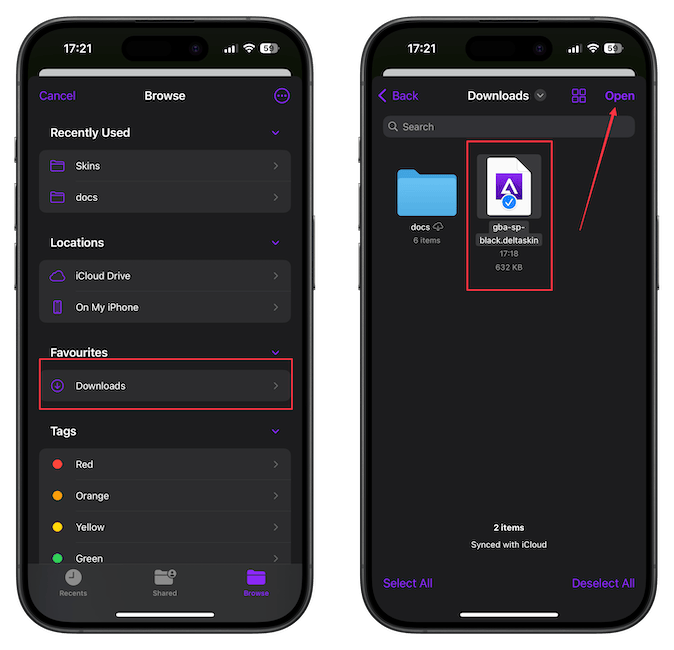
6. Navigate to the Downloads folder, tap to select the skin, and use the Done button to add the skin.
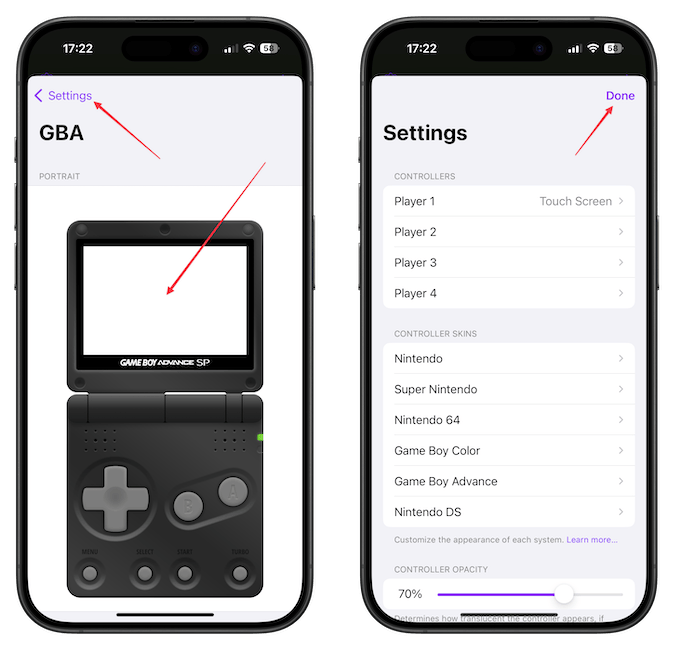
7. Tap the newly uploaded skin to apply it as the default skin. You can get out of the Settings page now.
That’s it. When you launch a game you will see the new skin, as shown in the screenshot below.
We hope you found this guide useful. If you plan on playing Nintendo DS games on your iPhone, click the link to find out how to solve the missing files error and play all the DS games.
