15 Best Obsidian Plugins Essential for Beginners
Discover the top 15 essential Obsidian plugins for beginners. Learn how to install plugins, customize settings, and supercharge your note-taking experience.

Obsidian is one of the best note-taking apps that's available across platforms. You can use it on your Mac, Windows, Linux, Android, and iOS, making it probably the best cross-platform note-taking app you can use. The best feature of Obsidian is that it saves your notes in plain-text format, so if you decide to jump switch in the future, you can do so easily.
With Obsidian, you also get features like note-linking, backlinks, graph view, canvas view, and more. But that's just the tip of the iceberg. Thanks to its vast plugin ecosystem, you can enable almost any feature you can think of. However, we understand that getting started with the plugin system can be confusing, so we are here to help.
In this guide, we will show you how to install plugins in Obsidian and then list the best Obsidian plugins to install to streamline your notes.
Table of contents
How to install plugins in Obsidian
There are two types of plugins in the Obsidian system: core plugins and community plugins. Core plugins are developed by the Obsidian developers and allow you to enable or disable the core features of Obsidian. For example, say you don't use the Obsidian Canvas feature. You can disable it to declutter your Obsidian toolbar.
Community plugins are developed by the awesome Obsidian community, allowing you to enable new features, like Kanban view, natural language processing, data interpretation, and more. This is where you can have fun exploring powerful and weird plugins that will supercharge your note-taking.
How to enable or disable core plugins in Obsidian
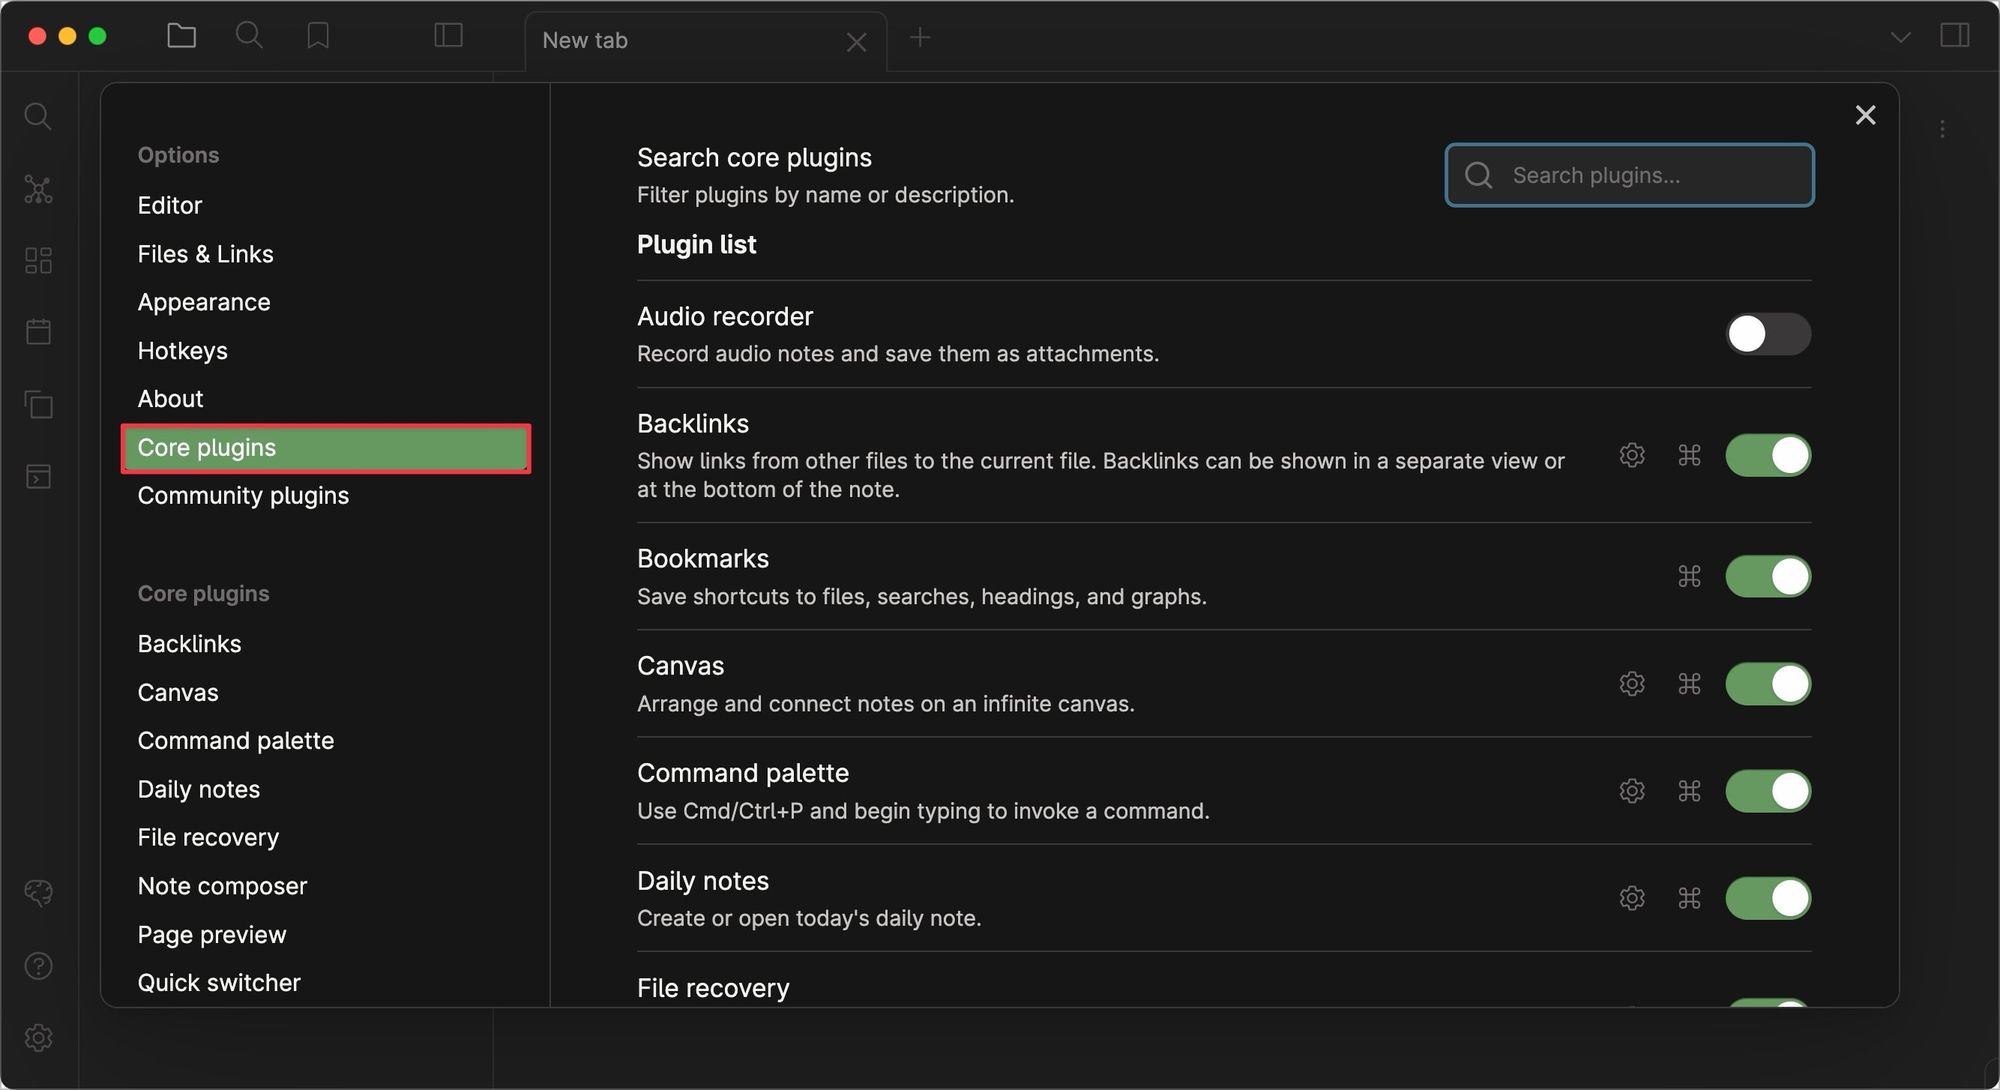
Here are the steps you can follow to enable or disable core plugins in Obsidian.
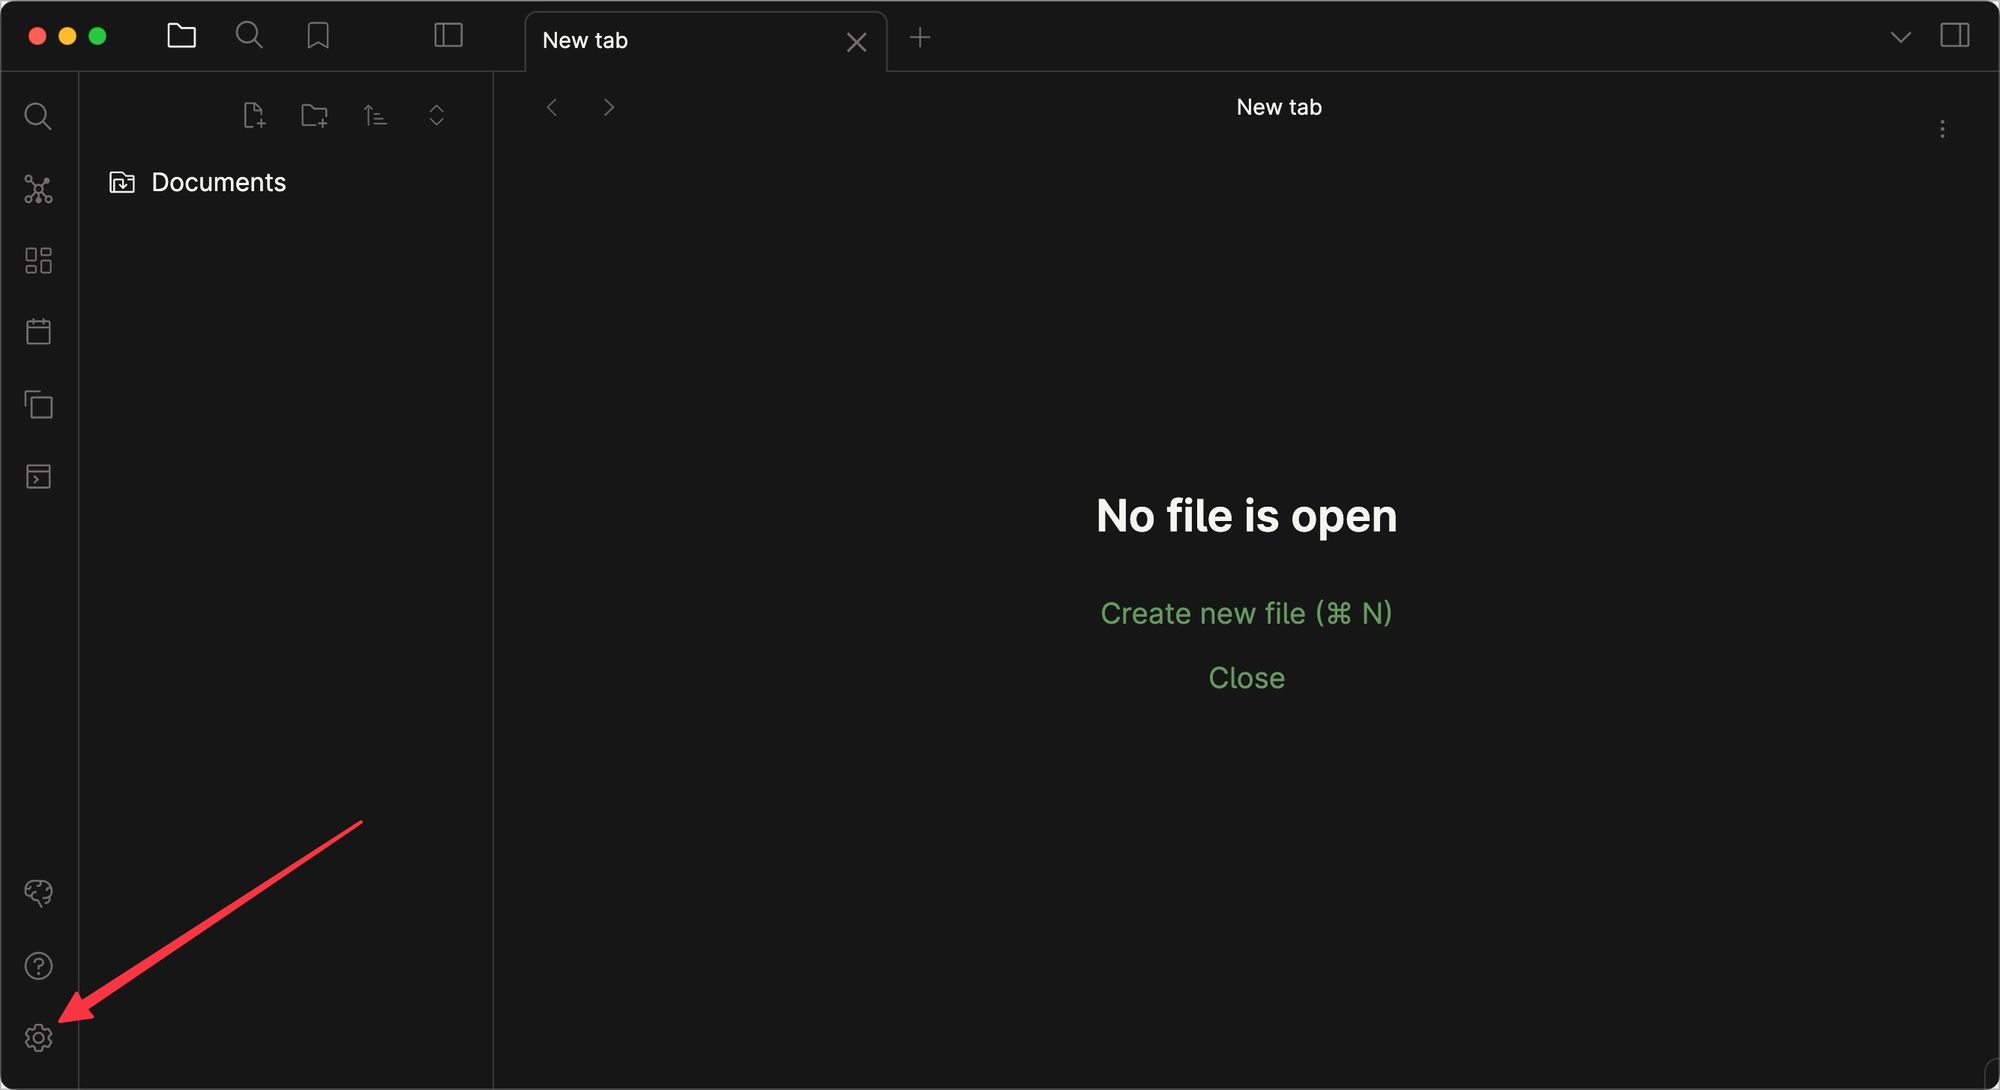
1. Launch the Obsidian app and click on the Settings icon in the bottom-left corner.
2 Click to select the Core plugins option and use the toggles to disable or enable the core plugins.
How to install community plugins in Obsidian
1. Open Obsidian Settings using the cogwheel icon in the bottom-left corner.

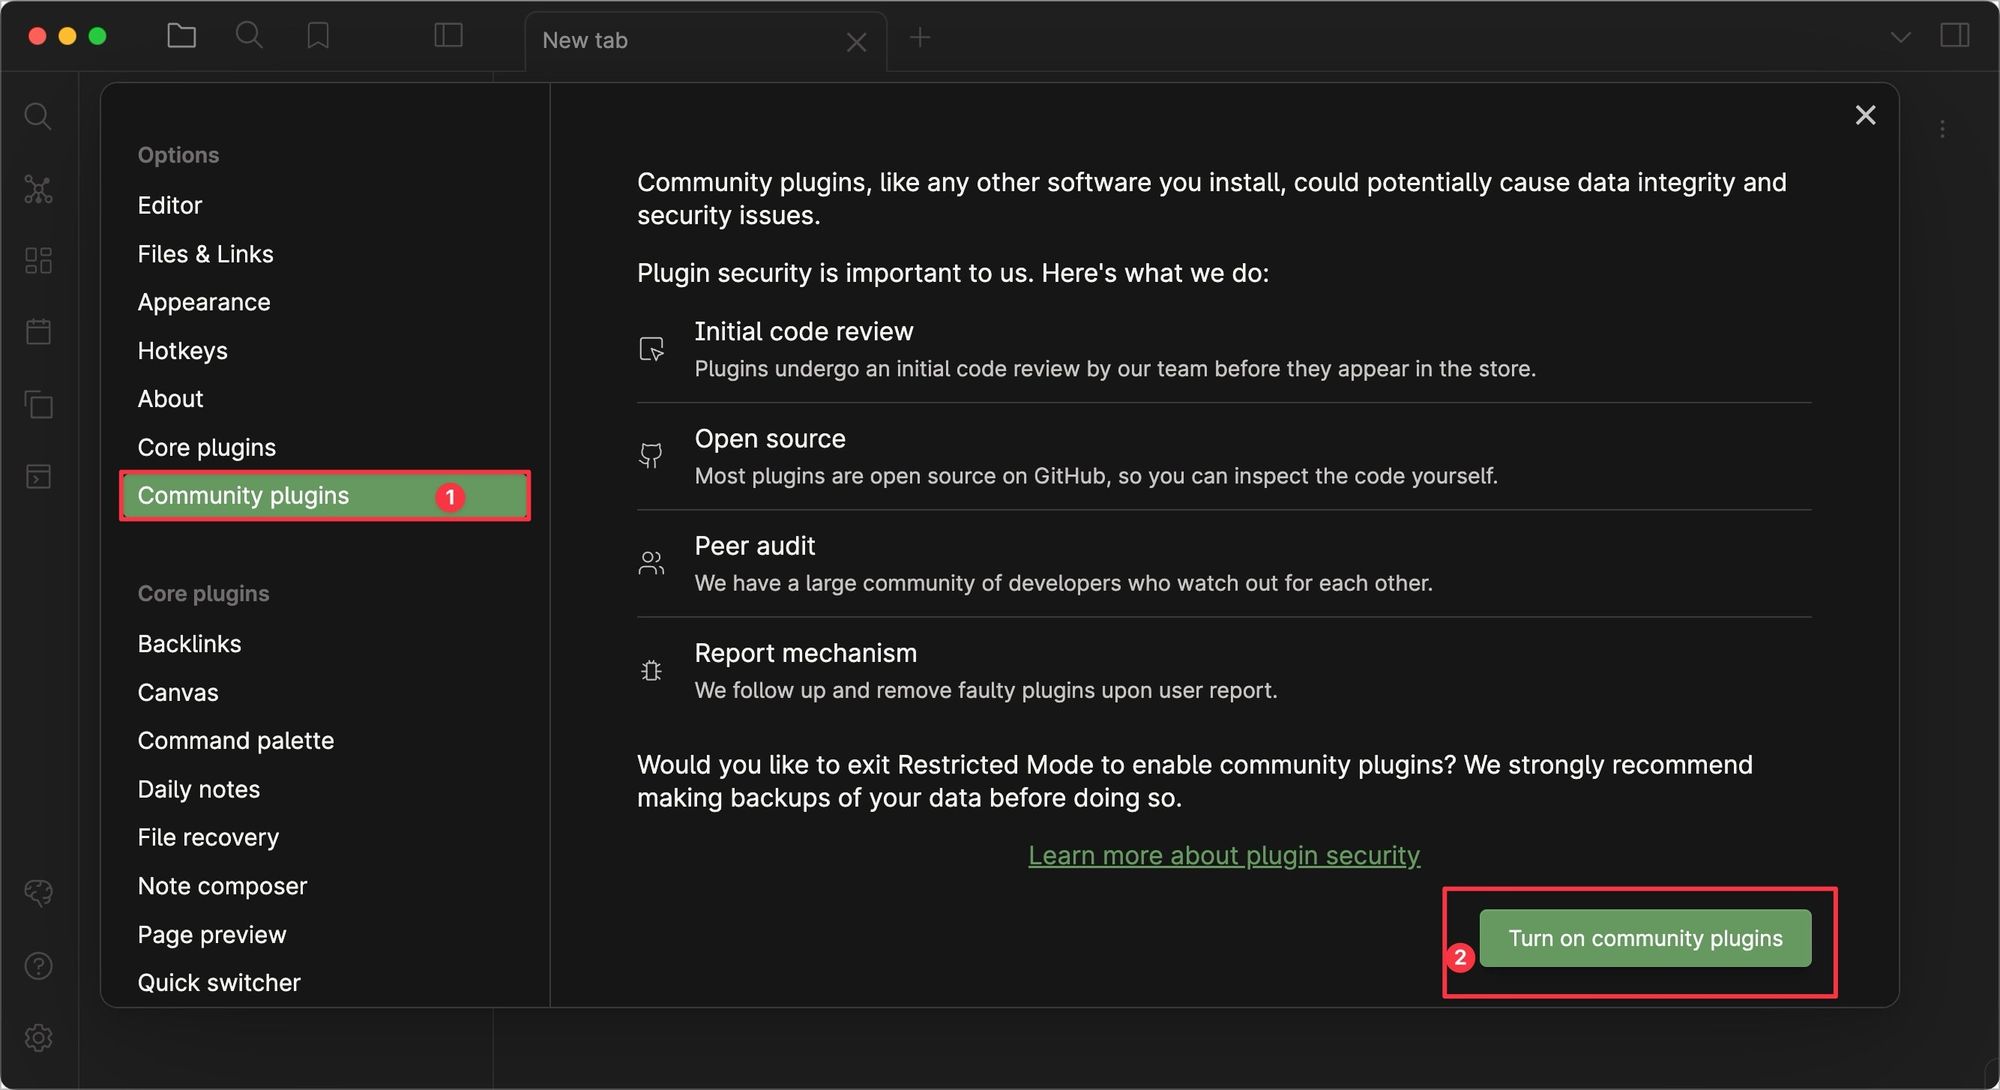
2. Choose the Community plugins option and click the Turn on community Plugins button.
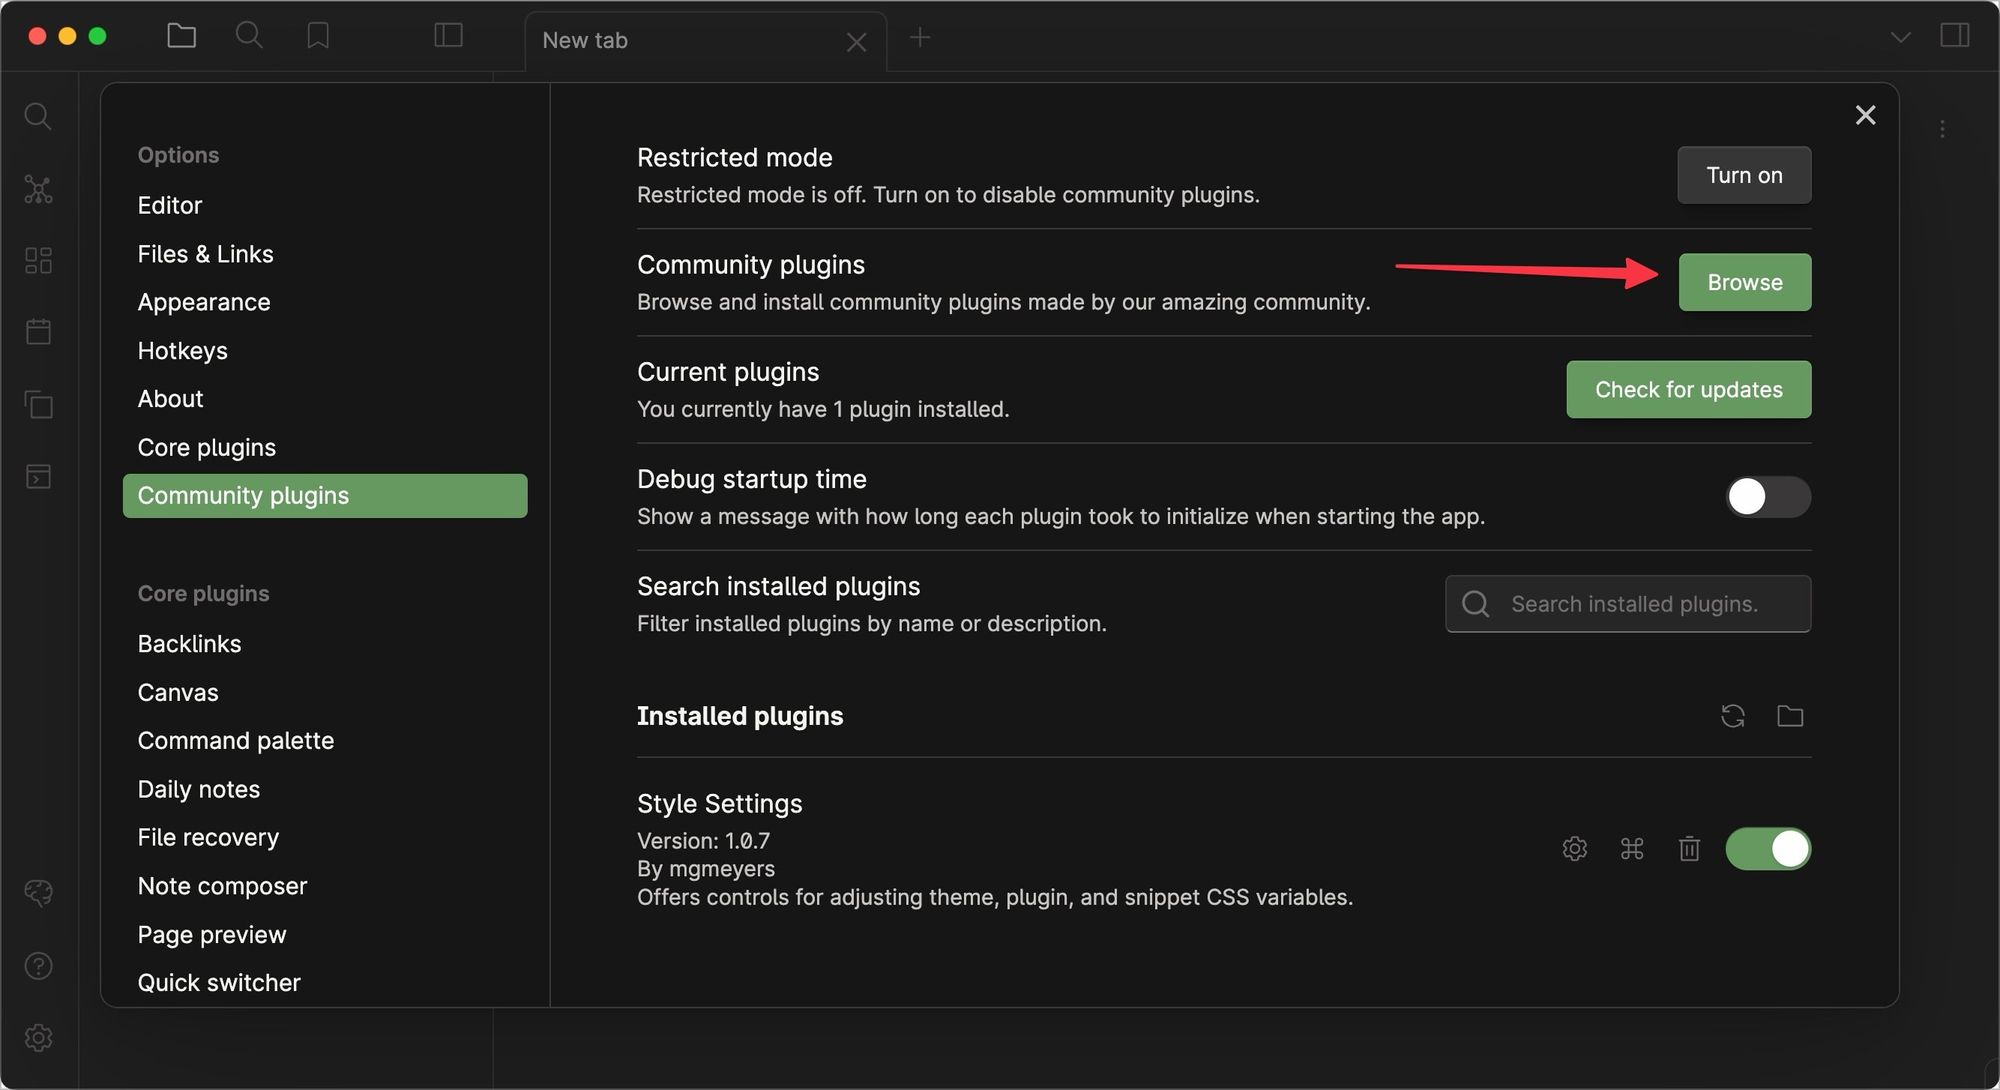
3. Now, click the Browse button next to Community plugins to browse the list of plugins.
4. Use the search bar to search for plugins and click on the plugin you want to install.
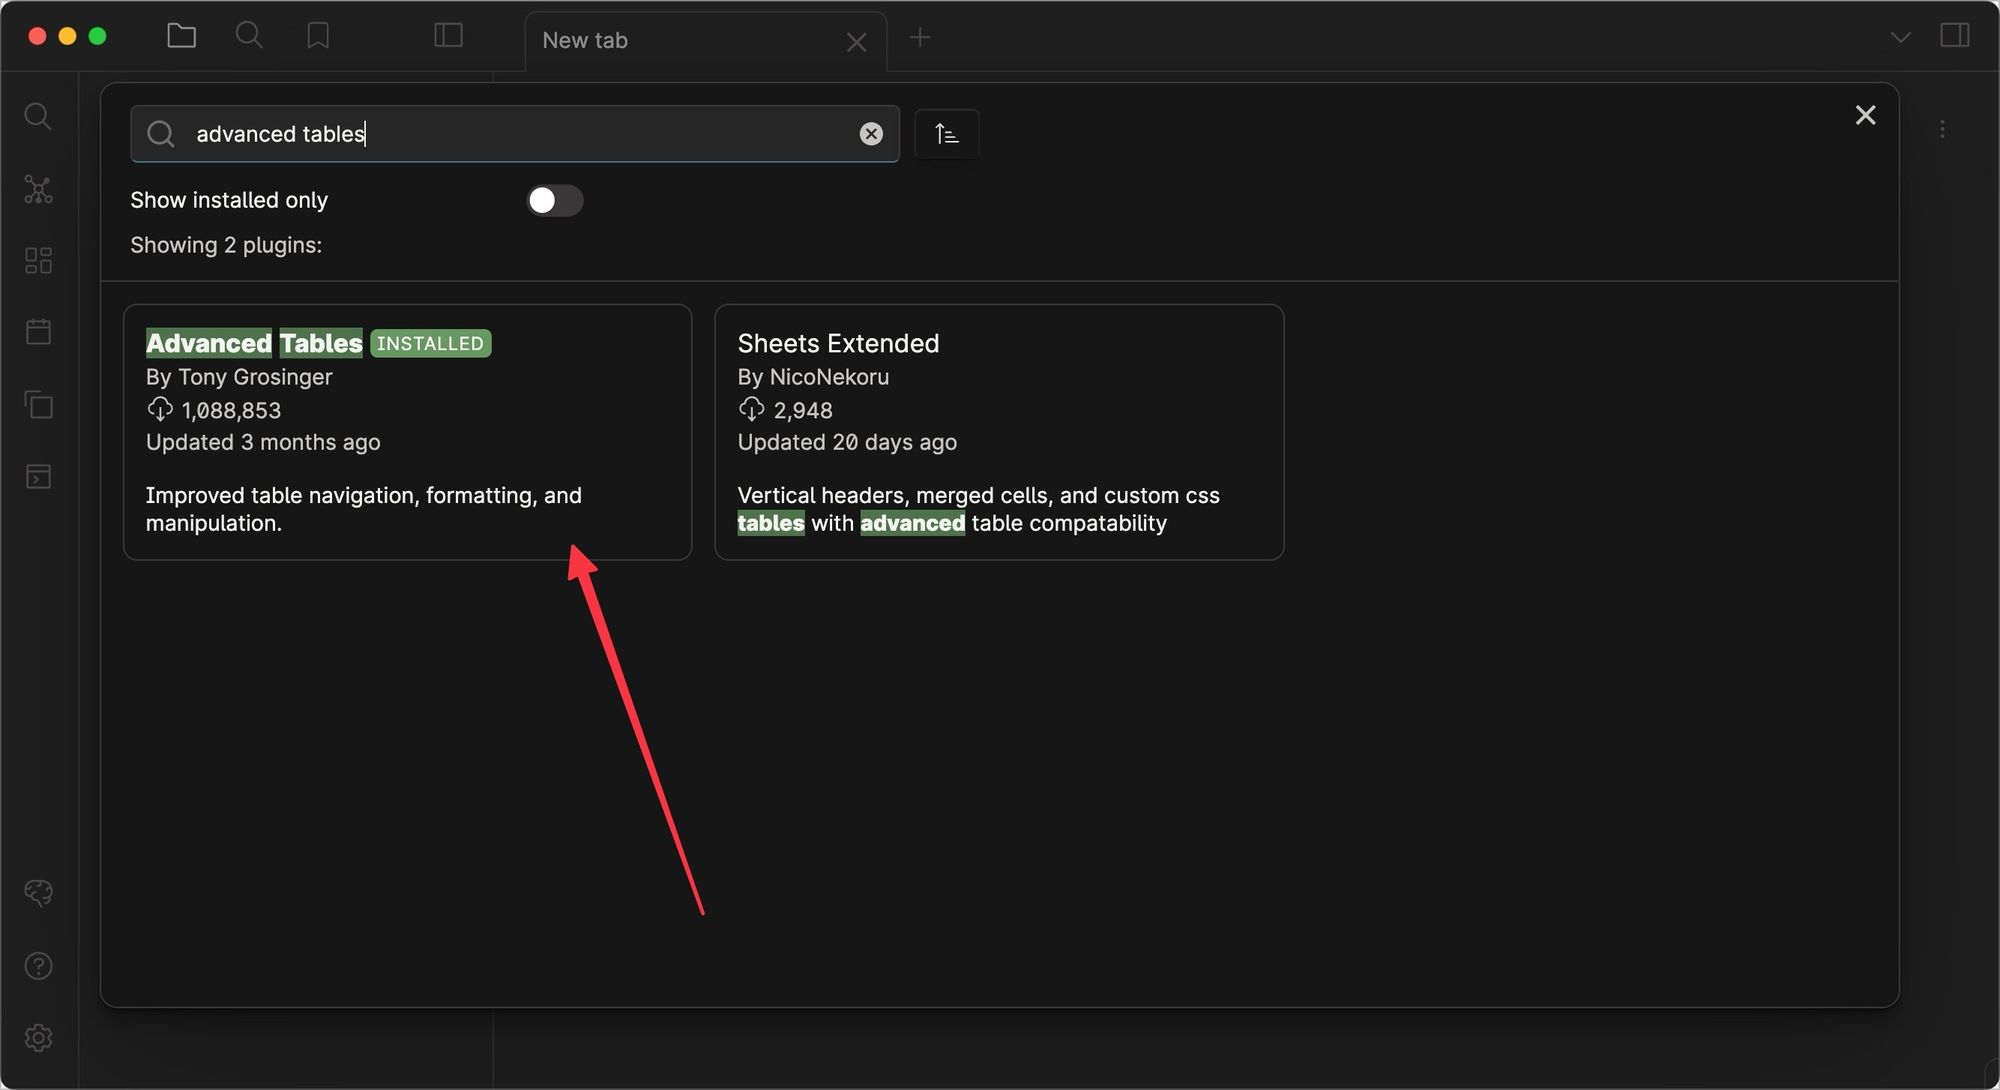
5 Now, click the Install button to install the plugin in your Obsidian vault.
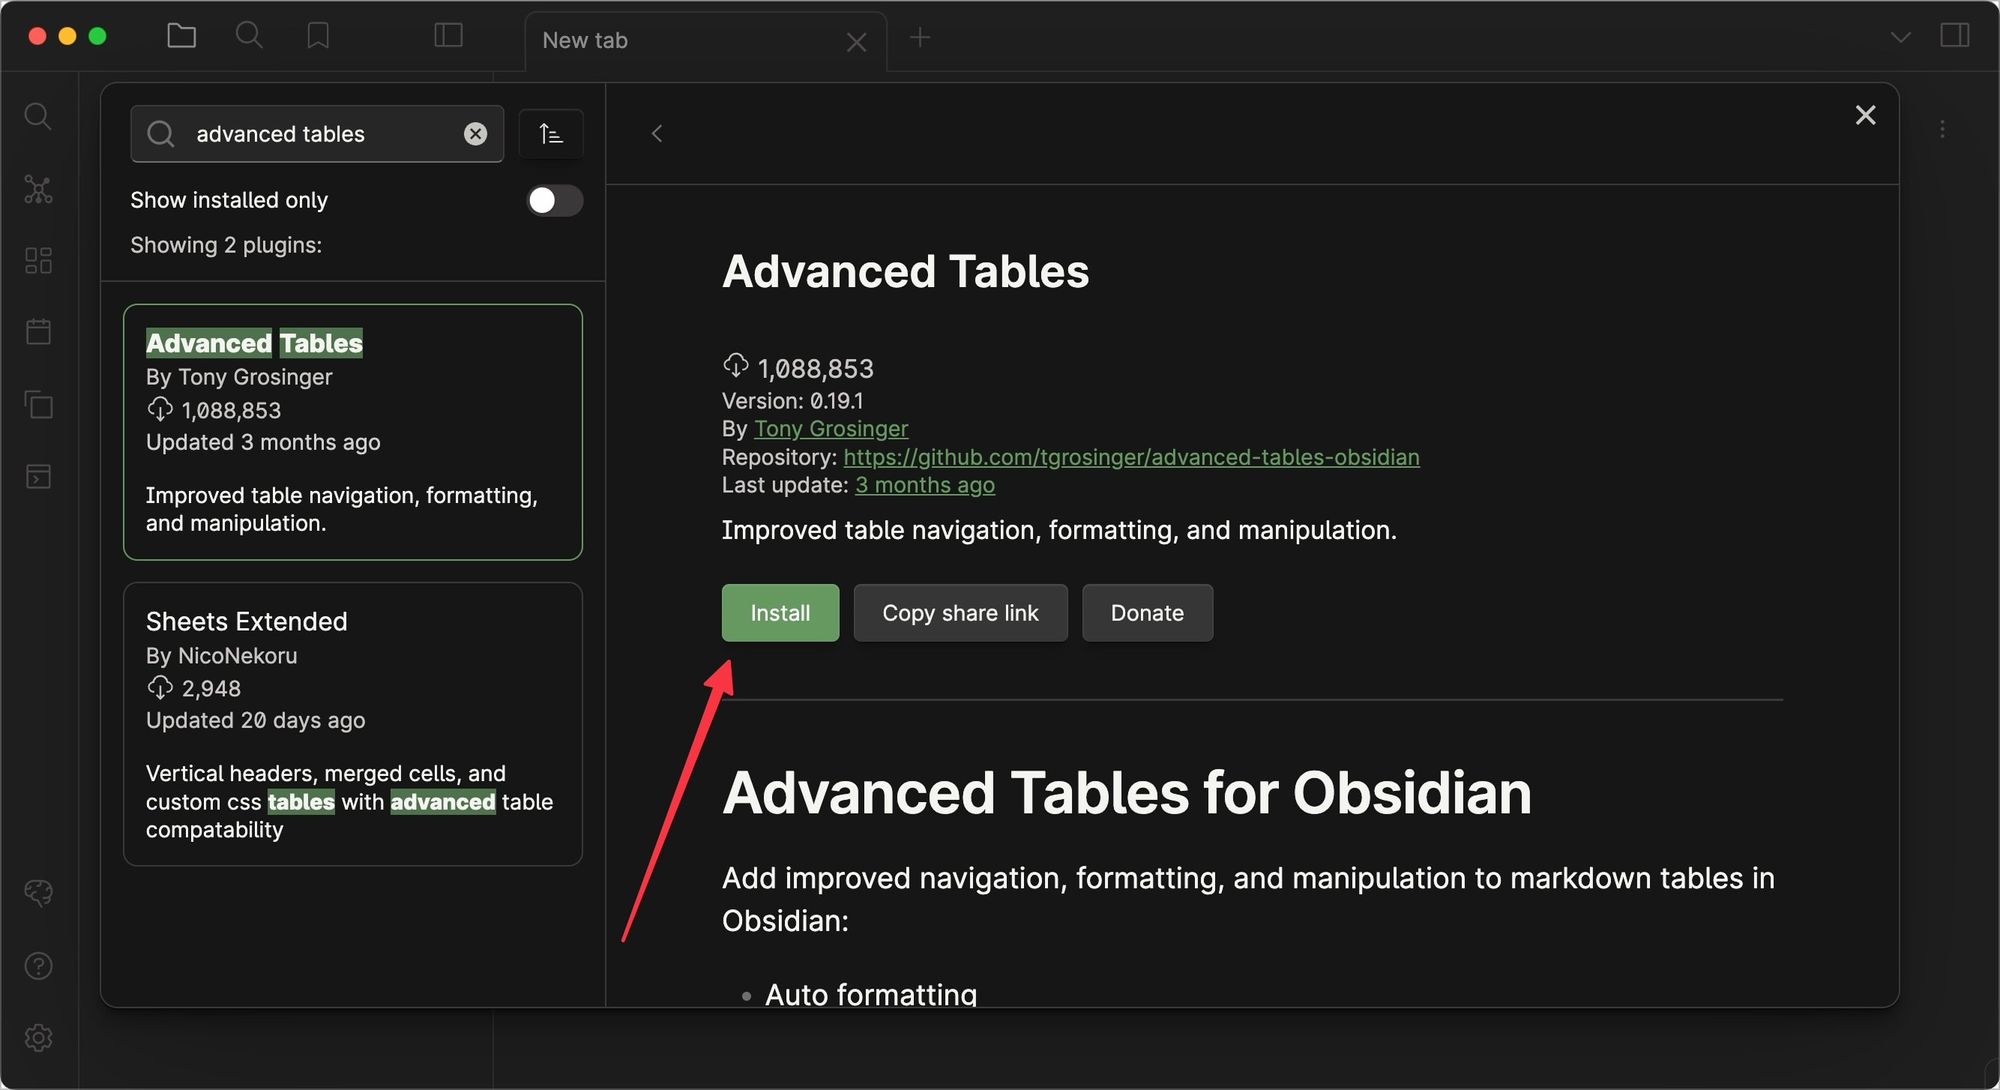
6. Finally, click the Enable button to enable the plugin.
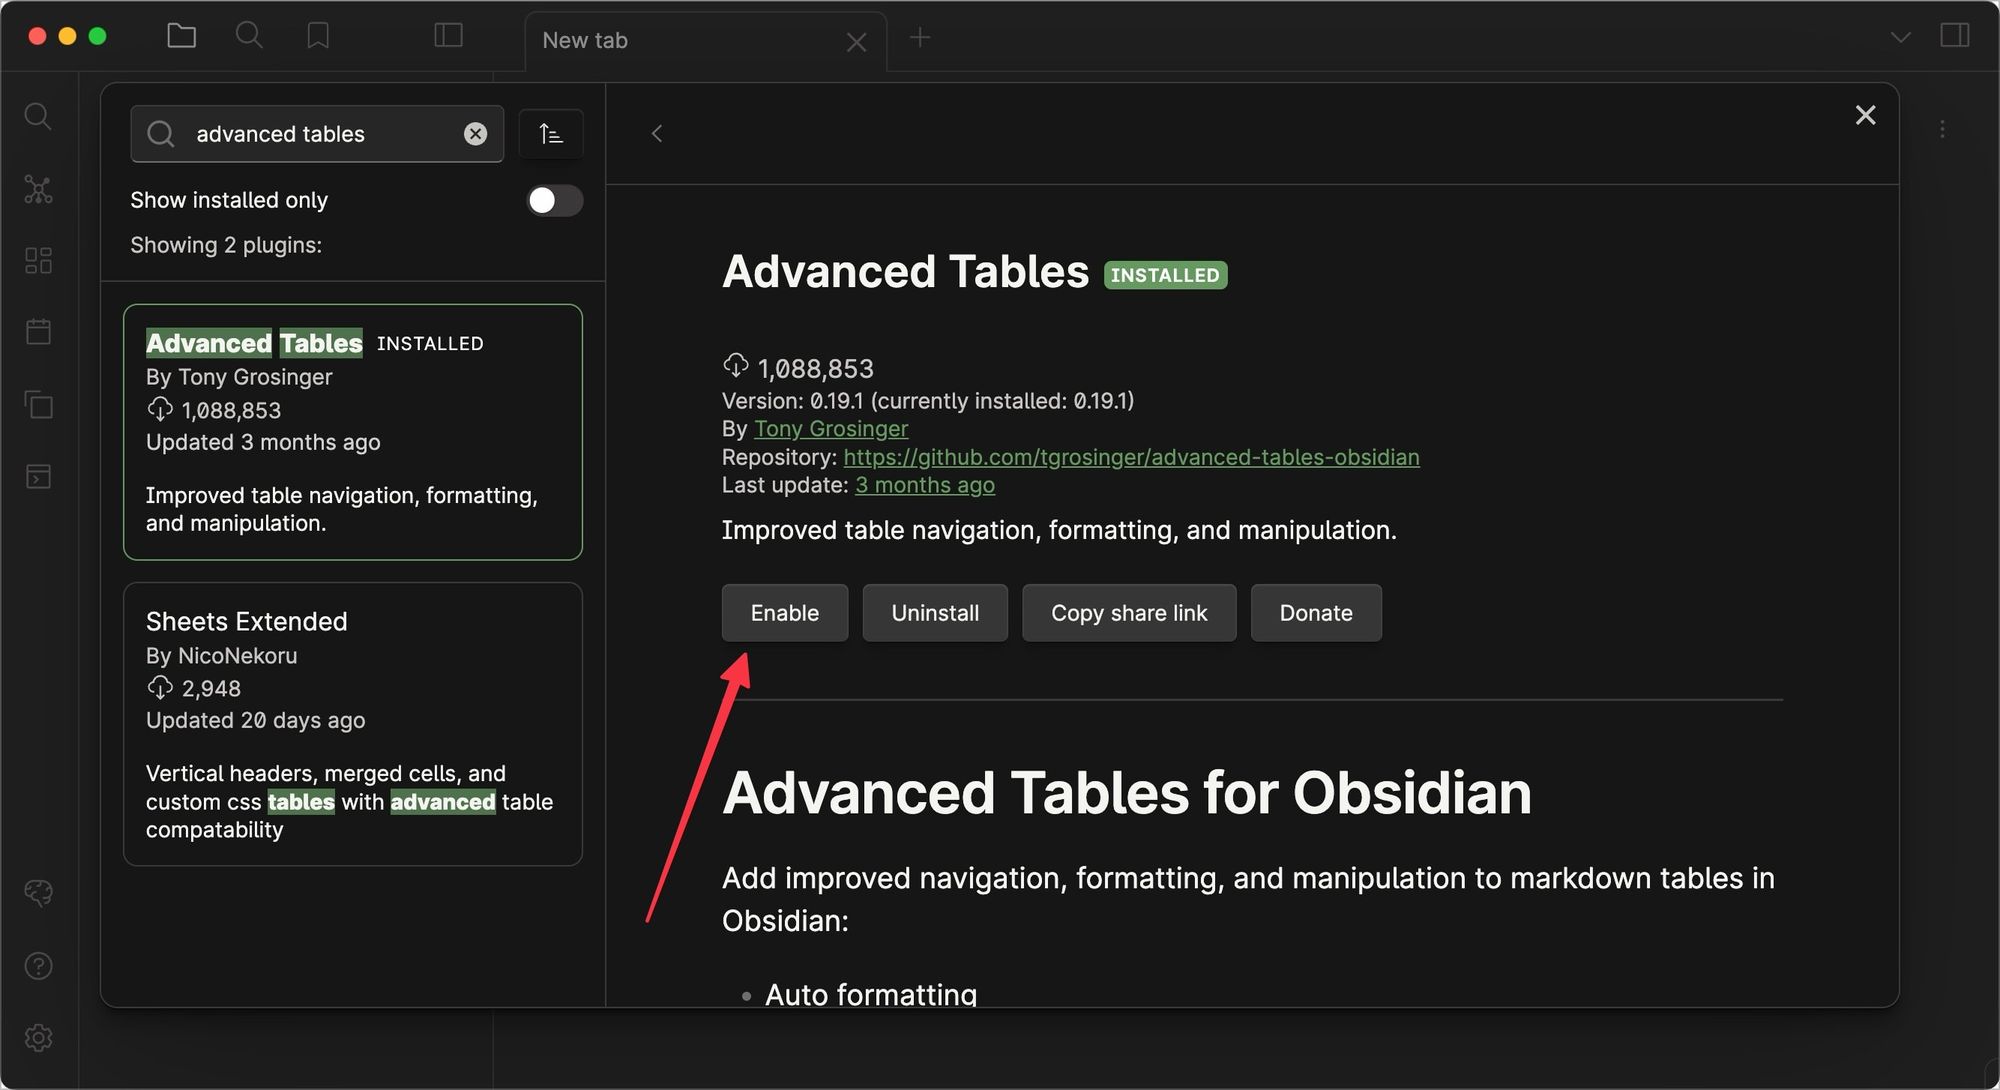
How to customize plugin settings
Most plugins you install will offer you a settings option that you can use to customize plugin settings. You can access these settings by opening the Obsidian settings and scrolling the left-sidebar to the community plugins section.

Here, You will see a list of all community plugins you have installed in your Obsidian vault. To customize a plugin, click on its name, and the settings panel will appear in the right window.
Top Obsidian plugins you should install
Now that you know how to install Obsidian plugins, let us check out the list of the top essential Obsidian plugins you should install to supercharge your notes.
1. Obsidian calendar plugin
Whether you are using Logseq or Obsidian, the first plugin we recommend everyone to install is the calendar plugin. The Obsidian calendar plugin adds a calendar icon to the right-sidebar of your Obsidian window. You can click on the icon to reveal the monthly calendar.
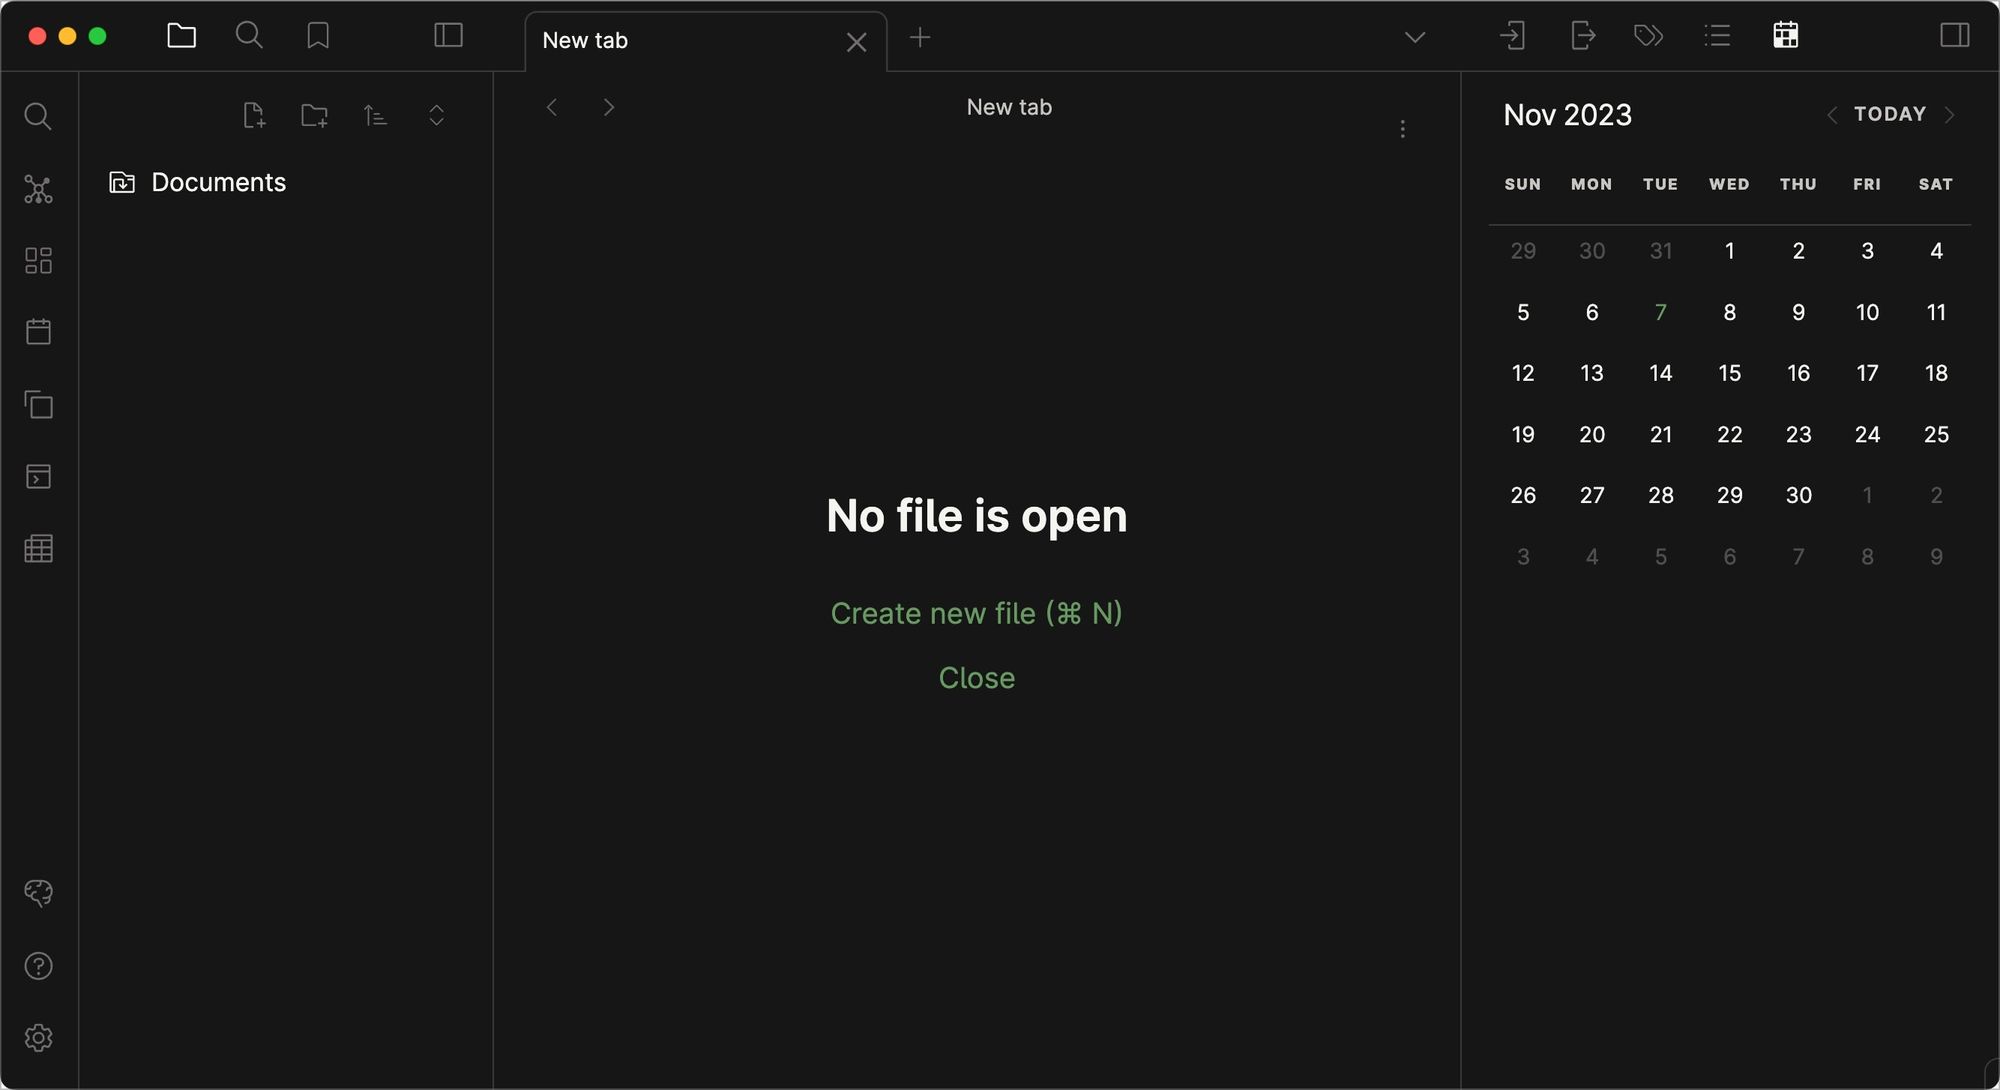
The best use of the calendar plugin is to move between your daily notes. You can click on any date to open the daily note corresponding to that day. If there's no daily note for the day, the plugin will ask you to create one.

You can also use the plugin to create weekly notes, which are perfect for planning your week. To do this, open the calendar plugin settings page and enable the toggle for Show week number.
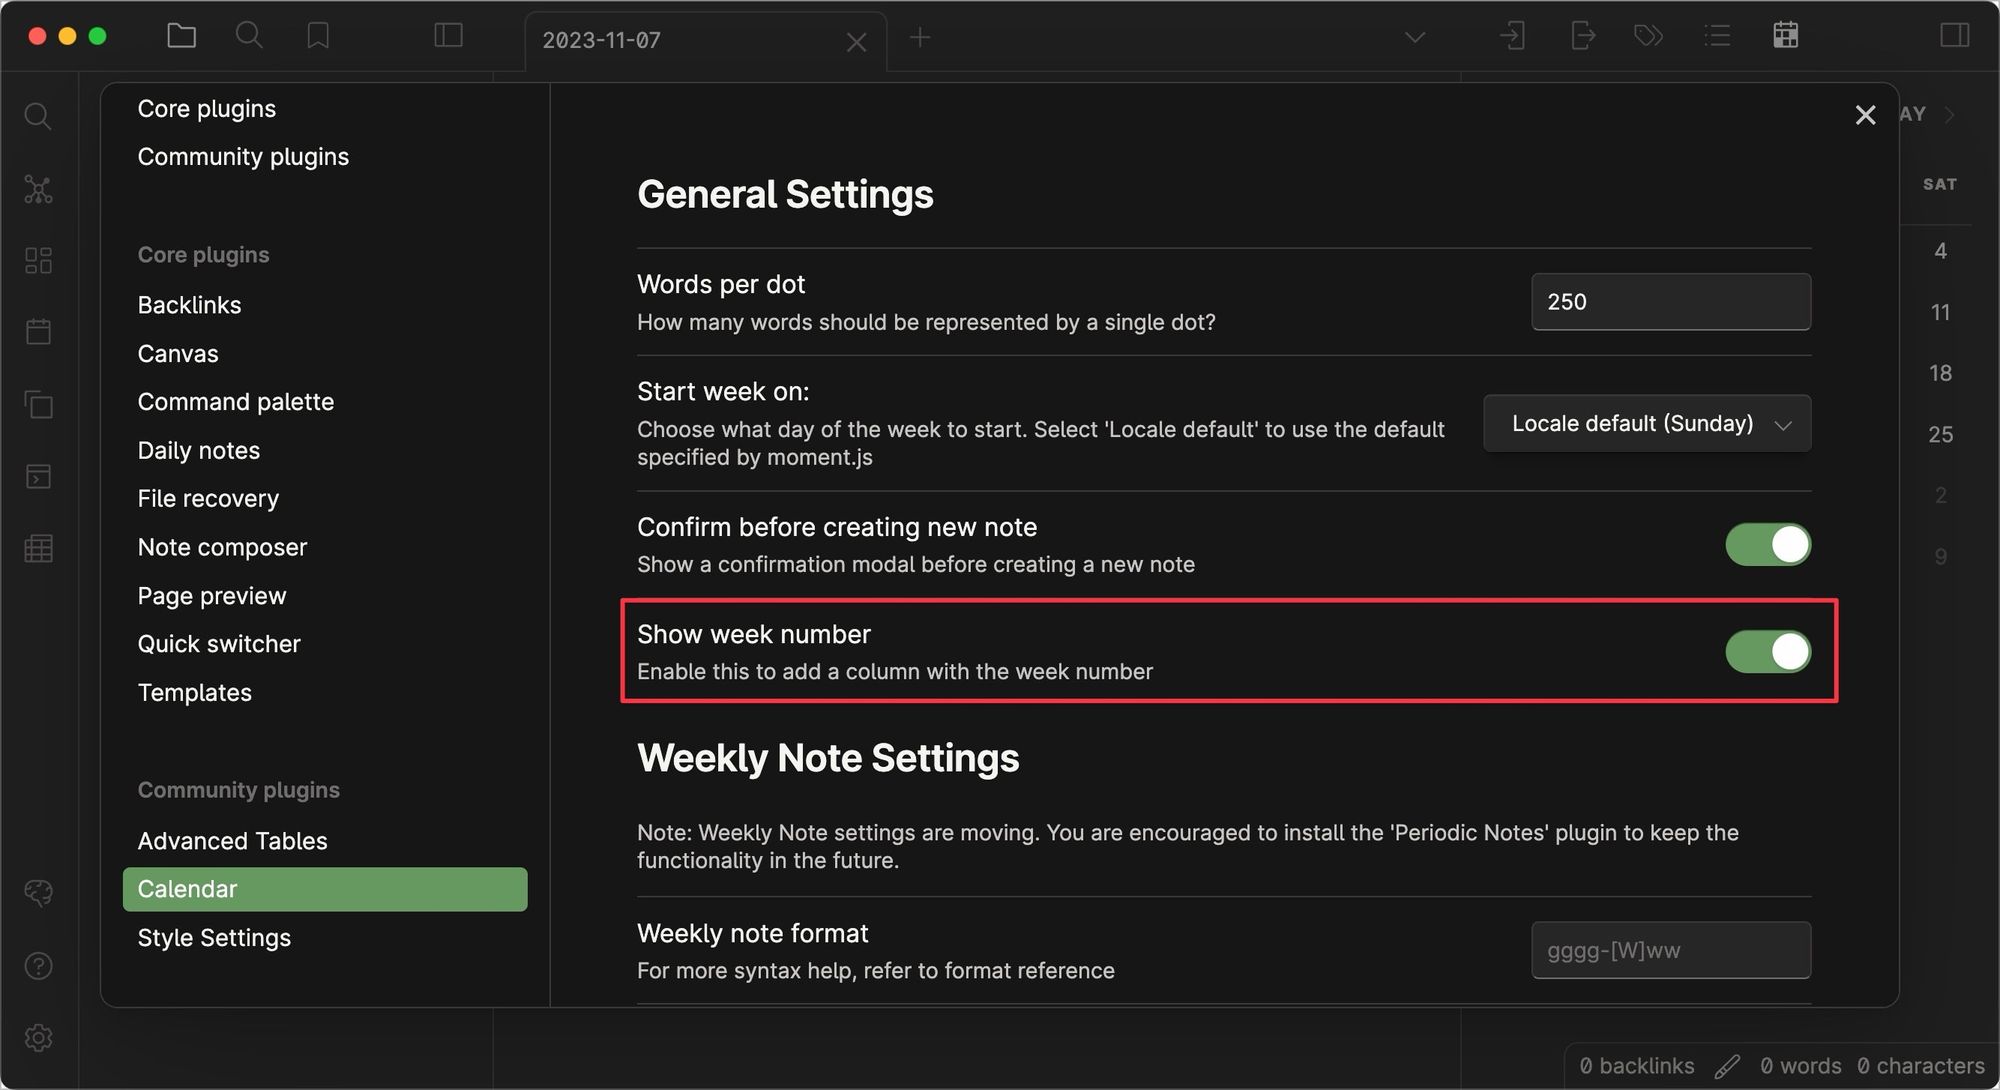
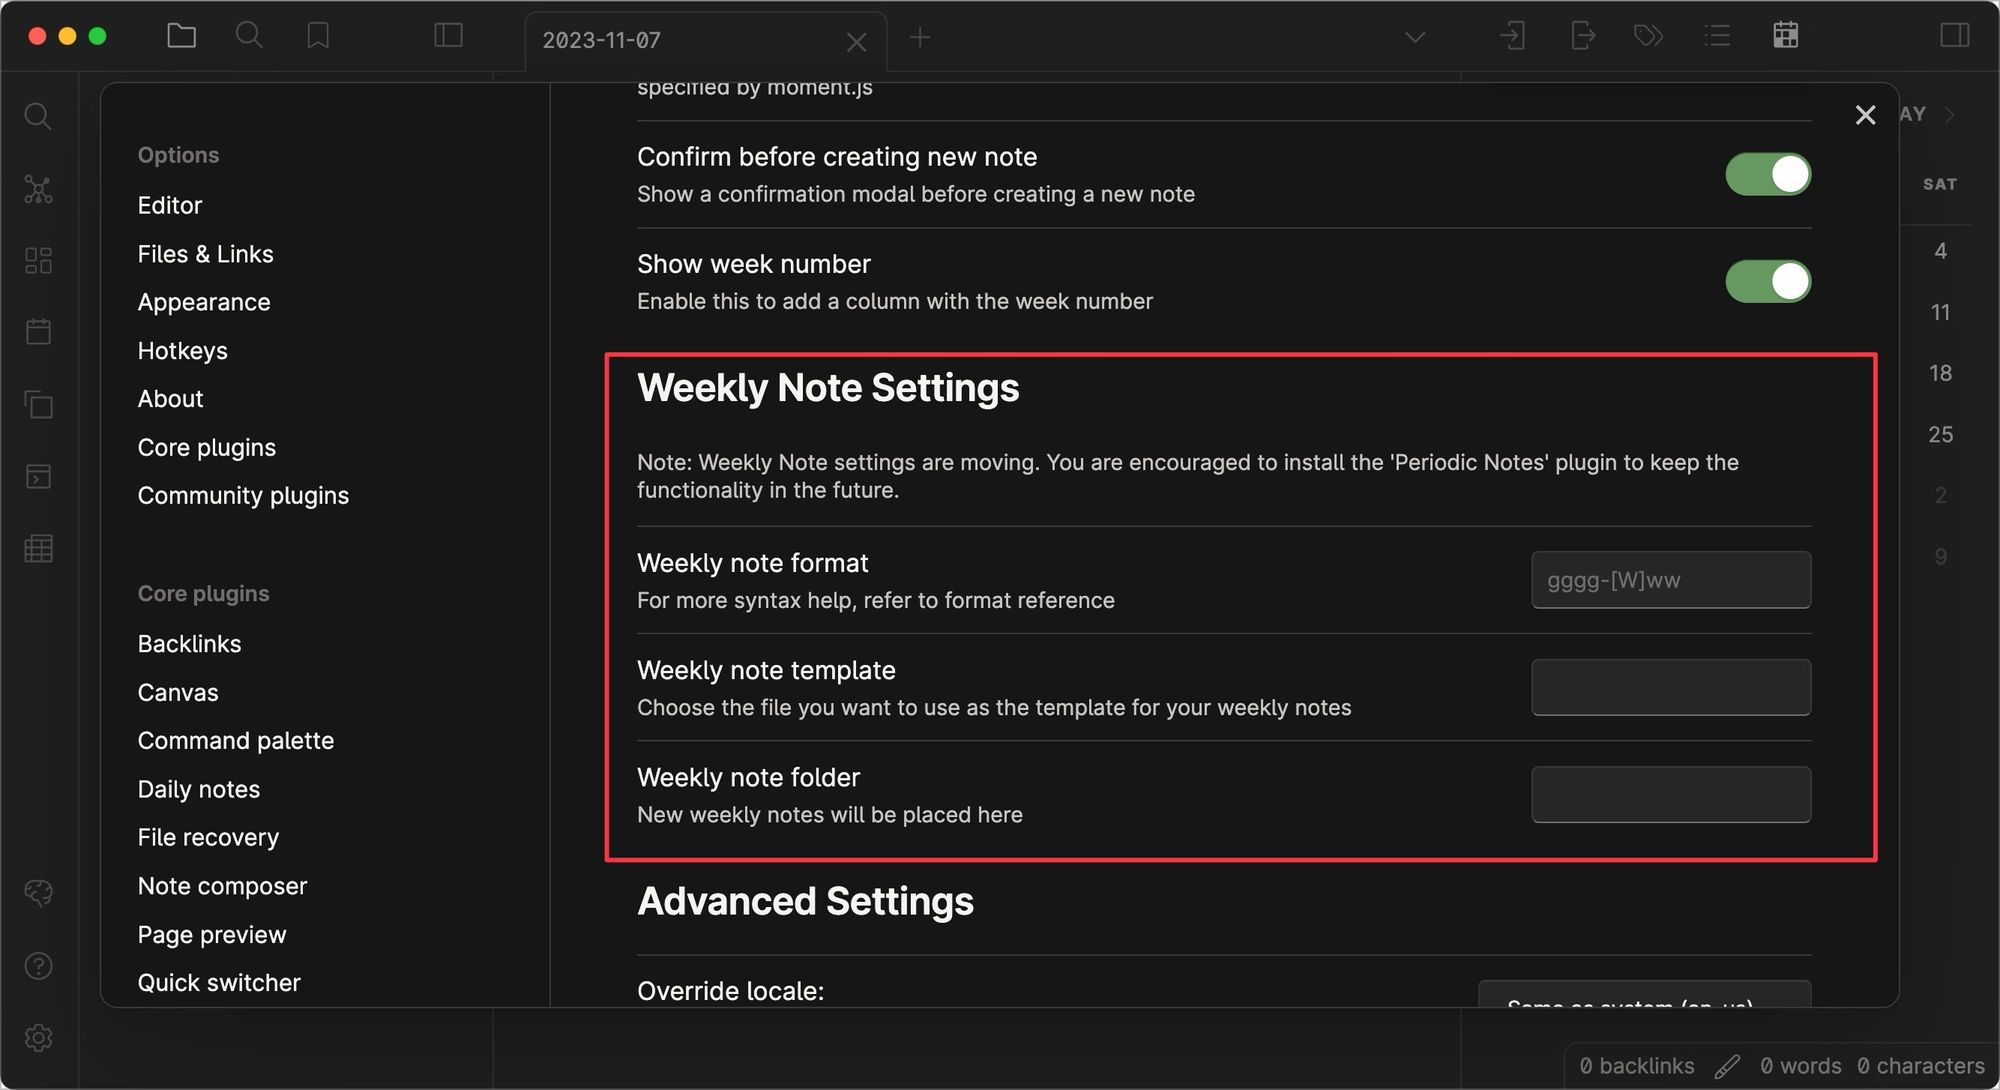
It will add a new Weekly Note Settings section. Here, you can add a template and folder location where you want to create the weekly notes.
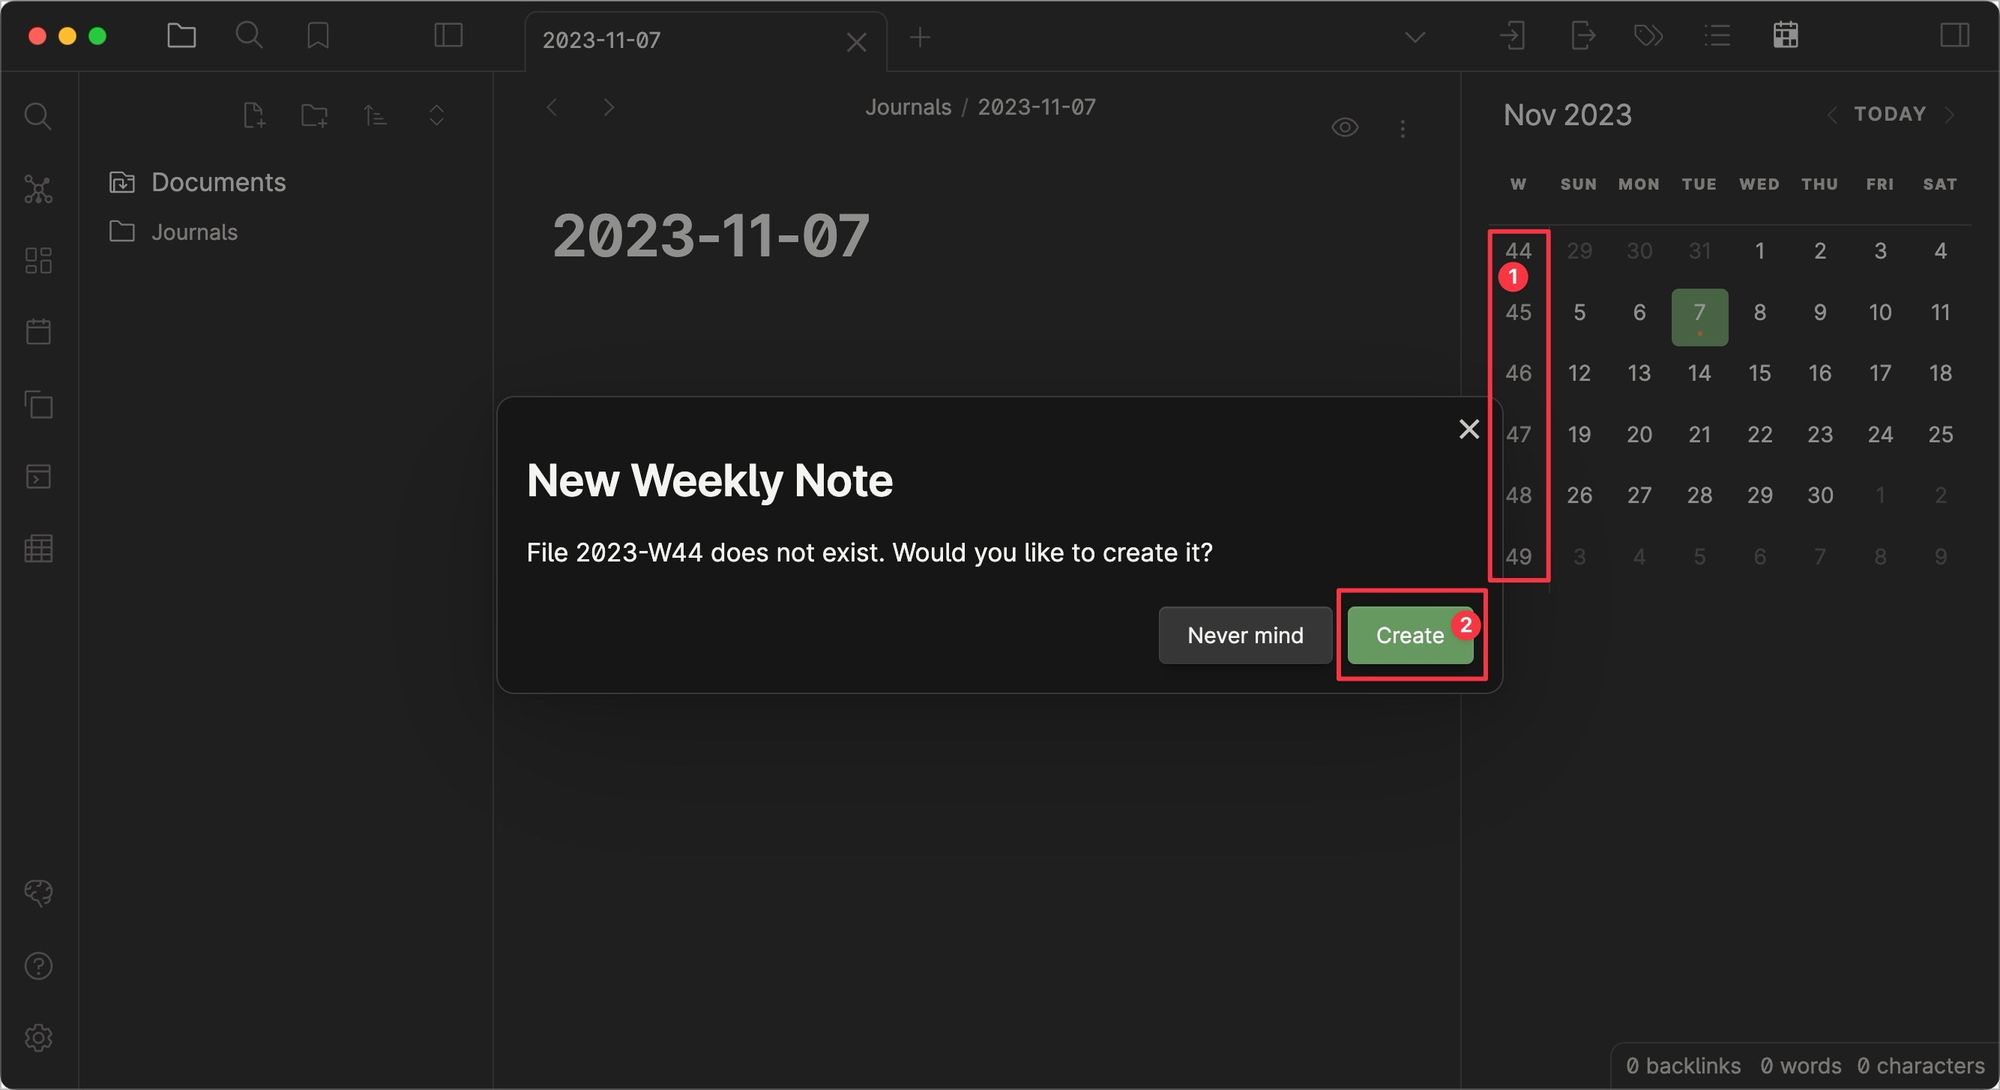
Now, go back to the main page and click on the week number to create a new weekly note for that week.
2. Readwise / Omnivore / Kindle Highlights
If you want to develop your Obsidian vault into a knowledge graph, you have to ingest what you consume. Be it videos, articles, or books, Obsidian should be the place where all your knowledge converges. For this, there are three main plugins you can use.
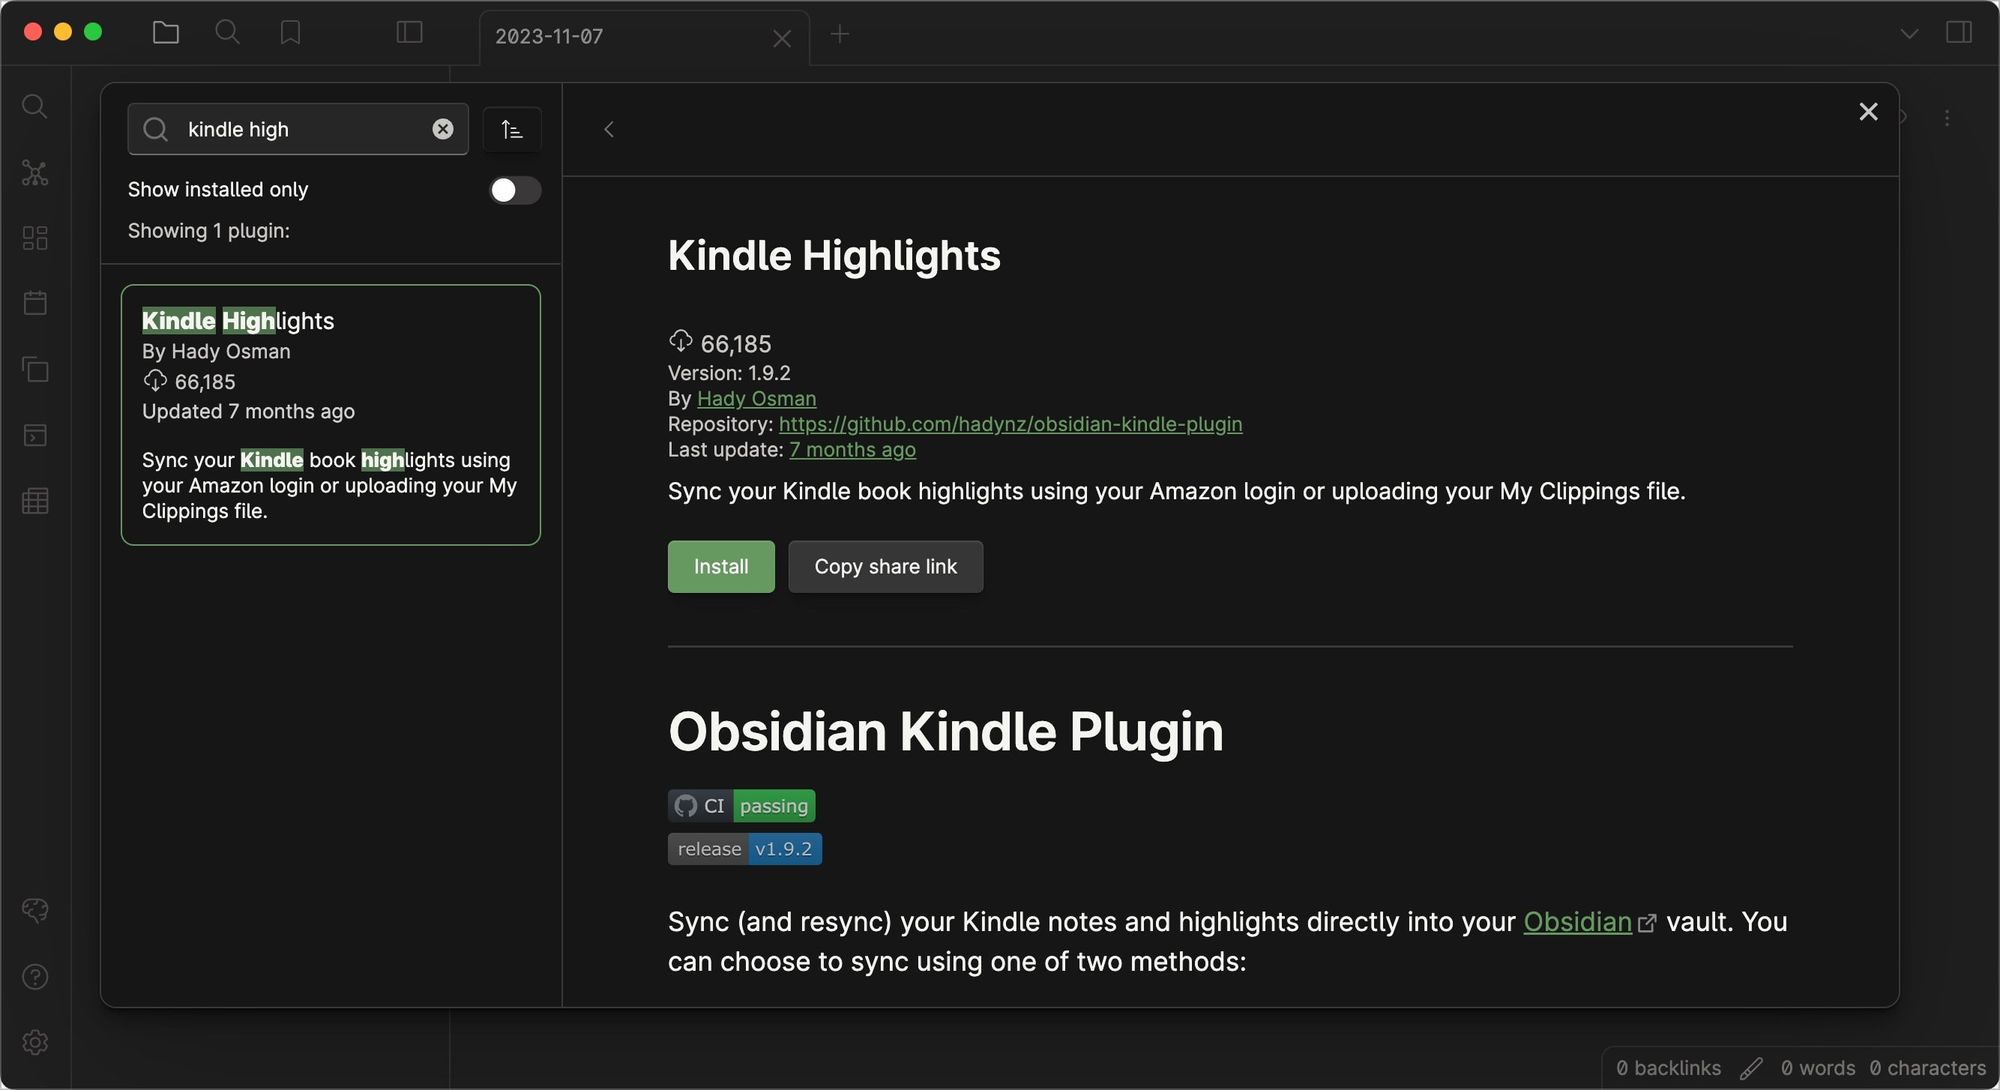
Kindle Highlights is the best plugin to import your highlights and notes from the books you read. Whether you use an Amazon Kindle Reader or the Kindle app to buy and read books, this plugin will help you import all the highlights you have made in your Obsidian vault.
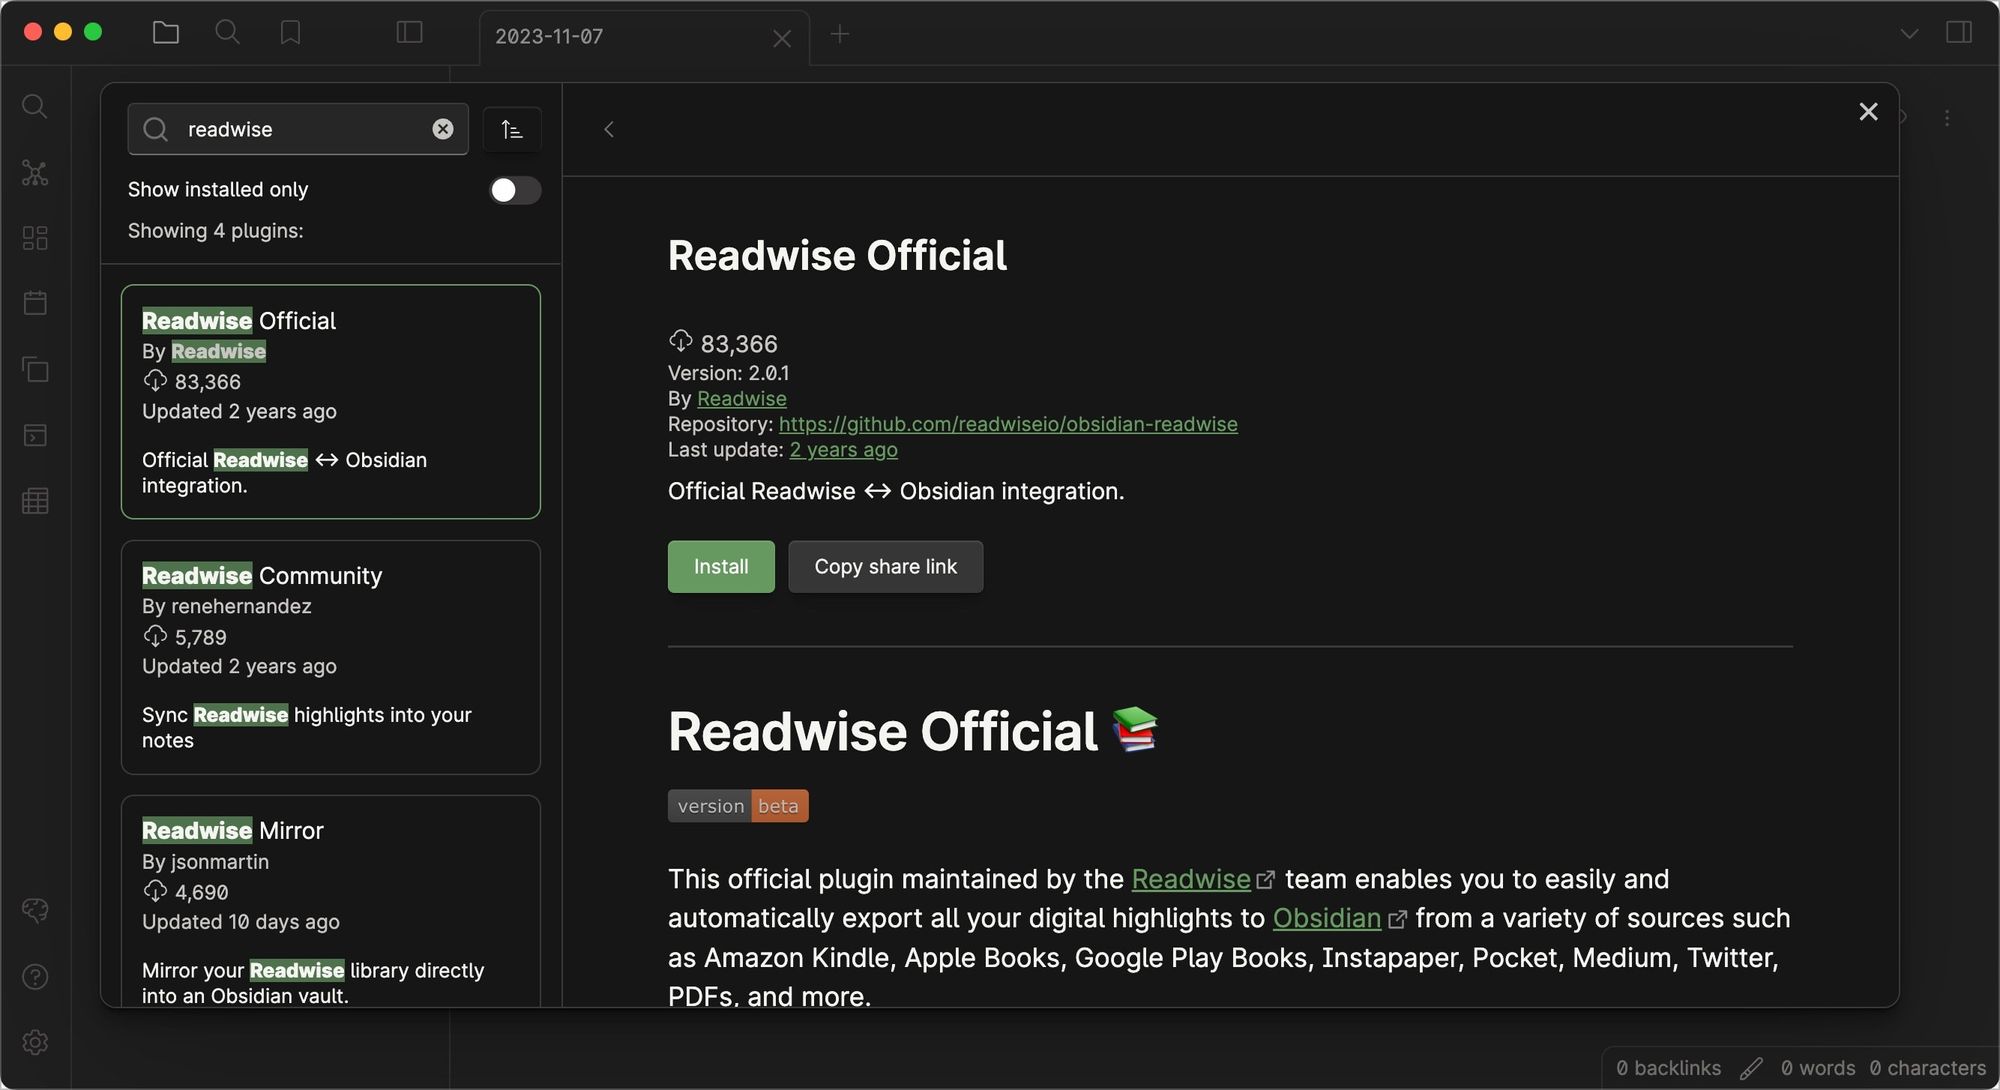
If you don't use Kindle, you can use the Readwise service to import your book highlights from other services, including Apple Books and Google Play Books. You can also import article highlights from web services like Instapaper, Pocket, Medium, and more.

Readwise also offers its read-it-later service called Readwise Reader, and it's one of the best read-it-later services on the market. With a Readwise subscription ($7.99/month), you can access both these services and import your book and article highlights in your Obsidian library.

That said, for bringing in our article highlights, we prefer the Omnivore plugin for two reasons. The first reason is that the service offers a premium reading experience despite being completely free. Second, its text-to-voice feature that lets us listen to articles on our iPhone and iPad is the best in the business. No other service we have tried comes even close to its quality.
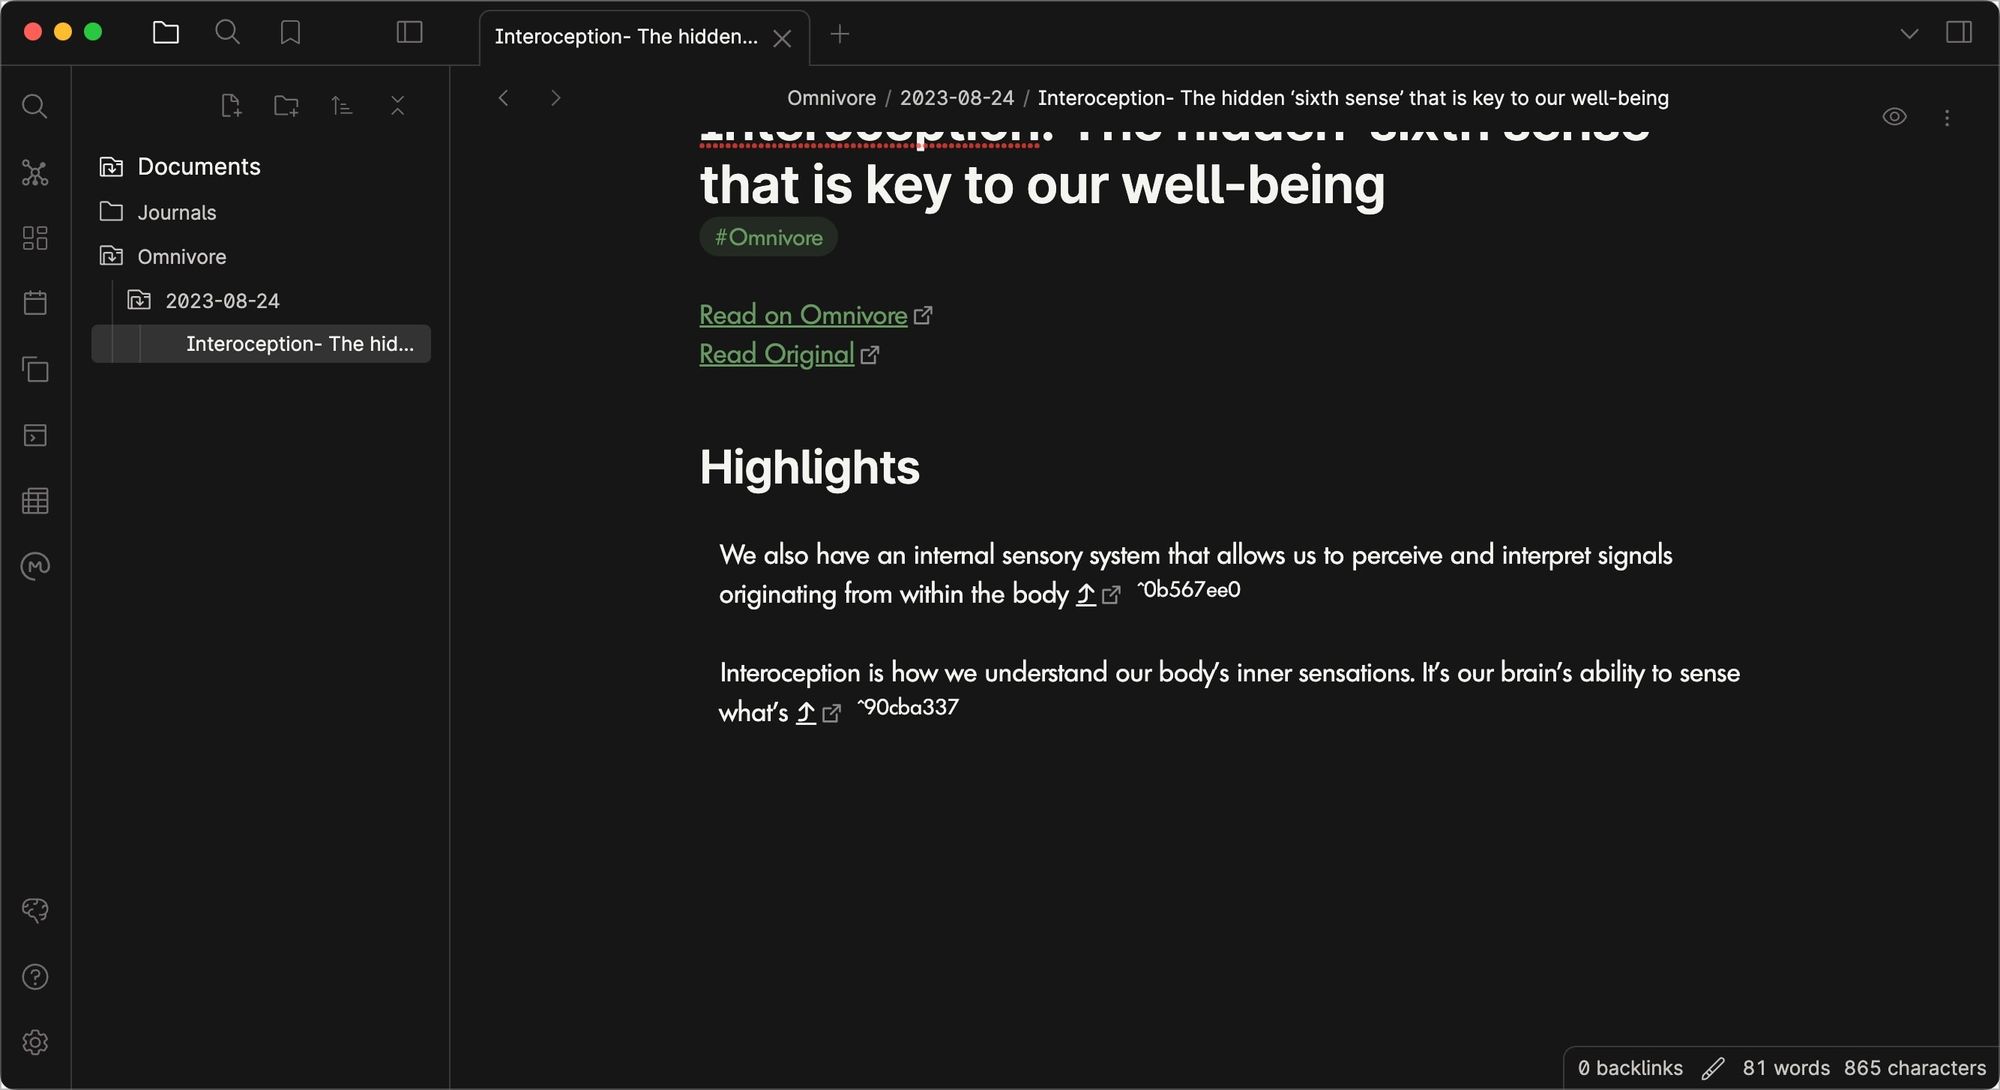
Install Kindle highlihts / Install Readwise / Install Omnivore
3. Notes Refactor
Once you ingest the content, it's time to convert them into notes for further processing, and no plugin does it better than Notes Refactor. Note Refactor allows you to select a part of your note and convert it into a new note.

Let's say you imported highlights from a book. Now, you want to convert a highlight into a new note. You select the part, invoke the command palette, and use the plugin to convert it into a note.
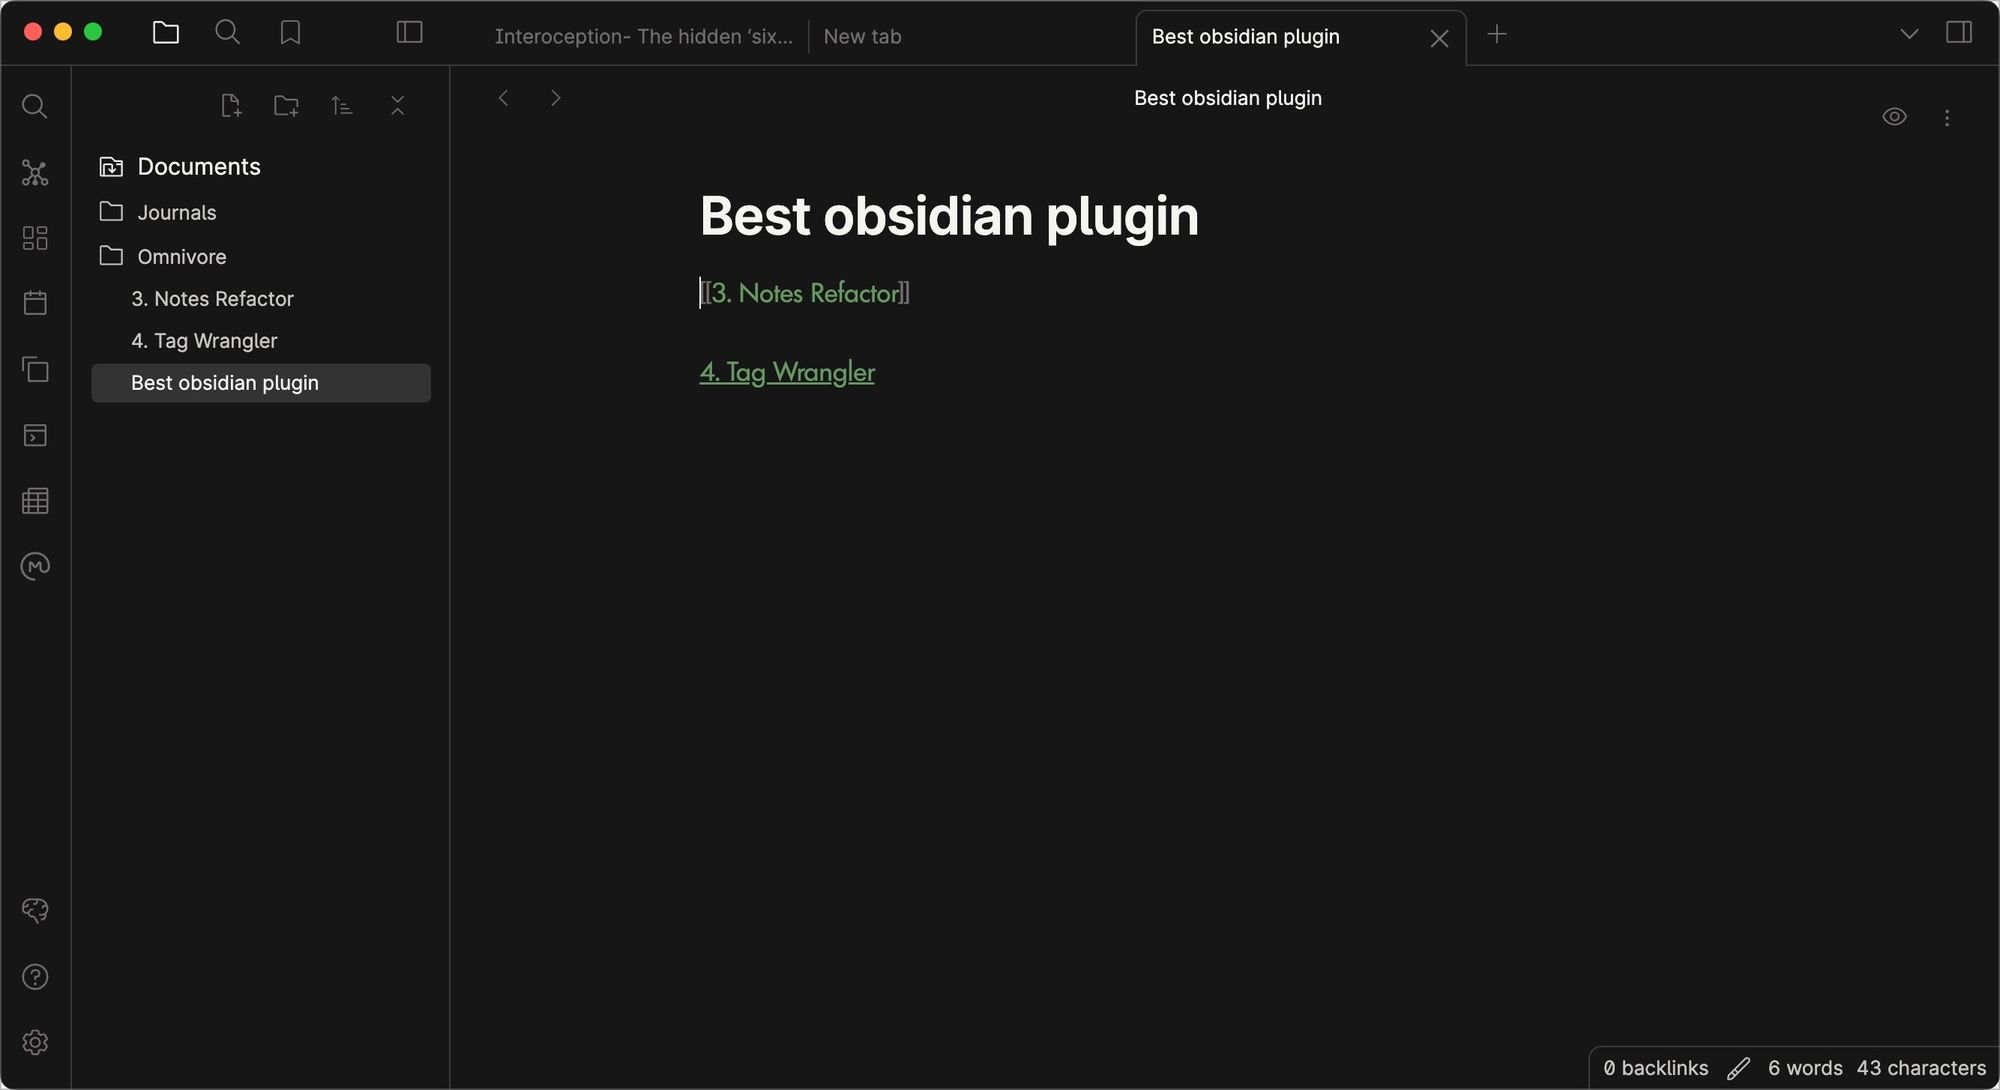
You can also use the plugin to split notes, create new notes based on the subheadings inside the note, and do so much more. If you want to be even faster, you can assign keyboard commands to these actions.
4. Tag Wrangler
In Obsidian, you can organize your notes using folders and tags. The benefit of using tags over folders is that it allows the same note to be in two places. For example, let's say a note is about productivity and how sleep can enhance it. You can tag that note with both productivity and sleep tags, so surface the note whenever you search for those topics.
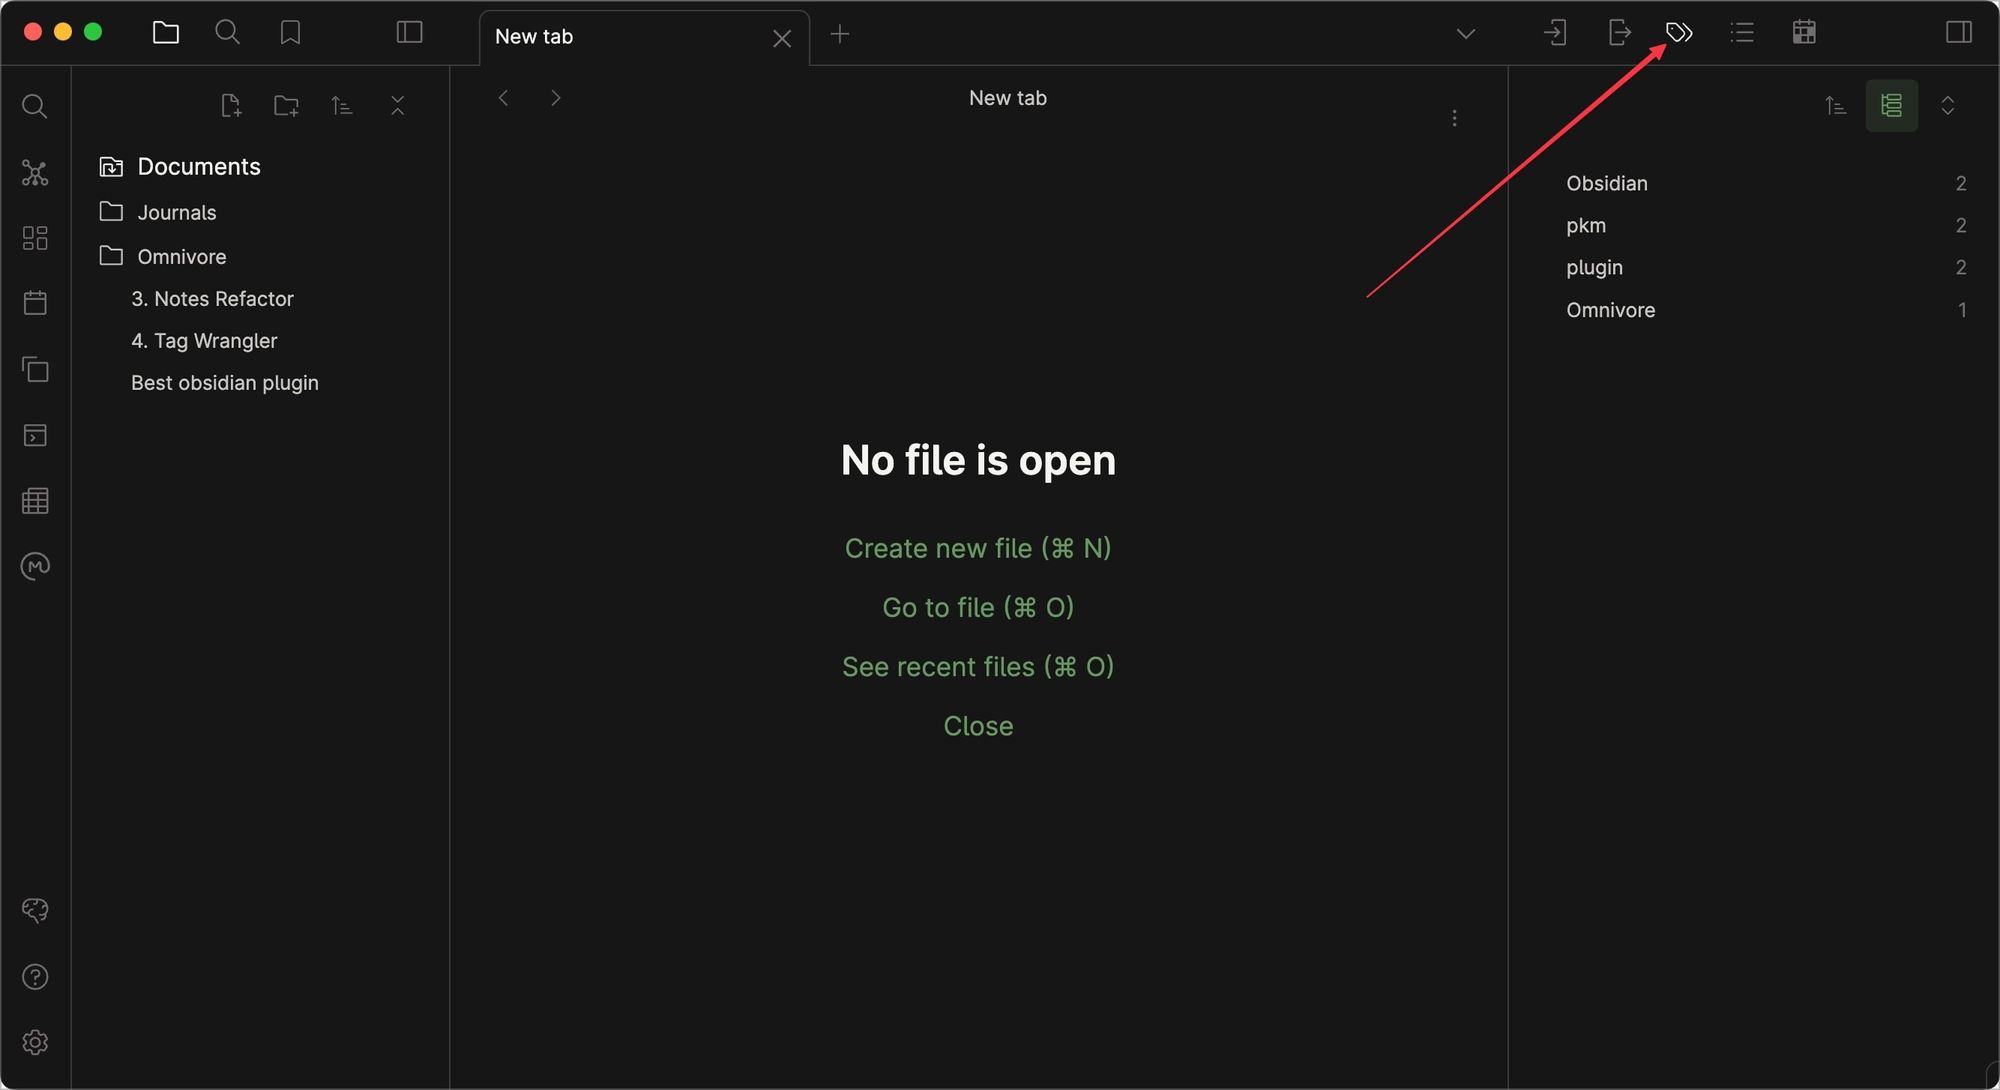
Tags become even more powerful with the Tag Wrangler plugin. The plugin allows you to rename tags and apply the changes everywhere that tag is used, something you cannot do natively in Obsidian. It also lets you refine your search by excluding tags.
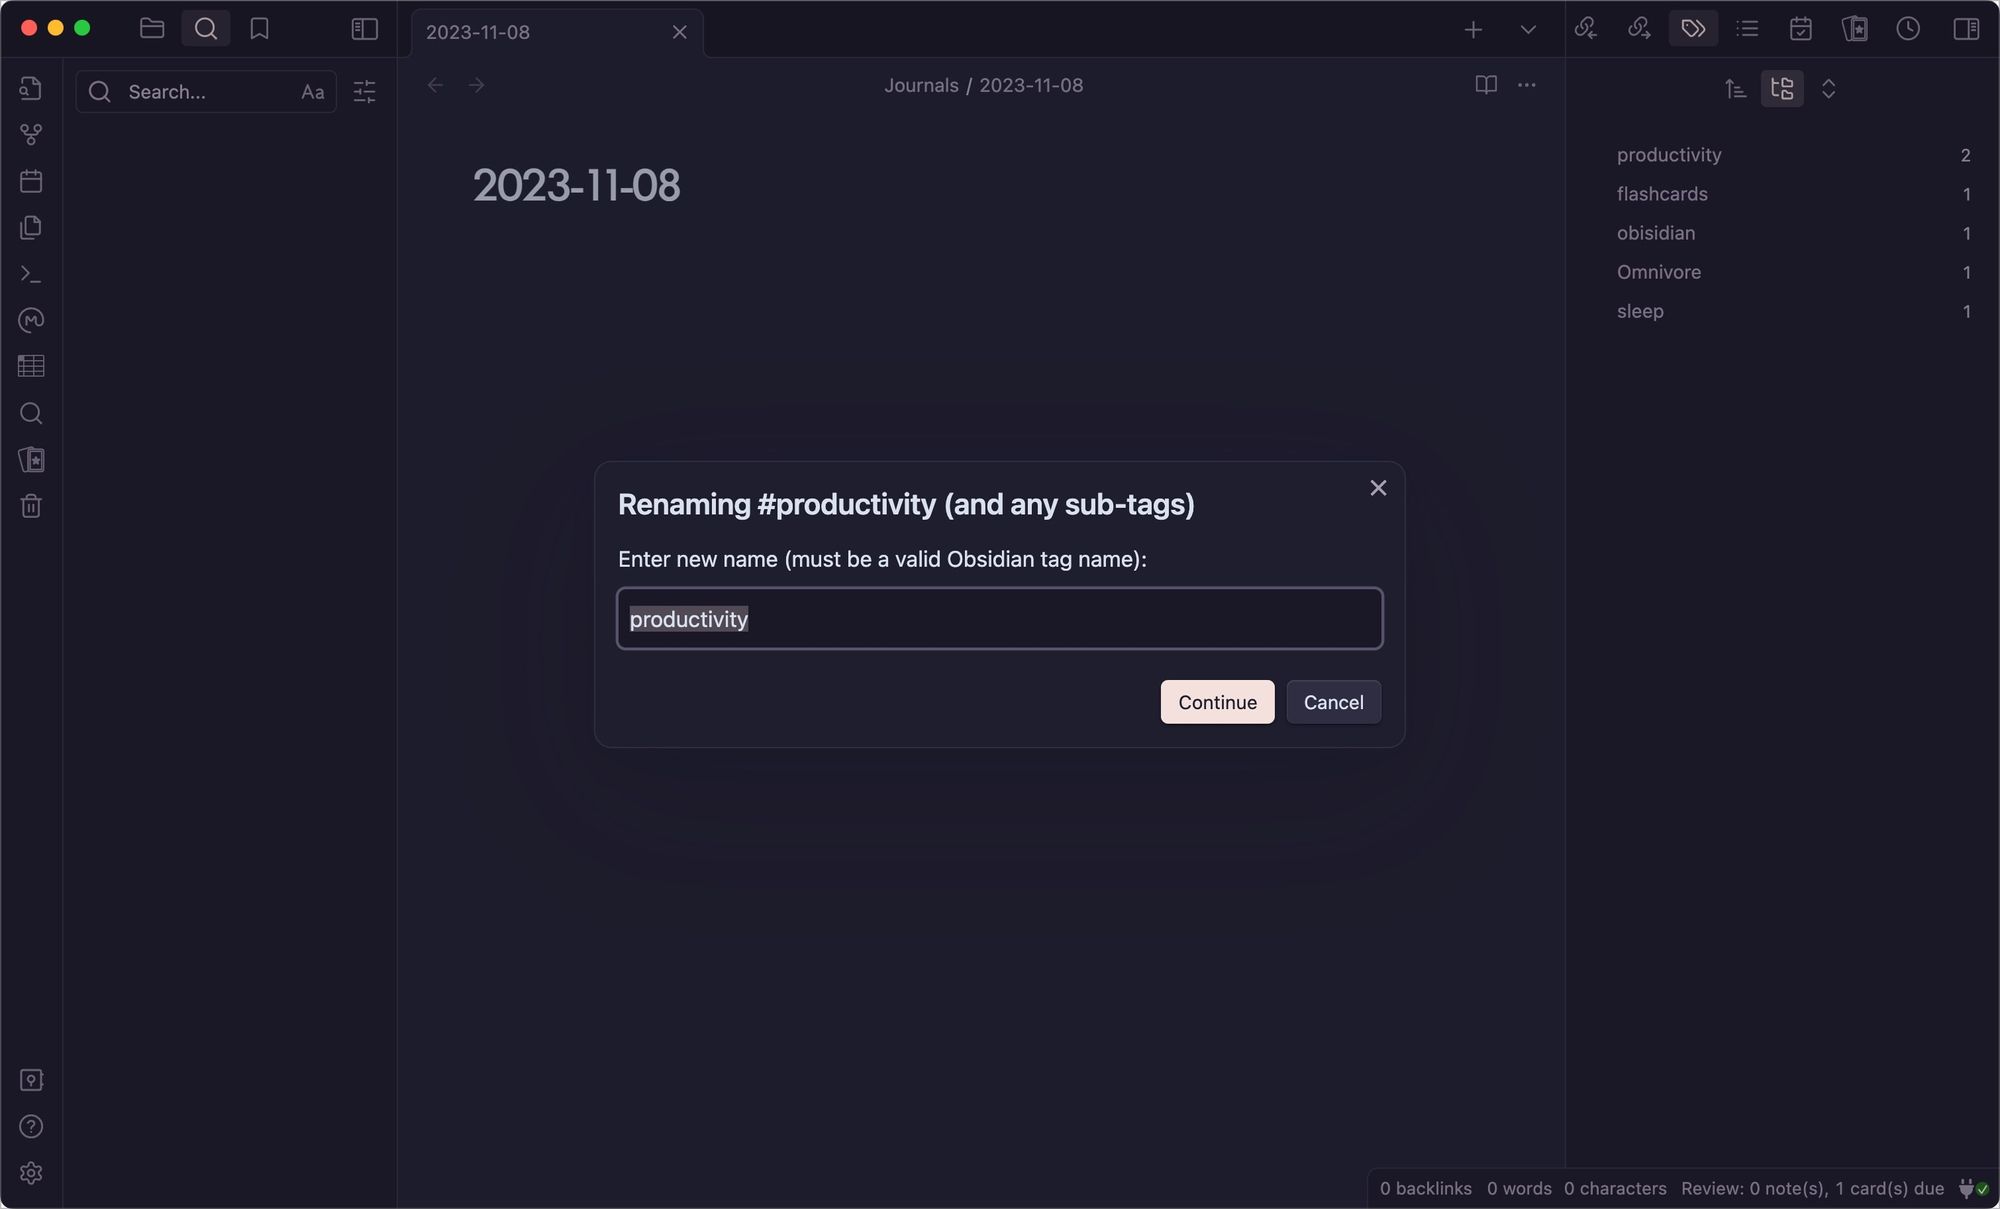
So you can perform a search for notes that include a tag but not the other. If you use tags for organizing your notes, this is a must-have plugin.
5. Omnisearch
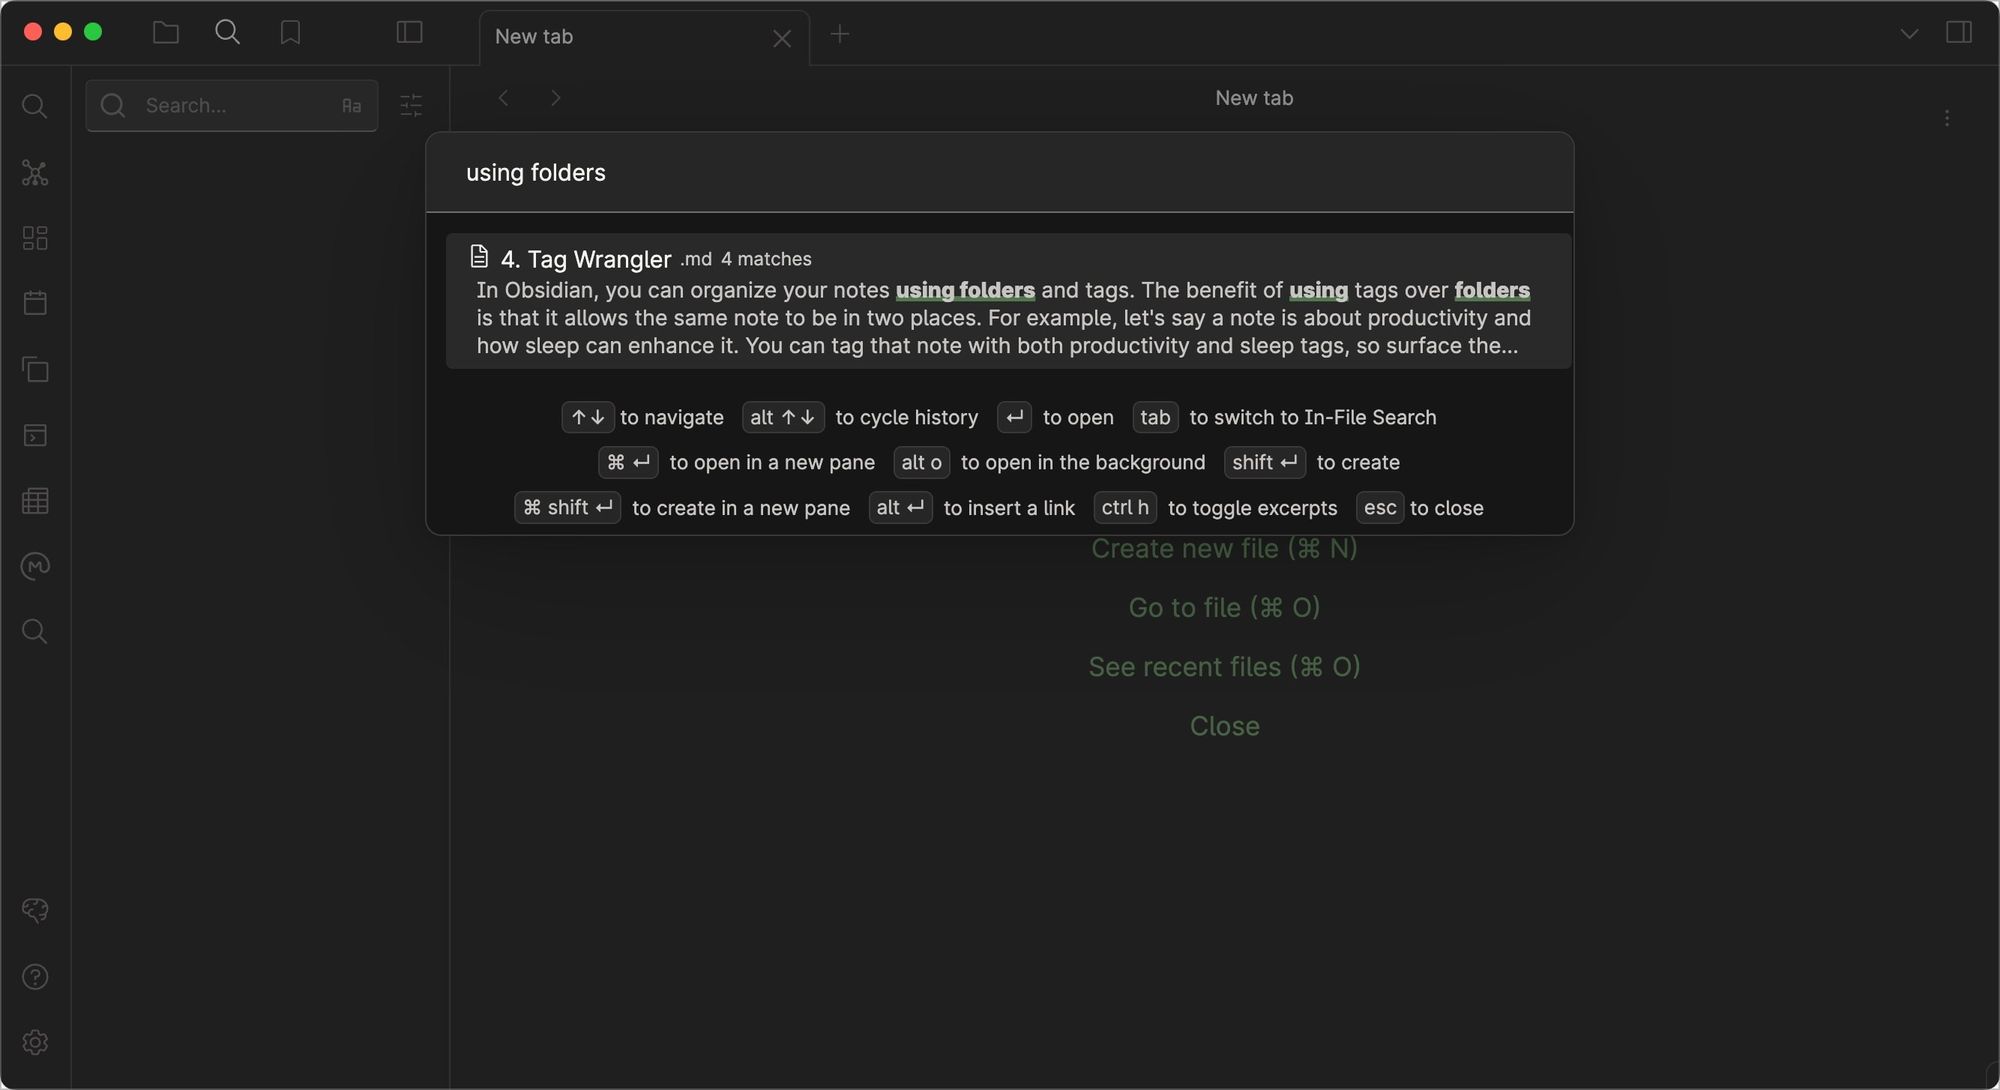
No matter how good you are at organization, you will lose track of some notes, and the Omnisearch plugin can help you find them. You can use this plugin to find notes, search inside notes, and even find text inside images and PDFs in your vault. You can assign a keyboard shortcut to quickly launch the search window and find any note in seconds.
6. Advanced Table
Obsidian uses markdown for formatting, and we love it. We use Ulysses, one of the best markdown writing apps for Mac, for writing all our content, so you can understand our affinity for the markdown formatting language.

One place where markdown fails horribly is in creating tables. Advanced Table plugin solves this issue by making table formatting more accessible in markdown. To create markdown tables, you only need to type the first pipe (|) character, enter the heading, and hit the tab key to create the next column.
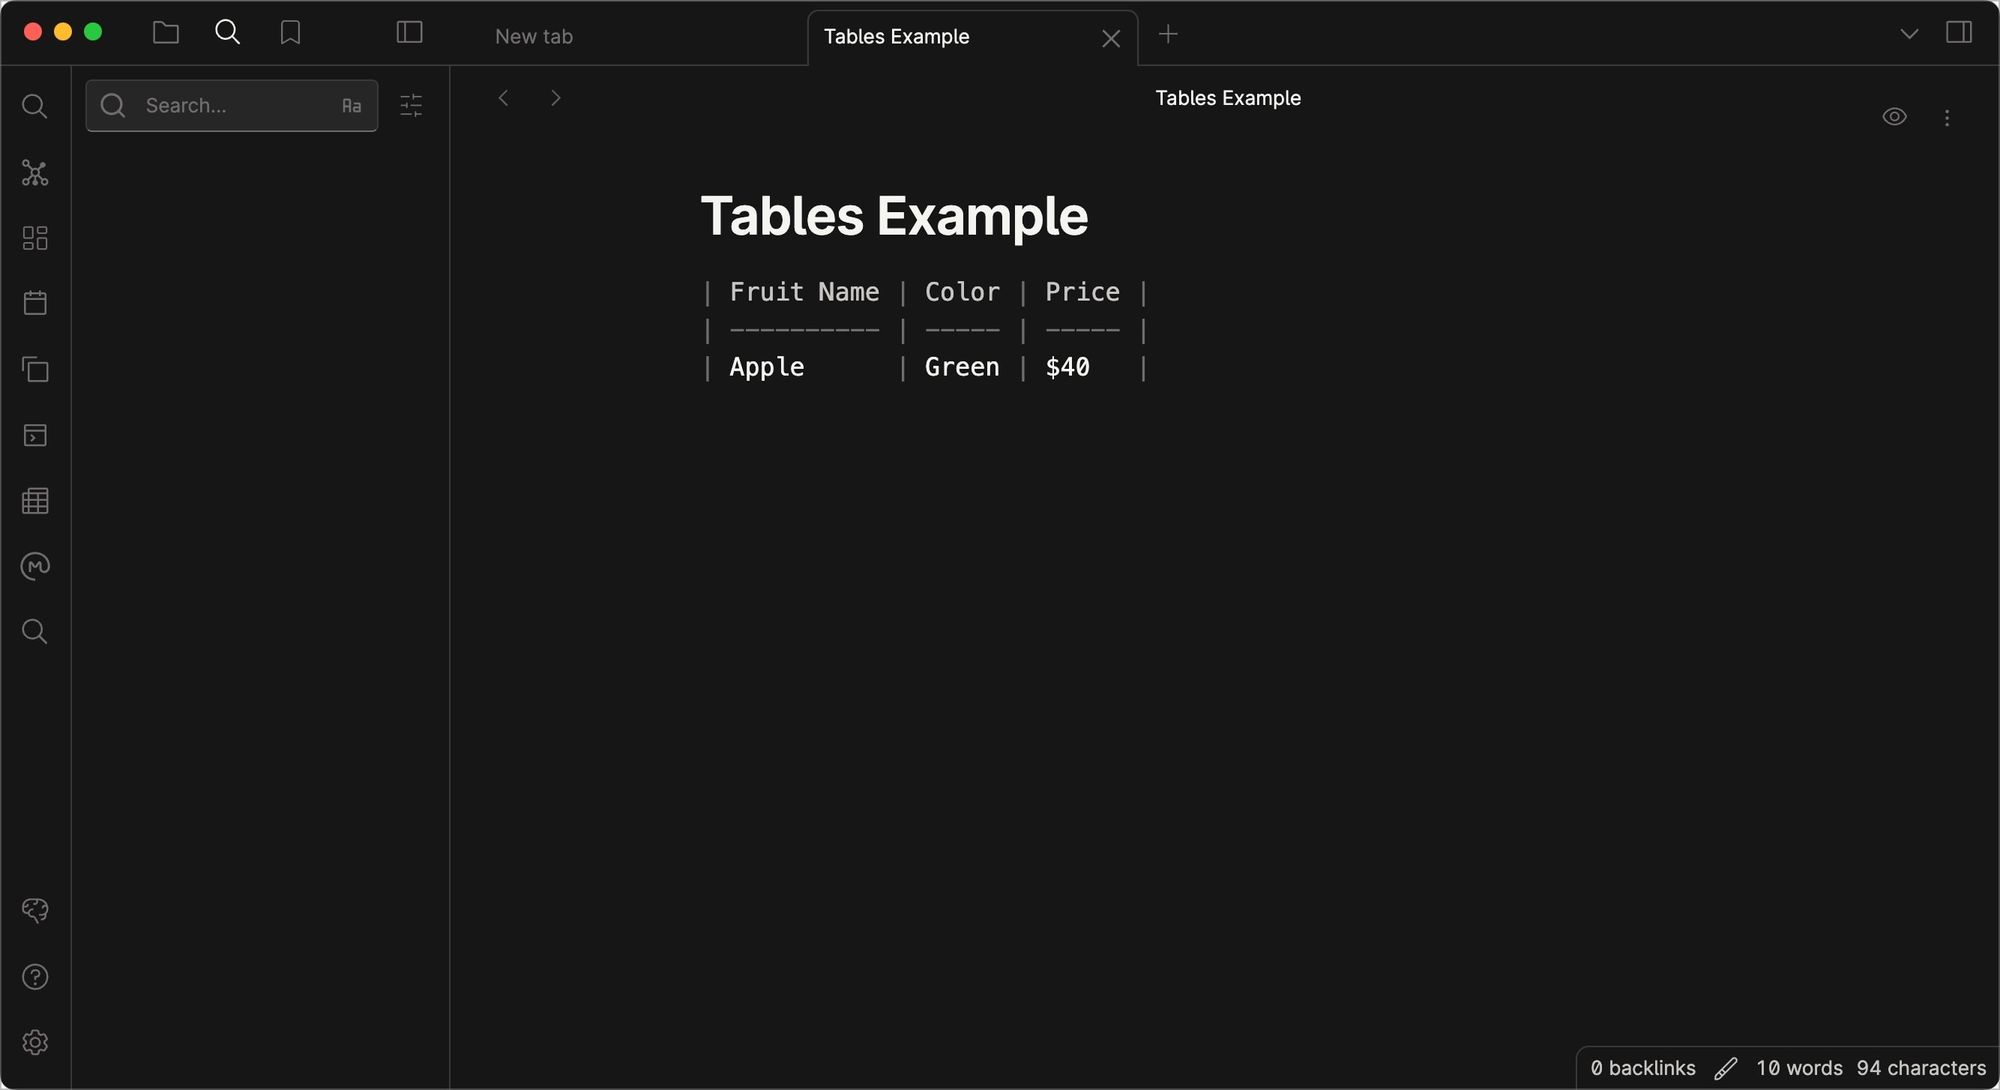
Create as many columns as you want, and then hit enter to create the next row. It's as simple as it can get. My favorite feature of this plugin is that it auto-justifies the row width so your content is properly formatted. Advanced table is a must-have plugin for Obsidian, and you should install it right away.
7. Kanban
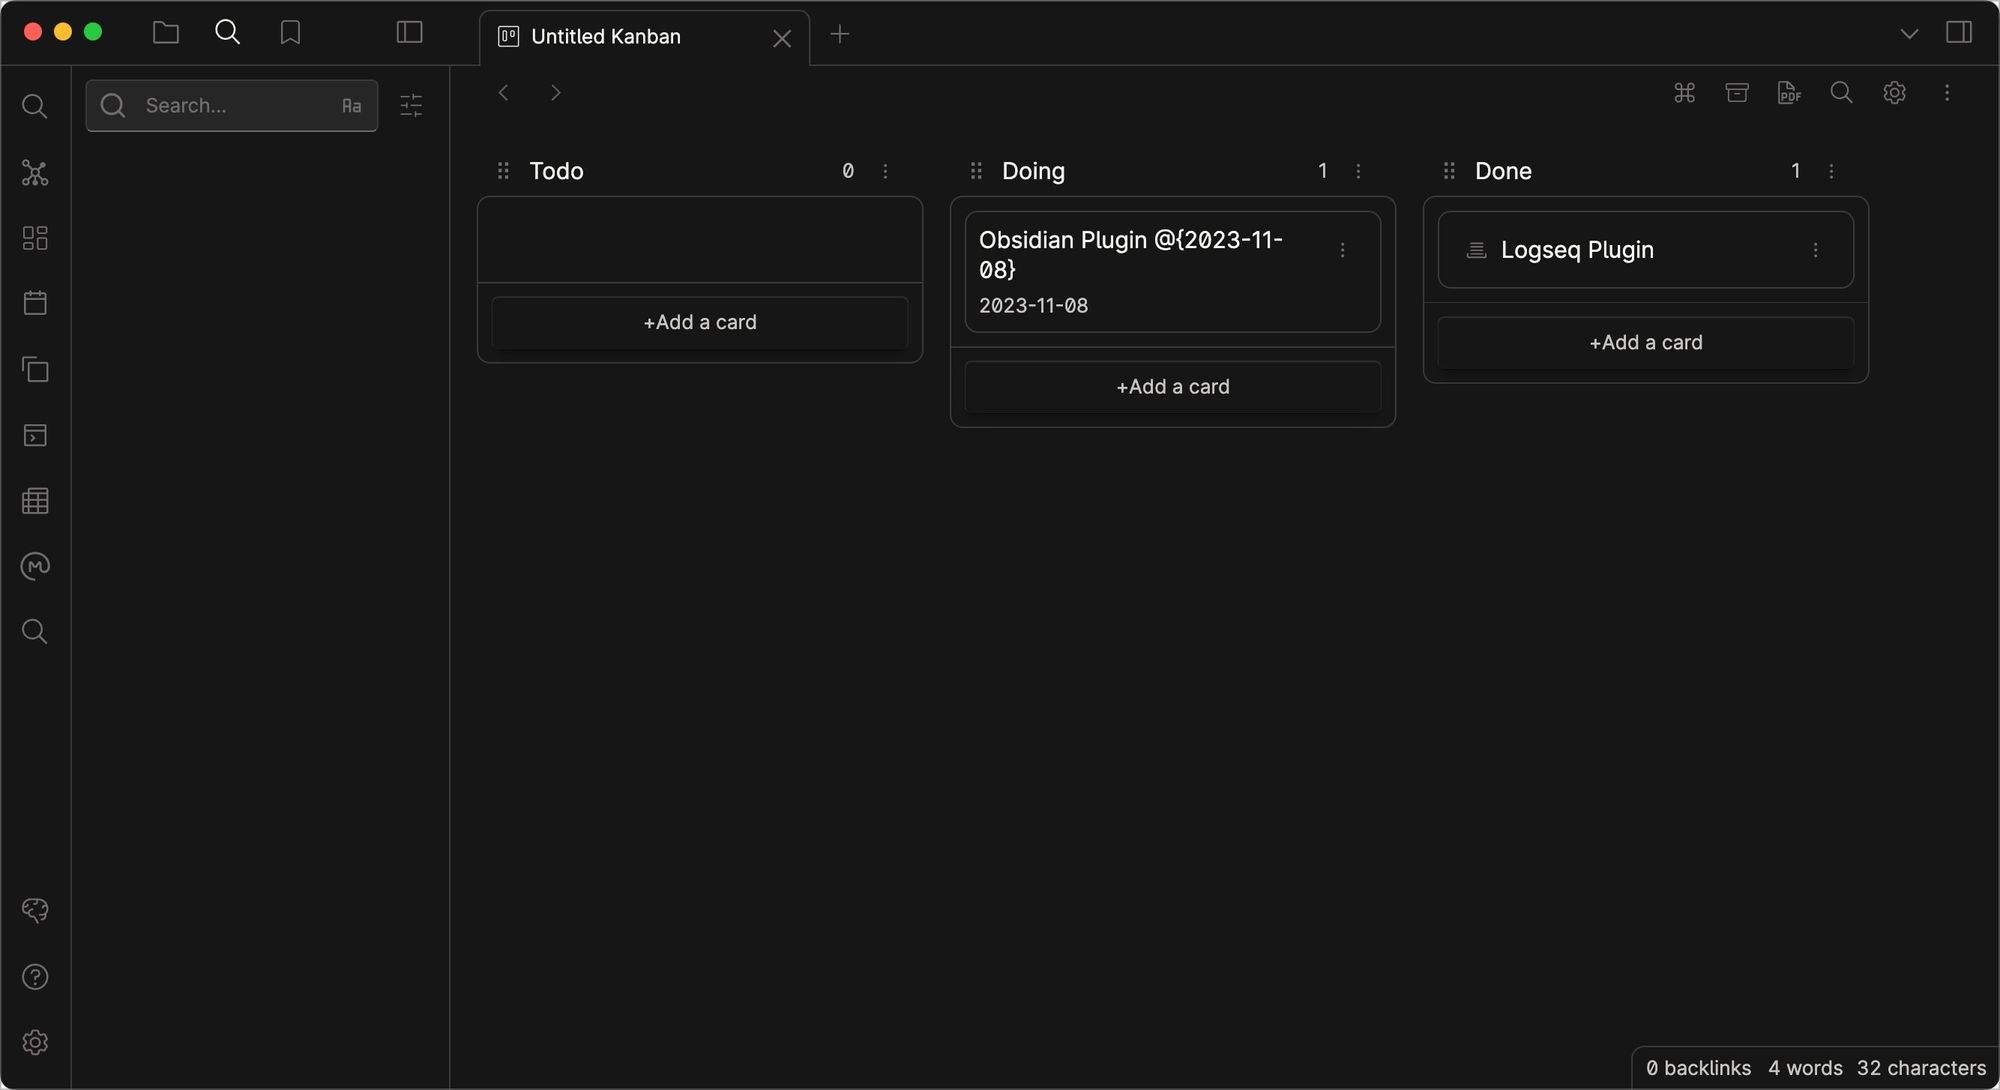
Kanban is one of our favorite Obsidian plugins. You can use it to create Kanban boards and efficiently track your tasks as they go through different stages. For example, we can create an editorial Kanban board where we can track all our article ideas as they move through your production process.
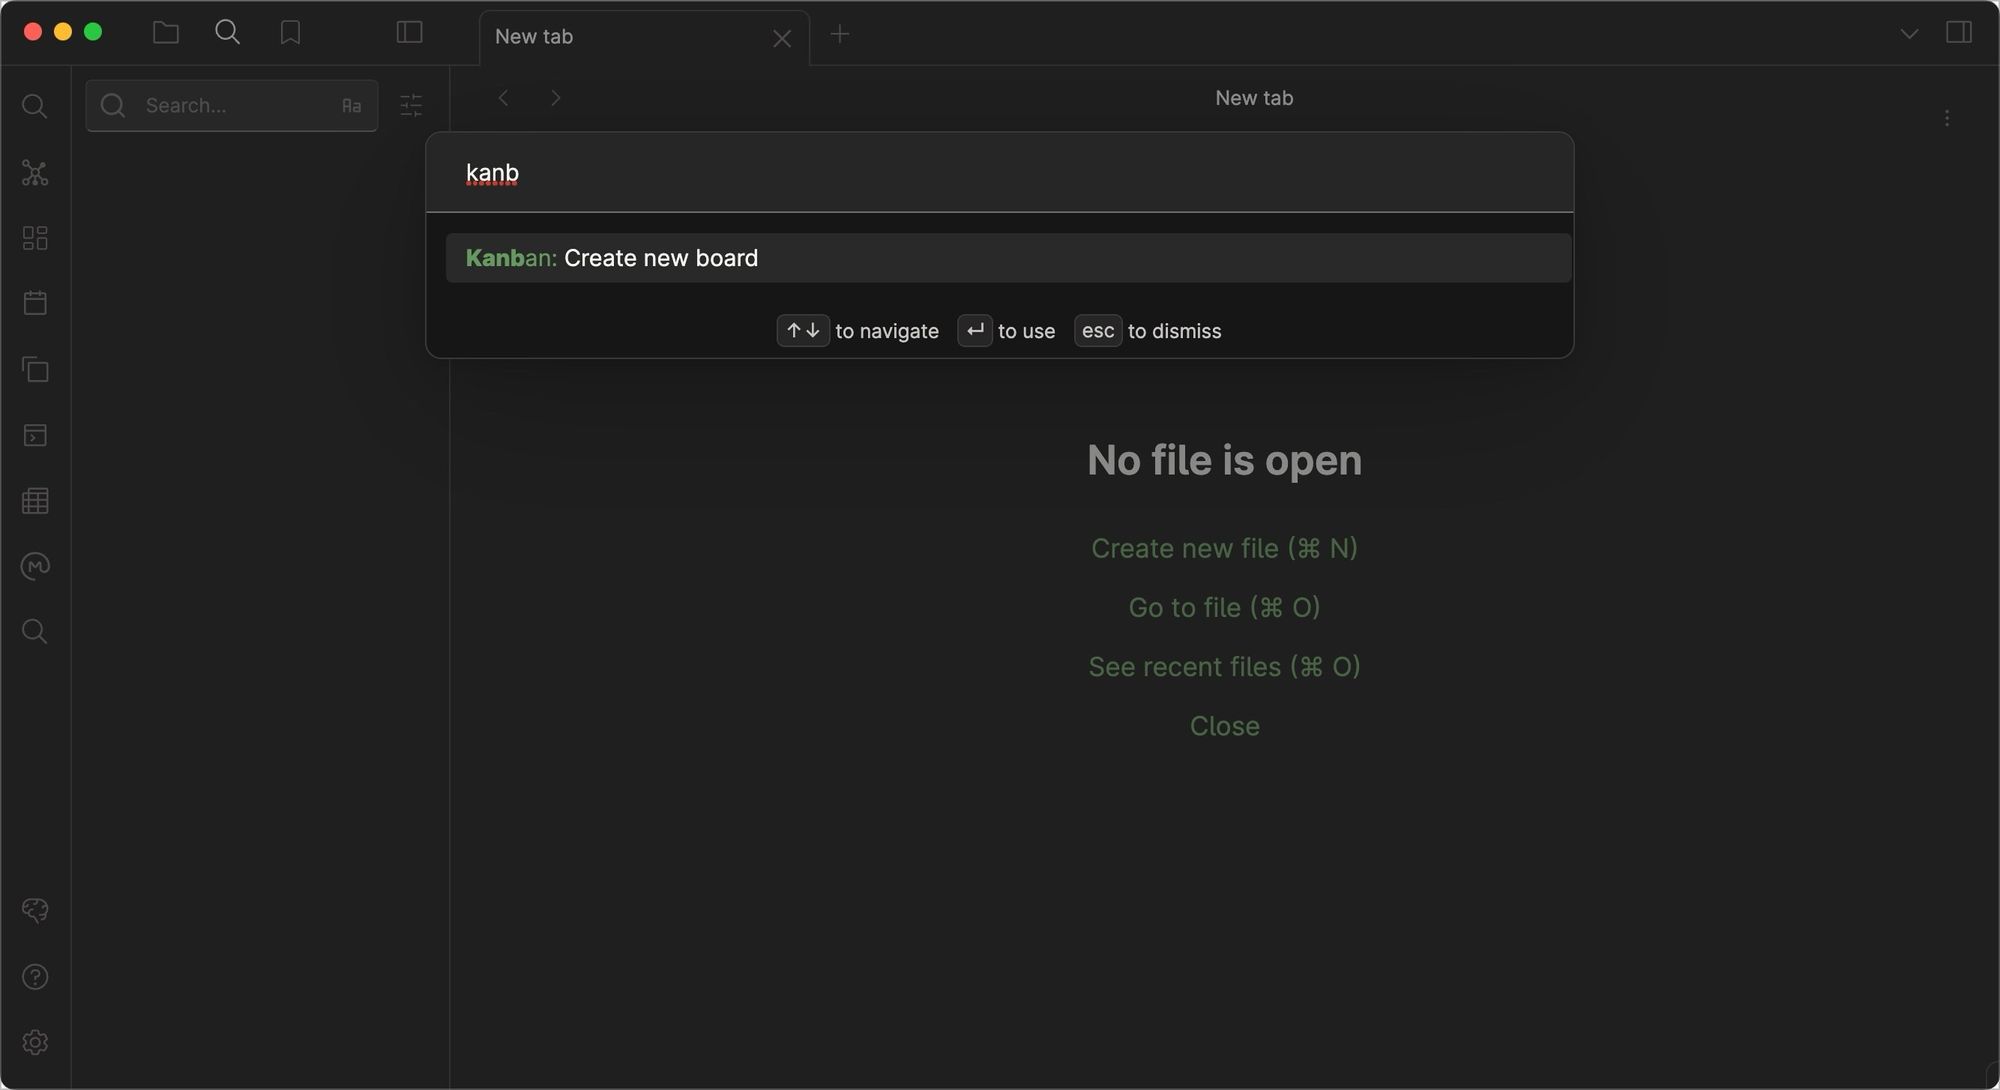
Creating a Kanban board is pretty simple. You bring up the command palette using the keyboard shortcut ⌘P (Ctrl+P in Windows), search for Kanban, and choose Create a new Kanban board option. Now, you can create columns and enter tasks as cards.
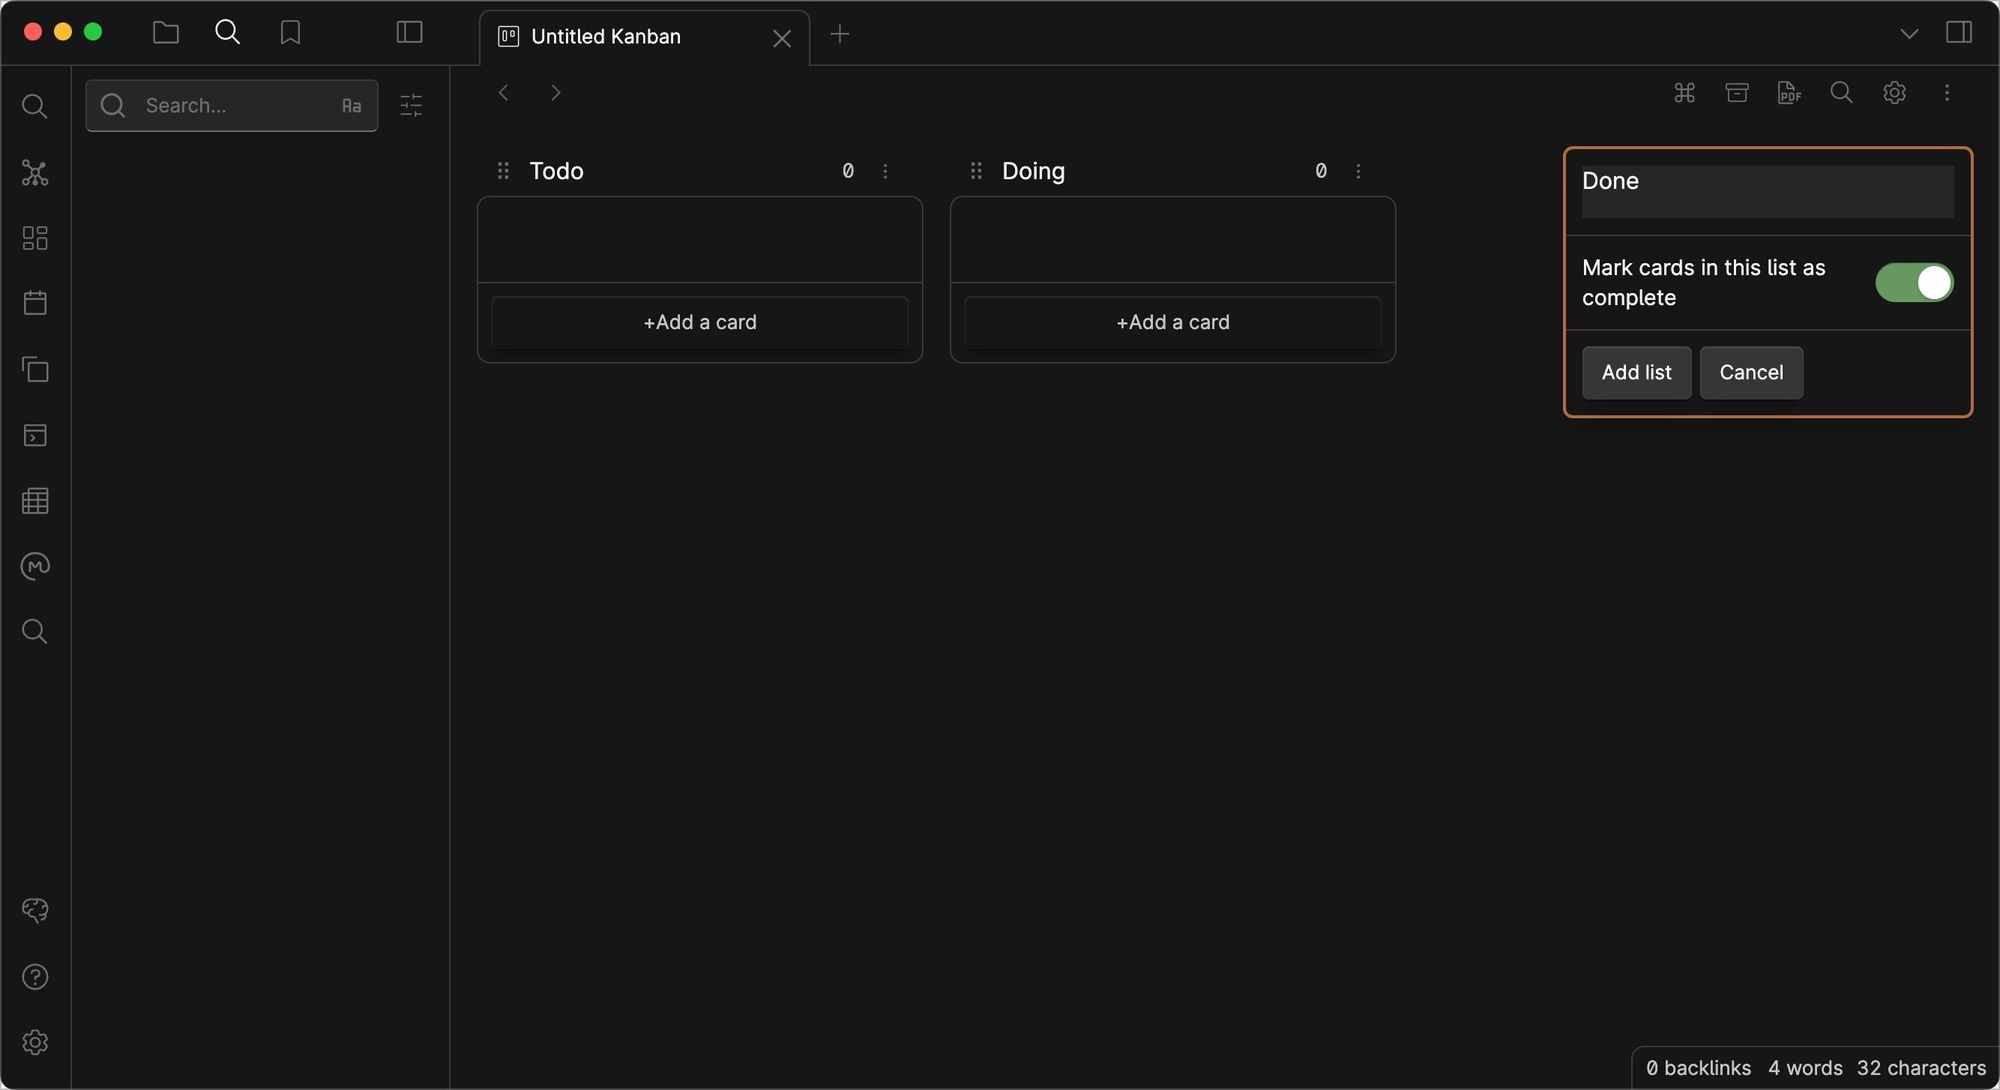
One of our favorite features of the Kanban plugin is that it allows a card to be automatically marked as done when you move it to the last column. There's much more to this plugin, so let us know if you want a separate article on this one.
8. Spaced Repetition
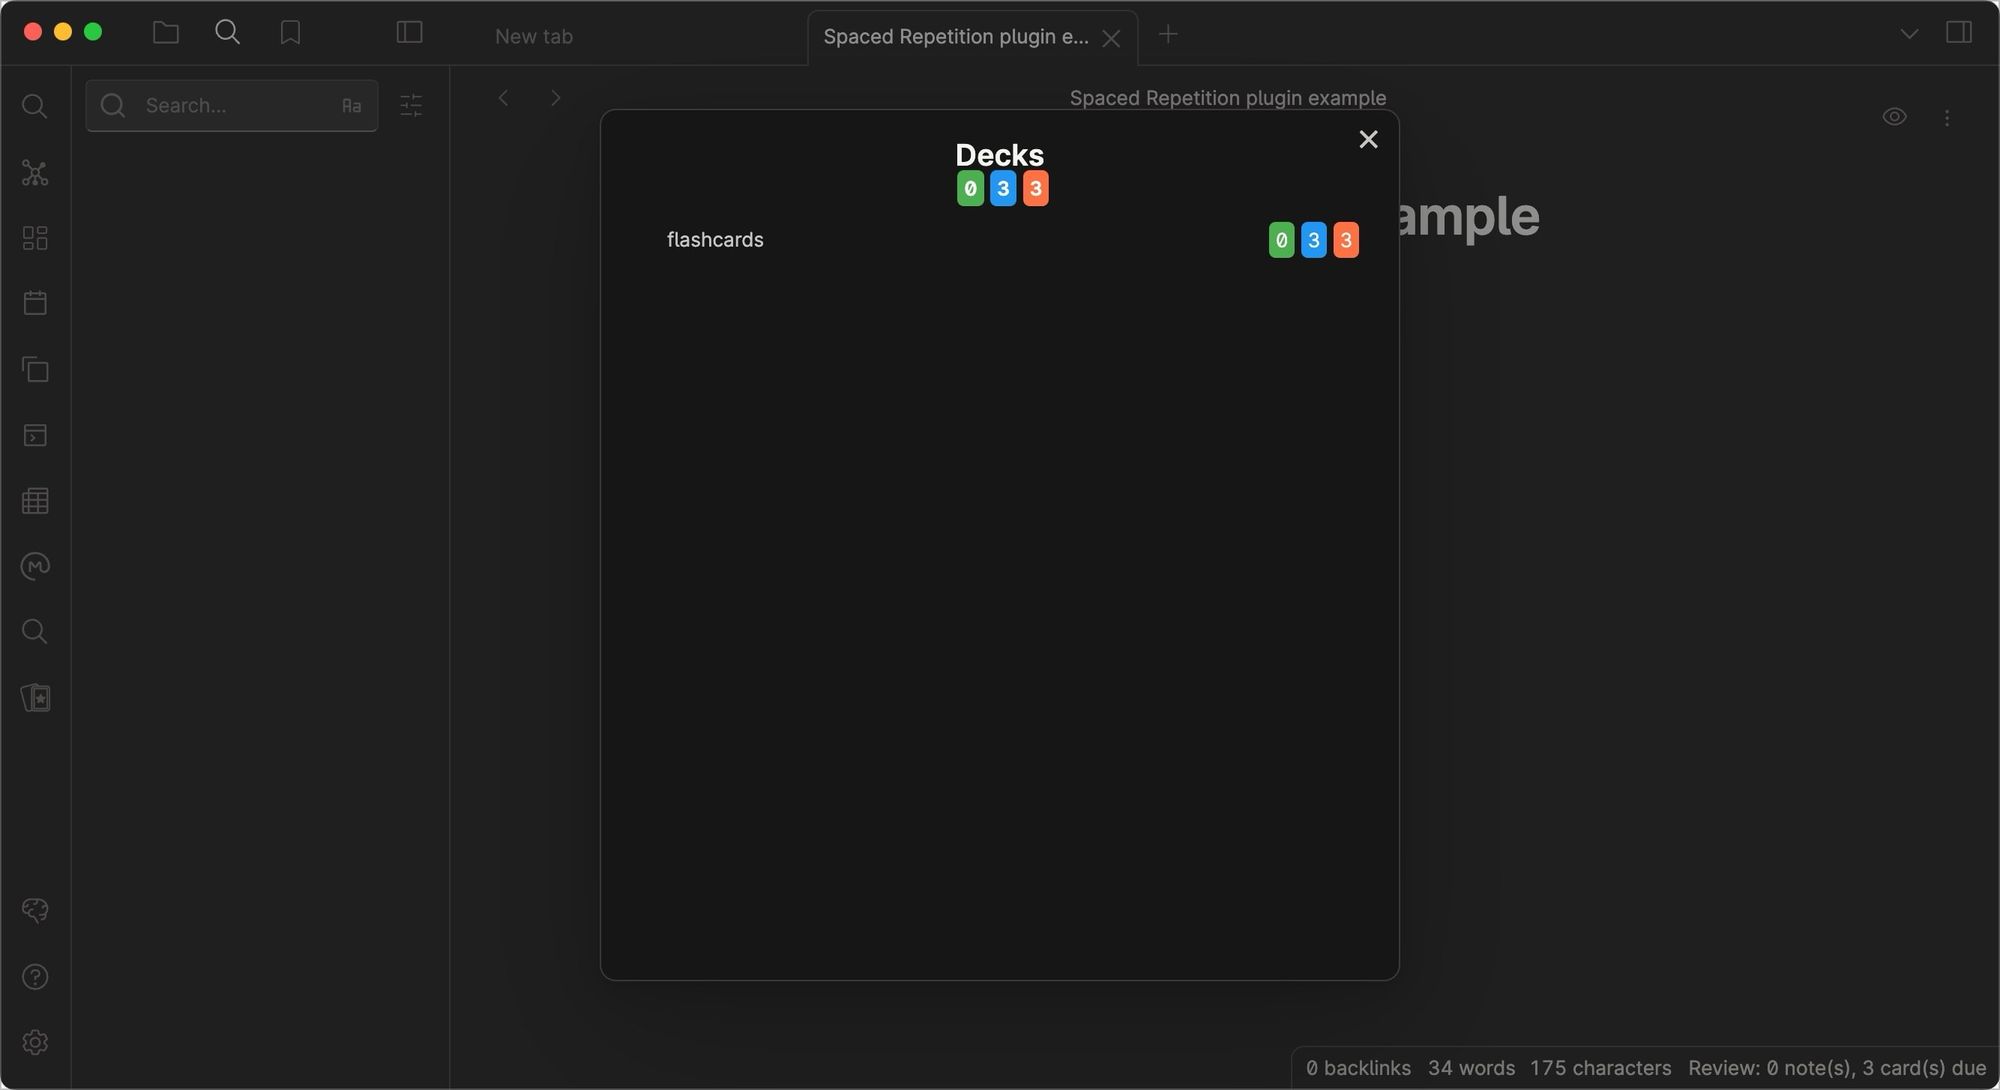
Spaced Repetition is an evidence-based technique that helps you learn things quicker and for a longer time using flashcards. When reviewing your flashcards, you can mark them as easy, medium, or hard, and the algorithm will accordingly space out the flashcards for best memorization.
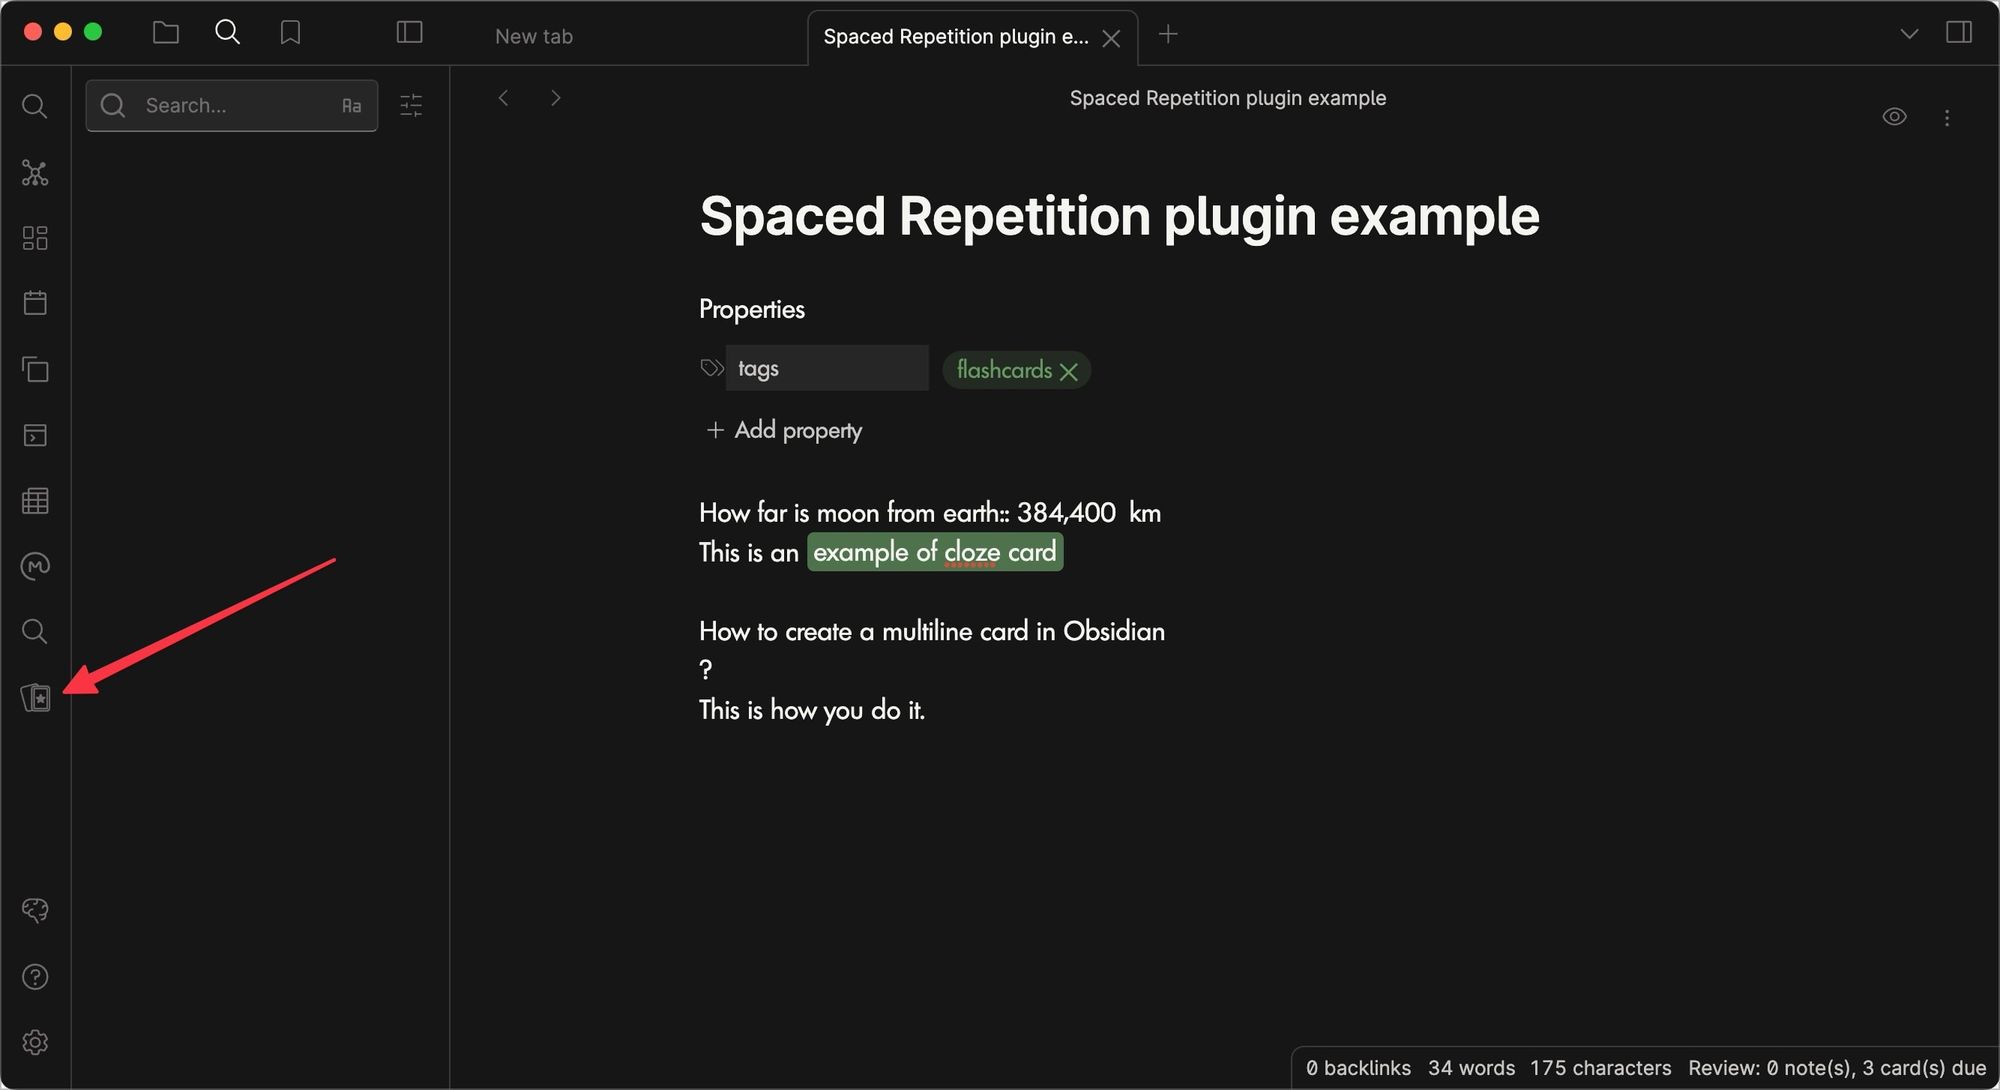
The Obsidian Spaced Repletion plugin allows you to use the same technique to review notes and flashcards. You can create simple flashcards, Cloze flashcards, and multi-line flashcards. Creating flashcards using the Obsidian Spaced Repetition plugin is pretty simple.
You can create inline flashcards by using double colons to separate the question and answer. It’s the simplest type of flashcard and the one you will use 90% of the time.

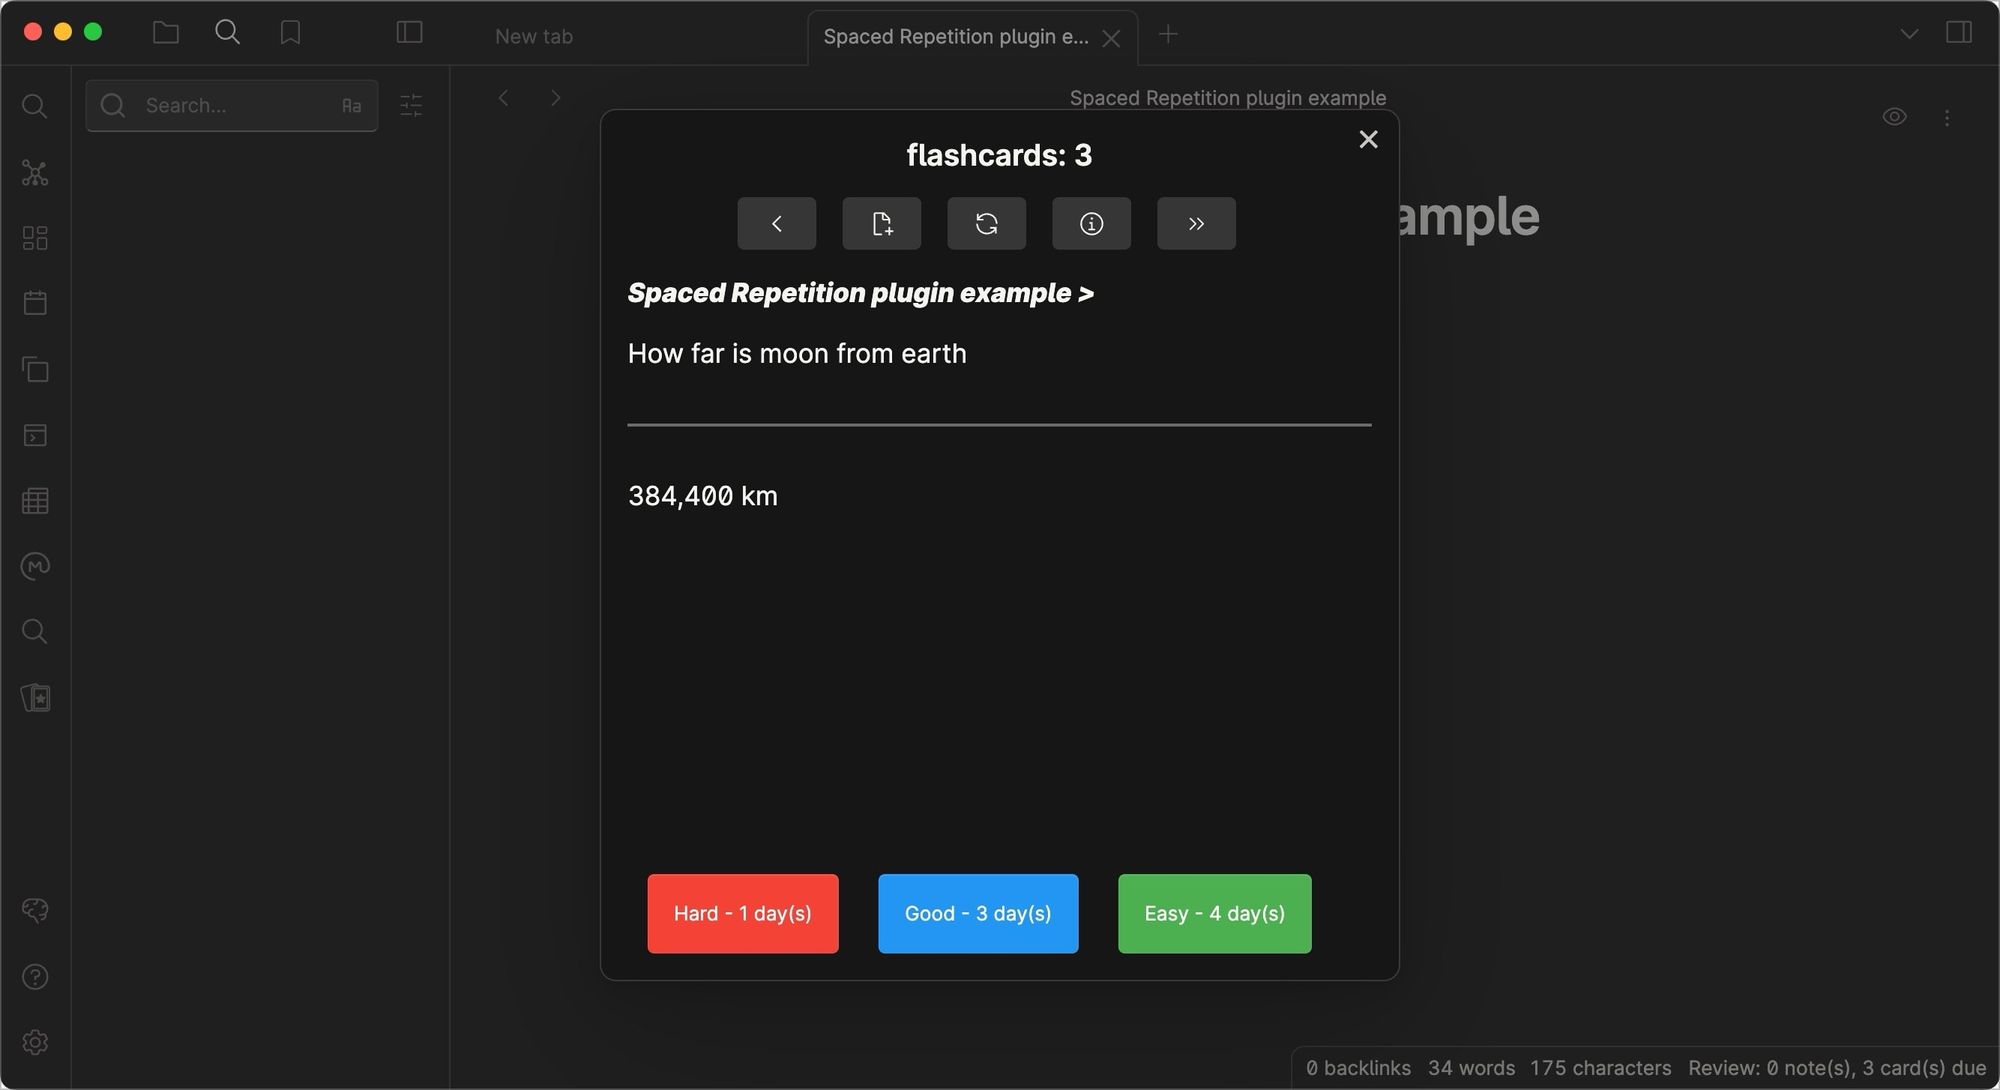
Then there’s the Cloze flashcards that let you hide part of the information. You can create Cloze flashcards by wrapping the text inside a double equals sign (==text to hide==). You can also create multi-line flashcards, where the question is in the first line and the answer is in the next.
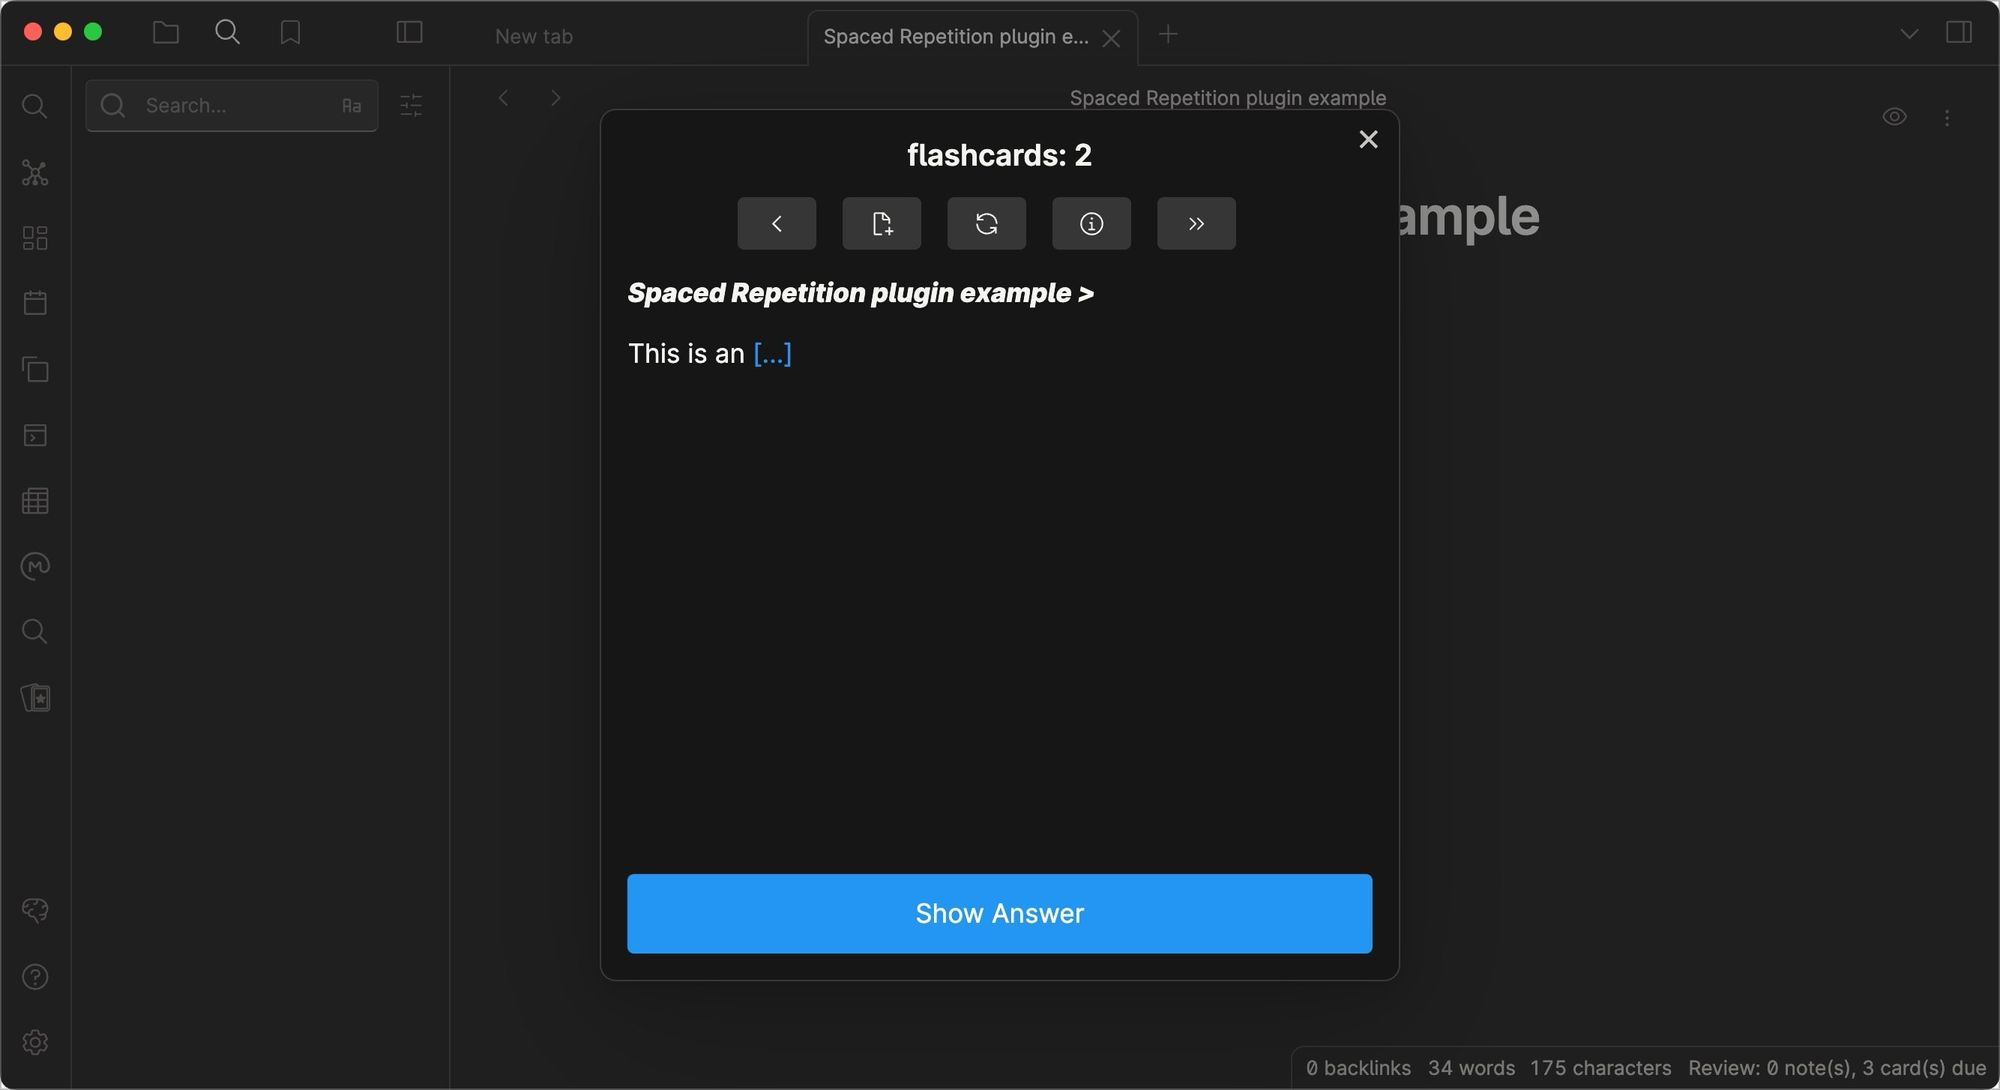
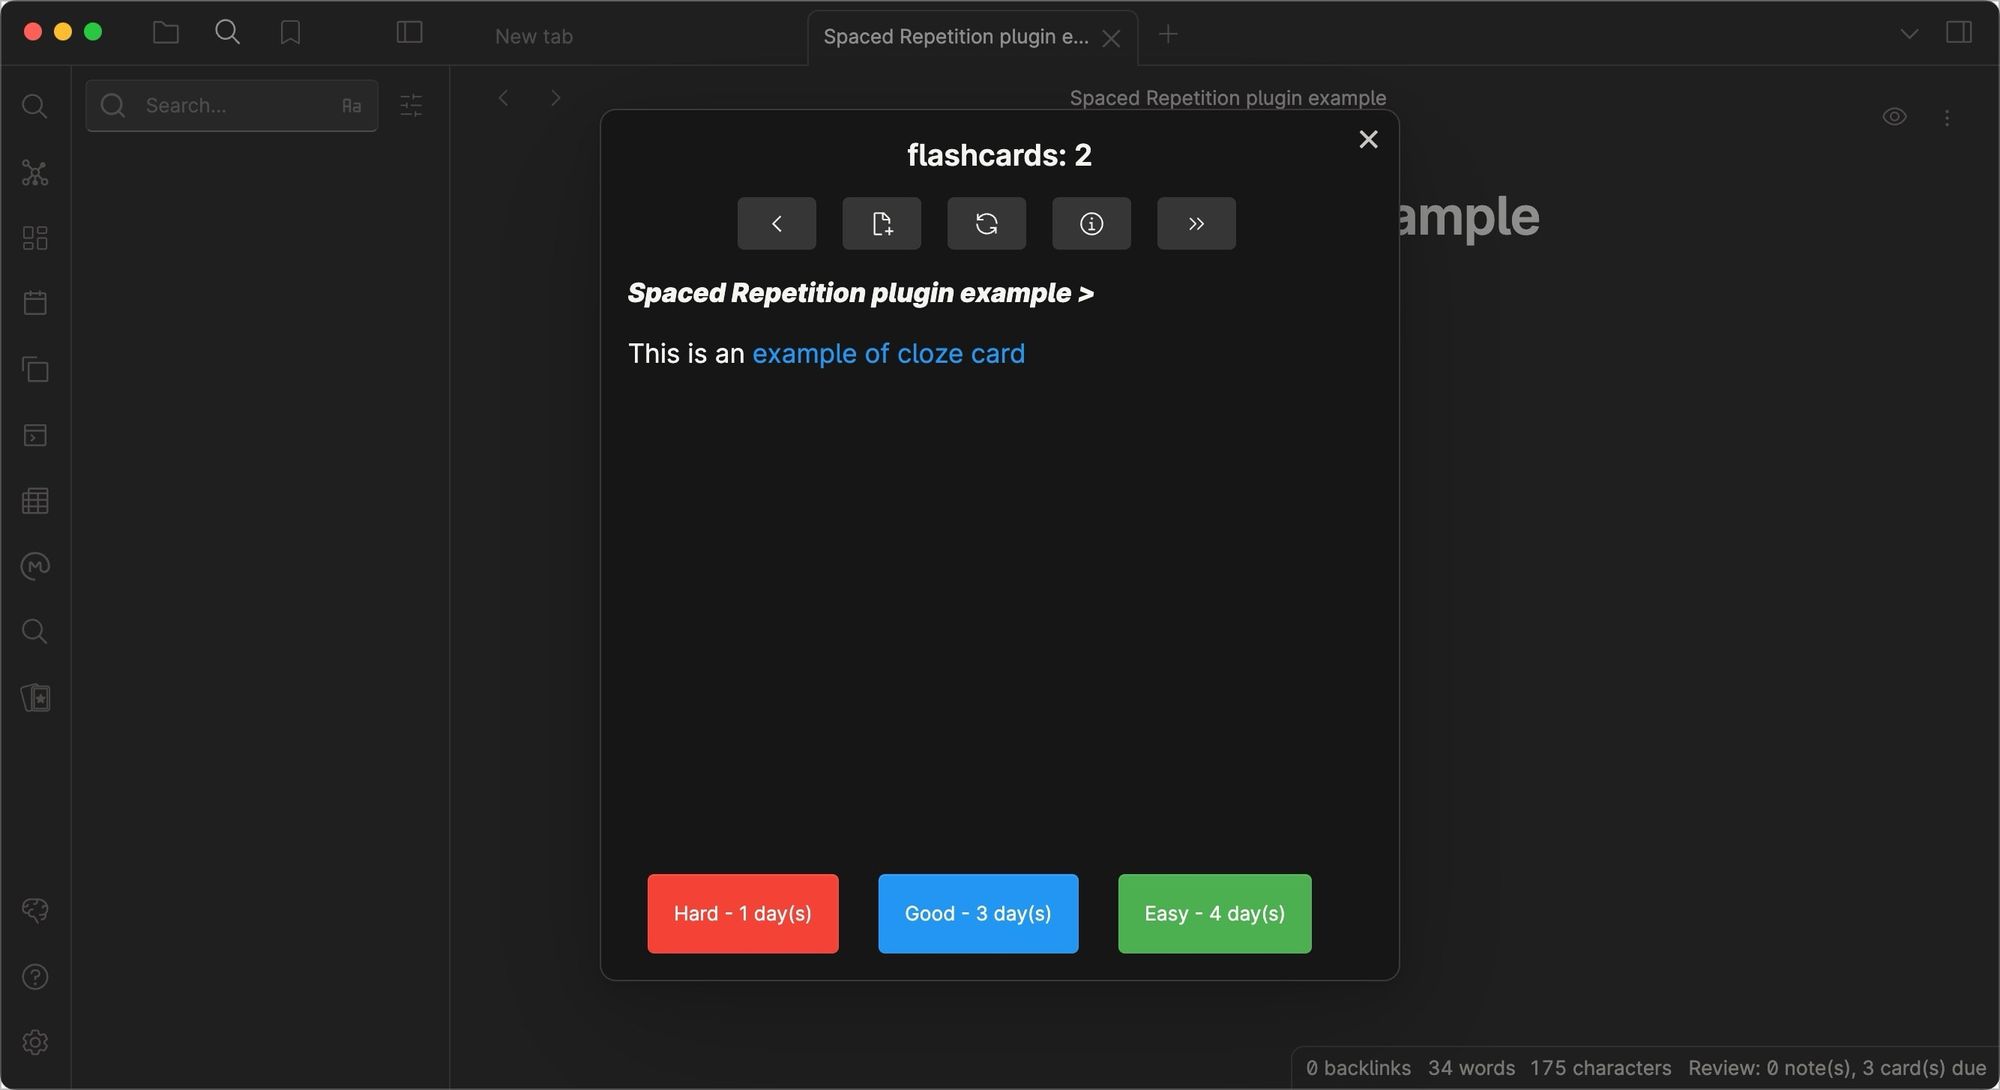
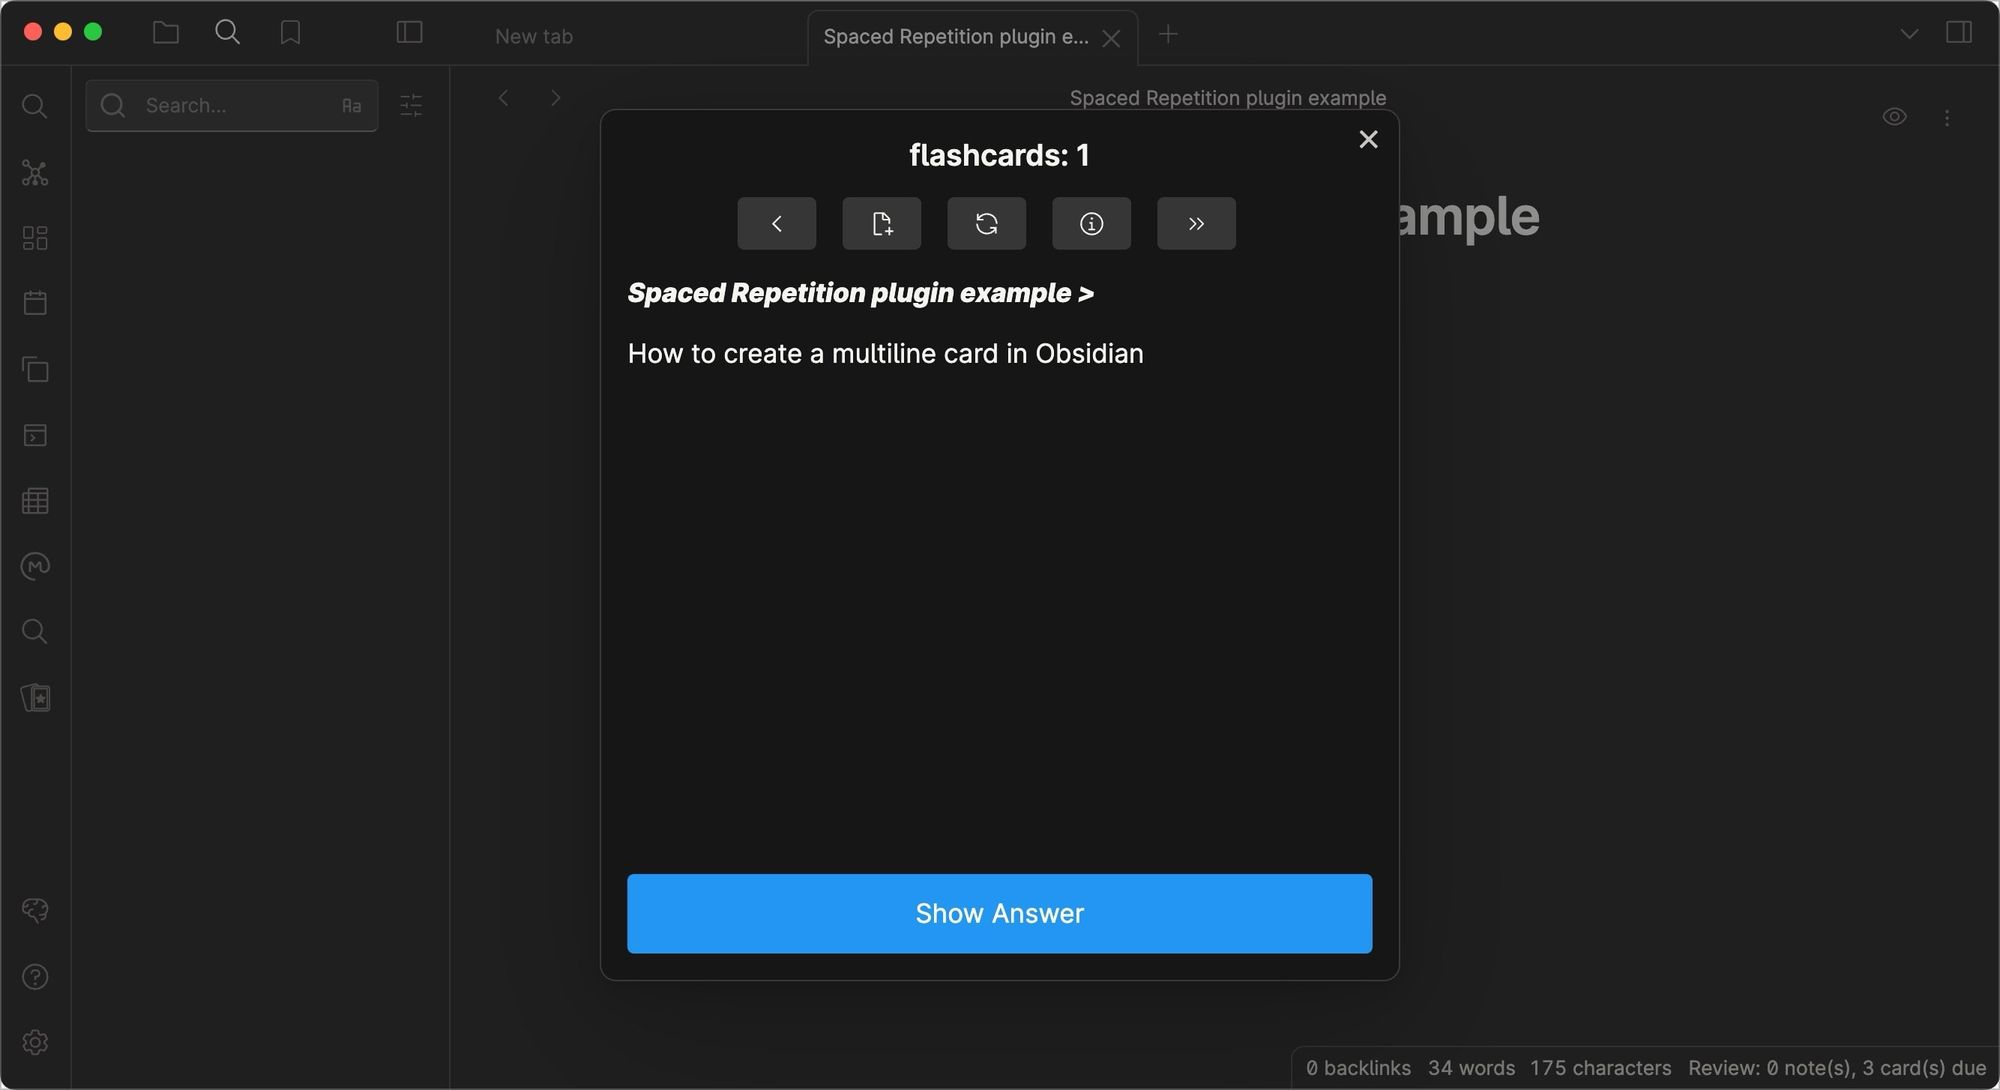
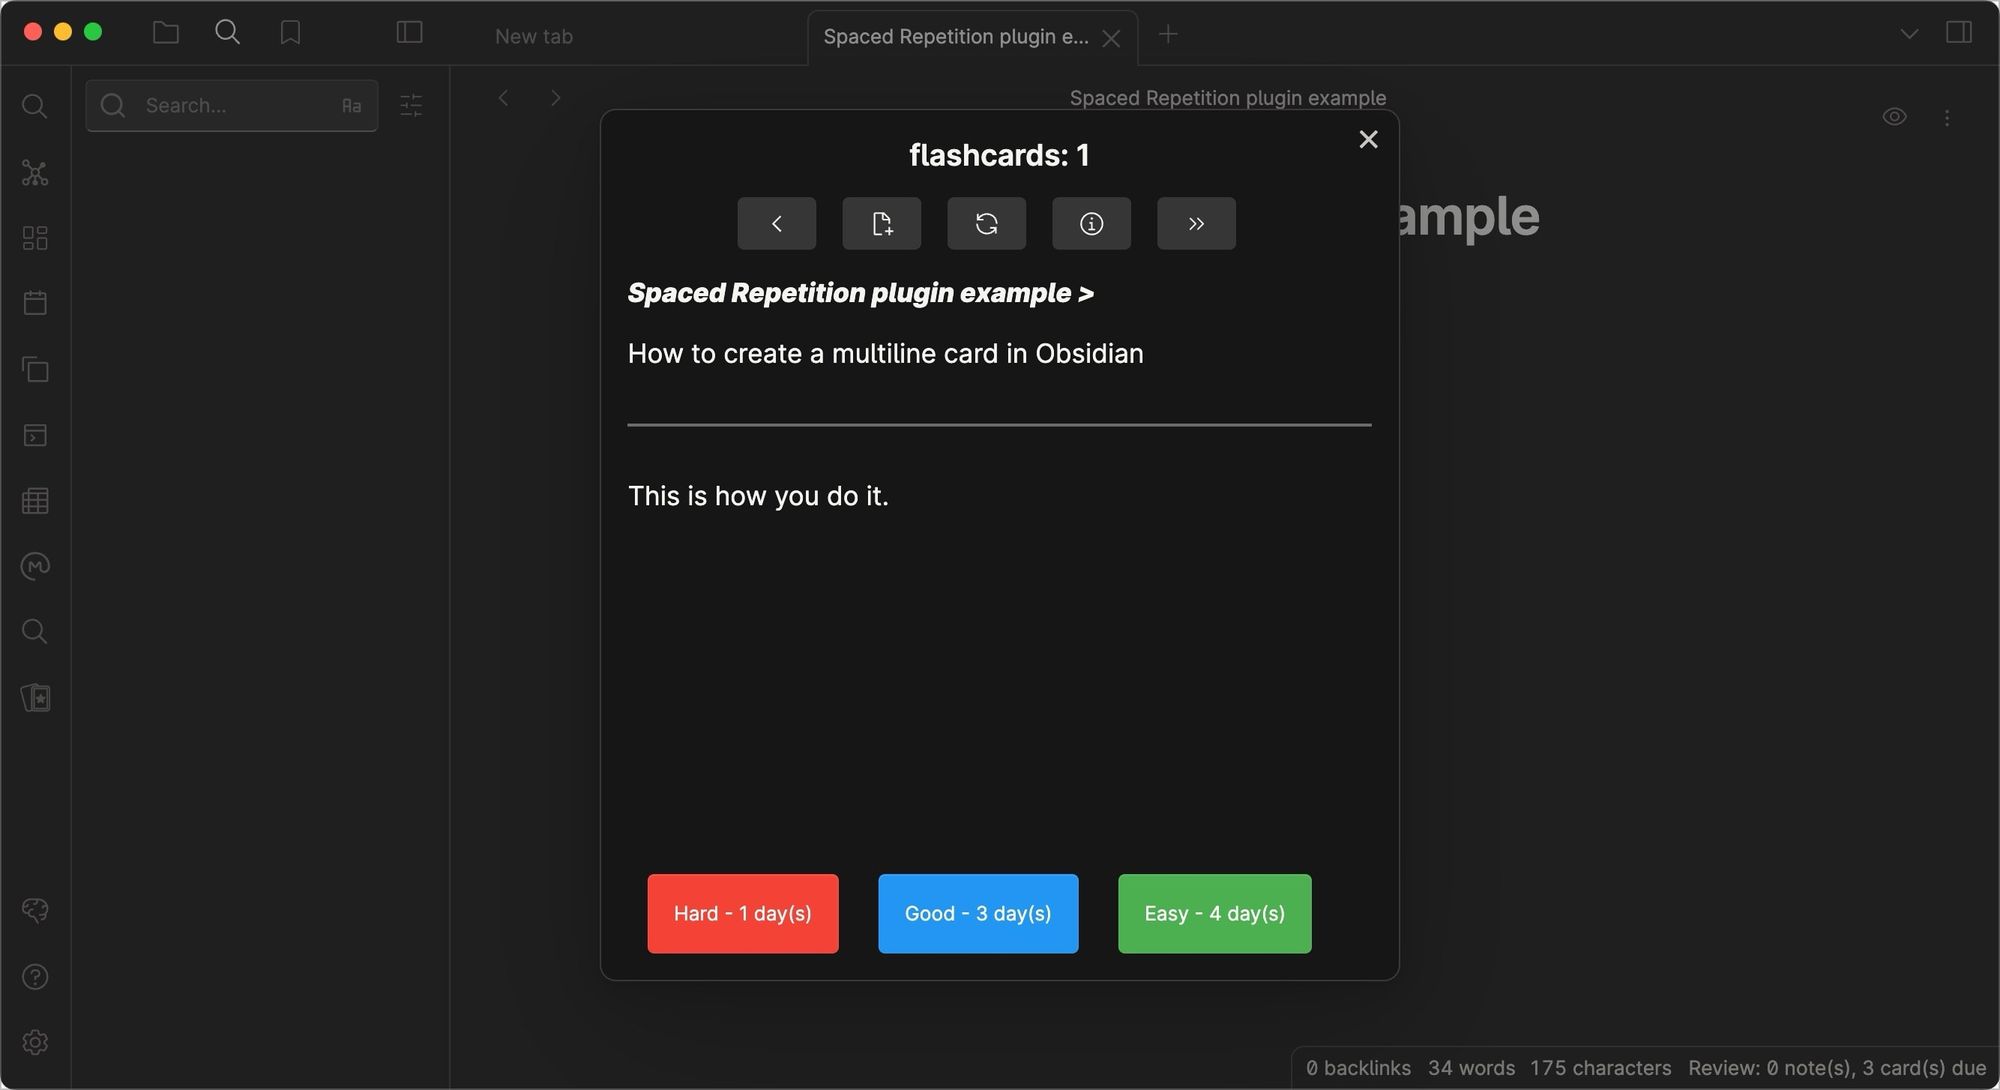
Note that for all these flashcards to work you will have to use the tag defined in the plugin setting. By default, it’s Flashcards, but you can set it to anything you want. You can also add multiple tags to create multiple decks of flashcards.
9. Janitor
If you use Obsidian for everything, chances are that you will accumulate junk files over time. The Janitor is the plugin that helps you clean up your vault by allowing you to detect and delete orphan files (media or attachments that are not referenced anywhere), empty files, big files, and more. It’s a simple cleanup utility that you should use to keep your Obsidian vault lean and devoid of cruft. On a side note, if you use a Mac, check out how you can clean your Mac to make it faster.

10. Iconize
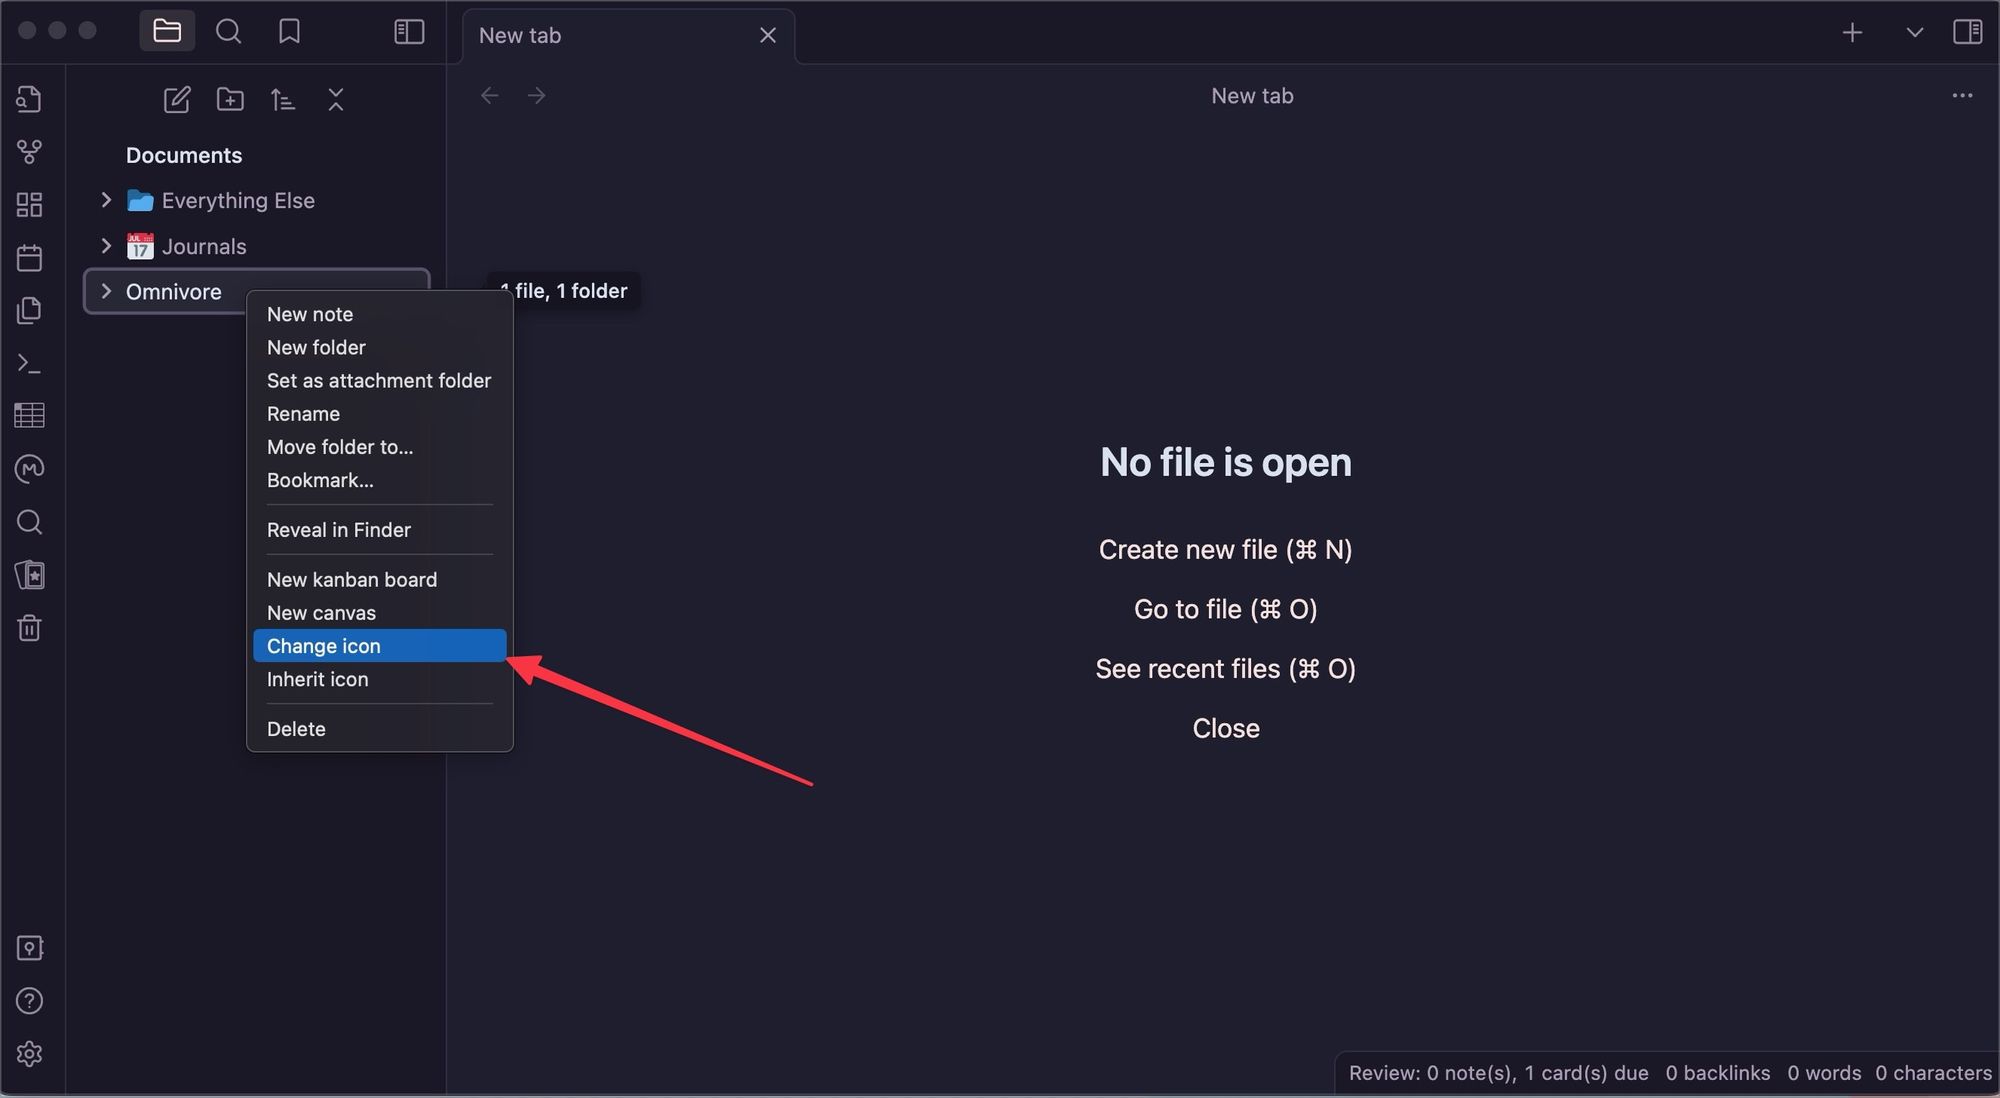
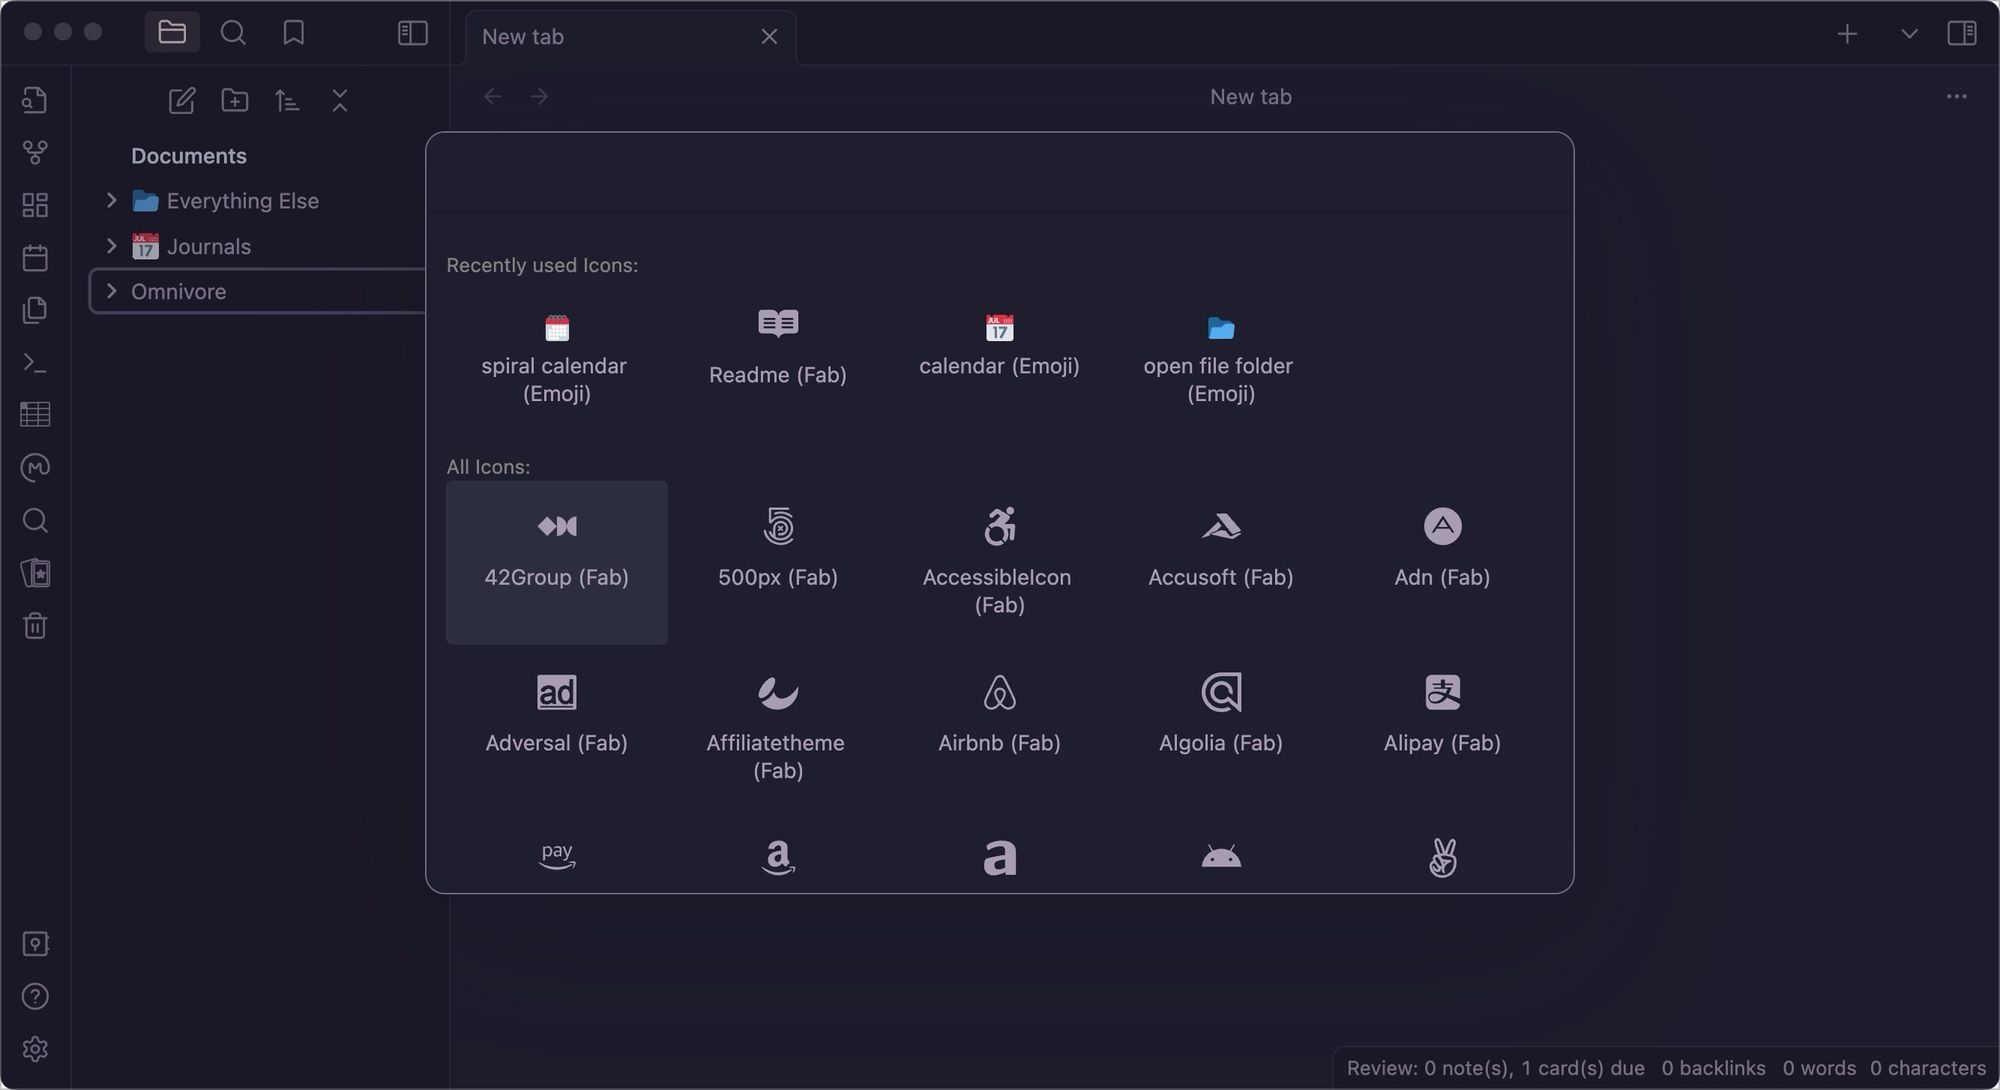
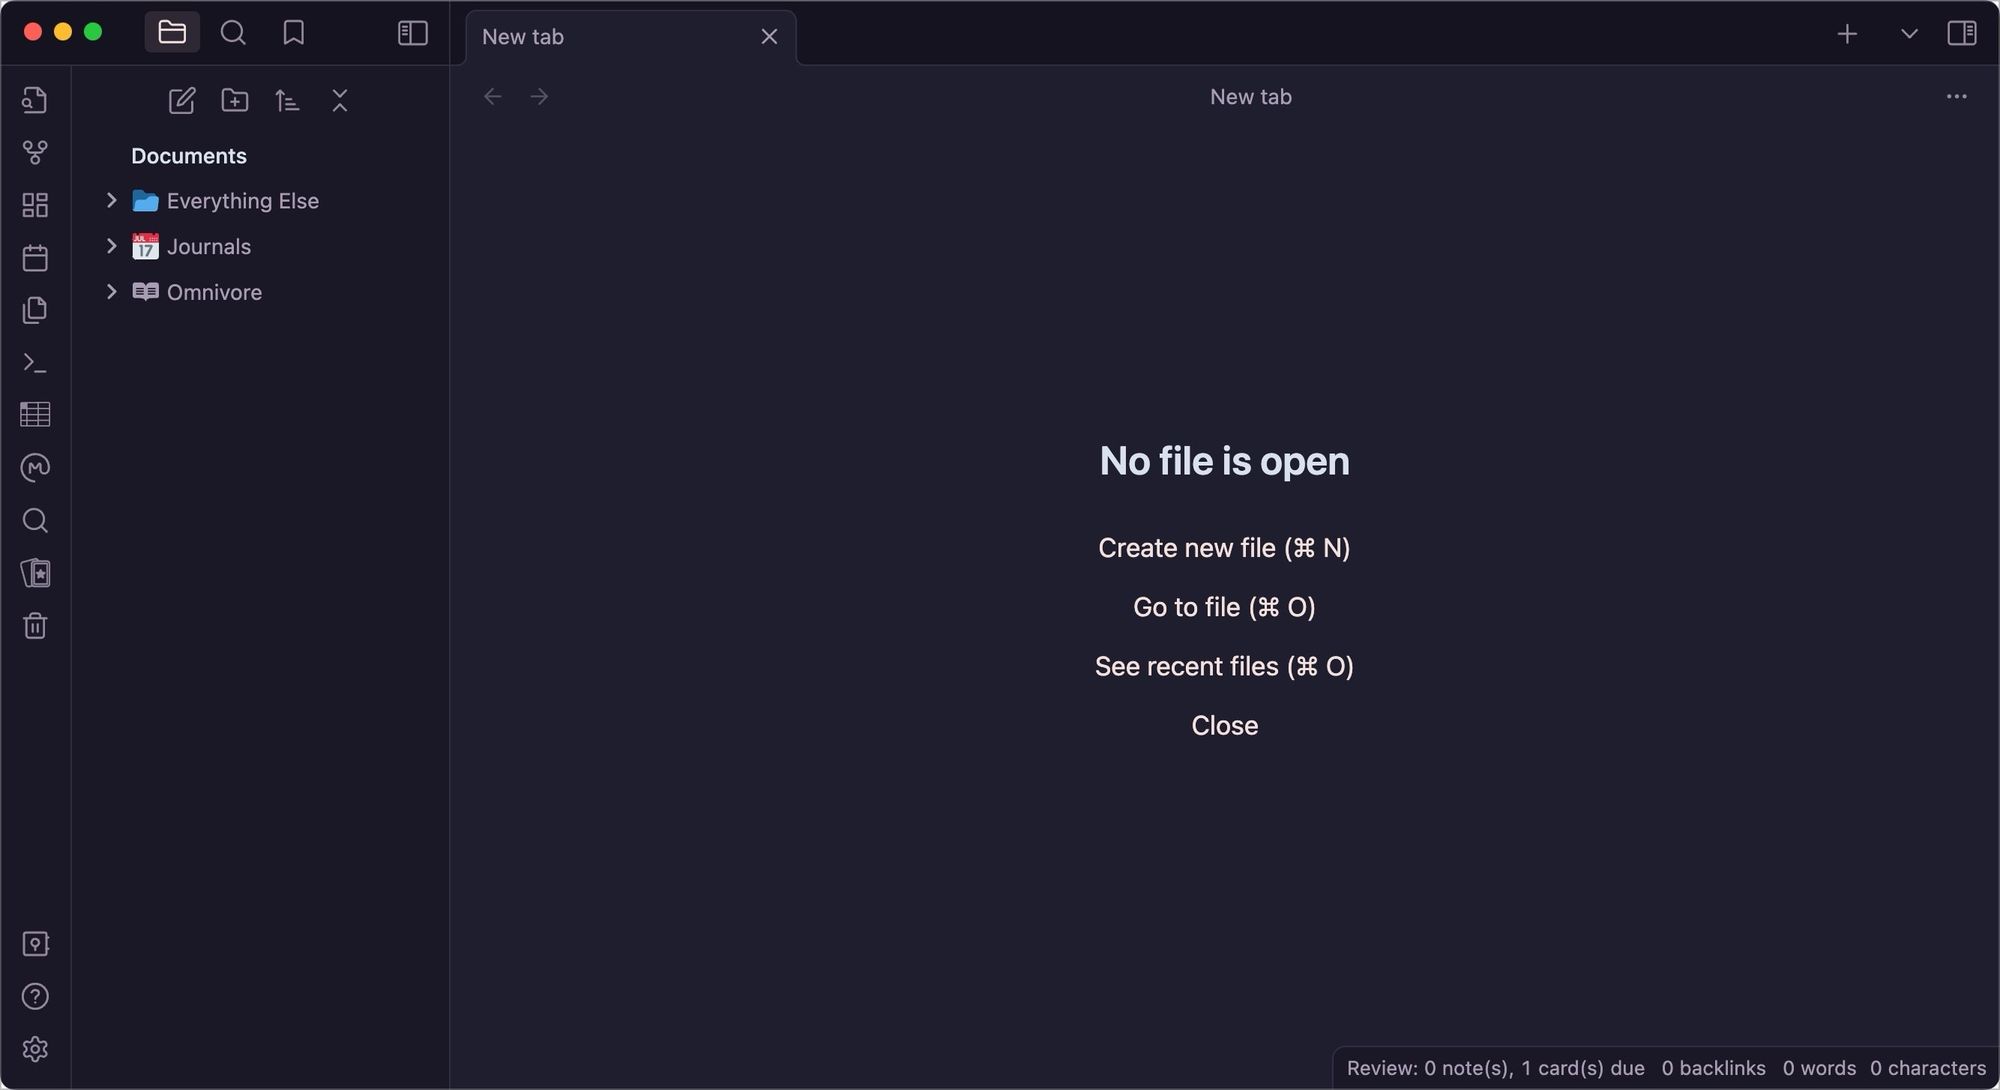
Iconize is one of our favorite Obsidian plugins. The plugin allows you to set different icons for folders and files inside Obsidian. You can also set files inside a folder to inherit icons. So when you add a new note to a folder, it will automatically inherit its icon. The plugin supports multiple icon packs, so you have a ton of options to choose from. If your Obsidian vault is looking too plain, you can use this plugin it give it a makeover.
11. Style Settings
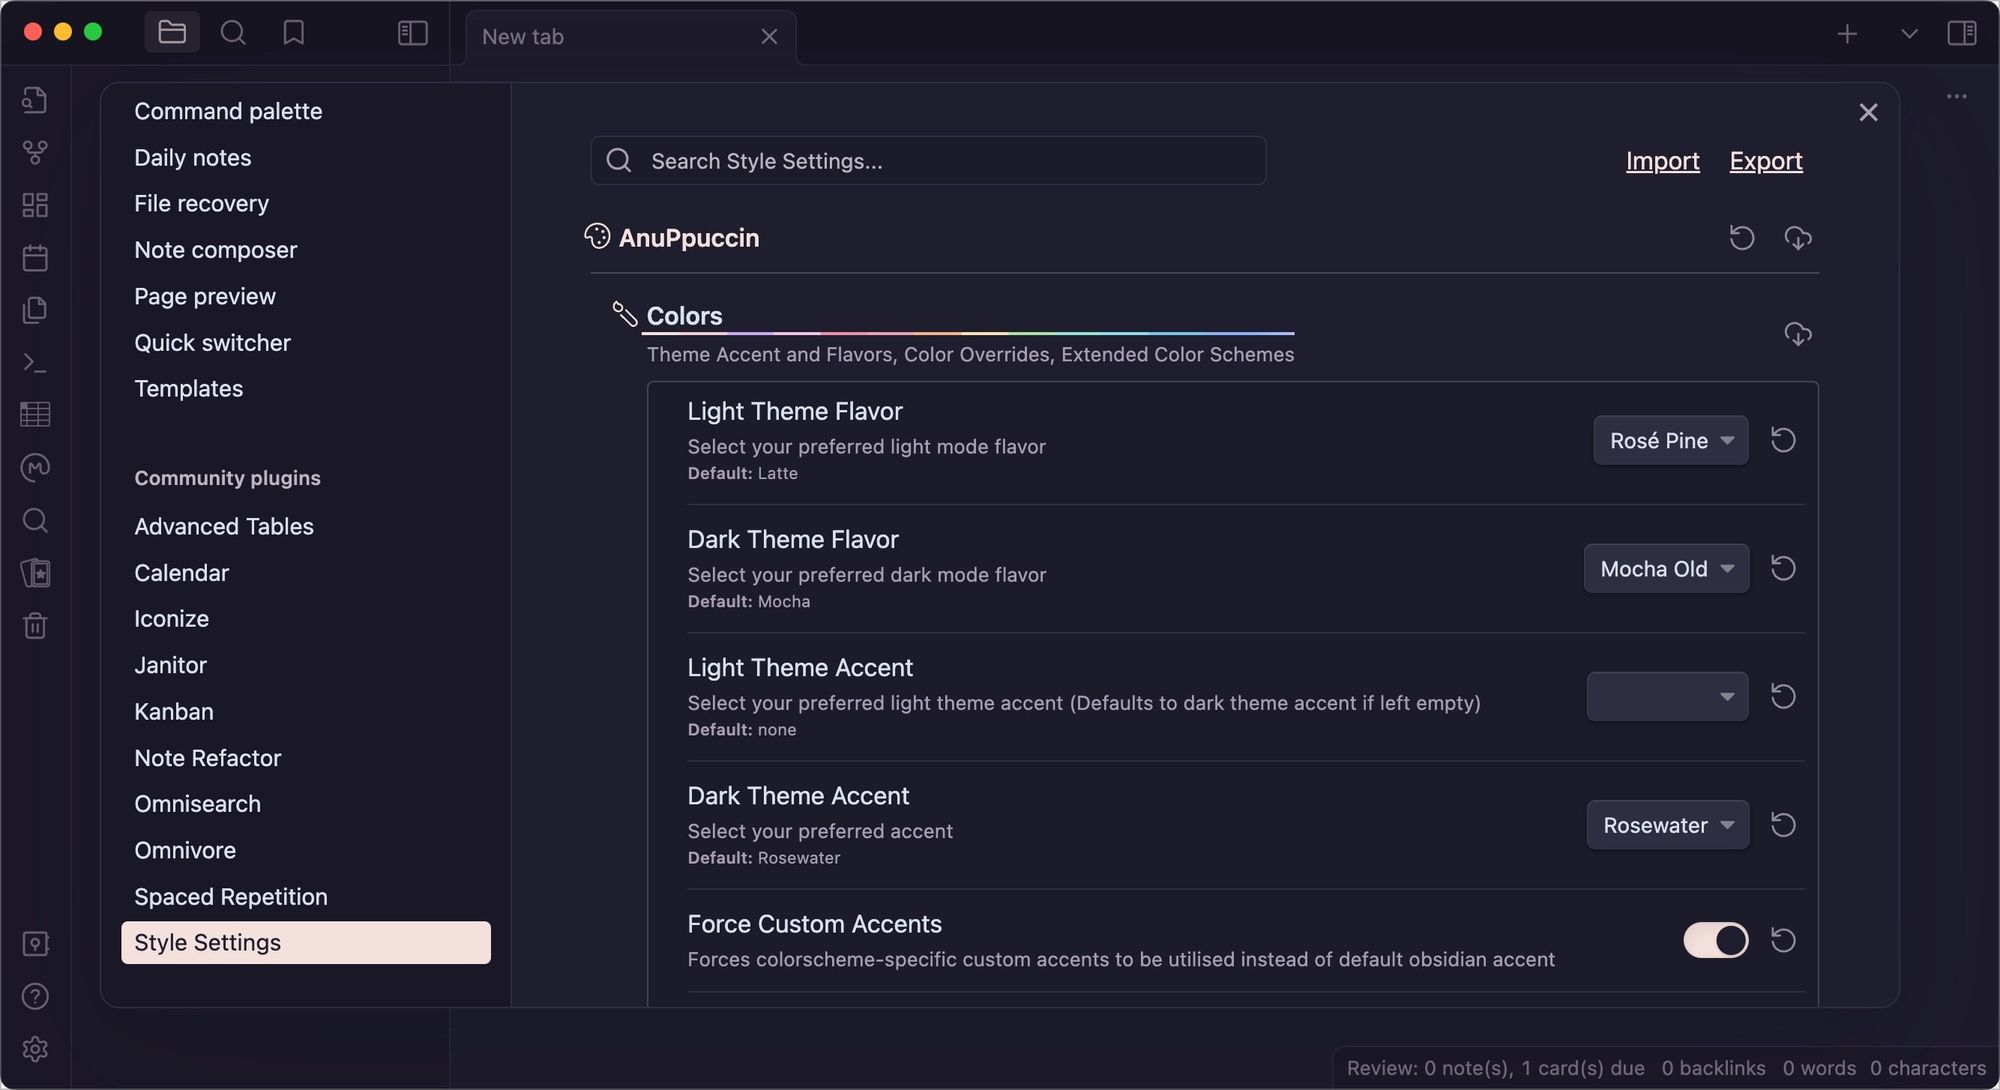
Style Settings is an important plugin if you use community themes. If you don’t know how to code, customizing the theme's colors, fonts, and other attributes can be a pain. The Style Settings plugin solves this issue by users control over the themes using simple UI. Most popular Obsidian themes support this plugin, allowing you to easily customize their properties. It’s a must-have plugin for all Obsidian users.
12. Settings Search
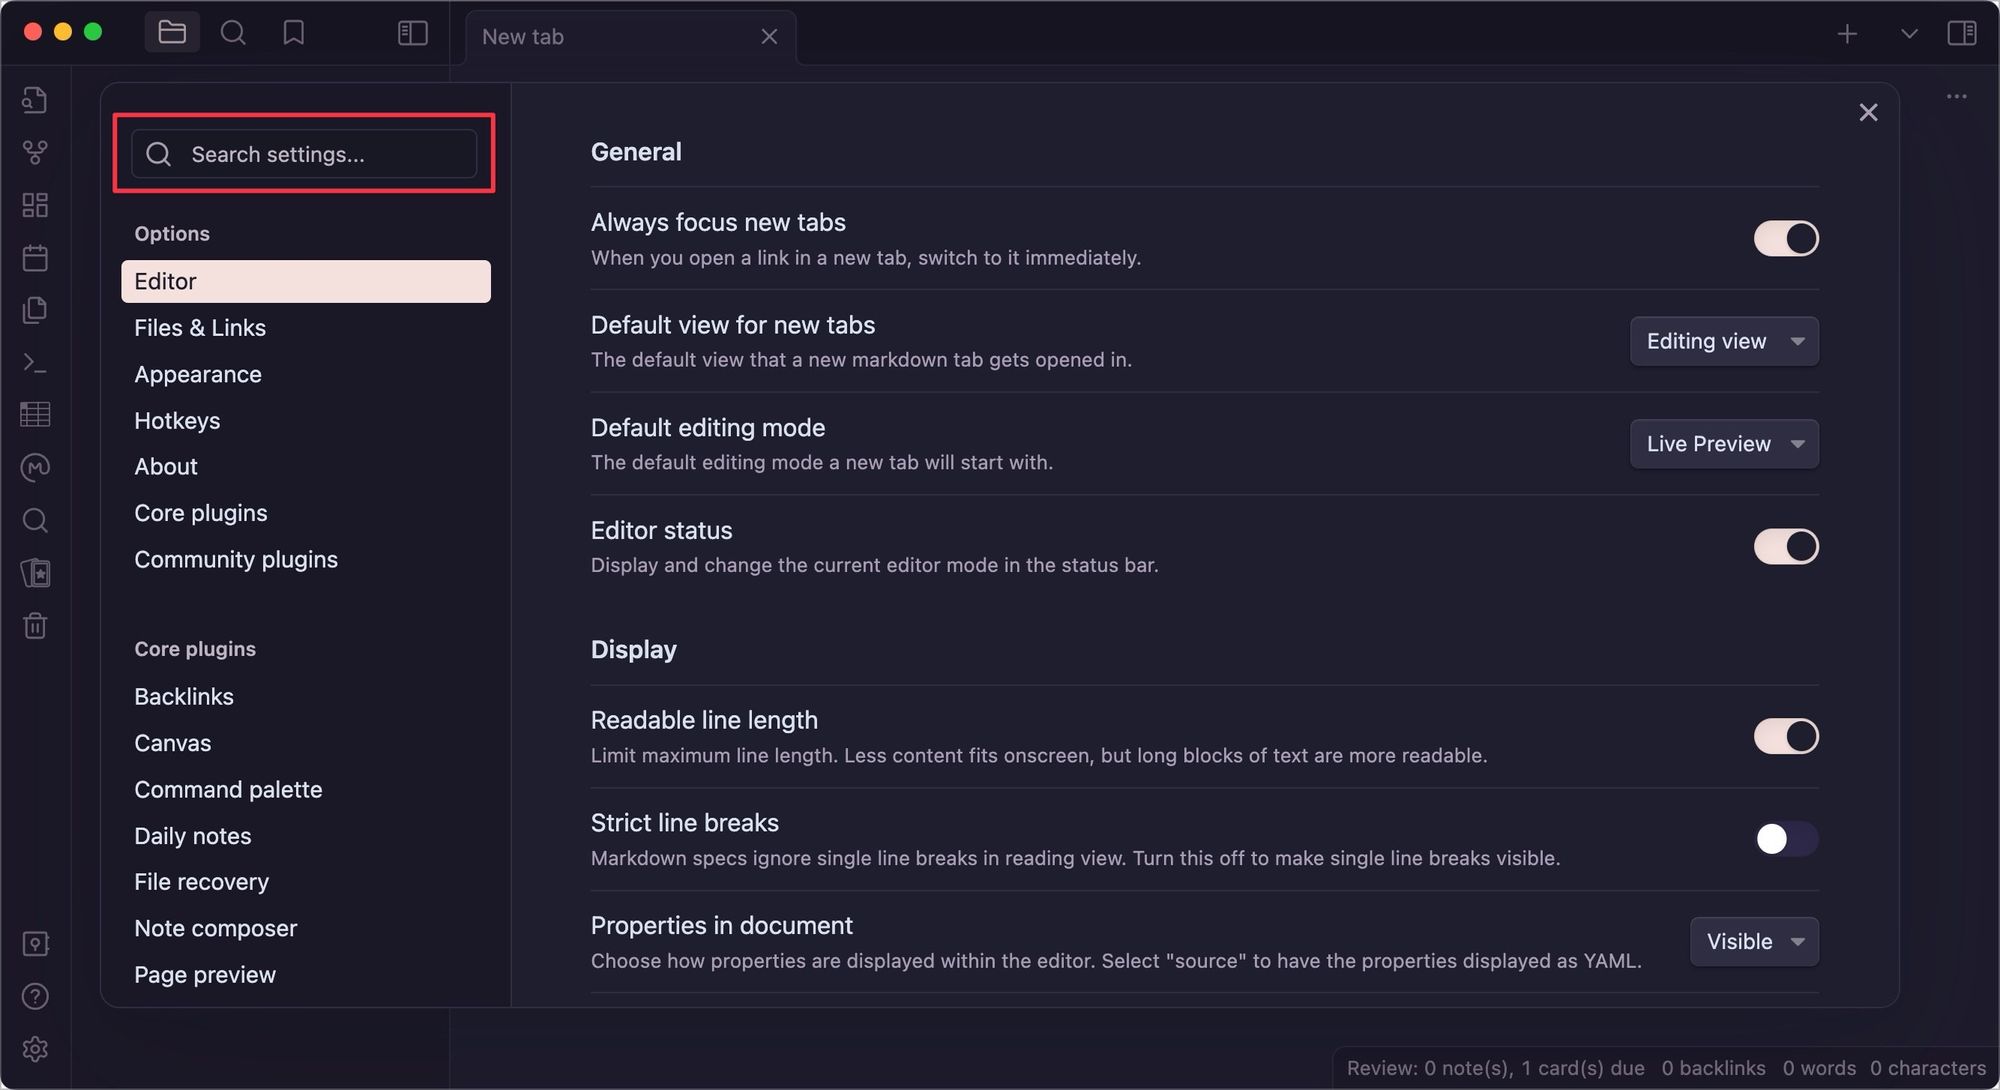
One of the best features of Obsidian is that it’s highly customizable. You can customize everything about this app, making it your own. However, it also means that the app has tons of settings options, which are not easy to find. Settings Search does a simple job of solving this issue. It adds a global search function for Obsidian settings, allowing you to easily find any settings without hunting for them in the menus.
13. Reminder
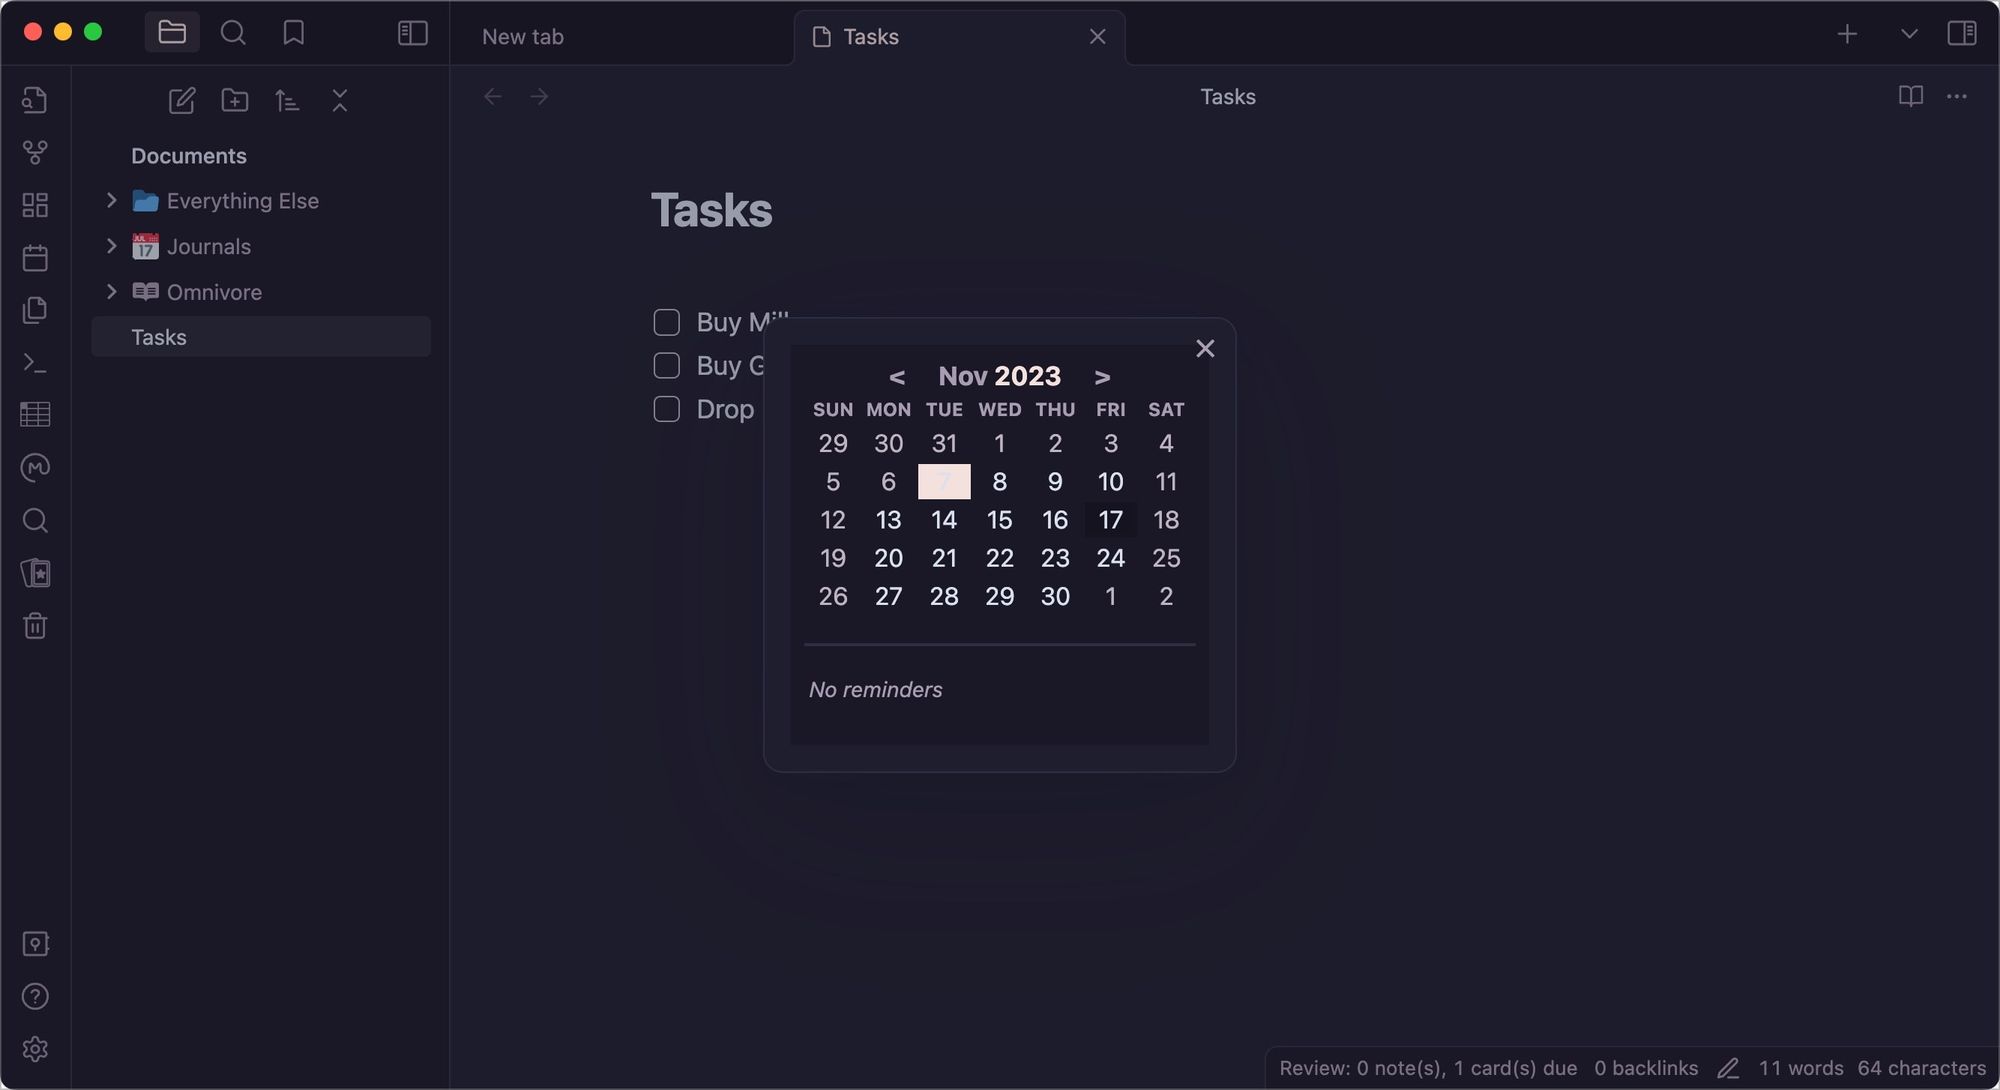
The Obsidian task management system doesn’t have a built-in reminder system, which makes it less useful. The Reminder plugin solves this problem by allowing you to add reminders to tasks in Obsidian. After you install the plugin, you can use the (@ symbol to open up a calendar and set reminders for any tasks.
14. Outliner
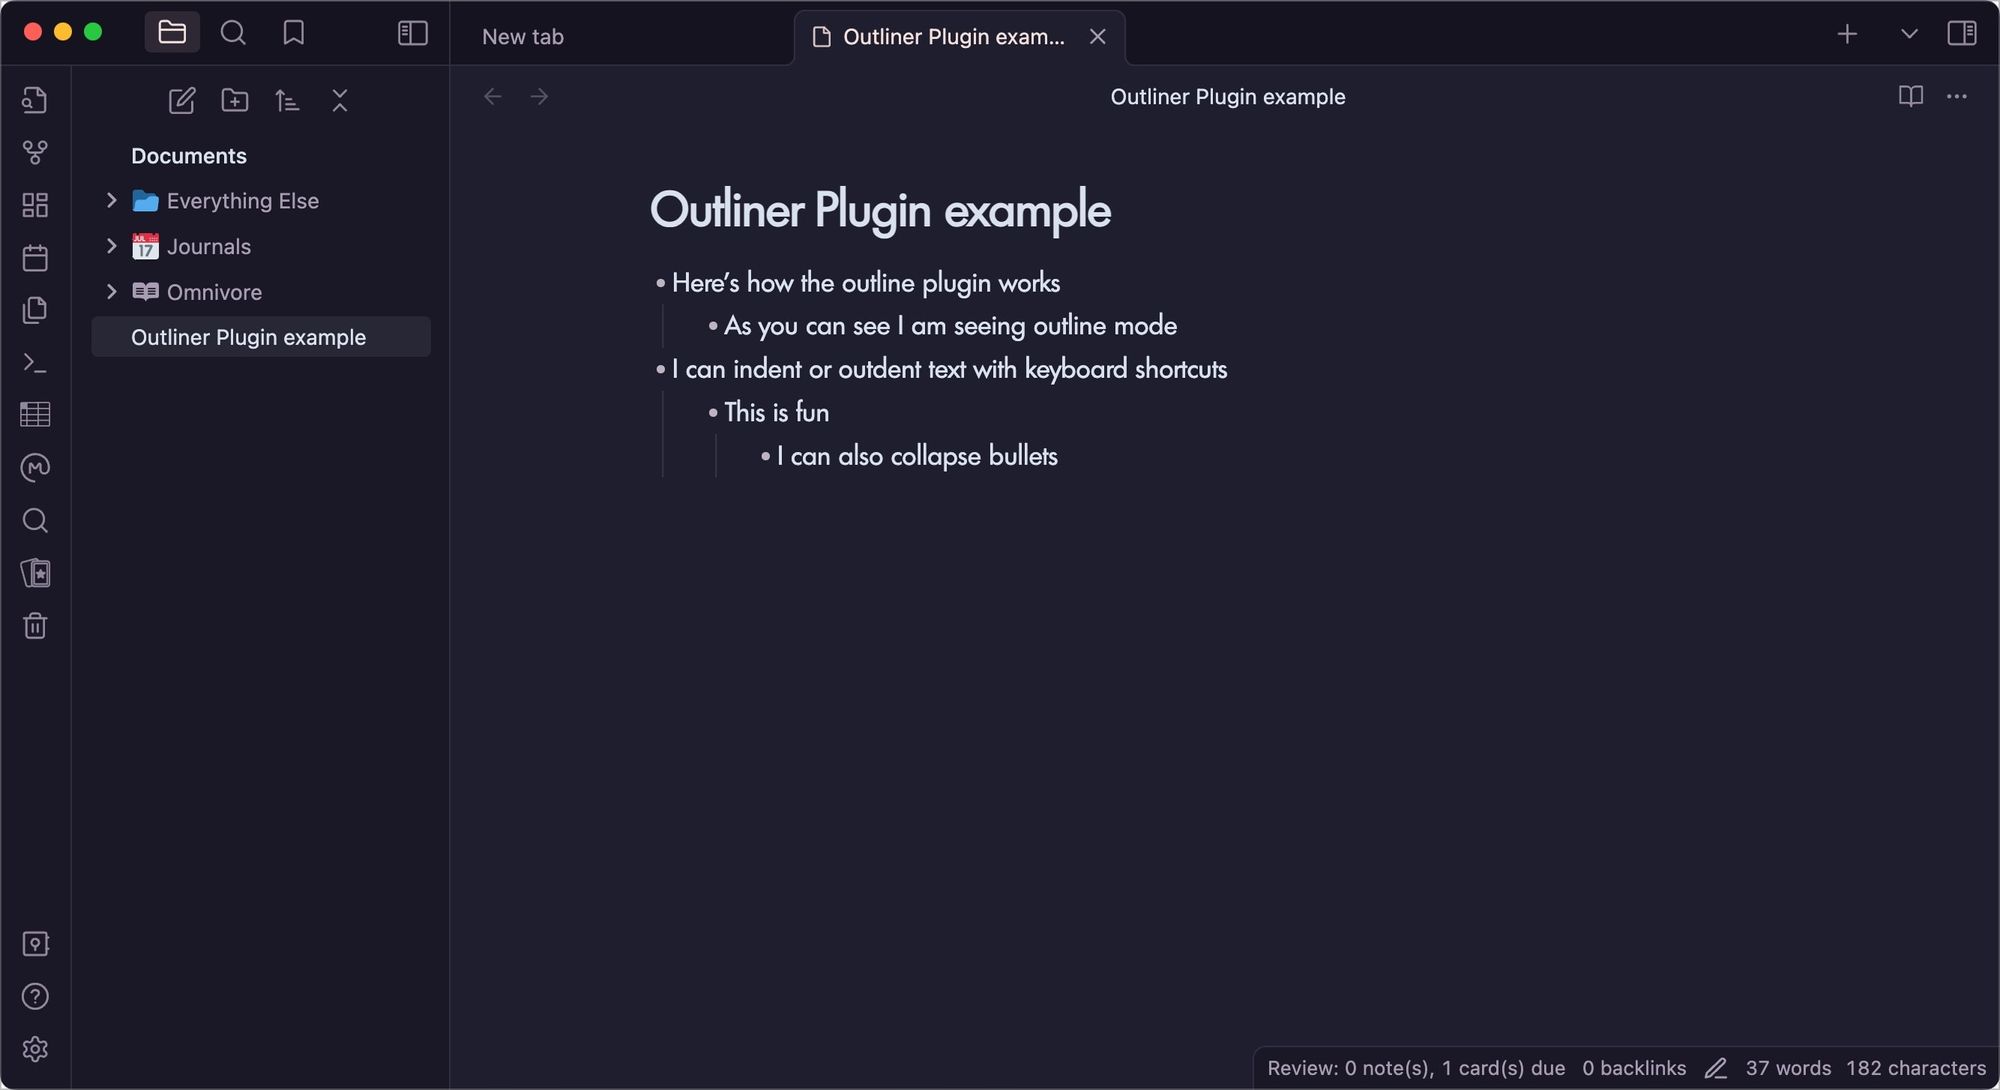
If you like the outline view offered by other note-taking apps like Logseq and Roam Research, then the Outliner plugin is for you. It allows you to create the same bulleted outline structure when taking notes. We also love that it supports keyboard navigation and allows us to change the indentations easily with keyboard shortcuts.
15. Plugins Update Tracker
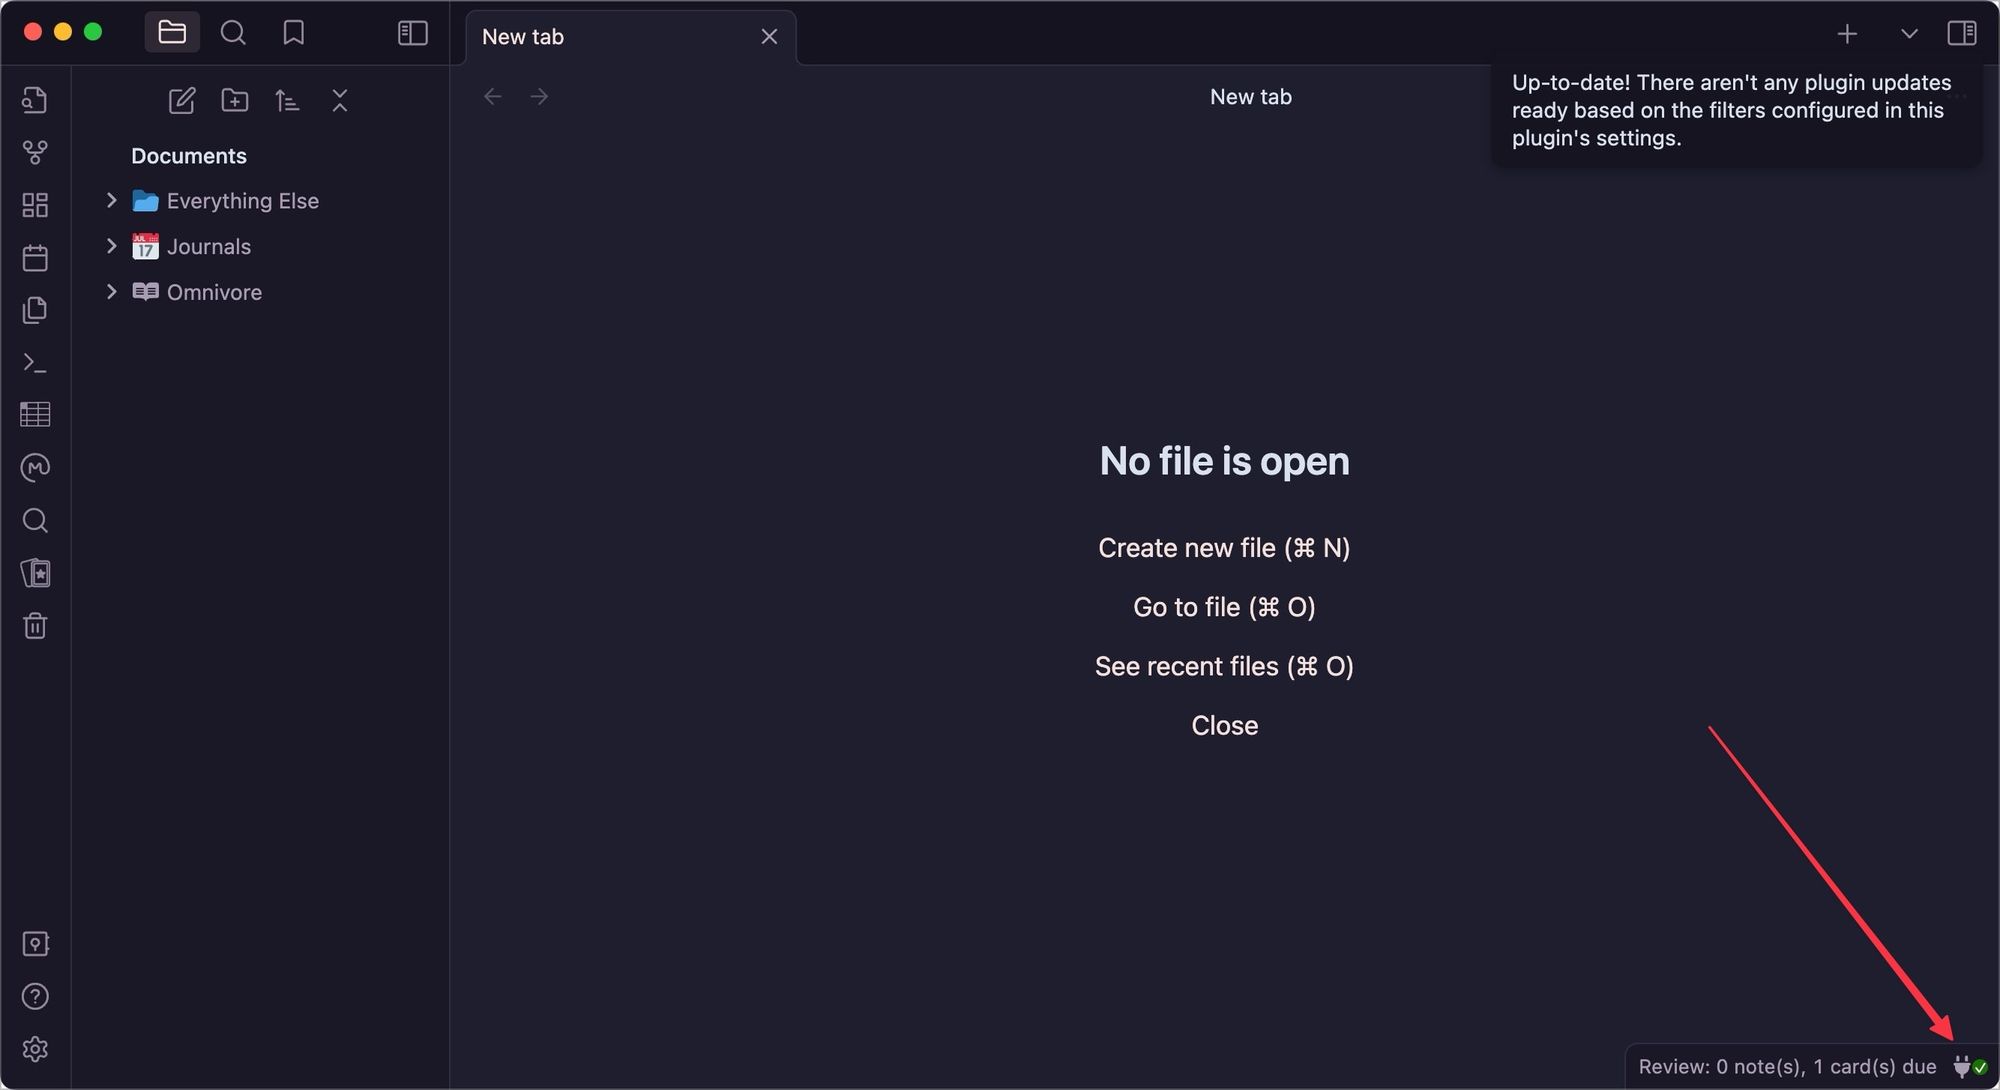
Keeping track of plugin updates can be messy, especially if you have installed dozens of plugins. That’s where the Plugins updater plugin can help you. The plugin fetches all the pending updates and renders them in a neat list. It also adds an icon in the status bar that notifies you whenever the plugin detects any pending updates. You can also see release notes for all plugins and install the updates with just a click.
Top Obsidian plugins for beginners
That ends our list of the top best Obsidian plugins every Obsidian user should install. Did we miss any plugins that you find indispensable? Let us know in the comments, and we will have a look.
